Walking into a fancy bakery can take your breath away. Forget elegant pastries and carefully piped frostings, bread can often be the most beautiful element of a bakery's display case. Using the simple technique of artisan bread stenciling, bakers become artists, and a loaf of bread becomes a blank canvas in their capable hands.
If you've swooned over gorgeously decorated loaves and assumed you couldn't replicate the look at home, think again! We turned to King Arthur Flour's head bread baker, Martin Philip, for details on how to master the technique of stenciling bread.
Martin has a serious resume: He's competed in the Coupe du Monde de la Boulangerie (the bread-baking equivalent of the Olympics) and he runs the bread-baking operation at our Vermont bakery, where he's worked for over 10 years. His artistry is evident in his gorgeous loaves: He's fallen in love with the craft of stenciling, and taught himself to make his own through trial and error.
Martin will tell you that it's his passion for baking that creates such beautiful results; any one of us with a love for baking can do the same at home with practice and guidance. On that note, let's get started!
Artisan bread stenciling is the technique of dusting a pattern onto the surface of bread in flour (or cocoa) using a stencil. You can buy pre-cut stencils, or you can make your own. Making your own allows you to give your bread a personal touch — a signature of sorts — that adds a level of craftsmanship and care to your baking.
Martin makes his own stencils out of a heavy plastic, since he'll use them over and over again in the bakery. If you want to create a quick, single-use design, you can just draw and cut your pattern out of parchment paper. Or, you can follow his steps for a sturdier stencil. Here's how to do it.
Think of the design you want to create. Keep in mind that more elaborate designs will be less likely to show up well; simpler designs without too many flourishes are best when you're starting out.
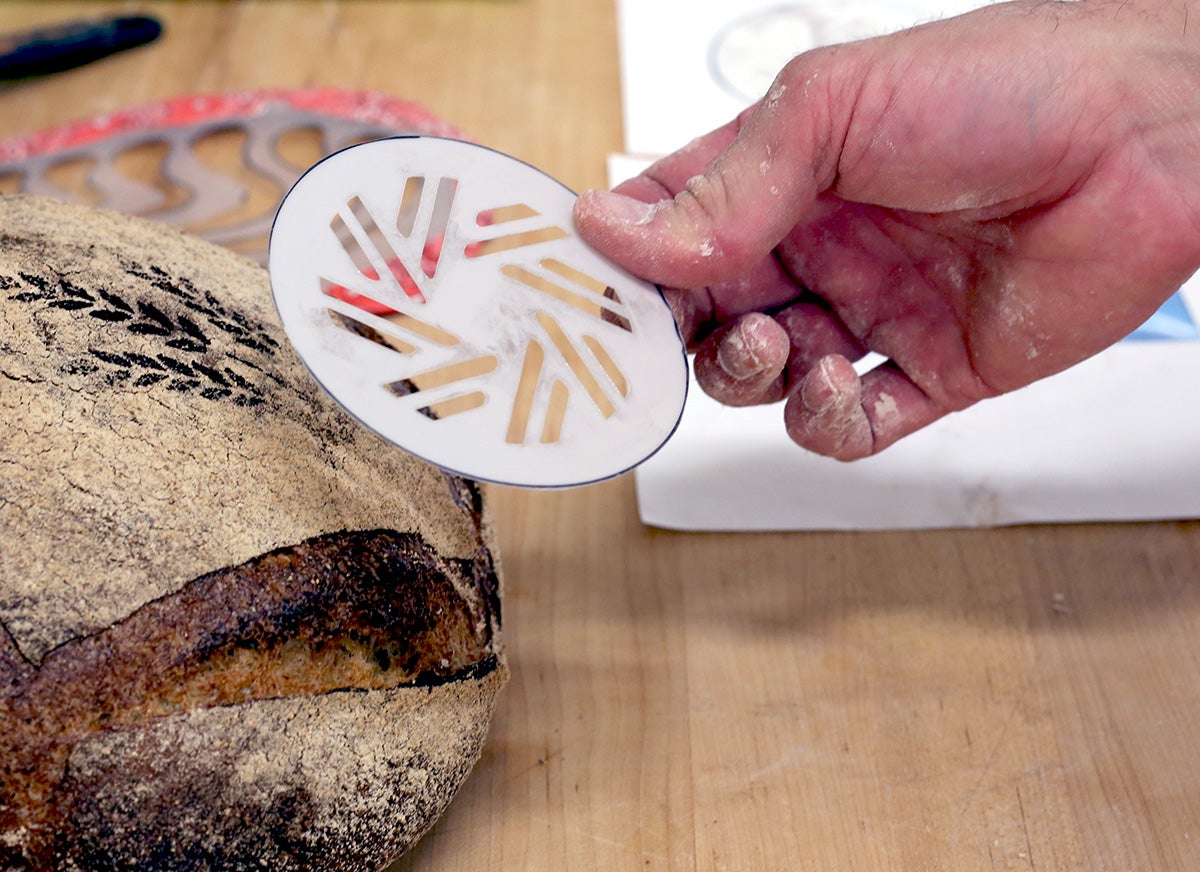
Martin loves to create designs that speak to the bread itself: a bee for a honey wheat bread, a sunflower for seeded bread, a grain sheaf for rye bread, and so on. You can stencil your name, the word "homemade," or even just a pretty swirl.
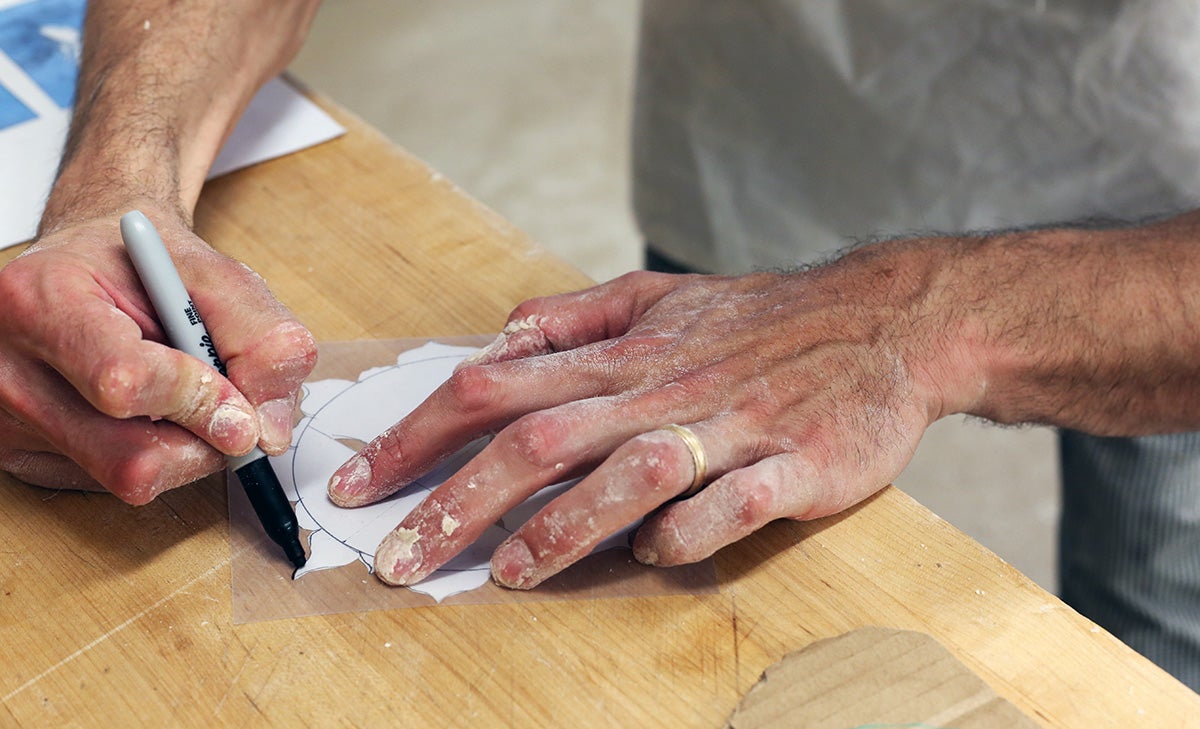
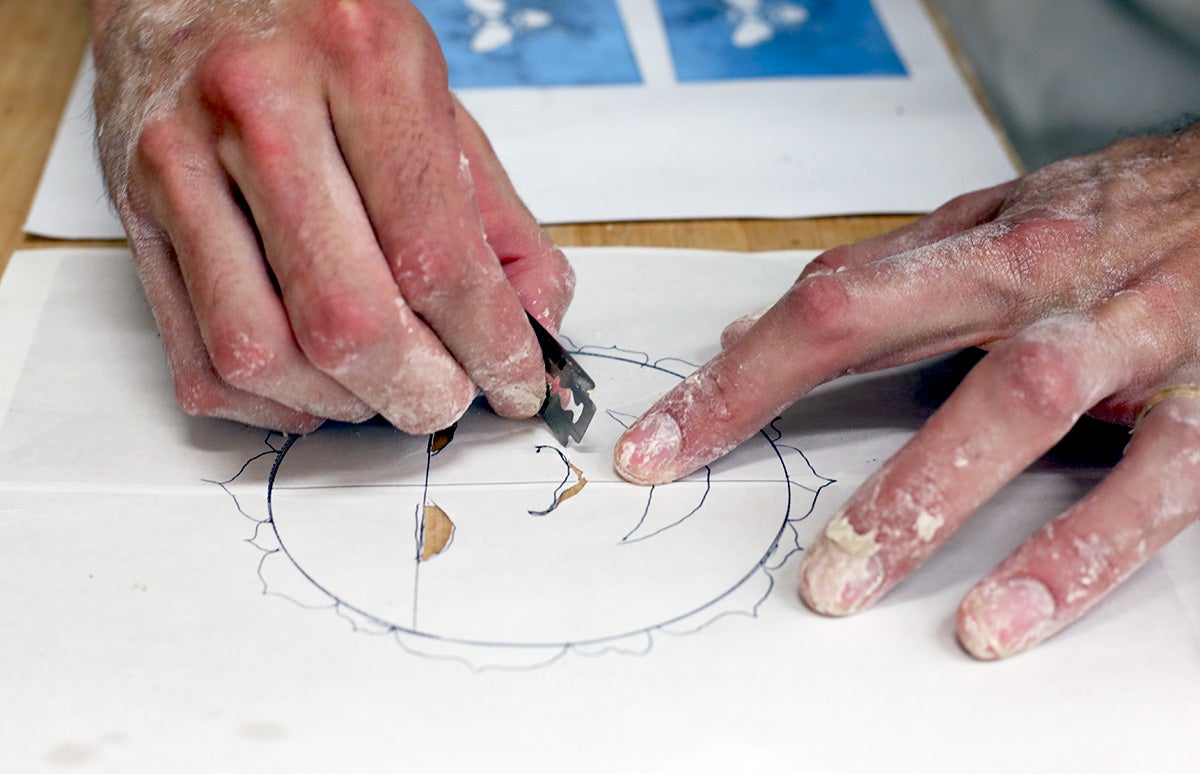
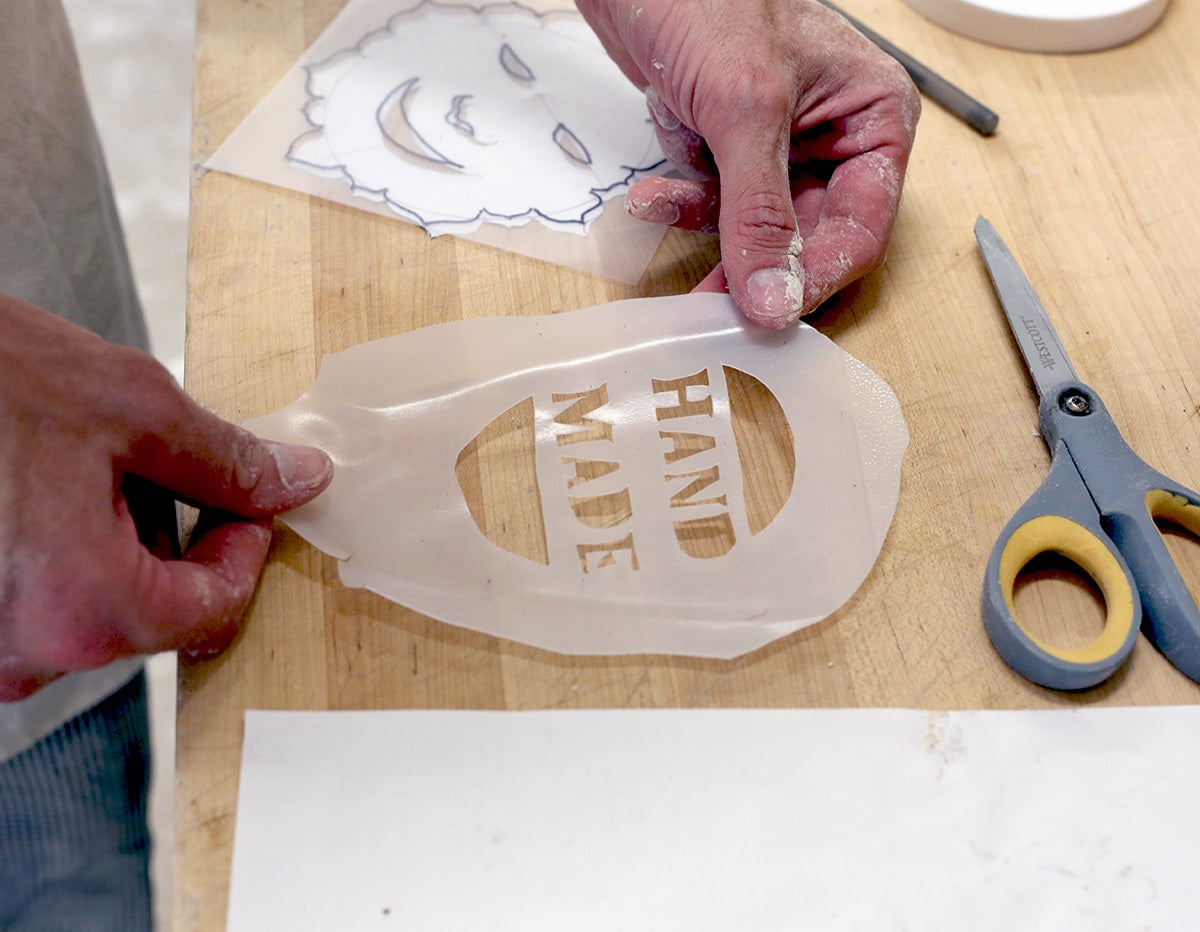
Draw your design on paper (heavy card stock works nicely here). If you want a sturdier version, trace the design using a marker onto a piece of heavy plastic (you can find thick Mylar plastic for this purpose at most craft stores).
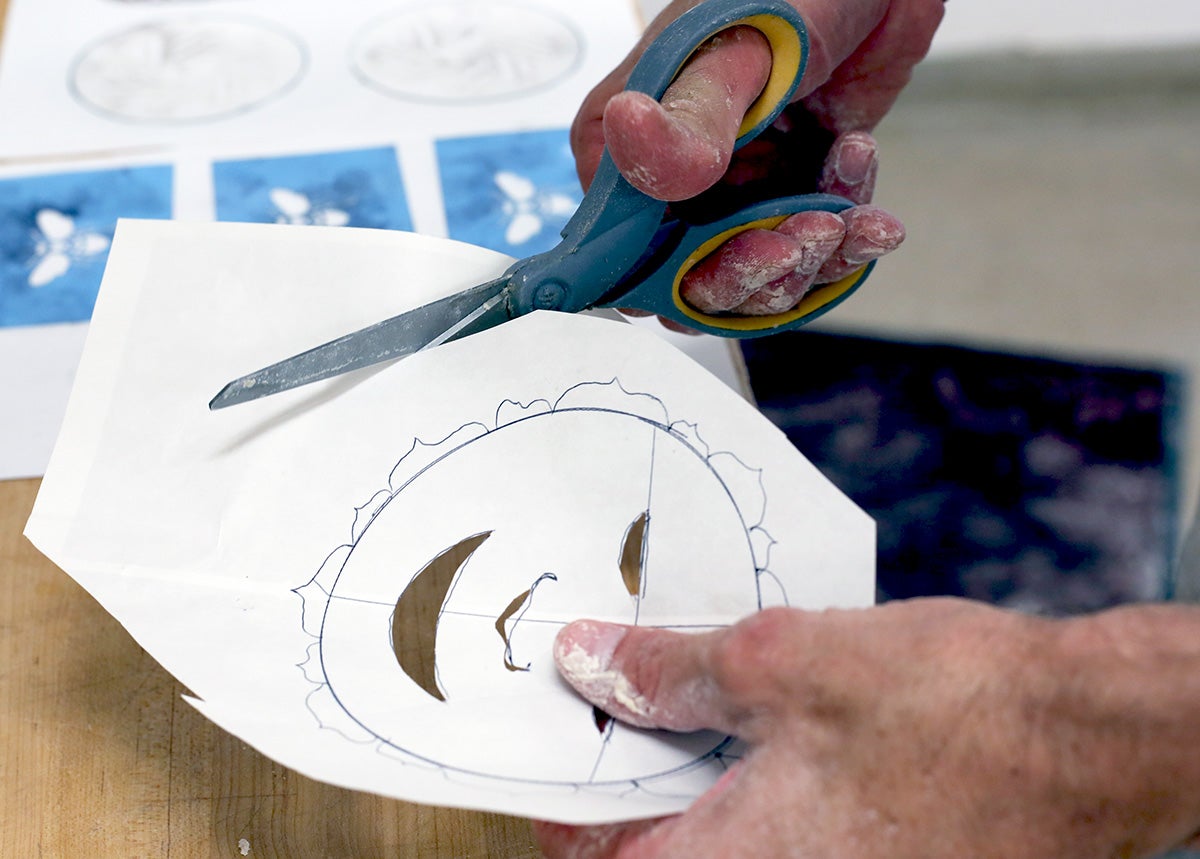
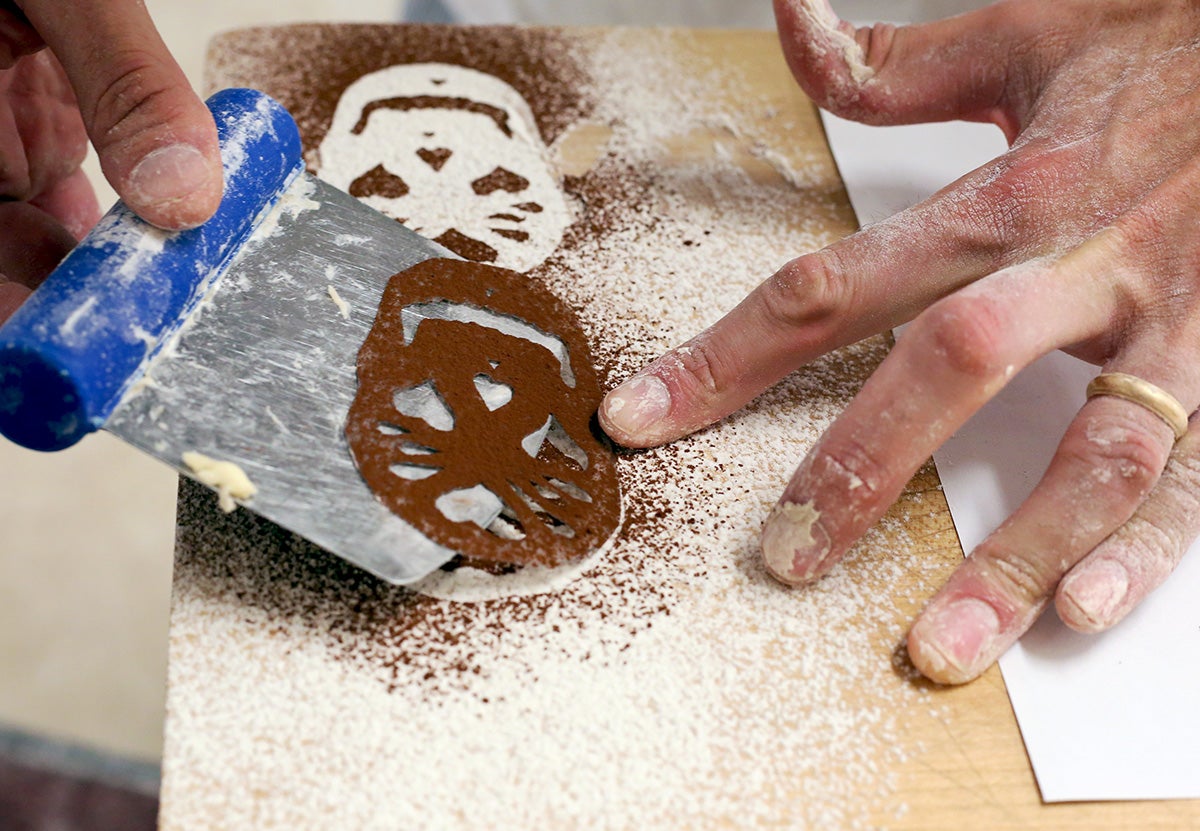
Using an X-ACTO knife, razor, or other sharp blade, cut out the design. Cut out the parts of the design that you want to show up: The negative, empty spaces will be dusted in with flour.

Once you've cut out the edges of the design itself, cut around the stencil so you can easily place it onto your loaf (if it's too big, it'll be unwieldy and difficult to use).
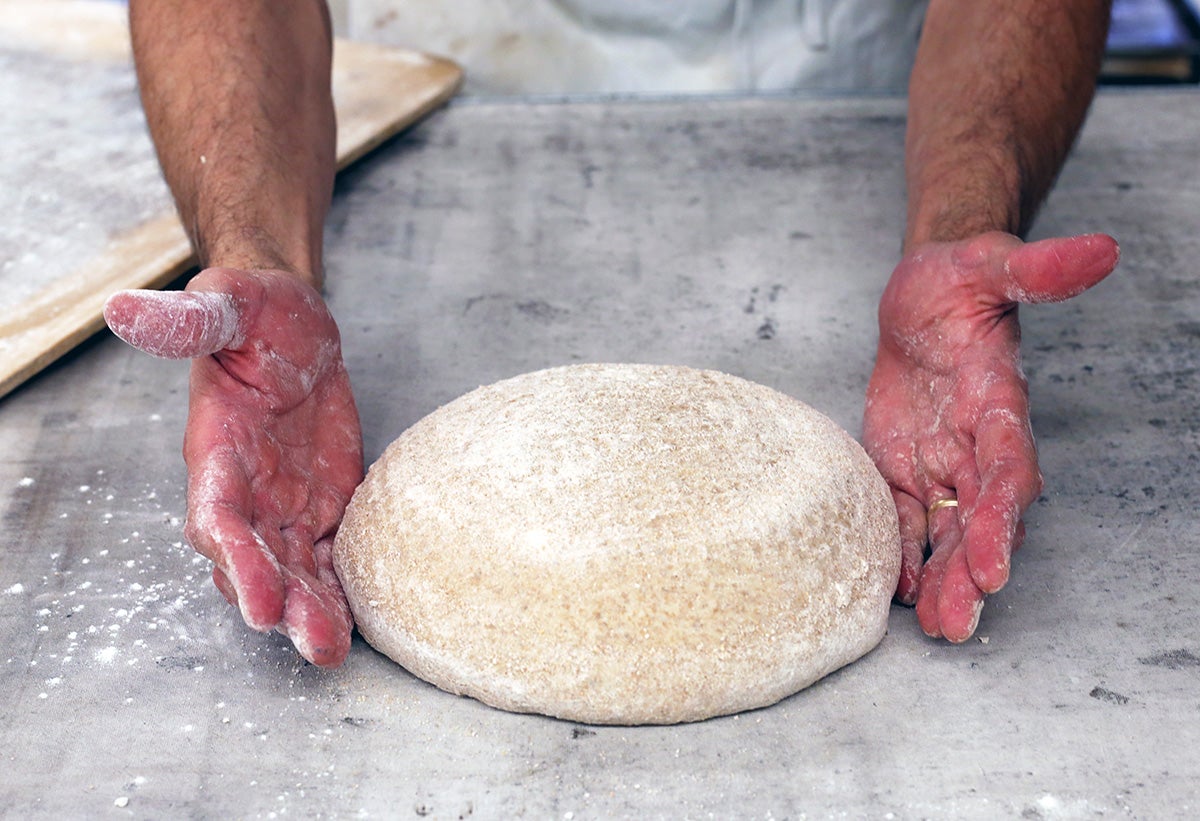
Prepare your recipe as directed. For beginners just learning how to stencil, a round loaf (like this Simple, Rustic Loaf or this No-Knead Rye Bread) is the easiest to practice on. Once you get the hang of stenciling, you can do it on just about any kind of bread, from a long, thin baguette to miniature dinner rolls.
Let the dough rise. Right before you're ready to bake, use the stencil.
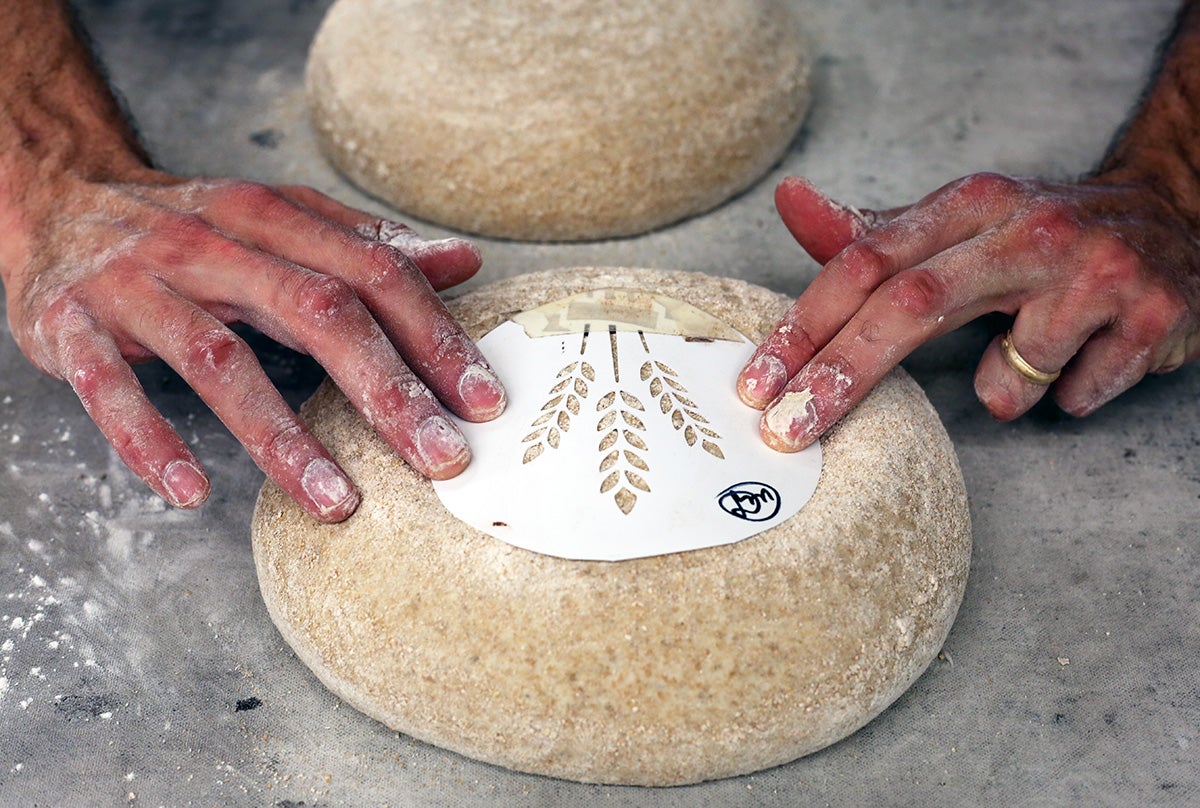
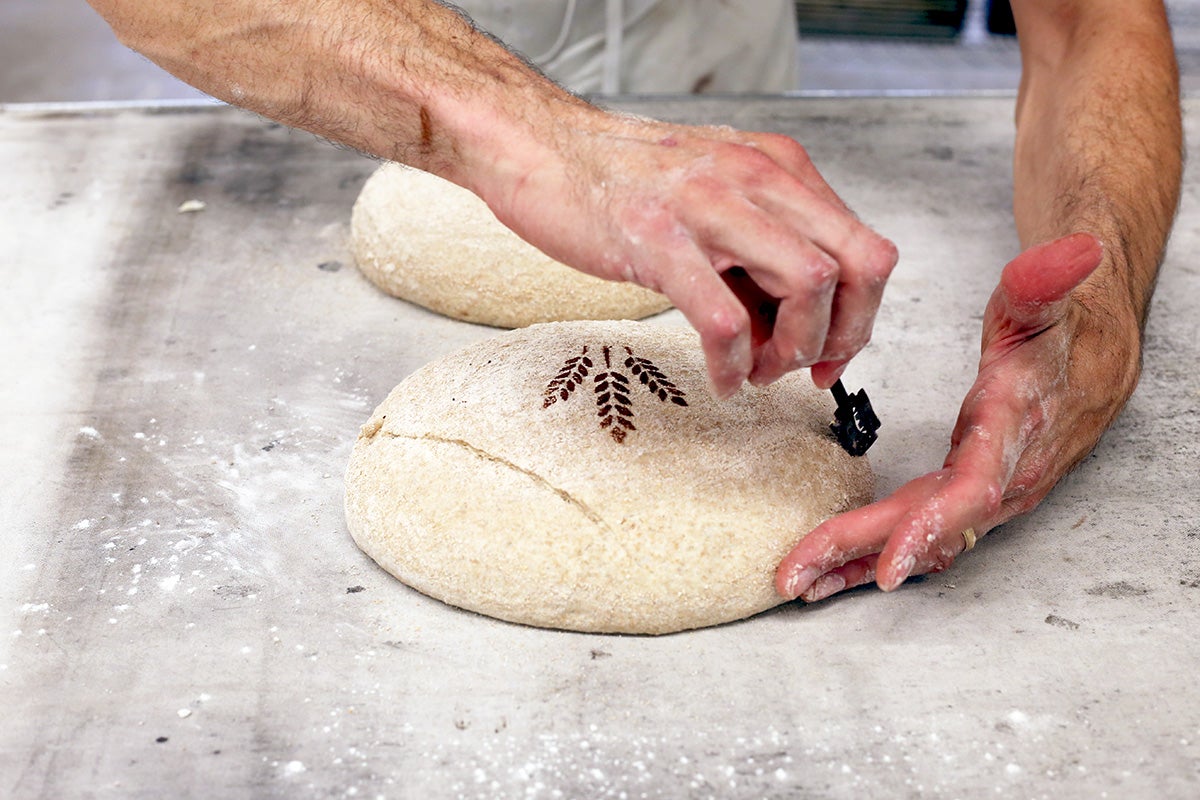
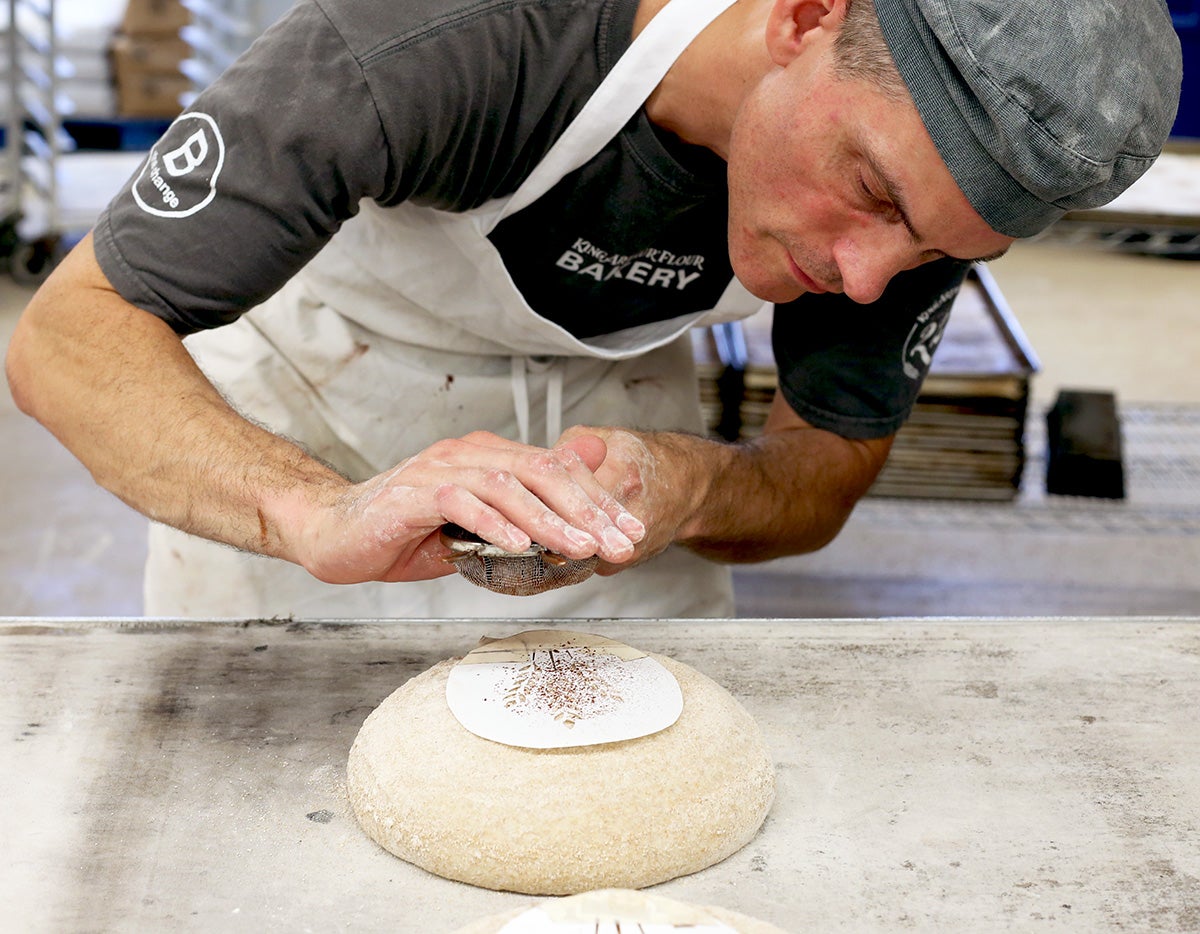
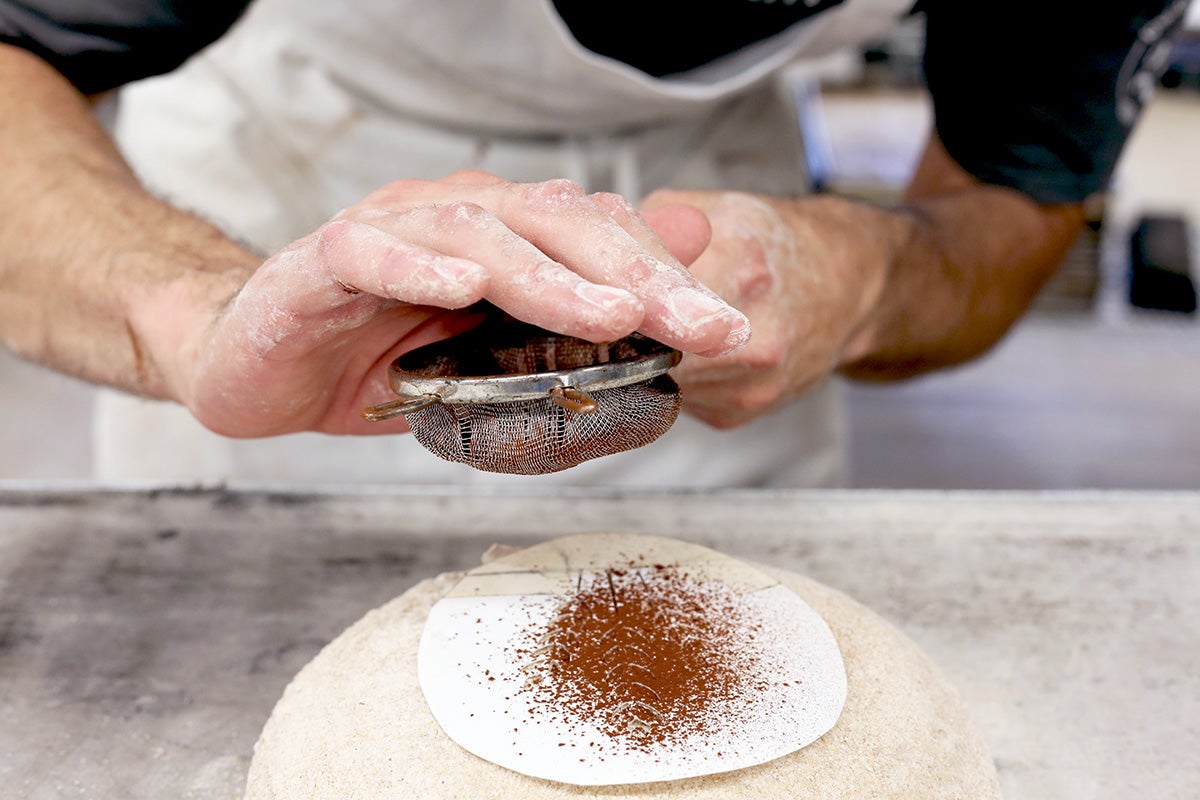
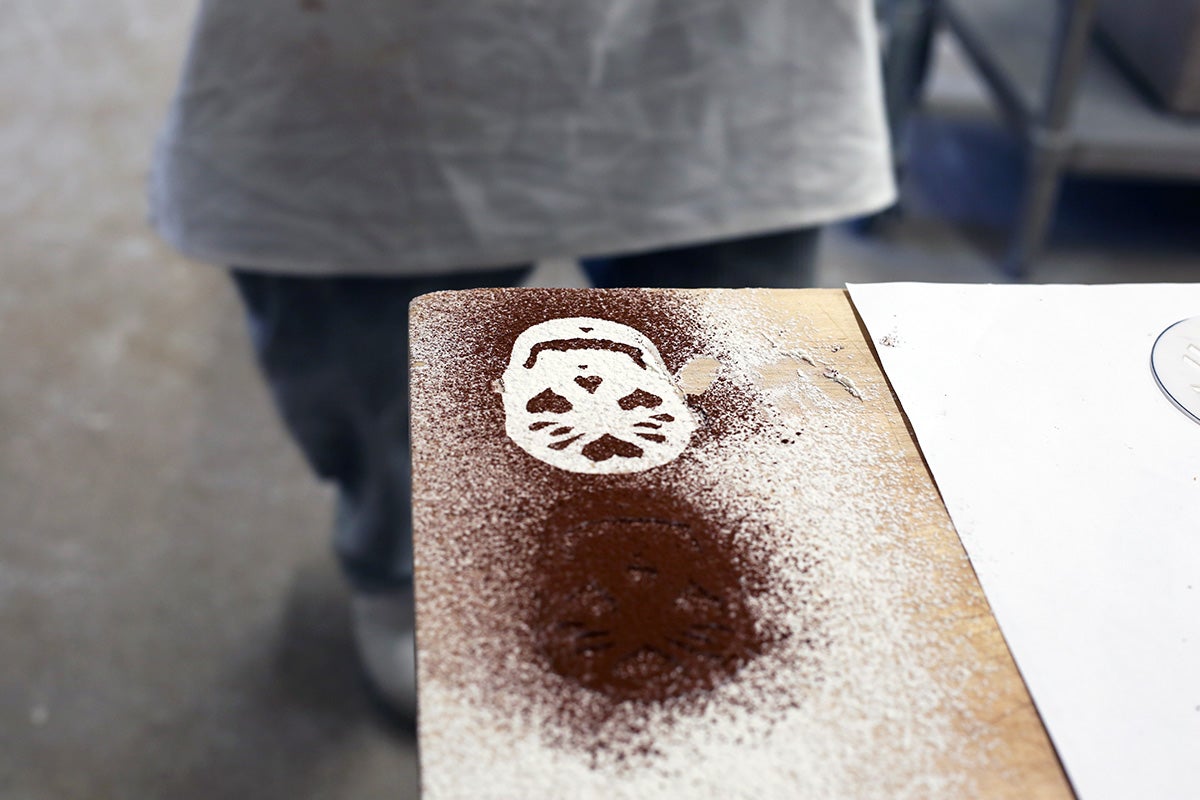
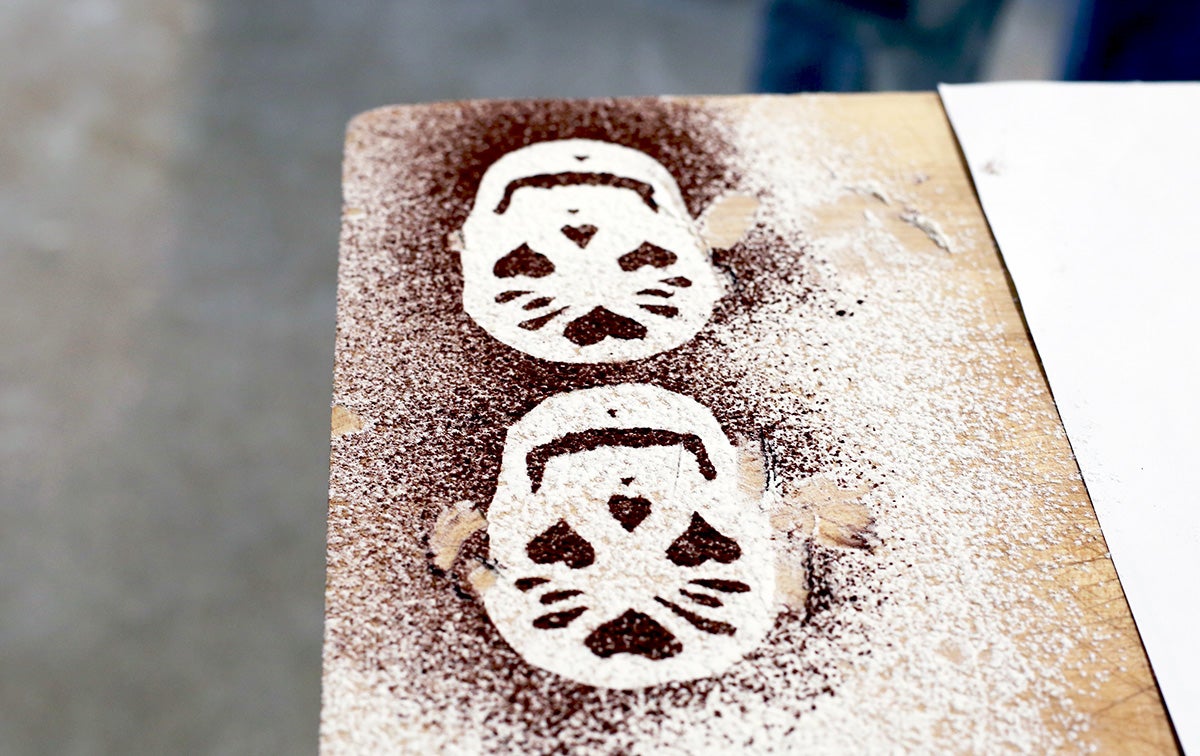
Carefully place the stencil on the surface of the loaf. Using a sifter or sieve, liberally dust flour over the stencil in an even, fairly thick layer. If you're baking a dark loaf (such as a rye bread), white flour will show up nicely. If you prefer a dark pattern, you can use cocoa instead of flour as Martin did here on his freshly milled wheat loaf.
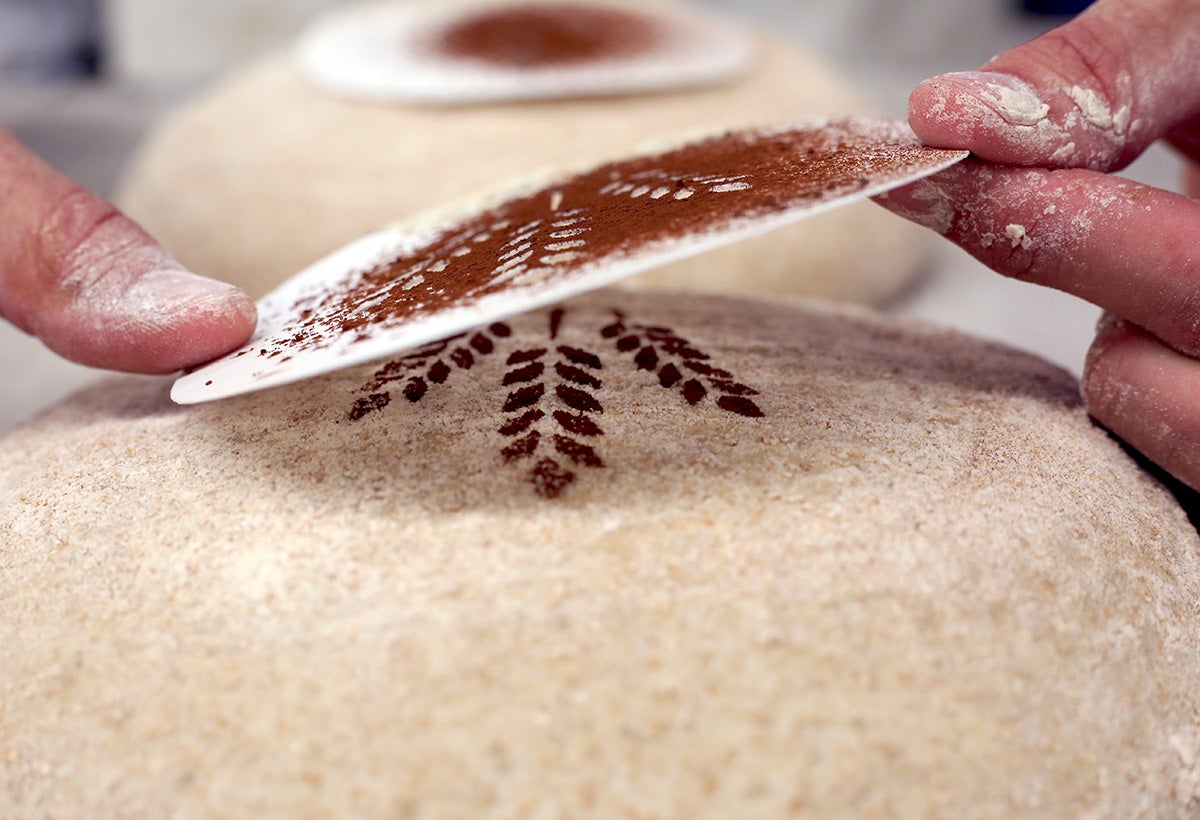
Very gently lift the stencil off the surface of the dough, taking care not to disturb the design you've just made.
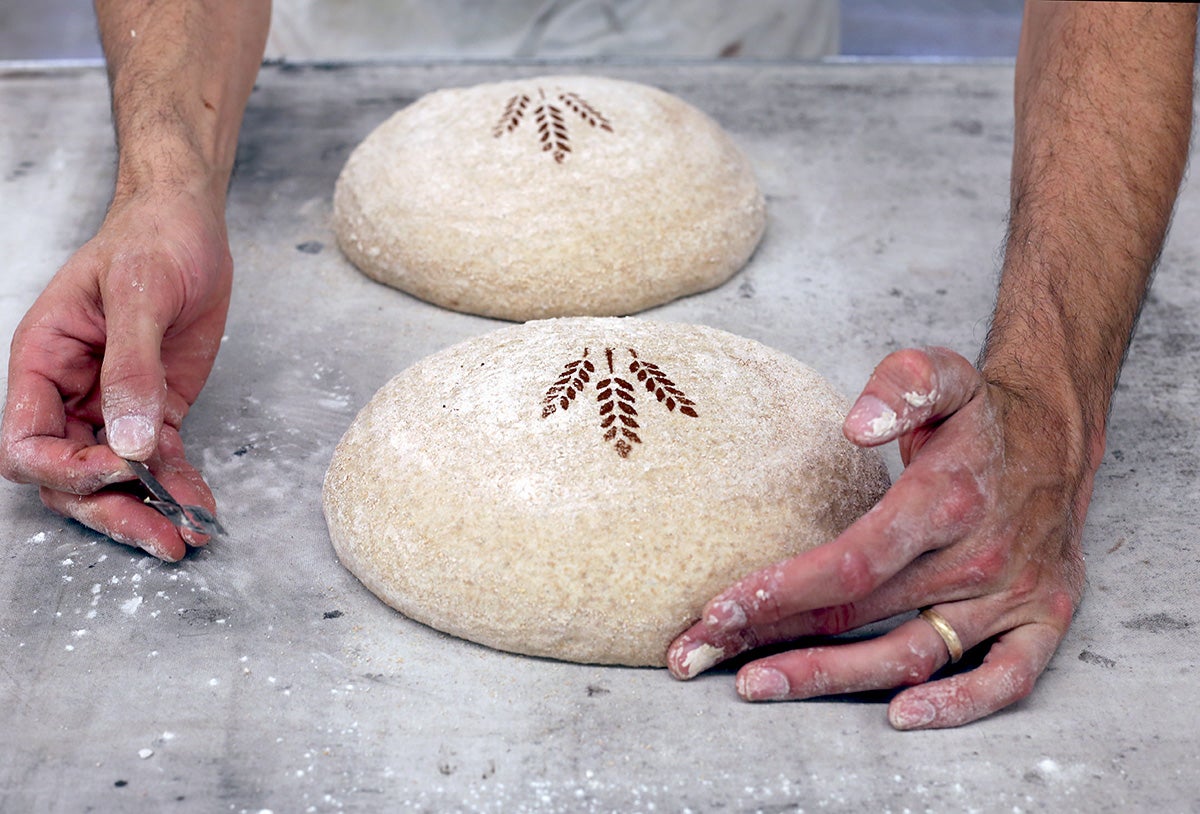
Depending on your recipe, you may need to slash the surface of your bread with a lame. If this is required, do so carefully. As Martin demonstrates here, the slashing can add to the decorative nature of your bread. He slashes in a diagonal pattern around the stencil, creating a border for his design.
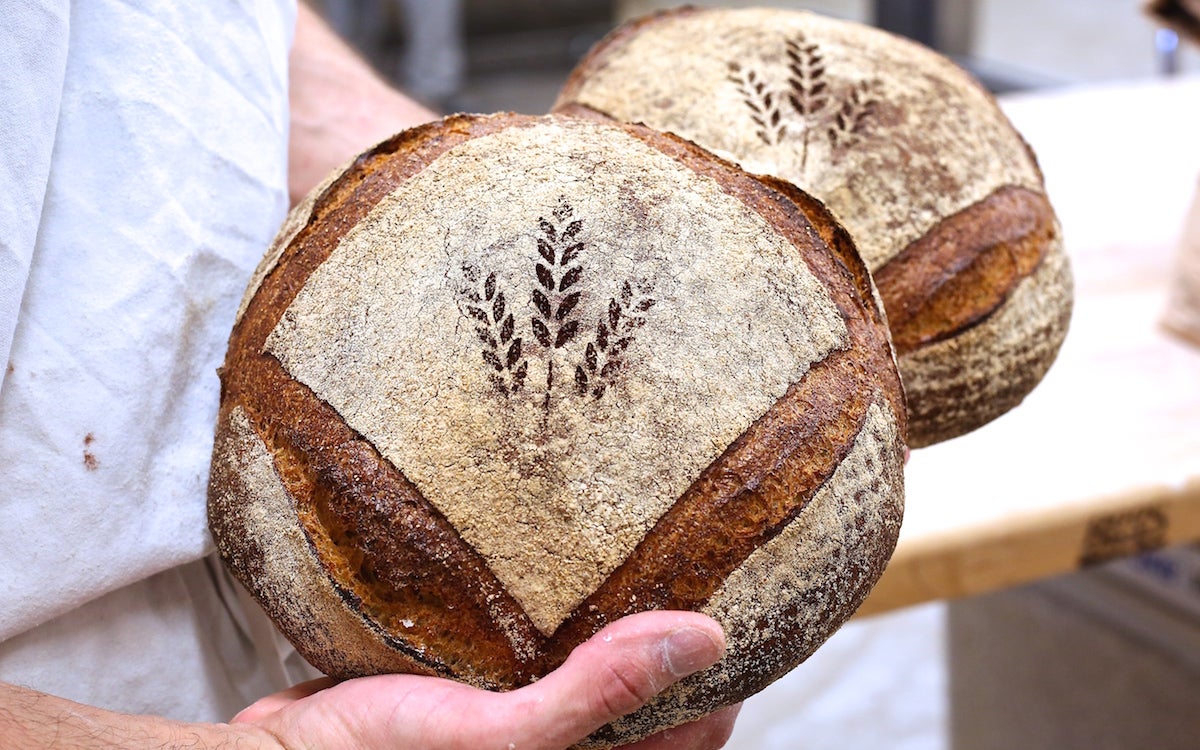
Bake your bread according to your recipe. When it's ready, you'll see the beautifully stenciled pattern baked onto the surface of your loaf.
As with all aspects of baking, practice is the best method. Martin points out that stenciling is an art that requires trial and error: Some designs will show up better than others. Some breads look better with a flour stencil, others with cocoa.
Martin says he could create endless designs, and is constantly coming up with new ideas based on flavors and seasons. Take a look at some of his more whimsical stencils here, and get inspired!
The best way to learn is to try it yourself! Once you make your own stencil once, you'll be hooked.