Sourdough schedule: How to plan your bread baking timeline
A tactical guide to managing your sourdough baking (while still having a life).

Date
May 20, 2026

Of all the questions we get about sourdough baking (and we get a lot), the most common ones usually revolve around starter: how to make it, how to feed it, and how to know when it’s ripe and ready to be used for baking. Timing the maintenance schedule of your sourdough starter so that it fits into your baking schedule (and, thus, your life schedule!) can be tricky. Here’s how to get your timing right, from feeding your starter to baking your bread.

Generally, there are two routines you may choose to feed and maintain your sourdough starter. Depending on your choice, here's how often to feed your sourdough starter:
Twice daily at room temperature: If you’re a very frequent bread baker, the best way to have ripe sourdough starter when you need it is to keep your starter at room temperature and feed it once a day (ideally at the same time of day). If you really want to rev up your starter and extend the time that it's ripe and has maximum leavening power, you can even feed your starter twice daily, spacing the feeds 12 hours apart. Practically, that means feeding it first thing in the morning and again at night. Fed once or twice daily and kept at room temperature, the starter is like the King’s guard: sitting there seemingly motionless, yet always at the ready. The pro of this countertop method is you never have to wonder how long it will take your starter to be active enough to bake with; six to eight hours after feeding, it will be! The con is that you have to feed it daily (though our new Sourdough Sidekick can help with this!), and even if you maintain a small sourdough starter, it can start to feel wasteful to feed it daily if you’re not certain you're going to bake with it right away.
Once a week in the fridge, aka “maintenance mode”: If you’re a more casual sourdough baker, it’s easiest to keep your starter in the fridge and feed it once a week. After feeding, let it sit at room temperature for a few hours to start fermenting before returning it to the fridge. Then, a day or two before you want to bake, give it a couple of feedings at room temperature to rev it up before using it to bake.
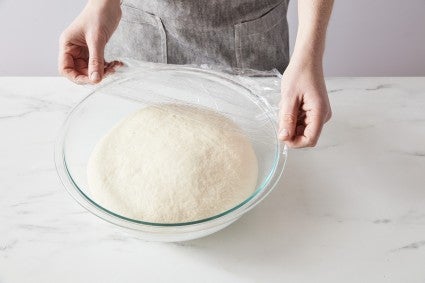
To feed sourdough starter, you simply discard some of the existing starter, then replace it with flour and water. Essentially, you’re giving the starter’s microorganisms food (in the form of flour) to keep them happy and healthy. Once fed, the starter will become active and bubbly again, doubling in volume before it exhausts itself and begins to sink back down.
For optimal performance, you want to use your starter when it has doubled or shortly thereafter. This is called “ripe” starter, and it’s the stage when it has the most leavening power. In order to take advantage of this window of ripeness, time your feedings for roughly six to eight hours before you mix your dough.

In broadest terms, here are the steps that typically lead up to baking a loaf of sourdough:
If you’ve been maintaining your starter at room temperature, you can mix your dough six to eight hours after its last feeding. But if, for example, I want to bake this Sesame Wheat bread on Sunday morning, and my starter has been in maintenance mode in the refrigerator, I need to start the process earlier so that my starter is active and ready for baking before I make my dough. Here’s a sample schedule, leading up to a Sunday morning bake:
Monday through Wednesday: My starter is in “maintenance mode” in the fridge. I don’t need to do anything!
Thursday: Pull my starter from the refrigerator in the morning and feed it. Let it stand at room temperature all day. Feed it a second time before I go to bed; keep at room temperature.
Friday: Feed my starter twice, once in the morning, and again before I go to bed. Keep at room temperature.
Saturday morning: Mix the dough using some of my sourdough starter (that I’ve fed roughly six or eight hours before) and let bulk ferment at room temperature. Give the remaining starter a feeding, let stand at room temperature for an hour, then return to the refrigerator. From here on out, my starter is in “maintenance mode” in the fridge and I don’t have to worry about it.
Saturday night: Shape dough, place in bannetons, cover, and refrigerate. Starter is in “maintenance mode” in the fridge.
Sunday morning: Preheat oven. While the oven preheats, remove shaped loaves from the refrigerator, then score and bake. Starter is in “maintenance mode” in the fridge.
With this schedule, my starter is in “maintenance mode” in the refrigerator from Saturday morning until Thursday morning. Then I take it out of the fridge and leave it at room temperature, giving it several feeds on Thursday and Friday to build up its strength so it’s ready to leaven my dough on Saturday.
Make sure you look at your recipe when you’re making your schedule. Some recipes, like the Sesame Wheat, use only a small amount of sourdough starter and have a long bulk fermentation period. Other recipes, however, like our No-Knead Sourdough Bread, call for a larger quantity of starter but have a shorter overall rise time. If you need to build up the amount of starter that you have, when you’re readying your starter for baking, feed your starter without discarding in order to build up the quantity of ready starter so you’ll have enough for the recipe and a bit leftover for your next bake. Learn more here: How to build the exact amount of ripe sourdough starter for a recipe.
Note that when your starter is in “maintenance mode” you’re storing it in the refrigerator, not at room temperature. Cold temperatures slow your starter’s fermentation to a crawl, which is why it can survive with only weekly (or even less frequent) feedings. If you have stored your starter in the refrigerator and haven’t fed it weekly, it’s probably still alive, just very hungry. In that case, it might take more daily feedings at room temperature before it’s ripe than in my sample schedule above.
Similarly, if you want to slow down dough activity, the refrigerator is also a useful tool. The cold retardation of dough (or shaped loaves) develops flavor in your bread, but it also introduces some flexibility to the bread making process, letting you pause the process and continue when it’s convenient for your schedule. In the words of my colleague Martin Philip: Don’t be a bread hostage.
Remember though, that because the cold makes your starter (or dough) more sluggish, if you want to increase its activity you need to warm it up. A Sourdough Home or a Bread Proofer can be useful here because you can set them to a consistent temperature; use the home for starter (it’s small) or the proofer for starter, dough, or shaped loaves.
Cover photo by Rick Holbrook; food styling by Kaitlin Wayne.