Pretzel Buns
Hey, friends, Martin here, celebrating King Arthur’s Big Month of Bread with these delicious pretzel buns. Imagine the best parts of a soft pretzel: the golden brown, shiny crust; the salty topping; and the soft, chewy interior. Now imagine all of these qualities in a homemade bun that's packed with your favorite sandwich fillings. They bring a fresh twist to classic sandwiches, as well as hamburgers and hot dogs.
- Do you always make me wait?
- [Producer] waiting for me?
- Well, wait to take a bite. That's all I, I'm just like, that's what my job is here is to make stuff and then eat it, right? So don't make me wait.
Hey friends, Martin here and we're in the studio today and we're celebrating this big month of bread. We've got a whole bunch of recipes. My choice today are these Pretzel Buns. I've got two different shapes. I've got a recipe link in the description. Let's get to the video.
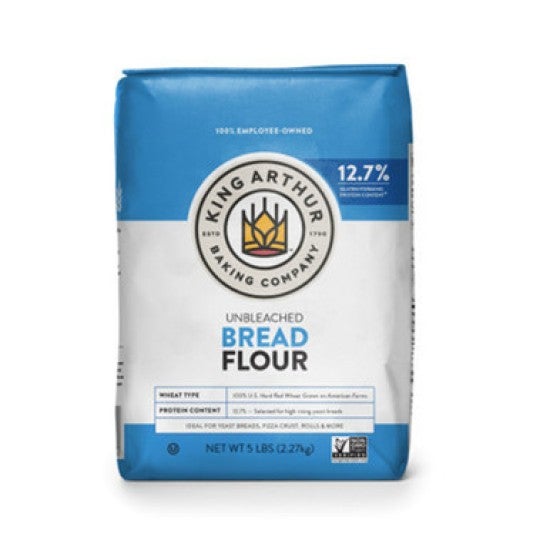
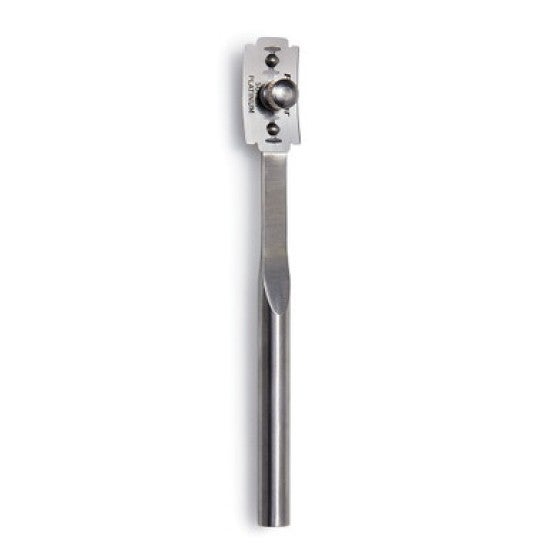
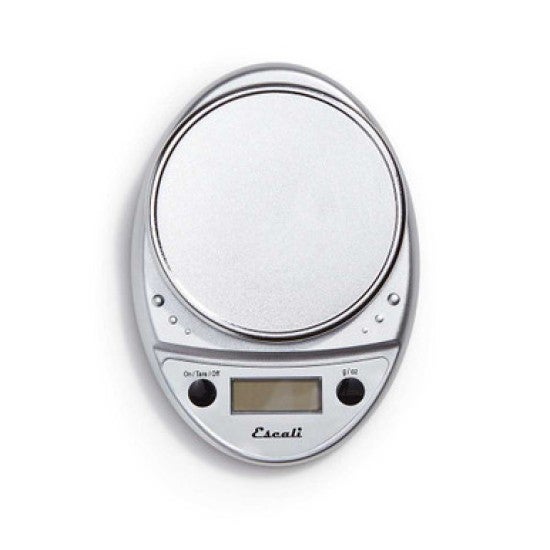
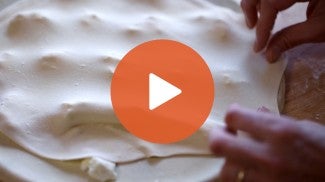
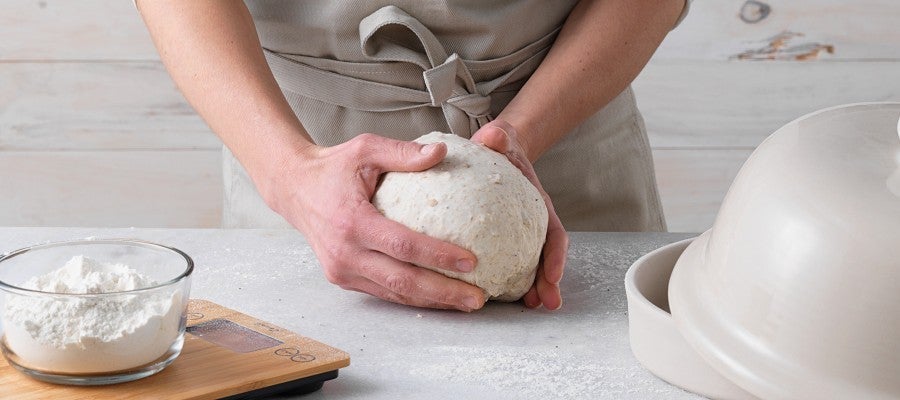
So we've got my bowl on the scale. Let's do this mix. I've got my bread flour out. Remember bread flour, our superpower, it's gonna give these pretzel rolls, the sort of pop that I'm looking for in the oven. It's also gonna give them that sort of signature tug or chew that I want from a good pretzel bun. So bread flour in the bowl, 540 grams. Sometimes when I make pretzels, I add in a little bit of whole grain too, if you wanna do that for maybe 10% of the flour or something like that. A little bit of rye, a little bit of Golden Wheat, a little bit of regular wheat. Man, excellent way to add a little bit of color and a little bit of flavor too. Next up, 28 grams of milk powder. Great for flavor. Great to sort of just add this smoothness to the way that these rolls taste, and that's 28 grams. And then some yeast. We got two teaspoons here and some salt. Three quarter teaspoon. And let's give that a little mix. 397 grams warm water straight into the bowl. Warm water will encourage those yeasts to move at a little bit more comfortable rate. Yeasts favorite temperature is like 96 degrees, so we're going in there, you know, depending on your ambient condition, somewhere between say like 80 degrees in the summer to up to maybe 100 or 105 degrees with my water temp in the winter. And last but not least, some softened butter. It's not melted but it's soft. And we want it soft because I'm gonna do this mix by hand. And if it's not soft enough to sort of break up when I'm using my hand or my wooden spoon, it will sort of leave some chunks of butter in the dough. If you're mixing with a mixer, maybe not quite as necessary. But the moral of the story here is that you want the butter to be a consistency where it will easily incorporate into the dough. And we'll just start mixing. You could mix this in your stand mixer. You could also use the dough cycle on your bread machine if that's something that you use as well. So I'm gonna do it by hand because I think it's good to show people that some of these doughs that you might think need to be machine-mixed actually can do pretty well by a hand mix. Before I get too far along with the mix though, I'm taking a little bit of the end of the wooden spoon and I'm just using it to clean my bowl by attending to that sooner rather than later. I'm less apt to have a bunch of stuff stuck to the bowl. And then I'm gonna go in with the flexible scraper, again, cleaning the sides a little bit. And then I'll start this sort of pressing and folding motion that you've seen me use before with lots of doughs. Pressing, folding, pressing, folding. This is a soft dough, a little bit soft honestly. So probably most of my work is gonna happen right here. And then I might knead in the bowl a little bit. And there's even the possibility to get this out onto the counter for a little bit of slap and fold. That's a good method for you to learn. And I think this is a good dough to practice with. So maybe we'll do a little bit of both. I'm basically gonna leave it in the bowl until I feel like most of my dry is incorporated. And then I have a relatively homogenous mass. I'm not really developing any strength yet per se, but just making sure that everything that I have in that bowl is evenly distributed within the mass of dough. This point, what you can do is you can take a little bowl of water and I like to use a wet hand because the dough just doesn't stick quite as readily. So a little bit of water in my hand. And then what I'm gonna do is just start to do this sort of like slap and fold in the bowl. And if you feel like that's going well for you and you wanna take it to sort of the next level, you can show off for your friends by doing it on the counter, slap and fold. So that seems pretty good. If you've got a little bit of a mess on your counter, take your flexible scraper and just clean it up. You can even shape it a little bit into a ball, can give it a little bit of a tightening here and it's happy and ready to go. Little bit of spray in the bowl. That'll help me later when I go to get it out onto the counter for the divide. Plop it in there. Alright, get a cover on, put it in a comfortable spot. We're gonna leave it to rise for one hour. It's ready when it's doubled. So you can also just keep an eye on it and wait till it's nice and puffy. And then we'll come back and we'll be on to the next step for these beautiful rolls. Okay, so we are to the point where we're gonna divide. I've got a beautiful puffy, well-risen dough. It's been about an hour, honestly here, we had a little bit more time. It's a little bit over an hour. It's okay. What you're looking for are the visual cues that the dough has doubled. It should feel sort of nice and puffy. So let's get it divided. I'm gonna use a little bit of flour on the bench. It's my preferred sort of handling material. I like the way dough releases in the recipe instructions. We also mention oil, if that's your preference, you you do that. It's okay. I'm gonna put a little bit on top just so that my tools don't stick and then I'm gonna divide it. Now when we get to the divide, we've got a lot of options. This is a great base pretzel dough. If you wanted to make a big soft pretzel, you could use this dough for that. If you wanna make buns, I'm gonna show you how. If you wanna make another shape, which is sort of like elliptical or like a mini sort of pretzel baguette or something, you can do that too. And I'm gonna show you. The point being that once you have a good dough, that's as healthy and happy as this, the sort of world is our oyster in terms of what we do with those shapes, okay? So let me show you two. First one I'm gonna show you is a classic pretzel bun, just a nice, round bun. You could use it for anything from a sausage patty and a breakfast sandwich to something else like a hamburger. Okay? So let's do a pretzel bun first. I'm gonna divide my pretzel buns into 100 gram pieces. This batch is about a kilo of dough. And so we could get, you know, 10, 100 gram buns here. I'm gonna do five of those. That's perfect. And then for the slightly larger one, I'm gonna do 'em at 125 grams. One of the beautiful things about rolls is that if you're someone who likes to shape bread, you've got a lot more opportunities, right? If I'm making sourdough, I might have like one or two chances to shape a beautiful loaf, rolls, I've got nine opportunities to enjoy myself and also improve my skills, right? With rolls, we have the opportunity to practice. We get a few more reps in. So let me show you how to do the round ones first. I have my little mass of dough here. I still have a little bit of flour on my surface, which is beneficial. Just a little bit of flour on my surface. And then what I'm gonna do also is I'm gonna prepare myself a tray here where I'm gonna rest the rolls before they go into the boil. And just to make sure that I don't end up in a situation where I can't get 'em off the tray. I've got a piece of parchment down and I'm gonna give it just a little spritz with some pan spray. Okay. How are we gonna shape these rolls? So same as it ever was, it looks like a bowl fold. It looks like shaping a boule. It's basically me stretching upwards from the outside and gently pressing to the middle to seal. So this is a small enough piece of dough that I can sort of keep my thumb right there in the middle and hold that bit of dough that I've stretched up and pressed in place while we wait for the next one. And then I turn it over and I just give it a little bit of a rounding, make sure that it looks relatively round. Doesn't have to be perfect. And then I'm gonna give it a little bit of a press. If I don't do that, you may find that you end up with too much of like a cannonball form as opposed to more of a roll form that you'd like to enjoy as a sandwich. Okay? So a little bit of press just to flatten it a little bit. Don't worry, it's gonna recover. It's gonna be nice and high. And lemme show you that process again. Once those are on the tray, they look good. I've given them a little bit of space so that they don't grow into their neighbor. They probably won't because it's kind of a short bit of time before we go to boil and bake. Okay, so now let me show you another form. I like these because they're a little bit unexpected. I think they look really nice. This is gonna kind of start the same as the other one. And once I have that sort of gently, tensioned first form, what I'm gonna do is just press it to sort of get it to elongate on a slightly sort of east-west axis. And then what I'm gonna do is I'm gonna go up to that top, I'm gonna bring it towards myself and I'm gonna press the seal and I'm being pretty firm. I'm in charge of the dough right now. I'm telling it where I want it to tension. I'm telling it the nice, smooth even form that I want it to have. Now we're pretty much there and you could leave it blunt at this point, that's perfectly fine, but I want a little bit of a taper to it. So I'm gonna roll it back and forth just to smooth the form out. And then I'm gonna go out to the sides and give a little bit of downward pressure just to sort of bring those tips to a point. And I've got a nice beautiful little roll and I'm gonna place it seam-side down right on the tray. We're gonna get these covered and we're gonna let 'em rest for 15 minutes. And in that time, we're gonna get everything ready for our boil, right? And our bake, it's been 15 minutes, maybe even a few more. It's okay. But remember, these are moving, so you wanna have some level of like focus and expedience when you're moving around getting your things together. Let me sort of walk you through what I have here. So I've got my rolls, they're rising, they're ready to go into the water. The water is coming up to temp. I haven't added my baking soda and my salt yet. I'm gonna go ahead and do that in just a second. I have some handling elements. I have some things to sort of move these rolls from the hot water onto my tray. You could use a fish spatula like that. If you have a spider, a spider's a pretty good tool too. I have a lame here, right? A razor blade. You could also use a very sharp, small serrated knife. If you have that, that can work as well. I've got some pretzel salt. If you don't have pretzel salt, you can use kosher salt or a coarse, any sort of coarse flaky salt will be fine. Or you can skip it. You do you. I've also got a tray here with some parchment on it. If you wanna give that an extra spritz with oil just to make sure that your rolls come off easily, you can do that. Or you can sprinkle a little cornmeal or semolina on there, that works as well. So let me get my stuff into the water here. It's about two quarts of water. I've got 18 grams of salt and about 57 grams of soda. The baking soda that's in here raises the alkaline, raises the pH level of the water. And what that does is during the baking process, it makes it so that they brown more easily. You're gonna see a beautiful deep brown color. That's because of that high pH. You also get a little bit of flavor in addition to the salt that we added to the water. Alright, so remember these are resting on this parchment paper that I spritzed with a little bit of pan release. It's gonna help me get 'em off here and into the water. Right now, they're rising seam-side down. And what I like to do is put 'em into the water seam-side up. I'm gonna give 'em 30 seconds and then I'll give 'em a flip. And in this pan, I can fit about three at a time and I think that'll be good. So in this boiling process, similar to a bagel, which is boiled, it helps to sort of produce this shiny, thin crust when it's baked, it gives you this textural element that you just don't get without boiling. And so the boiling aspect is actually very important to the eating quality of these pretzels. Okay, so I'm just looking for these to sort of puff a little bit and then I get 'em out about 30 seconds per side. Don't let 'em hang out in here too long. If you do, you may find that they overrise and then they just don't quite rise as well as you might want in the oven. So once they're out of there and onto the tray, in my mind, I've got a little bit of a timer ticking, right? I'm saying, "Okay, keep moving here. Don't sort of. Take your time. This is the time where you want to sort of move through the process a little bit." And the next step in this process is to give each pretzel bun a little bit of coarse salt. I have some pretzel salt here. If you don't have pretzel salt, just use kosher or use any one of the good coarse, flaky salts, just a little bit. And I like just a little x. And after I score 'em with my razor blade, I'm gonna go back and make sure that I cut 'em well. I just have a look. Are they separated? Yep. Everybody's happy there. Looking good. Yep. And just like always with scoring, you know, don't let that dough smell your fear. Go in there with confidence, show it who's the boss. So we'll get these into the oven, 20 to 24 minutes, 400 degrees. The oven is preheated because I'm gonna bake 'em both at the same time, probably at the halfway point or so. I'll go in there and rotate just to make sure that things are baking as evenly as possible. We'll see you in a minute with a beautiful roll. Okay, so let's just look a little bit more closely at these. I love them. They're beautiful. This might be one of my favorite colors in the world. It's that sort of chestnut brown, the beautiful bake, the boil, all of these things coming together to make that sort of iconic pretzel color. I love it. I love this shape as well. I love the taper to it. I love the care. It will hold a sausage really, really well. So I'm already thinking ahead to like, how am I gonna eat that? Well, first I'm gonna eat it plain. I can tell you that. And the bake is good on the bottom as well. Well-browned, all the way around. So we're not talking, let's have a bite here. It's got that super thin crackly exterior crust. That's what the boil is doing. They're nice and light inside. That's that bread flour going to work for us. Man, they're good. I mean, there's nothing that tastes like a pretzel, right? There's just nothing that is a sub in that category. And that's a good reason to make these in addition to all the other ones, right? They're beautiful, they're delicious, they are unique, and they're also an opportunity for you to practice your shaping. Remember, all of us as bakers have this idea as craftspeople that we wanna get better, right? And the way that I get better is by doing this over and over, rolls are a great chance for that. So there they are. A beautiful pile of pretzel buns. I did a couple different shapes today. You pick what works for you. This is a quick recipe about two hours door-to-door. But I tell you what, it doesn't taste like we cut any corners. It's a beautiful, beautiful roll and everybody needs a little bit of pretzel in their life. This is Martin and everyone in the studio saying, thanks for joining us. Happy baking.

Video Credits
Shop this video

Related Videos

Your bread fell flat. Your cookies crumbled. Who do you turn to?