Salt Bread (Shio Pan)
Martin makes this irresistibly buttery Salt Bread. Known as shio pan in Japan and sogeum-ppang in Korea, salt bread is formed by rolling each piece of dough around a block of butter. The butter steams and melts in the oven, leaving the buns with hollow centers and — our favorite part — butter-fried bottoms. Then Martin talks with recipe developer Kat Lieu about how she created King Arthur's take on this popular bakery staple in East Asia.
Hey y'all, Martin here in the studio today and I'm making something that's new to me and I'm loving it. This is Salt Bread. It's a recipe that was contributed to us by Kat Lieu, the cookbook author. Recently I had a chance to talk with her. Let's jump into the video.
As always, the link is down there in the description. You can click on it, you can bake along, you can be eating these by the end of day. Alright, so let's mix this dough.
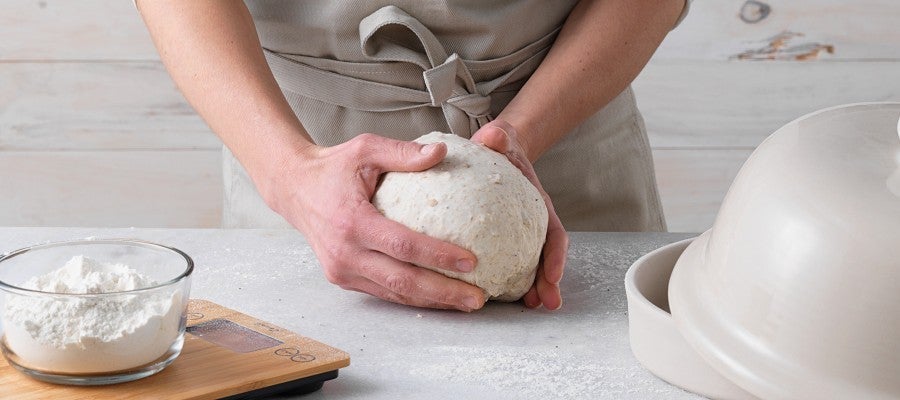
So I've got 218 grams of bread flour. I like bread flour with the milk bread because we want something that both has a little bit of tug and sort of like resistance when you bite it. But it also has the ability to hold air and rise nice and high. And in testing one of the things that I found really interesting was that Kat decided to use a little bit of cake flour, which is rare in bread, but if you think about it, it's sort of trying to find this balance between these two poles, right? Tenderness and tug. High rising, and also something that's a real plush joy to eat. And so she came up with using a little bit of cake flour and I think that's a great sort of way to go about it. If you don't have cake flour at your house, you could use all-purpose or you could use bread flour, that's fine. I think you're gonna be just as smiley when you take these outta the oven. And then I've got a little bit of sugar. It's not so much for sweetness, although it does fill out and sort of round the flavor profile. It also helps with browning. And these rolls I think are beautifully, beautifully browned when they come out. And then I've got a teaspoon of salt and in the recipe there's also an option if you have red miso at your house, you could use that instead, which I find fascinating. It's not something that I have, if I put miso, I have put miso in breads before, but I've never used it in place of the salt. So I think that's an interesting way to add flavor and salinity at the same time. Next step, I've got a teaspoon of instant yeast. The beauty of instant yeast remember is that it has a very small particulate size and so it can go straight in. You don't have to bloom it like you might active dry or some of those other things. So instant yeast straight into the bowl and I've got a little bit of butter, it's about a tablespoon and it's at room temperature. It's soft, it's not runny, but it is soft and that'll help it to incorporate when we get to our mix. And last but not least, I've got some hydration here. It's all milk, it's whole milk, 227 grams. So into the mixer and I'll get my dough hook on and I'm gonna mix it for five minutes on low. It's just sort of the incorporation phase of mixing. And if the dough's climbing the hook a little bit, just go ahead and push it down. Make sure that we're actually mixing this dough and not just spinning around in there, which is not necessarily helpful. So a little bit of cleanup. These are actually really tasty. I haven't played with 'em a lot in terms of like what I'm filling them with, you know? But in talking to Kat, one of the things that I thought was really interesting is the way which the Shokupan is being used is this sort of like vehicle for play. So she was talking about maybe adding ube to her dough and then doing an ube filling. I see a lot of sweet treatments and I've also seen bakeries that are doing it with things like ham and cheese inside. So a super versatile dough. If you learn these foundational doughs, you'll have the ability to sort of make all of those things. The dough is just sort of getting homogenous. We're not getting much development at this phase, right? We're just making sure that the ingredients are incorporated and well-distributed, getting a little bit of development of strength, but really it's more about the incorporation phase of mixing right now. And I think that's pretty good. I think we're there. So I really don't have any strength yet. And what I'm gonna do is just get this off the hook. Lemme show you actually what we've got here, which is not a windowpane. See how it's sort of tearing? It doesn't have the elasticity yet that will support a nice pane. It's thinking about it but it's not quite there yet. When we come back it will have even more strength than it does right now. But then we're gonna sort of double down on that and give it a good 10 minutes at medium. And that will really set us up for a strong base dough, which is both toothy and yet at the same time has the ability to rise nice and high and be this light delicious Shokupan. So set your 10 minute timer or just set one with your heart and don't worry about it. Go walk around the block, take the dog, go read a chapter of a book, come back in 10 minutes or so, doesn't really matter. And we'll give it the rest of this mix and then we'll be on our way with this beautiful bread.
- Hi Martin, my name is Kat Lieu. I was formerly doctor of physical therapy for over 13 years of my life and then I just fell into cookbook writing.
- I've been watching this trend for a few years now, but tell me about the salt bread and how you came to it a little bit.
- It also just like you, it was a trend that I saw online and I think it also came about this fascination for Asian baking and Japanese baking started a while back with milk bread and now very recently, within the last year there's this huge fascination for Japanese Shokupan or salt bread. But what we don't realize is that it's a very common bread that's been around East Asian bakeries for perhaps decades. It's a very common bread, but it's just so fascinating because here you have bread that you could eat on its own and not paired with dinner or for breakfast or as a sandwich item, but this beautiful, crispy, crunchy bread with this hollow interior inside and just everyone from my mom to like someone's grandma who's never baked before, has this huge fascination with this bread and now they're making it at home and they see it also in South Korean bakery. So it's just a very common staple that has become so viral and I'm loving it.
- Okay. Okay. Okay, we got you. Alright, 10 minutes. And during that time the flour is hydrating, gluten is actually developing and that's gonna shorten the amount of time that we need now for the remainder of the mix, it's a great trick. You know, it's what we're doing when we autolyse dough. There are lots of reasons to add those rests in. So now what I'm gonna do is I'm gonna go to medium speed and I'm gonna mix it for 10 minutes. So the dough's getting better. I can tell that it's getting better because I can sort of, I'm keeping an eye on the bottom of the bowl and I'm looking to see when the dough has enough strength to clean the bowl to literally it's cleaning the sides but it's not off the bottom yet. And I'm just watching it to see that point when it cleans the bottom as well, which tells me that elasticity is built to the point where it's like grabbing and stretching and snapping back, pulling that dough off the bottom of the bowl. And you know, we're like six minutes in so we still got four minutes for the rest of the magic to happen. Okay, so dough finally cleaned the bottom of the bowl. It's fully clean and my guess is that we can probably windowpane. I've got a couple minutes left, I'm gonna let it run and then we'll get it out and look at it. Okay, so let's see what we got here. I'm just gonna pull a piece off from the side and gently work it out into a thin layer that I can sort of see if the windowpane is there. When you're pulling a pane, don't just go yanking on it. You sort of have to tease it out a little bit and that looks nice and thin. So I'm gonna put it into a container. I'll give it a little bit of pan spray just so that it comes out a little bit more easily. And then I might just give it a little bit of a rounding and see it's a beautifully smooth, well-developed dough. Put it into a container. I'll put it into a comfortable spot to rise for 70 to 90 minutes. When we come back, we'll divide and shape and then we'll get 'em proofing. We're on our way to this beautiful salt bread. For people who don't know, talk us through the process just a little bit. And I'm gonna ask some questions along the way, but the foundational dough, you know as a baker you approached it with a milk dough and that's pretty common, right?
- I've been looking online, everyone's making it sort of like a baguette or a Bánh mì bread. So with like cold, icy water, a little bit of butter, no egg, right? And I've seen that. I know that the East Asian palate, they do like things that are a little bit chewy, like Boba and Mochi with a twosome chew. So when you use like ice cold water and then you have not as much fats, your bread doesn't rise as much and you have that more chewy tender interior, right? Versus that really fluffiness. But there is the other side where people love that milk bread interior where it's more fluffy. So you have the outside, it's crispy, but then you also chew and it's like a pillow. So with this bread you can make it either way and I found that you could use a milk bread dough to also make this bread as well. It's really dependent on your palate and your preferences. For me, I like the watery version where it's chewy. My son likes any version. He is like make it, just make it, I'll eat it. And I know the team at King Arthur Baking also likes the more fluffier milk dough version.
- Okay, we're back. We got a beautifully fermented dough, it's marshmallowy, well-risen, bodes really well for what we're gonna see in the rest of this process, which is a dough that moves well after shaping, it's extensible, it's all the things that we want, right? So I'm gonna dump it out on the counter and we're gonna divide it into 80 gram pieces. I'm gonna get seven rolls out of this batch. So if you're dividing with your eyeballs, just make sure you have seven even pieces. One thing that I found is that if I manipulate the dough too much at this stage, it makes it a lot harder for me to get this really long, thin piece of dough to work with when I go to the shaping phase. So what I've been doing is actually cutting into sort of a rectangular shape here. And then what that does is it prevents me from adding too much tension in the next step. So what I need are seven of these at 80 grams. And what I end up with is this beautiful sort of triangular shape. If I have one that's not quite sort of looking that much like a triangle, you can tug on the ends a little bit. You can tug on the point a little bit. It's okay to just sort of show the dough who's the boss and push it into shape. So if I set myself up well with these nice even triangles right now, when I go to make the final shape, everything will look more consistent and that is an aspect of baking that I really like. We're gonna put a lid on 'em and we'll come back in 15 minutes for the final shape. One of the questions that I had as I was reading through it was specifically about the shaping of the butter. Are you using sticks of butter and then you're cutting 'em down or what's your method there Kat?
- Yeah, so I took, if I'm making eight pieces of bread, eight Shokupan, then I would just take a standard one stick of butter, cut it into like your batons. Evenly into eight batons. And then you have that like nice little long baton and then you'll just roll the bread dough over it. But I found that when your baton is longer then you end up with a longer shaped croissant like Shokupan. So then when you take a standard stick of American butter, I was like, oh, how do I cut it in a way that it's like four centimeters in length and two centimeters in widths so I had to play around and Lego it, you know, cut the butter into the block like a Lego. That way you get your hole a little bigger in the inside of the bread and you end up with a chubbier roll. So it's really dependent on what you want.
- Alright, so I've got my dough. It's been resting for at least 15 minutes. If it's a little bit longer, that's okay. If it has some extra time, I think you'll find that they will roll even a little bit easier. The other thing I have here is my butter. I've got seven little bricks here, 24 grams each. The butter is gonna get rolled up inside the dough. It's one of these sort of iconic aspects of this roll is that when it bakes the butter melts, it comes out a little bit and when it does that, it sort of fries on the pan and that's what gives you that undercarriage, that bottom side of the roll, which is super crispy and buttery. It's delicious. Don't skip that. The other thing that the butter does is that it creates a little bit of a void in the roll. It creates a little hole inside and it's one of the sort of signature characteristics. What I like to do is I like to roll from the center to the point and then I come back and I roll from the center to the base and I'm trying to maintain this triangular aspect to the dough with a little bit of taper. And about halfway into that process you can see that I've got this nice long sort of triangular piece of dough. If you feel like the dough is fighting you, you know that's pretty common. Remember we put a lot of strength into this dough. It's got a lot of elasticity. So if you feel like it's snapping back a lot, maybe you find yourself in a position which I have several times where I'm like, eh, I'm gonna roll that until it feels like it's sort of bucky or snapping back. I'll set it aside and cover it. I'll work my way down the line and then I'll make a second pass through to get to the full length that I need of 16 inches when I roll up the butter. That's all the way out to 16, no problem. And so I think I'm gonna go ahead and roll up my piece here. I place the block of butter down here at the end and then I just roll it up and what I have found to be useful is to sort of keep the tail of the dough in my left hand or right hand if you're left-handed. And then I just roll it up and what I'm looking for is that this dough sort of stays in the middle of my shape similar to the way that I might roll up a croissant for example. And then I just take that tail and tuck it underneath and I've got this dough which has this sort of like arched aspect to it with like a centerpiece and then some shoulders to it. Not unlike I would do if I were rolling a croissant or something like that. So lemme do it again. And you'll notice I keep this lid on while I'm working, right? Especially in dry seasons you may see that dough dry out a little bit. If it dries out it won't stretch. So protect your dough. Beautiful. So cute. Okay, so we'll get a lid on 'em and we're gonna proof 'em in a nice comfortable spot for at least one hour up to two hours or maybe even a little bit longer if it's cold where you are. So as you near the end of that proofing, make sure to preheat your oven to 400 degrees and we'll be baking these in no time. I mean you're just eating them plain, right? Or how do you find yourself enjoying them?
- Well, I don't like things plain only because like it doesn't satisfy my inner child. I like to be very creative with my food. So like I'm probably one of the first to make an ube version turning the Shokupan purple with ube extract. And since there's a hole on the inside, it's kind of wasted if you don't fill it, right? So I've seen people fill it out with marshmallows and chocolate and turning the Shokupan chocolate. For me I made a version that I really love 'cause it reminds me of my trip in the Philippines. So like an Ube Pandesal, but inside on top of the butter I added a layer of ube halaya which is ube jam and then the cheddar cheese and then roll all of that together. So the butter goes away, but your inside, you have the melty cheese and the jam and you taste that and it's like a hit of sweet and savory that's just so delicious. Especially with this bread. So I like that version. The next version I wanna make would be like a matcha with a red bean paste on the inside.
- Wow. Wow. That's incredible. Okay, so the rolls have proofed for two hours in a nice comfortable spot. One note about the proofing is that because these have that nice big chunk of butter inside, remember butter will melt at 85 degrees. So if you're someone who's in the habit of throwing that tray of things into the oven with the light on, just watch yourself because sometimes those ovens will get quite a bit above 85 degrees. If that happens and the butter comes out, you'll have a problem, okay? So be sure that you're proofing at a moderate ambient condition up to 75, maybe 80 if you're rolling the dice a little bit. We proofed ours at about 75 degrees. They're beautiful, they're well risen, they're definitely puffy. If I shake the tray, I get a little bit of a jiggle. If I press with a finger, it retains the indent just a little bit. It sort of passes that poke test, they look ready to me. So let's go to the next step. So I've got some water in a spray bottle and I'm gonna give these a nice spritz with the water and that's gonna make the crust just a little bit crispier during the bake. Next thing is because they're salt rolls, we're gonna give 'em a little bit of garnish of some coarse salt. If you have a flaky salt, that works, if you have pretzel salt, that works, if you have some good kosher salt, that works as well. It just gives us that extra little crunch, that little hit of texture and also gives us just a little bit extra salt. So my oven's preheated, we're ready to go in 18 to 20 minutes. Get 'em in there, get 'em baking. We'll be back in no time. Where can we find you on the internet, Kat?
- Well, thanks for asking. I am very active on Threads and my handle is @KatLieu, K-A-T-L-I-E-U. Also on Instagram. I have a group called Subtle Asian Baking on Facebook. It's a private, oh no, actually it's a public group now because they allowed it to be public group. And I also have a website called modernasianbaking.com. You could find a lot of my bylines on Simply Recipes, on Tasting Table and hopefully more on kingarthurbaking.com. I'm very excited to keep writing for KAB and also please check out my cookbooks. I have three of them. My latest one is called "108 Asian Cookies." It's available wherever cookbooks are sold.
- Thank you so much for taking the time. Thanks for this beautiful recipe. I'm excited to make it. I'll do my best, I promise.
- Oh my gosh, you're gonna blow it out of the water. I know it.
- We'll see. Proof comes out of the oven as we always say, right? Hot bread, hot bread, come and get it. It smells incredible in here. So I've baked these to a beautiful full color and now what I'm doing is I've got a pastry brush and I'm just grabbing some of the butter that's sort of still on the sheet tray here and I'm just finishing 'em. The attention to detail that I gave that shaping process where I had sort of like that centerpiece and then I sort of had that taper, it made it the way through the proof and I think they're beautiful honestly. Make sure everybody's got a little bit of butter. Okay, I'm gonna let these cool on the tray for about five minutes or so and then I'm gonna come back. We'll salt 'em on the bottom when I return and we'll move 'em onto to the cooling rack. Beautiful, smelling good. Alright, so let's get one of these cut open. It does sound crispy and crunchy. Beautiful. When I squeeze it, the crust sort of like fractures a little bit where it's fried on the bottom. It definitely sort of crunches. That butter gives us that nice sort of signature hole that we're looking for, right? Wow. What this takes me back to is I remember when I was kid and we go to the school lunchroom and it's like those rolls that they would serve, like barely sweet, well-fermented, pillowy, puffy. It was like the most wonderful comfort food in the world. I'm so glad that Kat shared this recipe with us. We'll see y'all around the block the next time we're making something delicious. In the meantime, try this salt bread and as always links down there in the description below, click, you're off, you're baking, you're happy, you're crunchy, and maybe you're even a little bit salty too. They're definitely awesome.

Video Credits
Shop this video

Related Videos

Your bread fell flat. Your cookies crumbled. Who do you turn to?