Chocolate Pan De Cristal
Pan de Cristal, a rustic, chewy bread marked by its beautifully holey interior, is a wildly popular King Arthur Baking recipe. This riff on the original adds cocoa powder for a hint of dark chocolate, and chopped chocolate (or chips) for richness and even more flavor.
- Whew, cold. I feel like, a little bit chilly out today. Let's make some bread.
This is this Chocolate Pan de Cristal. A lot of people made the original version that I wrote a couple years ago. We have a video for it kicking around here. Beautiful, open-structured, crisp, crisp, crisp bread, easy to make in the space of maybe a half day or something like that. Delicious Pan de Cristal. It wasn't too long after I wrote that when somebody on our team came back to me and said, "Hey, would you write a chocolate version of this?" And my initial response was like, "No, I don't have any interest in that. That seems strange to me." But then I started tinkering with it, and it became something that actually I really like. And so let's jump into the mix. Before we do that, don't forget recipe link right down there below in the description.
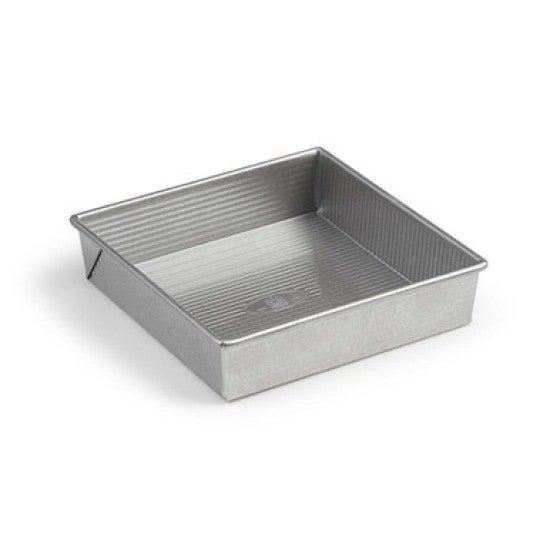
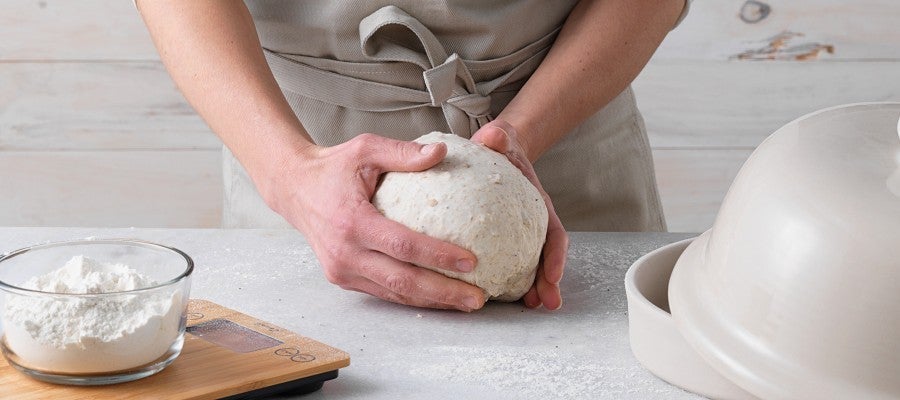
Let's make this. I'm starting with bread flour, and I'm using 100% hydration, meaning it's equal parts, sort of, flour and water by weight. So 500 grams of bread flour into the bowl. The bread flour is gonna support this sort of, miraculous transformation of this soupy dough that you're gonna see in just a minute into something that's stretchy and actually feels somewhat like a high-hydration dough. And then I have 10 grams of salt, and then I have three quarters of a teaspoon or 2 1/2 grams of yeast. I'm using a scale today. I always like to use the scale. And in the last video, there were some people giving me a hard time about switching over to volumetric measures for that small amount of yeast, when I spent a lot of time saying, "Listen, use a scale. 500 grams of flour, 500 grams of water, whatever it is, the scale is your most accurate tool for measuring." The truth is that once we get down to those small amounts, I do believe in switching over to volumetric for an amount, say, less than 10 grams or so. So 2 1/2 grams of yeast is very little. In some scales, when you put that on the scale, it won't even register it. And so it's important with a high-impact ingredient like yeast that we have super, super accuracy, right, we have super measurements. And so I advocate for with very small amounts, switch over to those volumetric measures in order to make sure that you're getting the accurate amount into the bowl. And then I'll get my cocoa powder into the bowl, 21 grams. If your cocoa has some chunks in it and it needs to be sifted, that's okay. You can sift it to get some of those pieces out. Mine has a few small lumps in it, but I'm not gonna worry about it. It's not gonna be impactful. Give it a quick stir. And then I've got some warm water. I'm at about 100 degrees. It's pretty cool in here. We're at a cold time of year, so I've warmed that water up slightly. There are some specifics in the recipe that'll tell you like if it's summertime and things are a little warmer, you're gonna want to use cooler water. What we're trying to do here is make sure that we guide fermentation in a way that's helpful for this dough. So if my flour is cold, I'm gonna warm the water. If my flour is warm and it's a hot day, I'm gonna cool my water because this is the way that I can affect the dough temperature at the end of mix. 520 grams of water into the bowl. So basically equal parts flour and water by weight. The water amount is slightly higher just to accommodate the cocoa powder, which also does take some water up. It's dry. It acts dry in the dough environment. And I'm just gonna start to combine. If this is your first time making one of these Pan de Cristal doughs, at some point in the recipe, probably in the next few seconds as you're mixing, you're gonna say, "Well, I tried that Pan de Cristal from King Arthur, and boy, that dough was messy." And you may be thinking, "Oh, Martin steered me wrong on this one." Just bear with me here. This dough is gonna come together. And the reason for that is that we're using bread flour, right? Bread flour, it has more strength than something like all-purpose and certainly more than other flour like pastry flour, for example. Bread flour has a lot of elasticity to it. It's that rubber-band sort of quality that allows this dough to hold the air that's produced by the yeast and then rise. Once you feel like it's stirred and everything's together, grab your flexible scraper, clean your tools up, and scrape down the bowl. I like to scrape down the bowl on the early side because if you let that sit, it may dry out some. And then I'll grab my pan, and we'll get it started here. So I'm using like an eight-inch brownie pan. In the past, I've also used other things like a glass Pyrex container, any other vessel like that. Basically, the idea here is that I'm gonna put some oil in, and then I'll dump the dough into that. And the reason that I'm using this container, it's not that I'm gonna bake in this, right? It's that I want the dough to easily release from the container during the folding process, which is, you know, takes some time, and we're gonna come back, and there'll be a lot of, sort of, coil folds and stuff like that. So it's into this pan because it releases easily from this. I like that better than the bowl. Okay, so tablespoon of olive oil into my pan, and you can just use your fingers to sort of distribute it. The other thing about these pans that's nice is that when I dump it out, the dough will come out as a square, and that will allow me to cut it more evenly into the eight pieces that I'm gonna make for these rolls. And then using my flexible scraper, I'm just gonna dump it into the bowl. It's definitely messy. In fact, let me show you as soon as I get this out. Okay, so I dumped the dough from the bowl into the pan. Lemme just show you how structure I have at this point. There's literally nothing. It's almost like a batter of some kind, right? It literally is a batter at this point. But I'm gonna come back in 20 minutes, and we're gonna do our first fold. We call it a bowl fold. It's in a pan. We just say bowl fold because that's what everybody knows, but we'll come back and do our first fold in 20 minutes. Make sure you leave it covered, and set it in a nice comfortable spot to rise during that time. Okay, you good? All right. So let's see what we got going on here. Been about 20 minutes, and I've said this many, many times, but don't feel like if it's 21 minutes, the dough is gonna be, you know, going in the bin. There's some flexibility there, right? You could fold after 10 and then wait 30. Those things are all possible. Let's just get in here, Wet hand, I'm gonna go in, I'm gonna take a corner of the dough, I'm gonna stretch up and then let it fall to the middle. We're calling it a bowl fold. Obviously, it's in a pan, but you get the point, right? Outside to middle, working my way around the mass of dough. So let's see what we've got. I mean, it's better than it was in terms of, it's not completely sort of shredding as I pick it up. Got a little bit of elasticity. If I push that, it will tear, and I'm trying not to push that. I'm being gentle. I'm just stretching to the degree that it will allow for right now. So a little bit of a stretch, press it to the middle, working my way around the dough, and it feels great. Honestly, I think maybe half the reason I'm a baker is because a dough like this just feels good to touch. It's building some elasticity and some strength. We're on track for beautiful Chocolate Pan de Cristal. So I'm gonna put the cover back on, and then we'll return in 20 minutes, and we'll do our first coil fold. Okay, back. It's been 20 minutes or so. I'm back to do my first coil fold. So let's actually look at this dough and see what's going on before I do the fold. Just gonna give it a little stretch. Have a little peek and see. Does it feel like it's beginning to get elastic? Yes. Will it almost window-pane? Yes, that means that it's fermenting well, and it's gaining strength well. So let's go ahead and proceed to our coil fold. So with wet hands, I'm gonna go into the sort of midline of this dough, and I'm gonna stretch it up and allow it to gently sort of elongate itself, at which point I'll sort of wrap it around itself, effectively coiling it up. That's why we call it a coil fold. So in, let it wrap itself, turn the pan, go in, stretch, and let it wrap itself up again, okay? Remember, the first time we made the regular Pan de Cristal, Tucker was filming, and he didn't know how high I was gonna stretch it. And if you watch the video, the camera goes like, "Whoa." So there's this moment where the dough is gonna surprise you, surprise everybody. You know, again, miracle in the pan, if this is the first time you're doing a coil fold, you may find this process like something that requires a little bit of learning or experience. It's pretty much there. I don't know that it's gonna really wrap itself. Yet again, it looks like that's about as much as it will stretch at this juncture. So that's good. We'll leave it, we'll come back in 20 minutes, and we'll do another coil. There we go. Okay, coil fold number two. Coil fold number two. So same as it was before, but I'll tell you that as the dough gains strength and as we repeat these coil folds, you're not gonna find yourself wanting to do as many. The dough is just gathering strength in a way that it just doesn't need as much action. So probably go in here and do it maybe once or twice. So to the center of the dough or sort of the midline, stretch up, let it sort of coil up on itself. And then I'll go back in one more time just to hit that other axis. So I'll turn it, stretch. Dough is very happy, and we're good. So cover back on, place it in comfortable spot. We'll be back in 20 minutes for the last coil fold. All right, coil number three, the third and final. Dough looks very happy, honestly. When I see some bubbles on the surface and I can sort of get a sense of that activity, I know that things are moving well, and we're on track for, sort of, exciting things down the road. Okay, so wet hand, and I'm going in same as it ever was, straight to the middle, stretch up, let it sort of fall on itself, one coil. Turn it, go back in, stretching upwards. And at this point, the dough feels very happy. It just feels cohesive to me. Doesn't feel as messy as it was. It won't stick to my hands. It's perfect. Everything is good. The world is right. We'll be back in 20 minutes to laminate the dough. We've had our 20 minutes since the last coil fold, and the dough looks very happy. I love how it has this rounded sidewall a little bit. That, to me, as opposed to something that's completely flat in the pan, says that we have great strength building in this dough. If you're not seeing those characteristics for the dough, it could be a couple things. It could relate to your flour choice. Did you use bread flour? That will affect the level of strength in the dough. Also, the other one could be that you didn't quite have the fermentation that you wanted. Remember, fermentation translates or affects strengthen the dough environment. So make sure you're setting yourself on a good course for fermentation with a good dough temperature. And now we're ready to go to the lamination part, the part where I'm gonna spread it out on the counter and add some chocolate. So let's get some water down on our counter. This is gonna keep the dough from sticking. You could just grab a bowl of water and splash a little bit on your counter as well, and then spread it around. That works too. The mister is good because it helps me to sort of evenly apply it. And then I'll just gently invert this container onto my counter and let it fall out. Happy dough. Looks quite strong, honestly. If I tug on it, yeah, it's definitely strong. That means that it's fermenting well. That means that I've guided fermentation well, and it also means that I'm using a really good, high-quality bread flour with a protein content that I can trust. And I sprayed my hands just a little bit to keep 'em from sticking. And I'm just kind of stretching and plopping and getting this dough spread out a little bit before I add the chocolate chips. I'm using bar chocolate today, but you could also just use good-quality chocolate chips out of a bag. That would work as well. If you're using bar chocolate, just chop it up to a size that is similar to that of chocolate chips. And I'm just sort of gently coaxing this into a flat shape. That's about 14 by 10. I'm gonna use my measuring tool because, I don't know, that's kind of the person that I am. 14 wide, 10 high. And now I'm just gonna sprinkle my chocolate chips as evenly as I can over the dough surface. You might have a little bit of spill, and that's okay. We'll go back and gather those little pieces if you have some that are falling off. Awesome, just plop 'em back on. Get back in there. And now I'm gonna do a letter fold. I'll go over to one side, I'll fold it 2/3 of the way, and then I'll come back with that second side and just fold it over, and then I'll roll it down from the top. So stretching gently, folding it over, back to the other side, stretching those corners just to sort of square it off a little bit, and then folding it over. Got a little bit of spill. That's okay. And now I'll go up to the top, come down 2/3 of the way, and then from the bottom up. And that is a strong dough. Kind of miraculous, right? I'm always amazed when that, sort of, process yields a dough that's like this. If you remember back to what we started with and I was pulling on it and was barely cohesive, it was like we were gonna make some sort of soft cake or something. So beautiful dough transformed with time and folds and through the power of bread flour. Get it into my pan, put my cover on, and we'll come back in about an hour and 20 minutes, somewhere right around there, and we'll do our divide. Okay, so dough is rested about 80 minutes, hour, hour-and-a-half, somewhere in there, and it's definitely happy. We kept ours in a nice warm spot, and it's risen really well. I'm seeing the signs of activity that I'm always looking for. I've got some bubbles. I've got this nice big jiggly, well-risen dough. Now let's get to the divide. I've got a bench knife. I've got some bread flour. I'm gonna sprinkle a good coating of that down so that the dough doesn't stick. And I've got a couple of pieces of good-quality parchment where the dough is gonna rest until it goes into the oven. Generous amount of bread flour down. This is one of those doughs where you need a fair amount of flour on the surface. If I sort of drag my finger through it, you can see how much I have there. It's more than just a light sheen, which I normally recommend, but in this case, 100% hydration, very sticky. Do yourself a favor and work on a nice amount of flour. Let the dough fall out. Very happy. And then a generous amount of flour on the top-side. This is very similar if you've made ciabatta before, it's a very similar, sort of, amount of flour or dusting process for working with the dough that you would use for ciabatta as well. You could divide this using your scale and give yourself eight exact pieces. This is one of those dough where I'm just gonna cut by eyeball. I'm gonna cut it in half, in half, and then in halves again to give me eight pieces. If you want a larger loaf, you could certainly do that, or you could cut longer shapes. This is your dough. Do what you like. For us, I'm gonna do eight roll-sized pieces. So I'm gonna start, and I'm gonna cut it in half on the sort of east-west axis here, cutting all the way through. And then I might just adjust a little bit just to see that I have a nice, even form. So even though I'm not measuring by weight, I'm still doing my best to sort of give myself equal portions, right? In half once again and one last time. One of the advantages of the smaller size is that they'll actually jump a little bit better in the oven, right? Something that's smaller, it will rise a little bit better in the oven. So I do like that smaller shape. It's one of the reasons I chose the smaller size for this dough that has the chocolate in it. One other thing here is that if you do have a sticky side that's exposed, you can put a little bit of flour on there, and that will actually help protect some of that chocolate from burning. It's one of the liabilities, anytime you put chocolate into a dough, which is baked in a pretty hot environment is that you do risk a little bit of burning, and burnt chocolate is not delicious, I will tell you. So we're gonna keep an eye on that. And even after the bake, when we go to look at the loaves, if we have a piece where the chocolate's migrated to the outside and it's burned a little bit, I'm gonna remove that before I share it with my guests because it is bitter. You know, one thing that I haven't talked about is the fact that this isn't a particularly sweet dough. I think some of the people that have gone to make the recipe have thought, "Oh, this is actually not super, super sweet." And that's the point for me is that it has some chocolate, but it's not like a dessert bread. It's not something that you'd serve instead of cake. But if you put some salted butter on it and serve it with a little bit of jam or something like that, it's incredibly delicious with a cup of coffee or something like that. So we're gonna set these to proof for two hours at room temperature. I'm not gonna cover 'em, which is strange, right? Normally, I'm hyper-concerned about the surface of a dough drying out. In this case, as with the regular Pan de Cristal, letting that surface develop a little bit of a skin actually supports a nice rise in the oven. Believe it or not, it's probably the only example of a dough that I won't protect from drying. That having been said, if it's a particularly dry season and you feel like you're really developing a hard crust, you might consider protecting them during the final rise. An hour before you want to bake these, get your oven preheated with a baking stone or steel in the lower third of the oven and your oven set to 475 degrees. We'll be back to look at the proof and get these in the oven. All right, a couple hours later, these look well-proofed. If I press with my finger, where I pressed sort of holds that indent a little bit. They're super well-proofed. I even see some bubbling on the surface. All of those are indications that the dough has risen well, and there's a really big window for this. Like, it's not as soon as they're ready to go in that they have to go in. You can extend that by quite a ways. In cold months, you may even see yourself leaving it well beyond the two-hour mark. In maybe the heat of summer, you might find yourself jumping that time just a little bit. What you're looking for though is a dough that is jiggly. My oven is hot, and it's ready to go. I'm gonna bake 'em for 10 to 12 minutes on the stone, and then I'm gonna transfer them up in the oven off the stone for an additional eight minutes or so. Bake to the color that you like. For me and my oven and our test kitchen ovens, we found that about eight minutes for that second half is good. If things move more quickly in your oven, as always, use your eyes, use your nose to tell you when things are ready to come out. So let's get 'em onto my tray here. That's what I'm gonna use to slide 'em onto the stone. I've got a nice big, flat tray. You can also use a baking sheet inverted. Just use that. Just be careful as it sort of slides off. So let's get these in. All right, so let's talk about this for just a second. Now that I've gotten, sort of, the important part out of the way, which is me getting to taste this, and I'm sorry to eat in front of you, but there's no waiting. Like, when these come out of the oven, serve 'em up. Don't wait, it's like a popover in some ways in that it's ephemeral. It has a lifespan. And if you really want them to be crisp, get 'em, like, as soon as they come outta the oven. Just pop 'em open and go for it. Let's pause though for a second and just talk about the bake. When I pick 'em up off the sheet tray, they're incredibly light for their size, and that's really the whole goal of making this bread is that you want something that sort of looks maybe a little bit stodgy, but then you pick it up, and it's absolutely like holding some empty little box in your hand, which is essentially what it is, because we worked hard through high hydration, through bread flour, through proper strengthening, through a bowl fold, and then a series of coil folds. We worked to create this high-rising structure. And if we do it right and we control fermentation and we push that final proof, you know, a couple hours, what comes out is this incredibly open, sort of, almost eggshell-crusted, sort of, feathery interior situation with these rolls. So this is our Chocolate Pan de Cristal. Thanks for joining us today. Happy baking. Make yourself something delicious. Share it with others. There's no better place to be than in the kitchen.

Video Credits
Shop this video
Related Videos

Your bread fell flat. Your cookies crumbled. Who do you turn to?