This page contains affiliate links that allow King Arthur Baking Company to earn a sales commission at no additional cost to you.
When your pie recipe calls for you to prebake the crust, do you envision spilled beans, hot parchment, and a sad, slumped crust on the bottom of the pan?
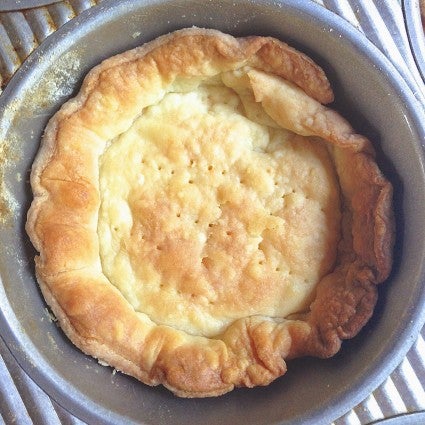
Avoid all that with help from simple gravity and a couple of pie pans. Baking your pie crust upside down (!) is a guaranteed method for making the perfect prebaked crust — one that bakes to an even golden brown and maintains its shape.
Some recipes call for prebaking your pie crust (e.g., Chocolate Cream Pie). But prebaking an unfilled pie crust can be more challenging than it seems. As the “naked” crust bakes, its fat (butter and/or shortening) melts. And without the pressure of filling to hold it in place, the crust slips down the sides of the pan. This tendency to slump is especially noticeable with all-butter crusts, since butter’s melting point is lower than that of other fats.
PJ Hamel
Crust sliding down to the bottom of the pan, as this one did, is impossible when you bake it upside down.
You can partially prevent slumping by lining the crust with parchment and filling it with beans, pie weights, or granulated sugar. But the process can be challenging, especially when removing the hot weights and parchment midway through baking to finish browning the crust. And honestly, you’re still going to see a fair amount of shrinkage.
But there’s a more effective way to keep your crust in shape, which one of our favorite bakers, Benjamin Delwiche, surfaces in his new book, Dessert Course: Turn gravity from an enemy into your ally by prebaking pie crust upside down.
How to prebake your pie crust upside down
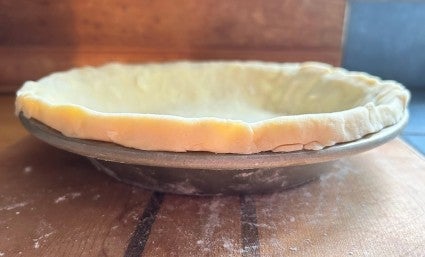
For a typical 9" x 1 1/2" pie pan, roll your pastry into a 13" to 14" round; you want it large enough to settle into the pan without stretching and with plenty of overhang.
PJ Hamel
Start with a thick rim of pastry, as your simple crimp and/or gravity will compress it during baking.
Lay your rolled-out crust into the pan, folding its edges over and pressing them into a ridge all around the rim.
PJ Hamel
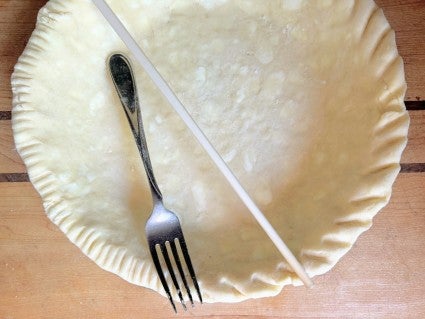
A simple crimp is preferable to anything fancy.
Do a simple crimp, if desired. Be aware that upside-down baking doesn’t allow for fancy or tall crimps, as the weight of the outside pan will press down and flatten the edges of the crust.
PJ Hamel
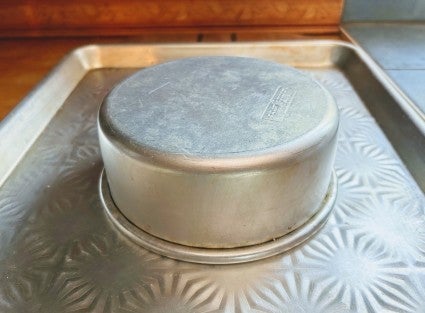
Pan-crust-pan: Your crust is now secured and ready for bakeoff!
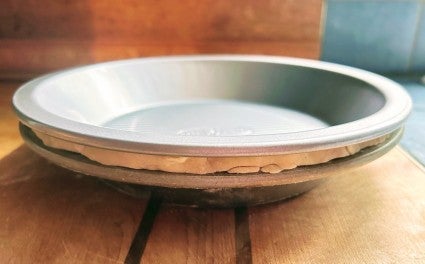
Center a parchment round atop the crust (8" or 9", for the typical 9" pie), and nest a second identical pie pan atop the parchment, forming a pie crust “sandwich” (pan-crust-pan). If you don’t have parchment, lightly grease the bottom of the nesting pan where it will touch the crust.
PJ Hamel
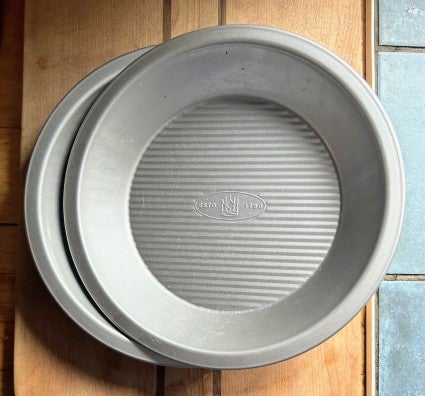
Identical metal pans, like these King Arthur pans, are a necessity for prebaking crust.
For the most secure fit, it’s important that the pans are identical; we highly recommend our King Arthur pans, which are not only the ideal pie pan in so many ways, but also stack together perfectly.
Can the pans be glass or stoneware, or do they need to be metal? We find metal, with its superior heat transference, works best. Ceramic and glass pans take longer to bake and may dry out your crust in the process.
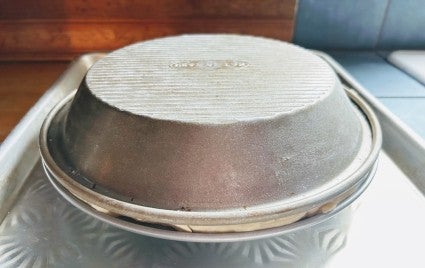
Center a 6" round cake pan on a baking sheet. Make sure the cake pan is deep enough for the pie pans to rest atop it without touching the baking sheet. Using the cake pan as a small pedestal simply makes it easier to grab the pie pans when you need to move them in and out of the oven.
PJ Hamel
There's no way the crust can sink to the bottom of the pan when it's upside down!
Holding the two pans together, invert them, and set them on the round pan. (Don’t have a 6" cake pan? Just place the inverted pans directly onto the baking sheet.)
Bake the crust in a preheated 375°F oven for 20 minutes. Remove it from the oven and carefully invert it so that it’s right-side up, then remove the top pie pan. At this point your crust is partially baked, ready to be filled and baked further (as with this Classic Sweet Potato Pie).
For pies whose filling goes into a fully baked crust (e.g., Banana Cream Pie), you’ll need to continue baking the crust as follows: Invert the pans right-side up, lift off the top pan, remove the parchment (if you’ve used it), and prick the bottom of the crust all over with a fork, to prevent puffing. Return the crust to the oven, right-side up, and bake for an additional 15 to 20 minutes, or until lightly golden brown.
PJ Hamel
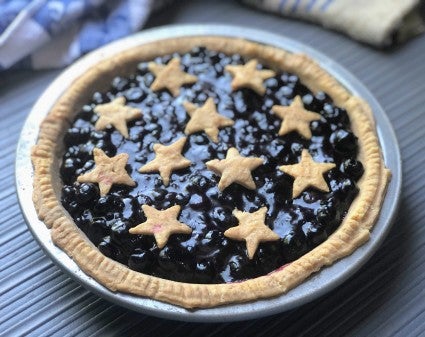
Prebaked crust is a necessity for this no-bake Fresh Blueberry Pie, whose filling is simply lots of fresh berries held together with stovetop berry compote.
For the very best results
Even pie crust baked upside down will shrink a little. But if you have some extra time, here are two steps you can take to minimize that shrinkage as much as possible:
Refrigerate your nested crust for about 30 minutes before baking. You can do this as your oven preheats. Chilling relaxes the flour’s gluten, making the crust less likely to shrink. It also solidifies the fat, which helps the crust maintain its structure.
Bake the crust for 40 minutes (instead of 20) before removing the nesting pan. This applies to both fully baked and partially baked crusts. A longer “sandwiched” bake ensures the crust will have set completely and will hold its shape perfectly once the nesting pan is removed.
Cover photo by Patrick Marinello; food styling by Yekaterina Boytsova.
PJ Hamel grew up in New England, graduated from Brown University, and was an award-winning Maine journalist (favorite topics: sports and food) before joining King Arthur Flour in 1990. Hired to write the newly launched Baker’s Catalogue, PJ became the small but growing company’s sixth employee. PJ w...