Once you've successfully created your own sourdough starter, you'll want to keep it healthy with regular feedings. While there are many ways to successfully maintain a starter, there are two basic options to choose from: keeping your starter at room temperature and feeding it daily or storing it in the refrigerator and feeding it weekly. If you plan to bake with your starter often (multiple times a week), keep your starter on your counter and feed it daily: The organisms in starter thrive at room temperature. If you plan to bake less frequently, store your starter in the refrigerator, knowing it will need a few feedings at room temperature before it's ready for showtime.
Prevent your screen from going dark as you follow along.
Note: For best results, weigh your ingredients using a scale when working with sourdough starter: It’s the most accurate and consistent way to measure. Starter volume varies depending on consistency and whether it's fully stirred down before measuring, so we highly recommend a scale for maintaining and baking with sourdough. However, if you prefer to work with volume measurements, please be sure to measure your flour the King Arthur way: gently spoon the flour(s) into a cup, then sweep off any excess.
To maintain your starter at room temperature: Stir the starter thoroughly and transfer it to a bowl. Into the now-empty container (there’s no need to clean it), place 50g (scant 1/4 cup) starter; discard the remainder or use it in a recipe calling for unfed or discard starter.
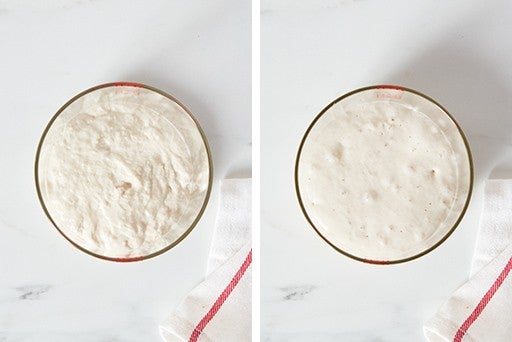
Notice the bubbles in the starter on the right; this is 8 hours after feeding and it has expanded and become bubbly.
To the container with the starter, add 50g (scant 1/4 cup) water and 50g (generous 6 tablespoons) all-purpose flour. Mix well, cover, and let the mixture rest at room temperature for about 24 hours, at which point the starter will have reached its maximum height and fallen back down. Note that the warmer your kitchen is, the faster your starter will rise and the sooner it will need to be fed.
Repeat this feeding process (steps 2 and 3) roughly every 24 hours, feeding the starter once a day. If you’re looking to bake with ripe starter, remove what you need for your recipe when it has roughly doubled in volume and become bubbly (about 6 to 8 hours), then feed the remaining starter. Revert to your normal 24-hour schedule for subsequent feedings.
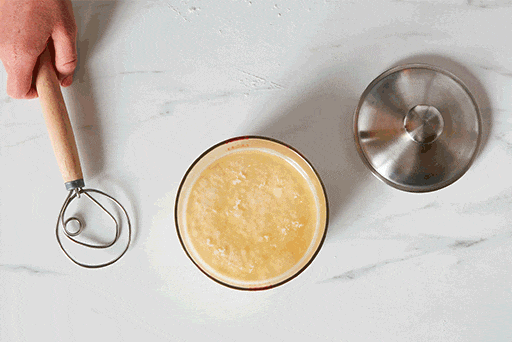
To maintain your starter in the refrigerator: Take the starter out of the refrigerator; there may be a bit of liquid on top. Either drain this off or stir it in, your choice; it's simply a byproduct of the fermenting yeast.
Transfer the starter to a bowl. Into the now-empty container (there’s no need to clean it), place 50g (scant 1/4 cup) starter; discard the remainder or use it in a recipe calling for unfed or discard starter.
To the container with the starter, add 50g (scant 1/4 cup) water and 50g (generous 6 tablespoons) all-purpose flour. Mix well, cover, and let the mixture rest at room temperature for 1 to 2 hours. (If your kitchen is on the cooler side, let it rest for the longer amount of time.) This rest gives the yeast a chance to warm up and become active; you might not notice any visual changes.
Return the starter to the refrigerator. To maintain your starter's health (and for best baking results), repeat this process about once a week.
To ready your refrigerated starter for baking: Remove your starter from the refrigerator, discard (or set aside) all but 50g (scant 1/4 cup) and feed it with your usual equal parts water and flour by weight, 50g each.
Cover the starter and let it rest at room temperature. Depending on its health and how recently you'd fed it, the starter may start to bubble and expand quickly, or it may take up to 12 hours to show signs of life.
Repeat the feeding process (steps 9 and 10) every 12 hours until you see it double or triple in volume within 6 to 8 hours; this means it's ready to bake with.
For what you judge will be the final feeding prior to baking, set aside about 50g (scant 1/4 cup) starter; feed it to maintain it for the next time you bake (repeat step 6 and 7). To the remaining starter, add enough flour and water to reach the quantity you’ll need for your intended recipe. For instance, if your recipe calls for 227g (1 cup) starter, add 113g each water and flour. If your recipe calls for 454g (2 cups) starter, add 227g each water and flour. (See our blog post, How to build the exact amount of ripe sourdough starter for a recipe for more details.)
Once the starter is ripe (it will look bubbly and will have roughly doubled in size), spoon out what you need for the recipe and set it aside with the recipe's other ingredients. Discard any remaining starter or add it to your container to feed and maintain regularly, about once a week for starter kept in the refrigerator.
Tips from our Bakers
The feeding ratio of flour, water, and starter used in the scenarios below is 1:1:1, or in other words, equal parts flour, water, and starter by weight. Here, we’ve used 50g of each to maintain a starter of about 150g (about 2/3 cup), which we’ve found to be an ideal size. If you’d like to maintain a larger amount of starter, simply increase the quantity of flour, water, and starter you use for each feeding. To increase the amount of starter you have ahead of making a recipe, see our blog post, How to build the exact amount of ripe sourdough starter for a recipe.
Use "discard" starter to make pancakes, waffles, cake, pizza, flatbread, or another treat; for inspiration, see our sourdough discard recipe collection.
Sourdough baking is as much art as science. This method for maintaining sourdough starter is just one of many you might choose to follow. It may not match what's written in your favorite sourdough cookbook, or what's shown in that video you saw online. And that's OK: If you have a process you successfully follow regularly, then stick with it. Or try this one and compare your results.
Looking for tips, techniques, and all kinds of great information about sourdough baking? Find what you need in our sourdough baking guide.