


For the prelude to this paean to pretzels, see Pretzel dough 9 ways, part 1.
Now, where did we leave off with all the wonderful, amazing, and totally yummy things you can do with pretzel dough?
Part 1 of this two-part series covers classic pretzels, plus rolls: sandwich, onion, and soft garlic butter knots.
Those are the basics; let's jump right in to some rather more decadent variations on simple pretzel dough. The photos here illustrate treats made from our easy Soft Buttery Pretzel Mix.

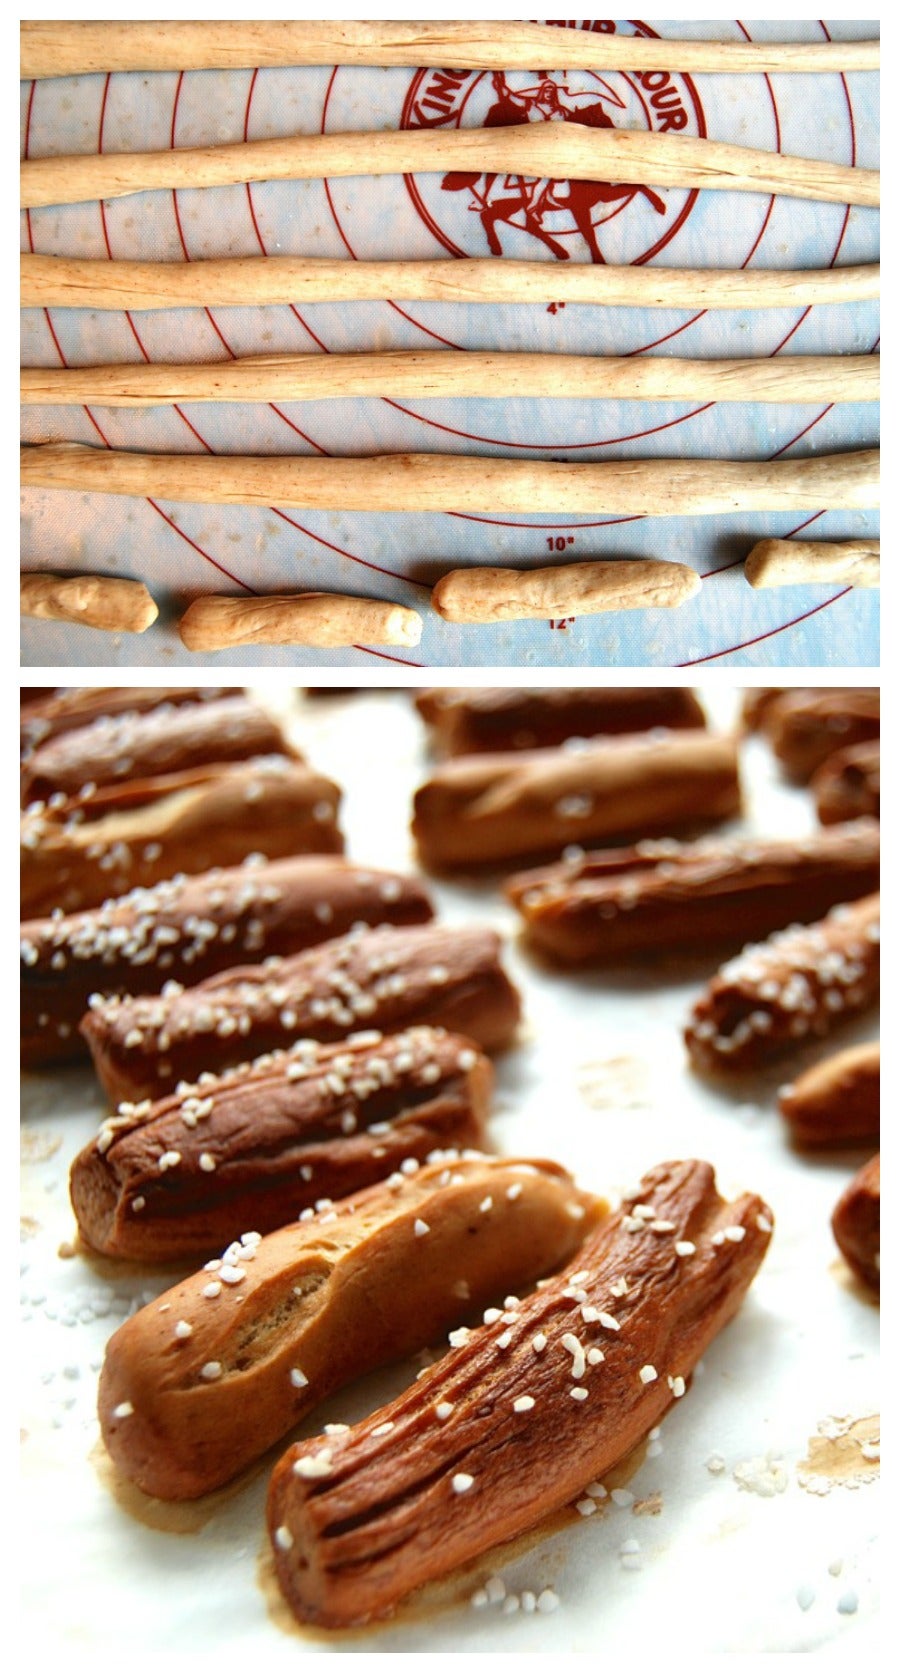
Let's start with pigs in a blanket.
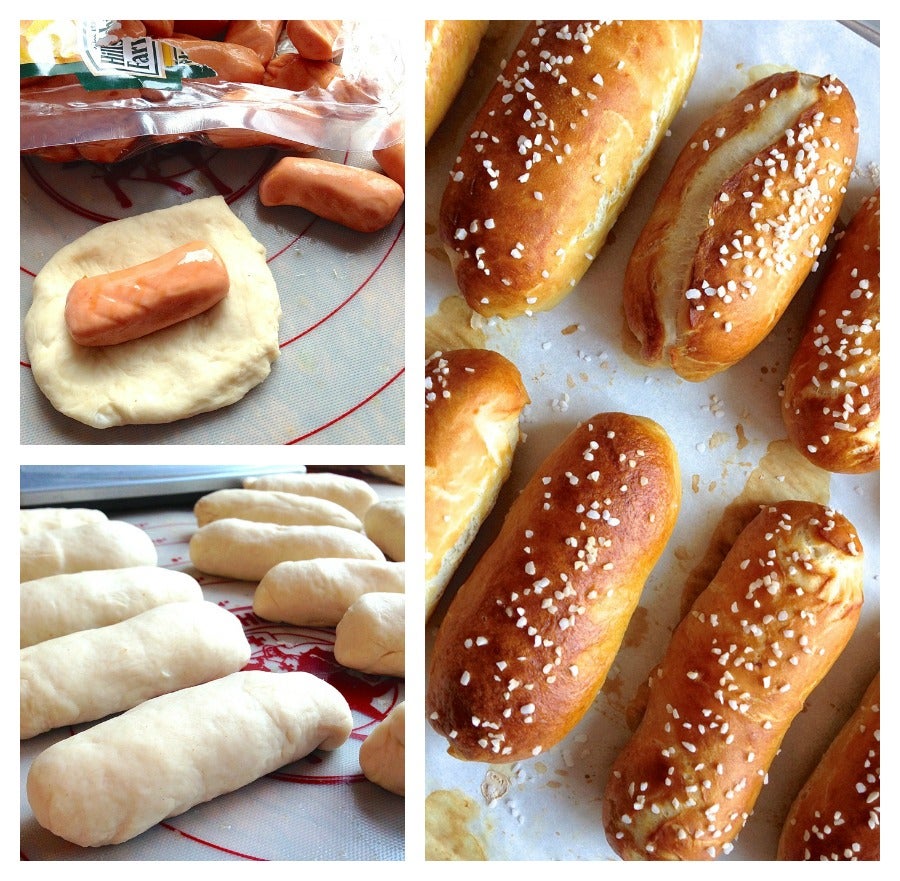
Divide your pretzel dough into 24 pieces. Flatten each piece into a rough square or rectangle; a 3″ square works well for the typical 2″ mini dogs you might use.
Roll ’em up; pinch the seam to seal; it helps to wet the edge just a bit first, to create some stickiness.
Let them rest for 15 minutes, while you heat heat 6 cups water, 2 tablespoons baking soda, and 1 tablespoon table salt in a large saucepan or electric frying pan.
Simmer the "pigs" for 30 seconds. Place them on a baking sheet, and sprinkle with coarse white pretzel salt (included with the mix).
Bake in a preheated 400°F oven for about 18 minutes, until they're golden brown. Serve warm or at room temperature, with your favorite mustard.
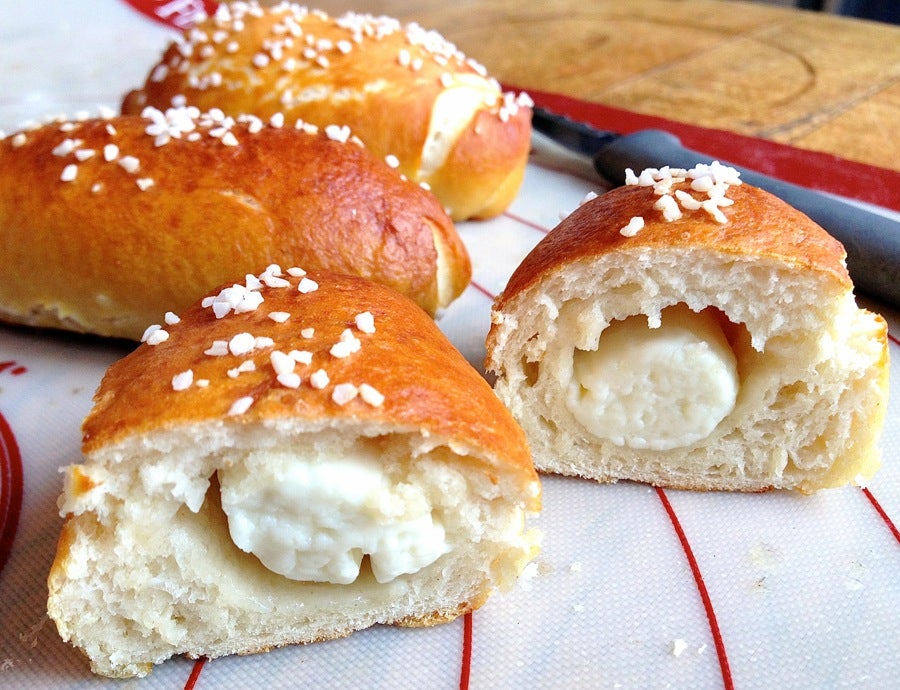
Tip: Substitute halved string cheese (mozzarella) sticks for a vegetarian crowd. Or just because; they’re yummy!
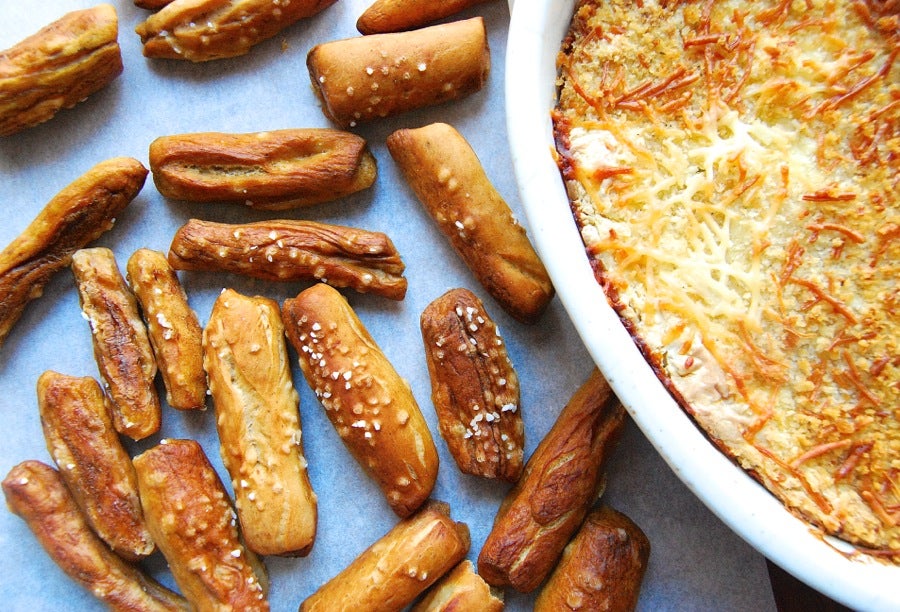
Pretzel dipping sticks with Hot Popper Dip? We can absolutely do that.
Add 2 teaspoons each cumin powder and chili powder to the dry pretzel mix in the bowl, before adding the water. Divide the dough into 12 pieces, and roll each piece into an 18″ rope. Cut 3″ sticks; you’ll have 36 pieces.
Simmer the sticks for 30 seconds in the water bath. Sprinkle them with coarse white pretzel salt, and just like the pigs in a blanket, bake them for about 18 minutes, until they're golden brown.
Tip: Hot Spinach Dip is another delicious complement to these sticks. And talk about easy – you can make the hot dip in your bread machine!
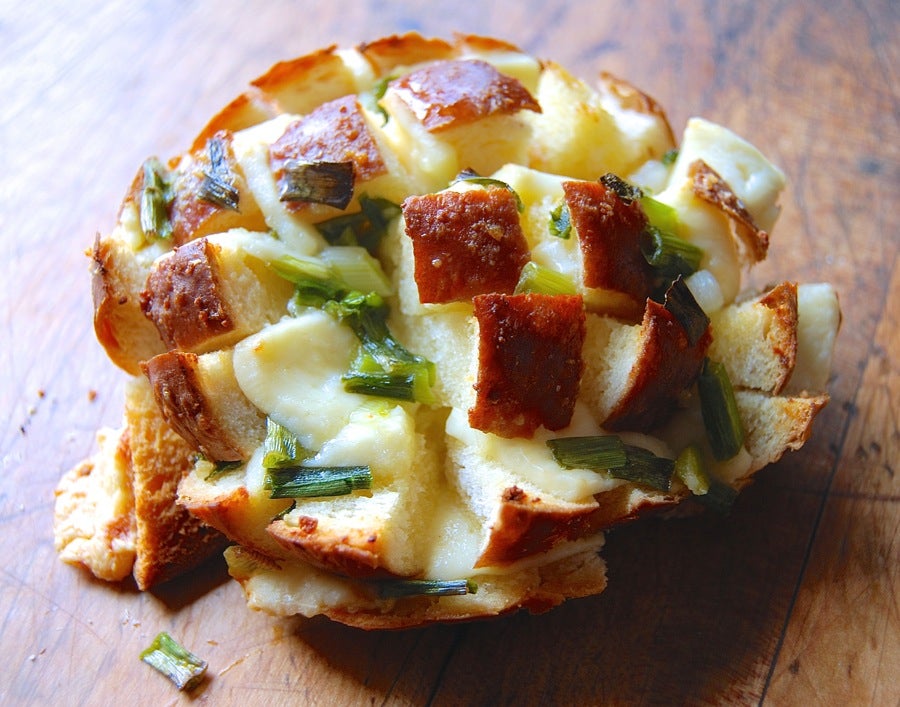
Here's a bread that's taken the blog-o-sphere by storm: "bloomin'" cheese bread, a crusty loaf filled with cheese, doused with melted butter, garlic, and scallions, and baked.
I'm going to make four individual-serve mini loaves. And I'm going to experiment a bit with the simmering-in-water step: how much difference does it really make?
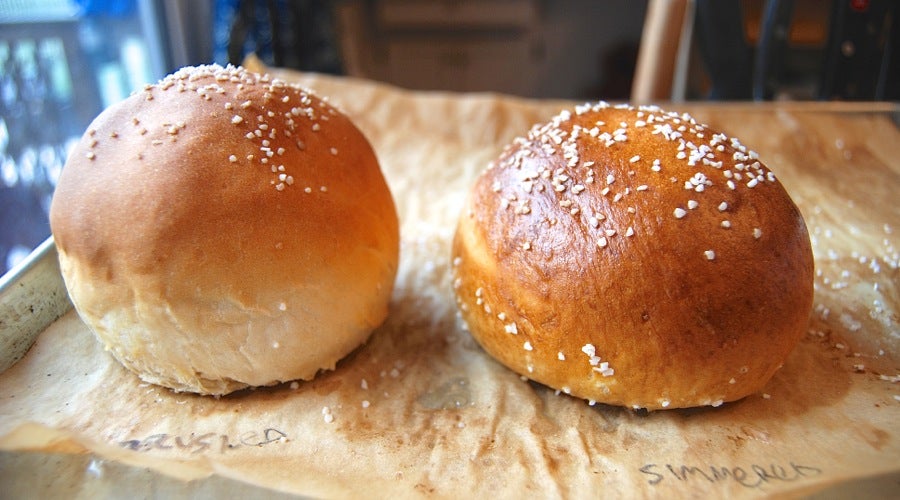
The loaf on the left didn't go through the water bath; I brushed it with plain water so the salt would adhere. The loaf on the right simmered in the water bath for 30 seconds on each side.
See the difference after baking for about 22 minutes? The simmered loaf on the right is a bit shorter, but also darker, shinier...
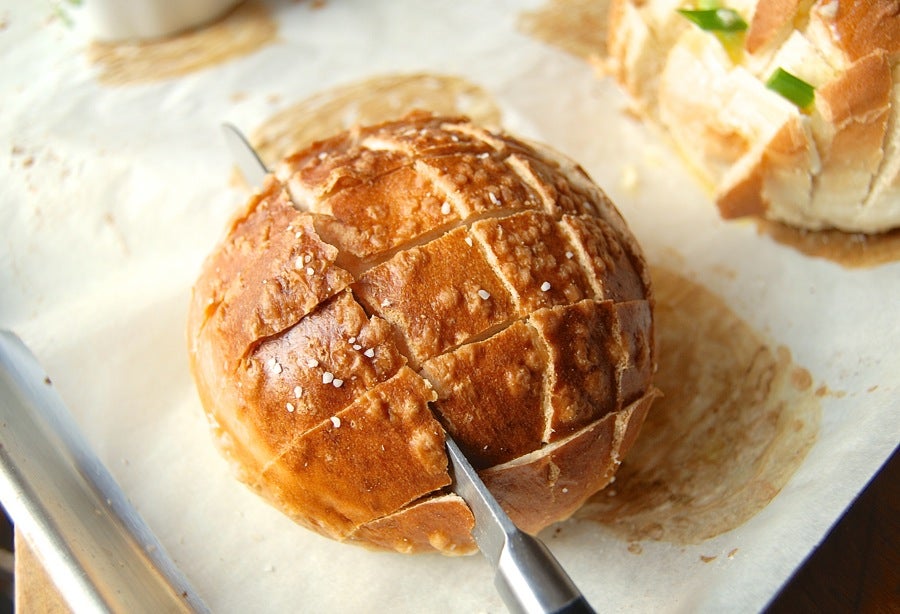
...and sturdier. In order to stuff cheese slices into the bread, I slice it to (but not through) the bottom, both ways. Slicing the simmered loaf was easy; the loaf that hadn't been simmered was more delicate, and pieces of crust peeled off as I worked.
Score one for the simmered loaf.
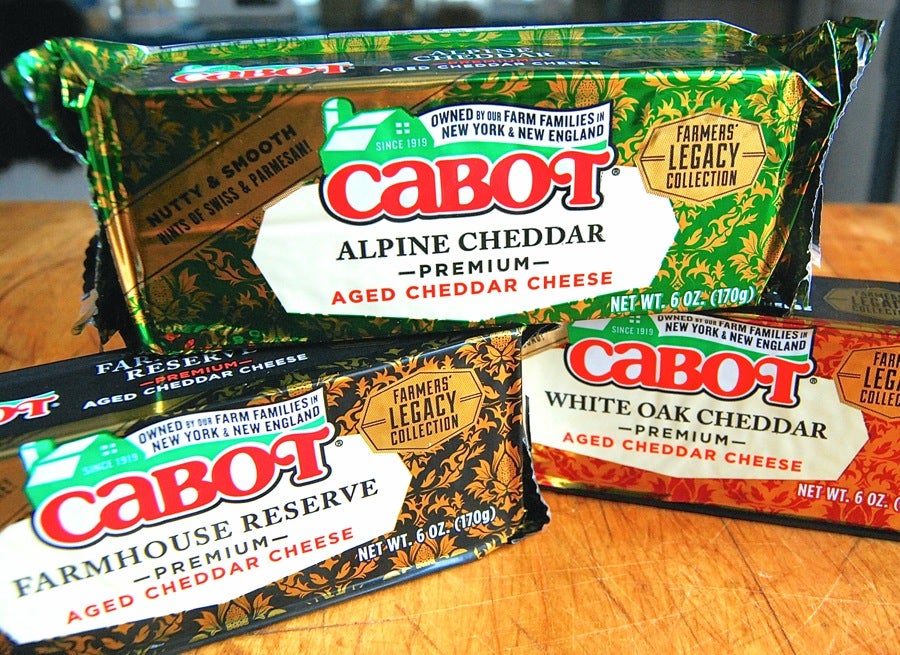
Now, choose your cheese. These new cheddars from Cabot's Farmers' Legacy Collection are very tasty indeed.
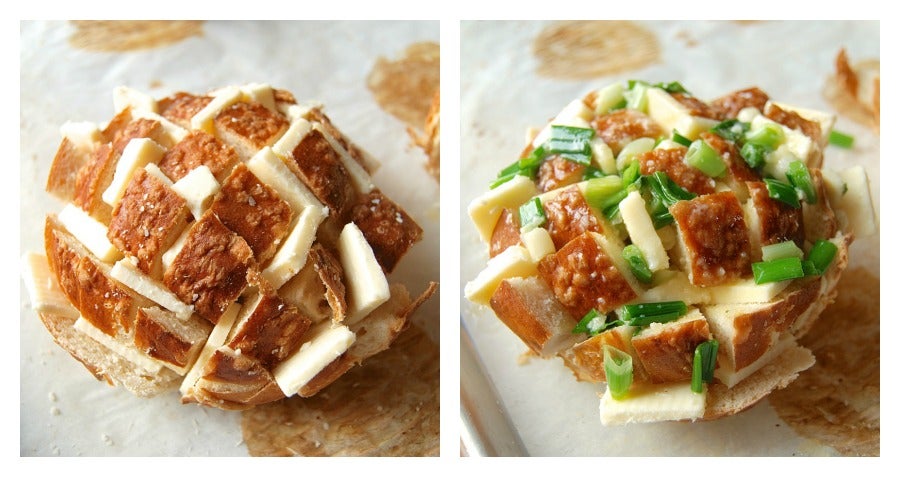
I slice the cheese (about 1 pound total for the four loaves), and stuff it into the deep crevasses I've cut into the bread.
Next, I mix 4 ounces melted butter with 1 cup sliced scallions (both green and white parts), a tablespoon of minced garlic, and 1/4 teaspoon salt (if you're using unsalted butter; salted butter won't require any additional salt).
I drizzle this aromatic mixture over the four loaves, and cover them with foil.
I bake the loaves in a 350°F oven for 20 to 30 minutes, or until the cheese starts to melt. Then I bake them maybe 10 minutes more, uncovered, to crisp everything up a bit.
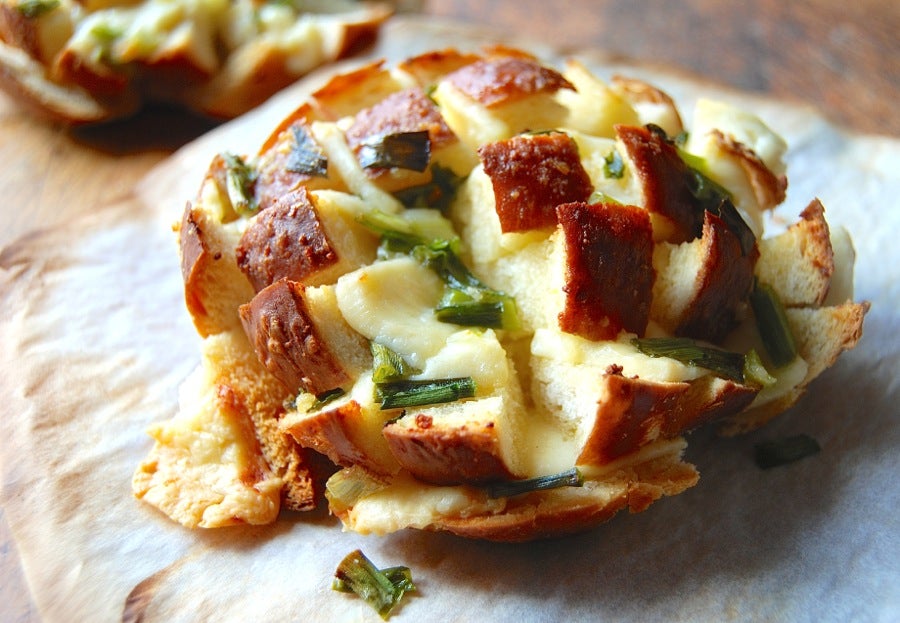
Oh, my... Tear and share!
Tip: Some cheeses melt more quickly and thoroughly than others – thus the range of baking times. In general, soft cheeses (think Muenster or Fontina) melt more quickly than harder cheeses. Start checking at 20 minutes, but be prepared for the bread to bake longer.

What would life be without pizza? In this case, pretzel crust pepperoni pizza.
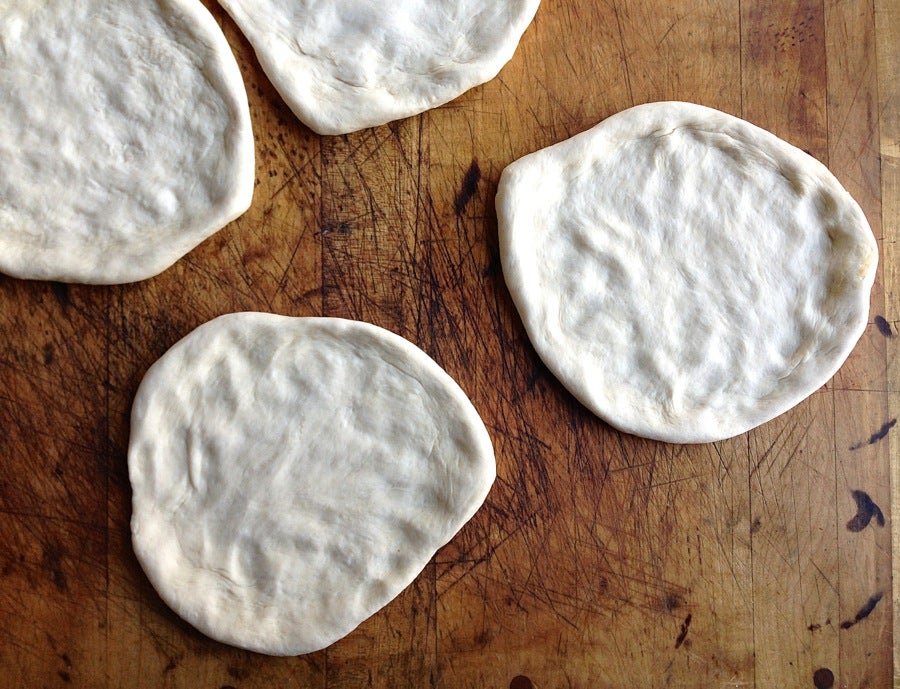
I divide the dough into four pieces, and stretch each piece into a 7" round.
After resting 15 minutes, I simmer them for 45 seconds in the water bath, pushing them under the surface several times but not turning them over.
I use a slotted spatula to lift them onto the baking sheet. Sprinkle their edges with coarse white pretzel salt.

Into the 400°F oven they go, for 20 minutes.
Ah... Just savor that chewy yet very light crust, its salty rim offsetting the mild mozzarella and spicy pepperoni. Little Caesars, eat your heart out!
Tip: When shaping your pizzas, make the center thinner than the outside edge. A nice, puffy rim, especially when it's coated with coarse white salt, makes for a very attractive pizza.
Finally – dessert! Though the path to this particular treat wasn't without its pitfalls.
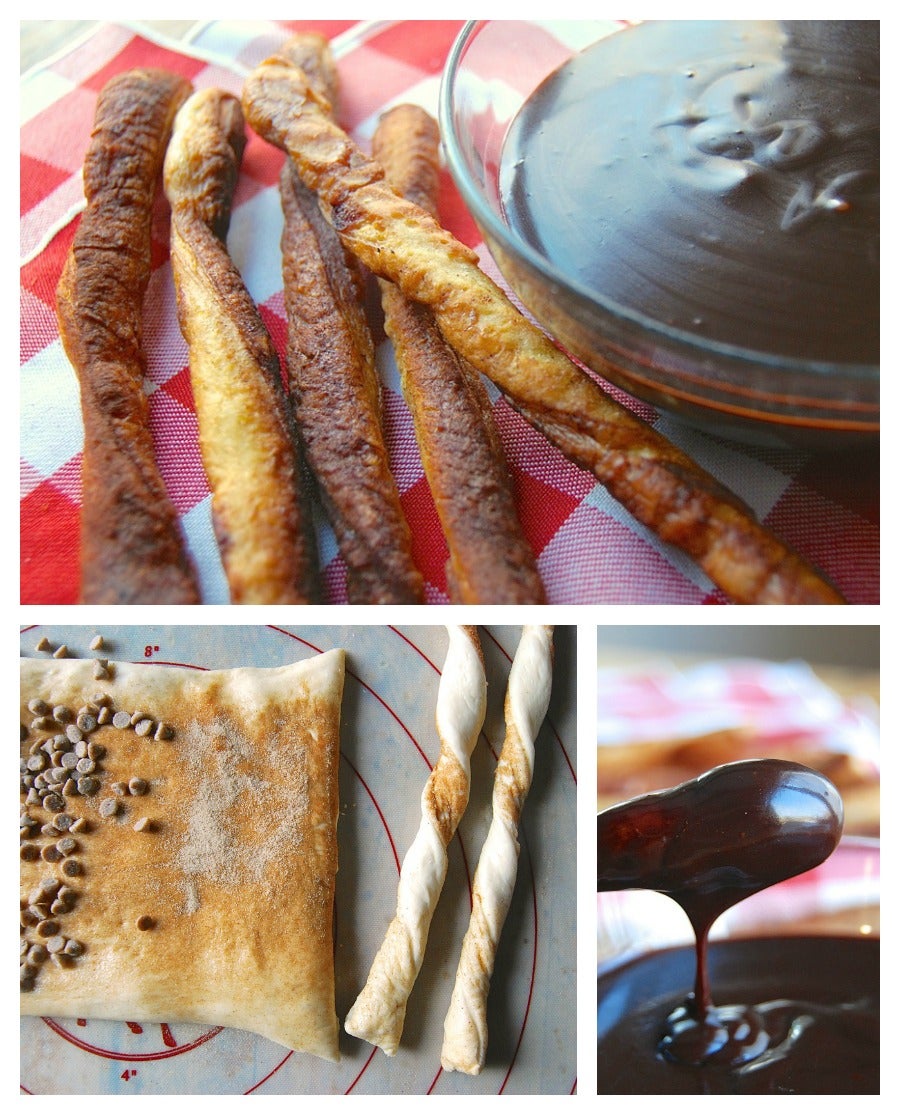
I decide to make cinnamon twists with chocolate fondue dipping sauce.
I cut the pretzel dough into two pieces, and roll each piece into a 5" x 15" rectangle. Sprinkle each rectangle with cinnamon-sugar. Then, deciding to get fancy, I add cinnamon chips to half of one rectangle, pushing them into the dough – only they keep popping out again. Strike one.
I cut each rectangle into 1/2" strips, and twist the strips. Only problem is, the more I twist, the stretchier they get, the longer they become. Pretty soon these 5" strips have turned into skinny 10" twists – too long to fit into my saucepan of simmering water. Strike 2.
So I chop them all in half, to get them into the pan. But frustrated at the slow pace, I crowd too many into the pan at once. They simmer too long, become soft, and fall apart as I lift them out of the water. Strike 3.
And most of the cinnamon chips fall off, anyway. Strike 4. What was I thinking?!
I decide to bake the now gnarly, misshapen ropes anyway. I sprinkle them with more cinnamon-sugar, put them into the oven – and forget to set the timer. Let's hear it for strike 5!
The bad news is, I don't know how long they baked. I don't know, ultimately, how many I ended up with.
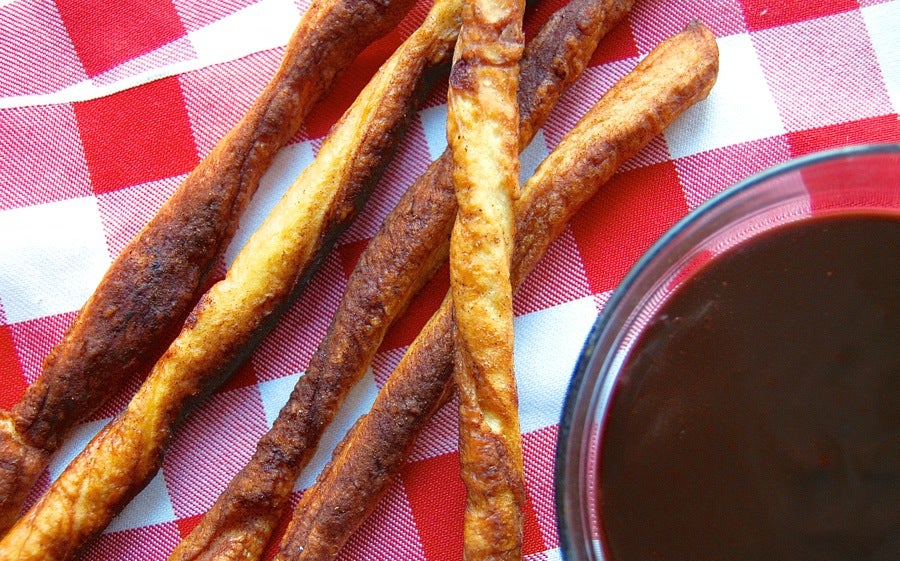
The good news is, they taste pretty good, even on their own. And with the chocolate fondue? Heaven!
Next time I do this, I'm making simple naked ropes, about 5" long; simmering them in the water bath, THEN sprinkling heavily with cinnamon-sugar before baking.
Tip: Do as I say, not as I did!!
Some key points to remember:
•Bring the water bath to a medium (but not rolling) boil; when you add your bread or sticks, it’ll calm down to a simmer.
•Sprinkle the salt onto whatever you’re making as soon as you lift it out of the water bath and put it onto the pan. If you wait for your pizza or bread to dry off, the salt won’t stick.
•If you’re worried about appearance, these treats are best enjoyed the same day you make them. When stored overnight under wraps, the salt tends to melt and disappear. They’ll still taste good; they just won’t show that pretty white-salt coating.
So there you have it – lots of yummy things to do with simple pretzel dough. While I used our pretzel mix for all of the treats pictured here, you can also start with our Hot Buttered Soft Pretzels recipe. Yields will be different, but the techniques are all the same. Enjoy!
