Claire Saffitz’s new failproof pie crust
A bench knife is the magic tool for flaky, easy-to-roll pie dough.


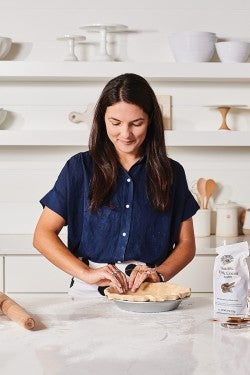
Claire Saffitz has made a lot of pie crusts in her lifetime, always tweaking and experimenting to find the best method. So when she tells us she’s found a new crust technique that’s basically failproof, we listen.
After a lot of experimentation (and a lot of pies), she recently landed on what she calls “the most successful method I’ve found to date.” Crucially, she uses a bench knife — rather than her hands — to bring the dough together. “Not only does this prevent the butter from warming from the heat of your hands, but it also very evenly distributes the water,” she explains. Thoroughly hydrating the dough means there are fewer dry spots, which leads to less cracking while rolling.
There’s another benefit to the bench knife: “The butter gets broken up into pieces of all different sizes,” says Claire. “It results in a crust with a great balance of tender and flaky; tender from smaller pieces of butter, flaky from the larger.”
The result? “A dough that gives you the best of both worlds,” raves Test Kitchen Director Sarah Jampel. “Unlike with a food processor or a stand mixer, you have total control of the size of your butter pieces; and unlike with your hands, you don't risk warming the butter up quickly with body heat.”
Can’t wait to try it? Watch Claire demonstrate her method and read on for more details on her new All-Purpose Flaky Pastry Dough.
This method starts like most pie doughs. Claire mixes the dry ingredients — flour, sugar, and salt — and adds cold butter, sliced thinly crosswise. The butter gets tossed to coat with flour, then Claire uses her fingertips to break the butter into smaller pieces. The key here: small-er, not small. The butter pieces can remain quite large, as they will be more thoroughly broken down later.
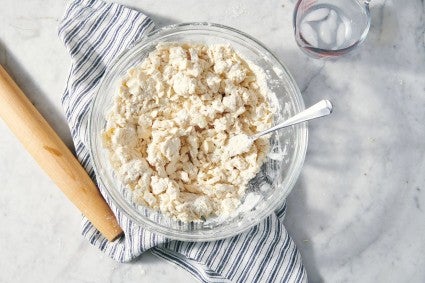
Next the ice water gets added, and everything is tossed with a fork to form a clumpy mixture with lots of dry spots. (Claire prefers a fork to help prevent the wetter parts of dough from getting stuck to her hands.)
While most pie dough recipes might have you continue this step until a dough is formed, Claire pauses here — when the mixture is still extremely dry and uneven — and uses a different technique to finish the dough.
First, she tips the bowl’s contents onto a work surface. “I love to work directly on the bench to bring together dough,” she says. “Using a bowl to contain everything feels a bit restrictive.”
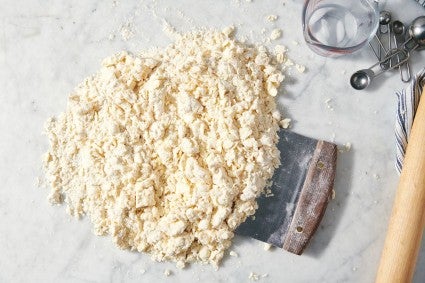
She then uses the straight edge of a bench knife (or bowl scraper) to chop up the mixture, breaking up the clumps of butter and periodically using the scraper to toss and push the mixture back into a pile.
(No bench knife? Claire says, “Any dull straight-edge will work here. You could use the flat end of a metal spatula, or even two butter knives in a slicing motion.”)
This step further breaks down the butter pieces — you’ll get some small pieces to create tenderness and some larger pieces to get flakiness. And it’s all done without using your hands and warming the butter.
What this also does is distribute the water, hydrating the flour evenly but gently so that the dough isn’t overworked. This way, the dough can be rolled out easily because it’s not too dry, nor is it gummy from too much water or tough from too much gluten development.
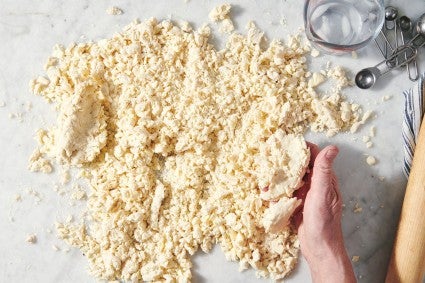
Once the butter is broken down into small pieces no larger than a pea, Claire pushes it into a pile and squeezes with her hands until it holds together in large pieces. At this point, the entire mixture may hold together without dry spots, in which case she moves to the next step.
However, if the dough continues to have some floury areas, she’ll move the larger clumps to the side, leaving the floury bits left behind in a pile. She drizzles 1/2 tablespoon of ice water over the floury area, then uses the bench knife in the same chopping motion to evenly distribute the water. Again, she squeezes to bring the mixture together, moving any large pieces to the side and continuing with more ice water until no floury bits remain.
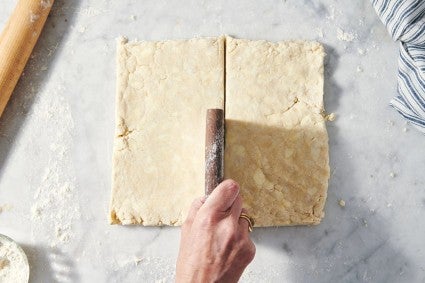
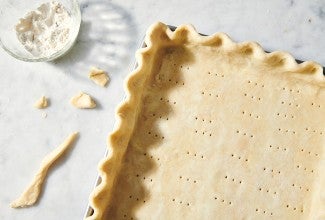
Once the dough is formed, Claire stacks it to make more layers — another trick to increase flakiness. After patting the dough into a rough square about 3/4" thick (the dimensions here don't need to be exact; it can be rectangular, more of a square, etc.), she uses the bench knife to cut the dough in half, then places one half directly on top of the other. She uses a rolling pin to flatten and lengthen the stack slightly, then cuts it in half again and stacks the halves once more.
Not only does this stacking and flattening increase the flakiness of the dough, but it also further distributes the moisture, making it easier to roll out.
Potential pitfall: If you’re working in a hot kitchen, the butter might soften and make the dough sticky and difficult to handle. If this happens, transfer the dough to the refrigerator or freezer and chill until it’s firm, about 10 to 15 minutes, before proceeding. Don’t skip the stacking process, as it’s needed to give the dough some structure. Bringing the dough together with the bench scraper is such a gentle method that it might not develop sufficient gluten, so without stacking, the dough could crack during baking.
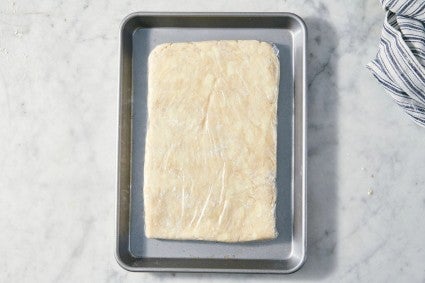
Once flattened with a rolling pin into a long rectangle measuring 3/4" thick, the dough is ready to be portioned, shaped, and chilled. Claire uses the bench knife one last time to cut the dough in half and make two equal portions — each for one piece of dough. If she’s ultimately going to roll the dough into a circle for a pie pan, she’ll use the heel of her hands to gently shape into a disk so it’s easier to roll out round.
Claire wraps each piece in plastic or reusable food wrap, maintaining the round or rectangular shape. She rolls over the wrapped pieces with the rolling pin to flatten the dough and force it to fill out the plastic or food wrap (applying this pressure will help prevent cracking later), then transfers to the refrigerator to chill until very cold and firm, at least two hours.
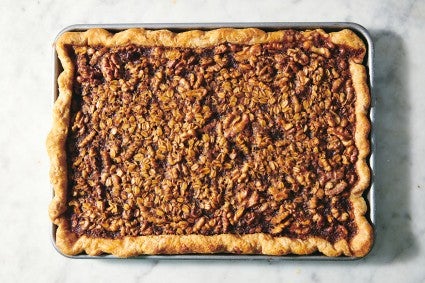
From here, the pie dough is ready to be turned into the recipe of your choice. Might we suggest a recipe from Claire herself? Try Walnut & Oat Slab Pie, featuring a filling of oats and nuts enveloped in brown butter, cream, and cinnamon, or Cinnamon-and-Sugar Apple Pie, a classic pie with twists like a dusting of cinnamon sugar on the top crust and a big dash of bitters in the filling.
Cover photo (All-Purpose Flaky Pastry Dough) and food styling by Liz Neily