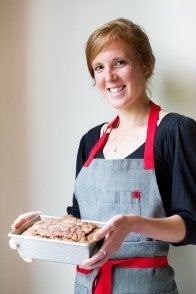
The Fall 2018 issue of Sift is packed with recipes that will warm your home during the colder months. Among the many treasures tucked into its pages is Rustic Milk Pie Crust, a recipe revelation from food stylist and recipe developer Judy Kim. She created this incredible design, which nods to another favorite of the season: cozy knit sweaters! Thanks to Judy for sharing her recipe, techniques, and food styling for this truly beautiful pie.
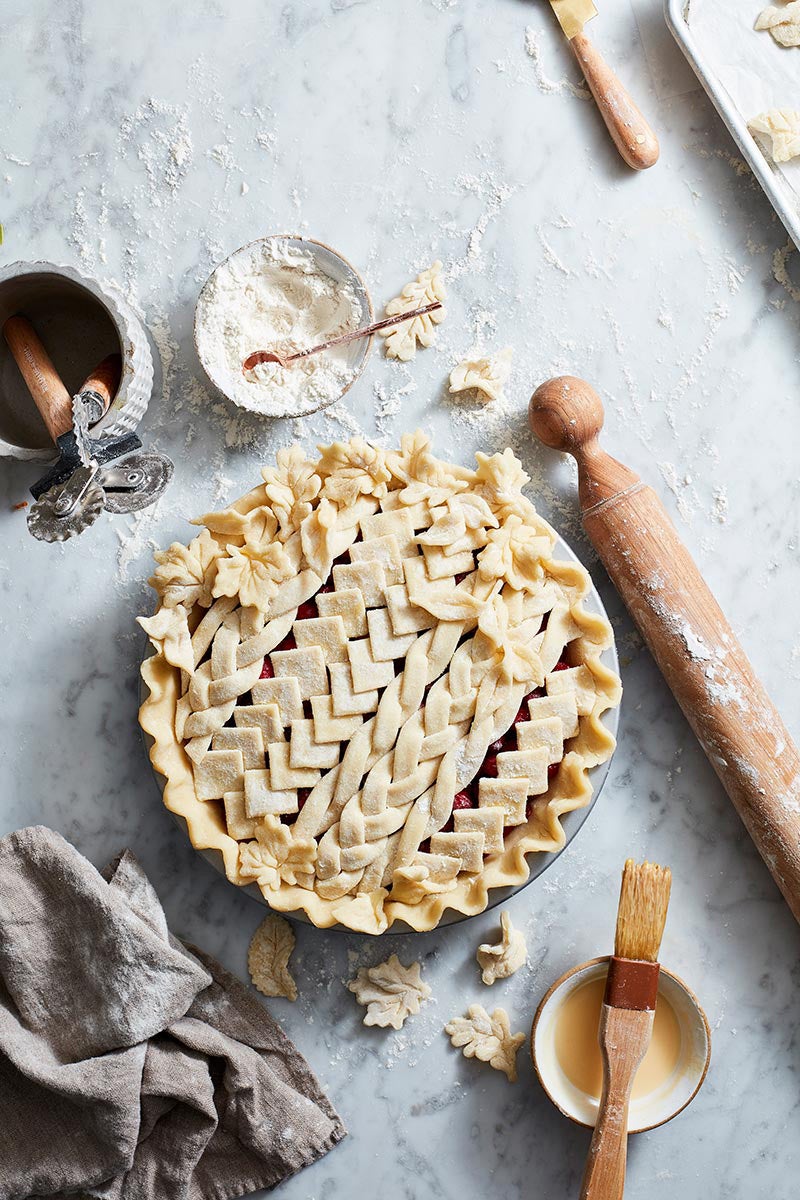
If you've ever wanted to make a show-stopping dessert that people will remember forever, now is the time. You can use simple ingredients — flour, butter, milk, and a few other pantry staples — to make a fancy pie crust that's a true masterpiece. We're going to make a knit sweater-inspired pie!
Imagine that knit sweater your mom (or maybe even your grandma) used to wear on chilly days. It has lots of cables, braids, and maybe a few other intricately woven details. While vintage sweaters might not exactly be your style, we're going to use this knit theme to make the most stunning pie ever.
In order to make detailed designs on your pie, you need to start with the right pie crust recipe. The dough should be able to withstand being rolled, twisted, and folded without falling apart.
But remember, we're still going to eat this pie; that means it should be tender and flaky, too. You're aiming for the best of both worlds.
Luckily, we've discovered Judy Kim's Rustic Milk Pie Crust recipe. It contains just the right amount of tenderizing ingredients (milk, butter, lard or shortening) to give it the perfect texture.
The secret to its strength? The amount of liquid that's added. This is a wetter pie dough than a classic version. It allows the dough to come together smoothly, making it easy to work with and make designs.
Bonus: It calls for just a smidge of apple cider vinegar. My fellow blogger, Susan, teaches you why it's important to use vinegar in your pie crust here.
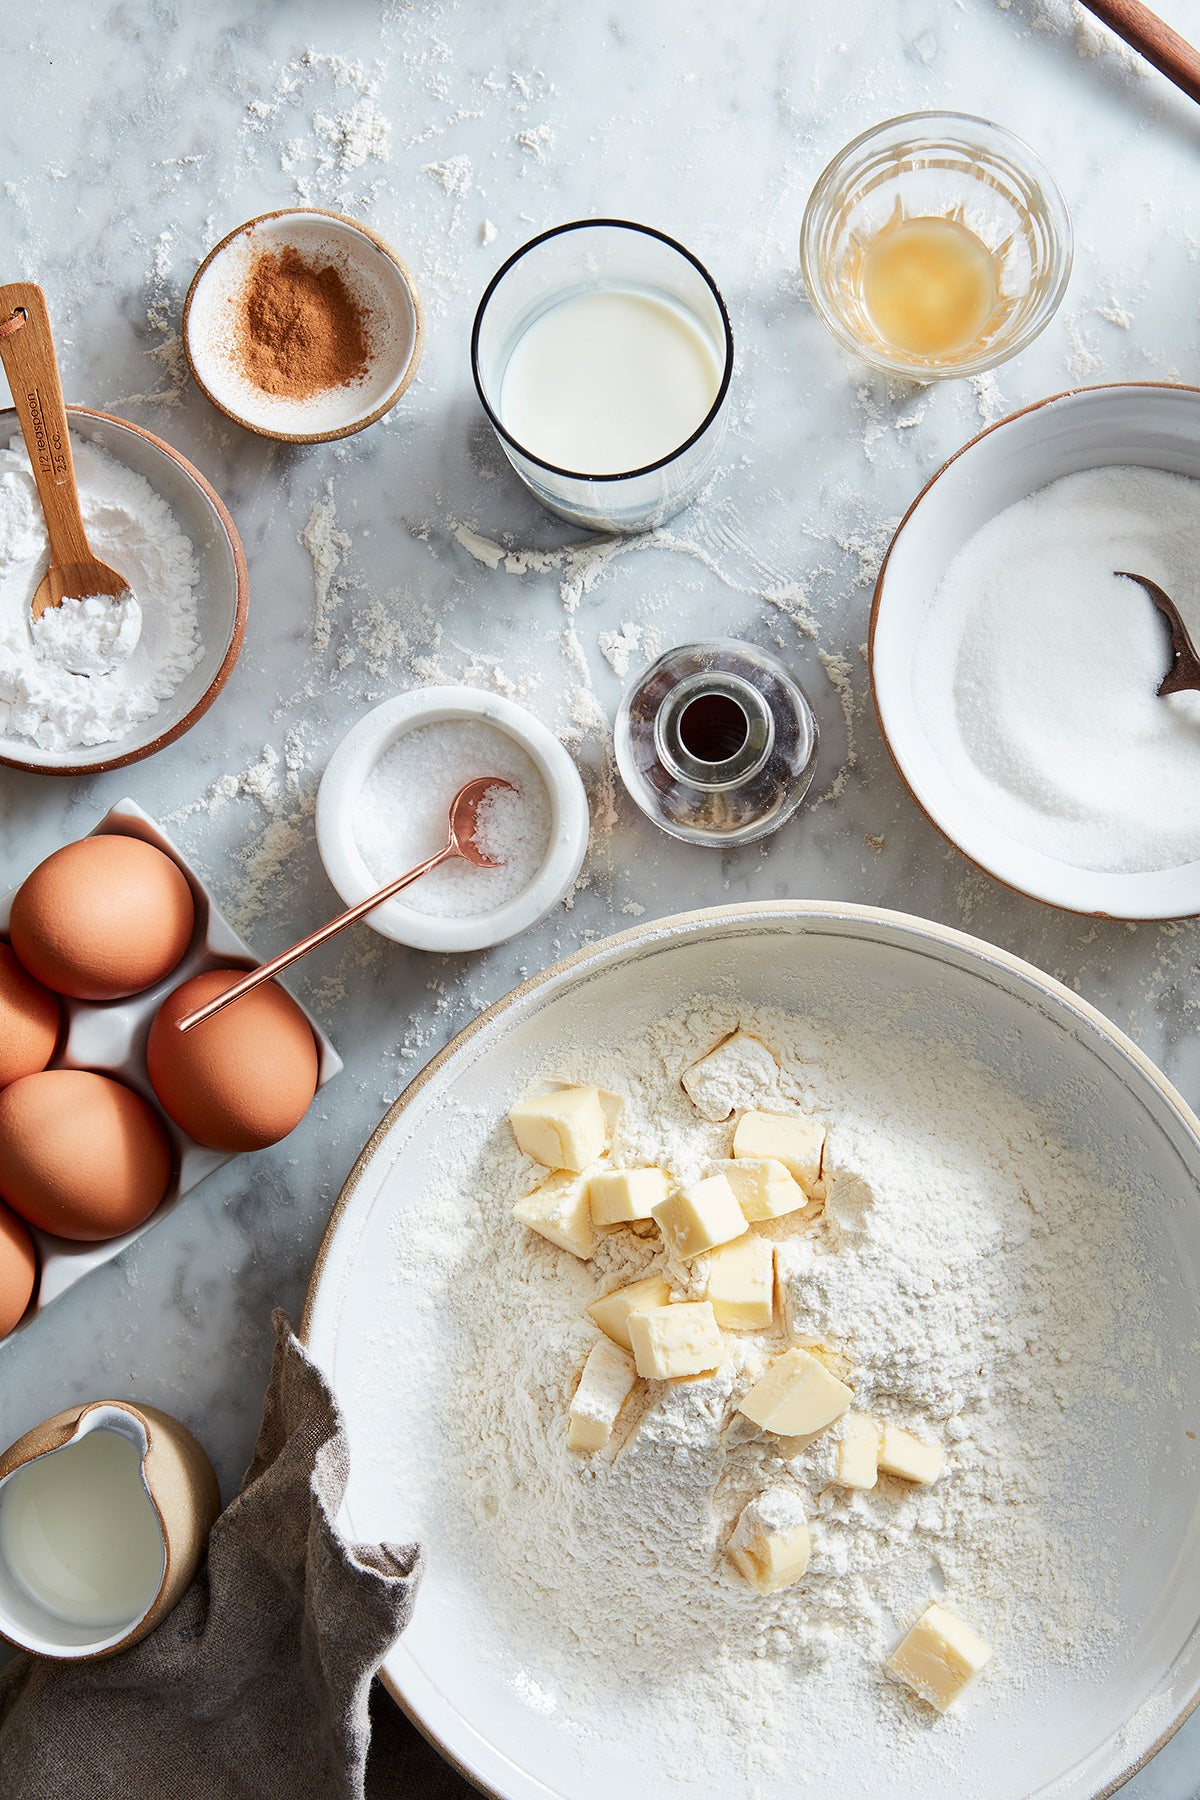
Convinced it's the right place to start? OK! Gather your ingredients:
3/4 cup (170g) whole milk
2 teaspoons apple cider vinegar
2 3/4 cups (330g) King Arthur Unbleached All-Purpose Flour
1 teaspoon kosher or 1/2 teaspoon table salt
1 tablespoon (9g) sugar
3/4 cup (12 tablespoons, 170g) unsalted cold European-style butter, cut in 1/2" cubes
2 tablespoons (28g) lard or shortening
The higher fat content in European-style butter contributes a different flavor and texture than normal (Grade AA) butter. The crust is richer in taste but only moderately flaky. This kind of butter has less moisture than Grade AA, which is another reason we add a bit more liquid to this crust.
You can use regular butter if that's all you have on hand. Just hold back about 1 tablespoon (14g) of the milk; add it only if the dough seems dry.
We're ready to mix the dough. Combine the milk and vinegar in a liquid measuring cup. (Don't worry if the milk looks curdled at this point; that's a normal reaction caused by the acid in the vinegar.) Place this mixture in the fridge so it can get nice and cold while you measure out the other ingredients.
Next, weigh your flour. Or if you don't have a scale, you can use the fluff, sprinkle, and sweep method.
Add the salt and sugar. Whisk to combine. (My grandma used to hide a tablespoon of cocoa powder at the bottom of the bowl to make sure I really whisked well. Pretend there's something hiding and whisk well!)
The butter comes next. Cut the butter into 1/2" cubes. I use a bench knife and dough scraper for this job. They're a perfect pairing if the butter starts to stick to one of the tools.
Toss the butter cubes in the flour mixture. They should be coated on all sides. Using your clean hands, press the butter cubes between forefingers and thumbs. Press down to flatten the chunks into leaf-like pieces, or shards.
Work quickly, as the butter will start to soften and become sticky the longer you work with it.;
Once all the butter cubes are roughly dime-sized, work in the lard (or shortening) the same way.
Use your fingers or a spoon to create a well in the middle of the flour mixture. Add the chilled milk and vinegar mixture 1 tablespoon at a time. Stir in some of the flour with each tablespoon, working up to the full amount. You'll want to use all of the liquid. That's right — we said this was a wet pie dough!
Use your hands to bring the pie dough together into a rough ball. Knead it a few times on a lightly floured surface, until it looks smooth.
Give the dough a light dusting of flour and divide it into two parts: one third and two thirds respectively. We'll use a third for the bottom of the pie and keep two thirds for the top. We're making lots of fancy pie crust designs here!
Wrap the pie dough in plastic and chill for at least an hour before rolling out. The wait can be tough if you're short on patience but trust us — it's a worthwhile step that makes working with the dough so much easier.
The crust can chill for up to two days in the fridge. If you'd like to store it longer than that, freeze it. Wrap it well in plastic to prevent freezer burn; use within two months of freezing.
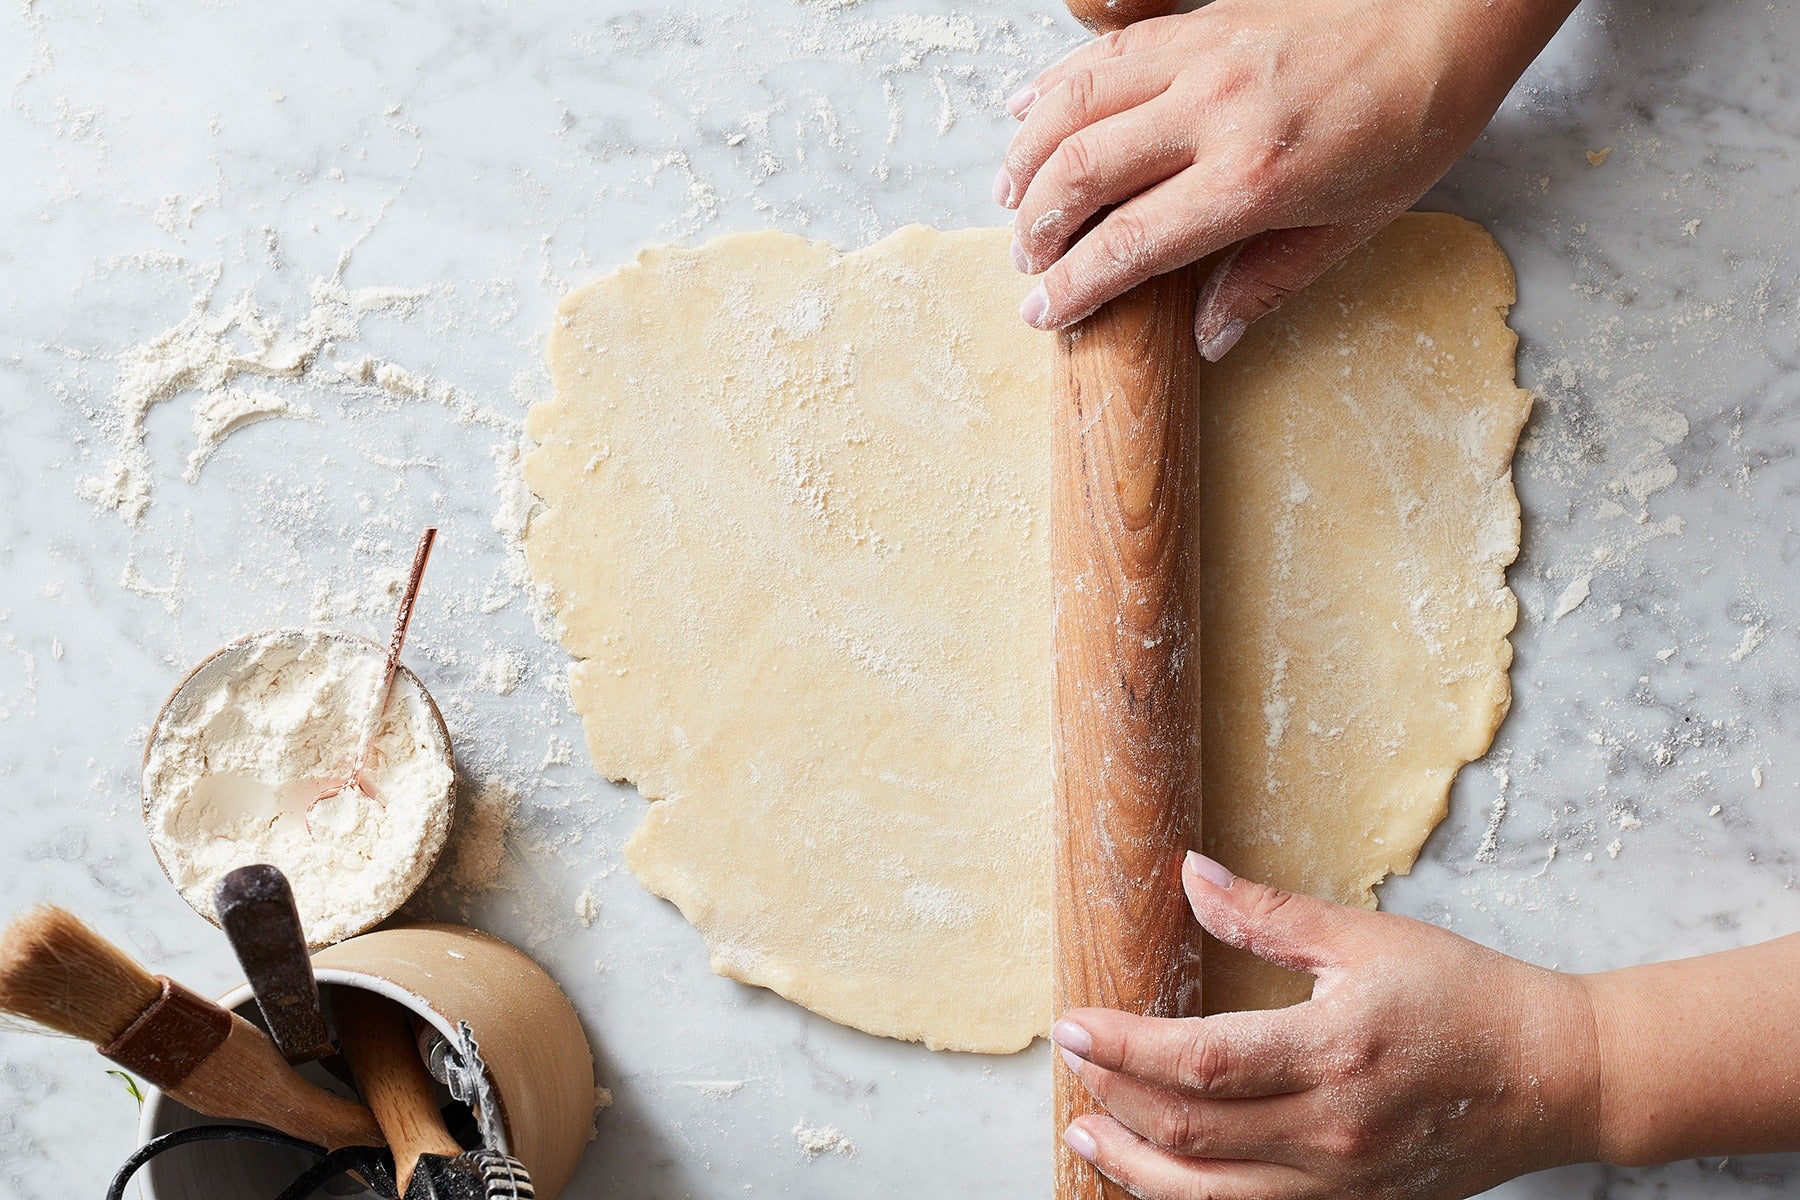
Once your dough has chilled, it's time to start building your pie from the bottom up. Take the smaller piece of the chilled dough and roll it about 1/8" thick.
Transfer the pie crust to a pan — preferably a metal pie pan, as we've learned that helps pie crust brown on the bottom.
Crimp the edges of the crust using your favorite technique. I'd recommend using a simple, classic crimp since we're going to get elegant with the designs on top. Make sure the edges stand about 1/2" tall so there's room to layer in the top crust.
Place the crust in its pan into the fridge to chill for another half hour at minimum.
While you're waiting, plan your decorative pie design. What kind of sweater-inspired design do you want to make?
The choices are endless, but we're going to show you four of our favorite ways to create a fancy pie effect. You can use just one technique, pair two or three, or go big and use all four!
Start by making a plan so you can divide your dough accordingly. Remember we're shooting for a super-fancy pie here, so we encourage you to be ambitious. You can do this!

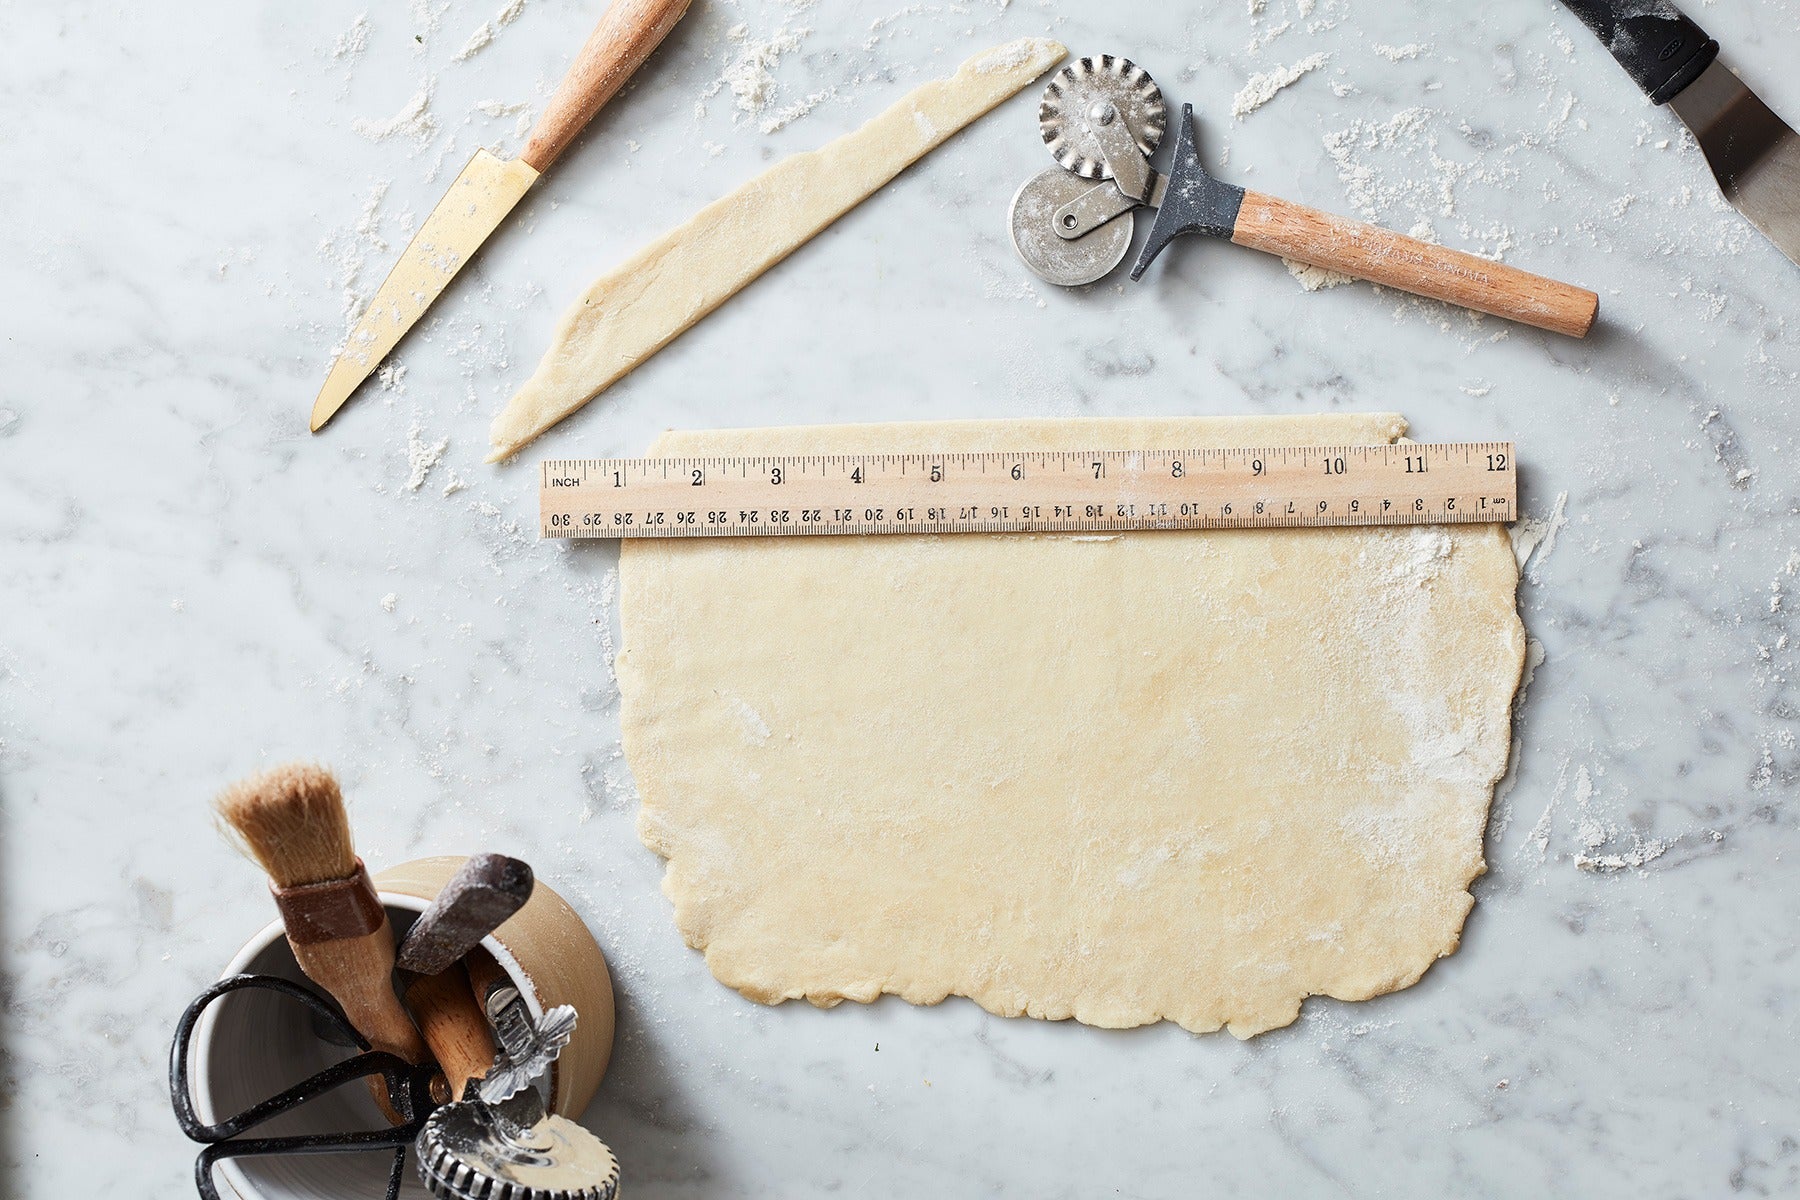
Cut off a portion of dough based on how many braids you'd like to make. (About half the reserved dough is a good place to start.) Lightly dust your work surface with flour. Roll the dough into a rectangle that's at least 12" long. The dough should be between 1/4" and 1/8" thick. (Pastry pins are super helpful here.)
Once you have your rectangle, use a ruler and a pastry wheel to cut 1/2" strips the long way. You can run the pastry wheel right along the length of the ruler to help keep your cuts straight.
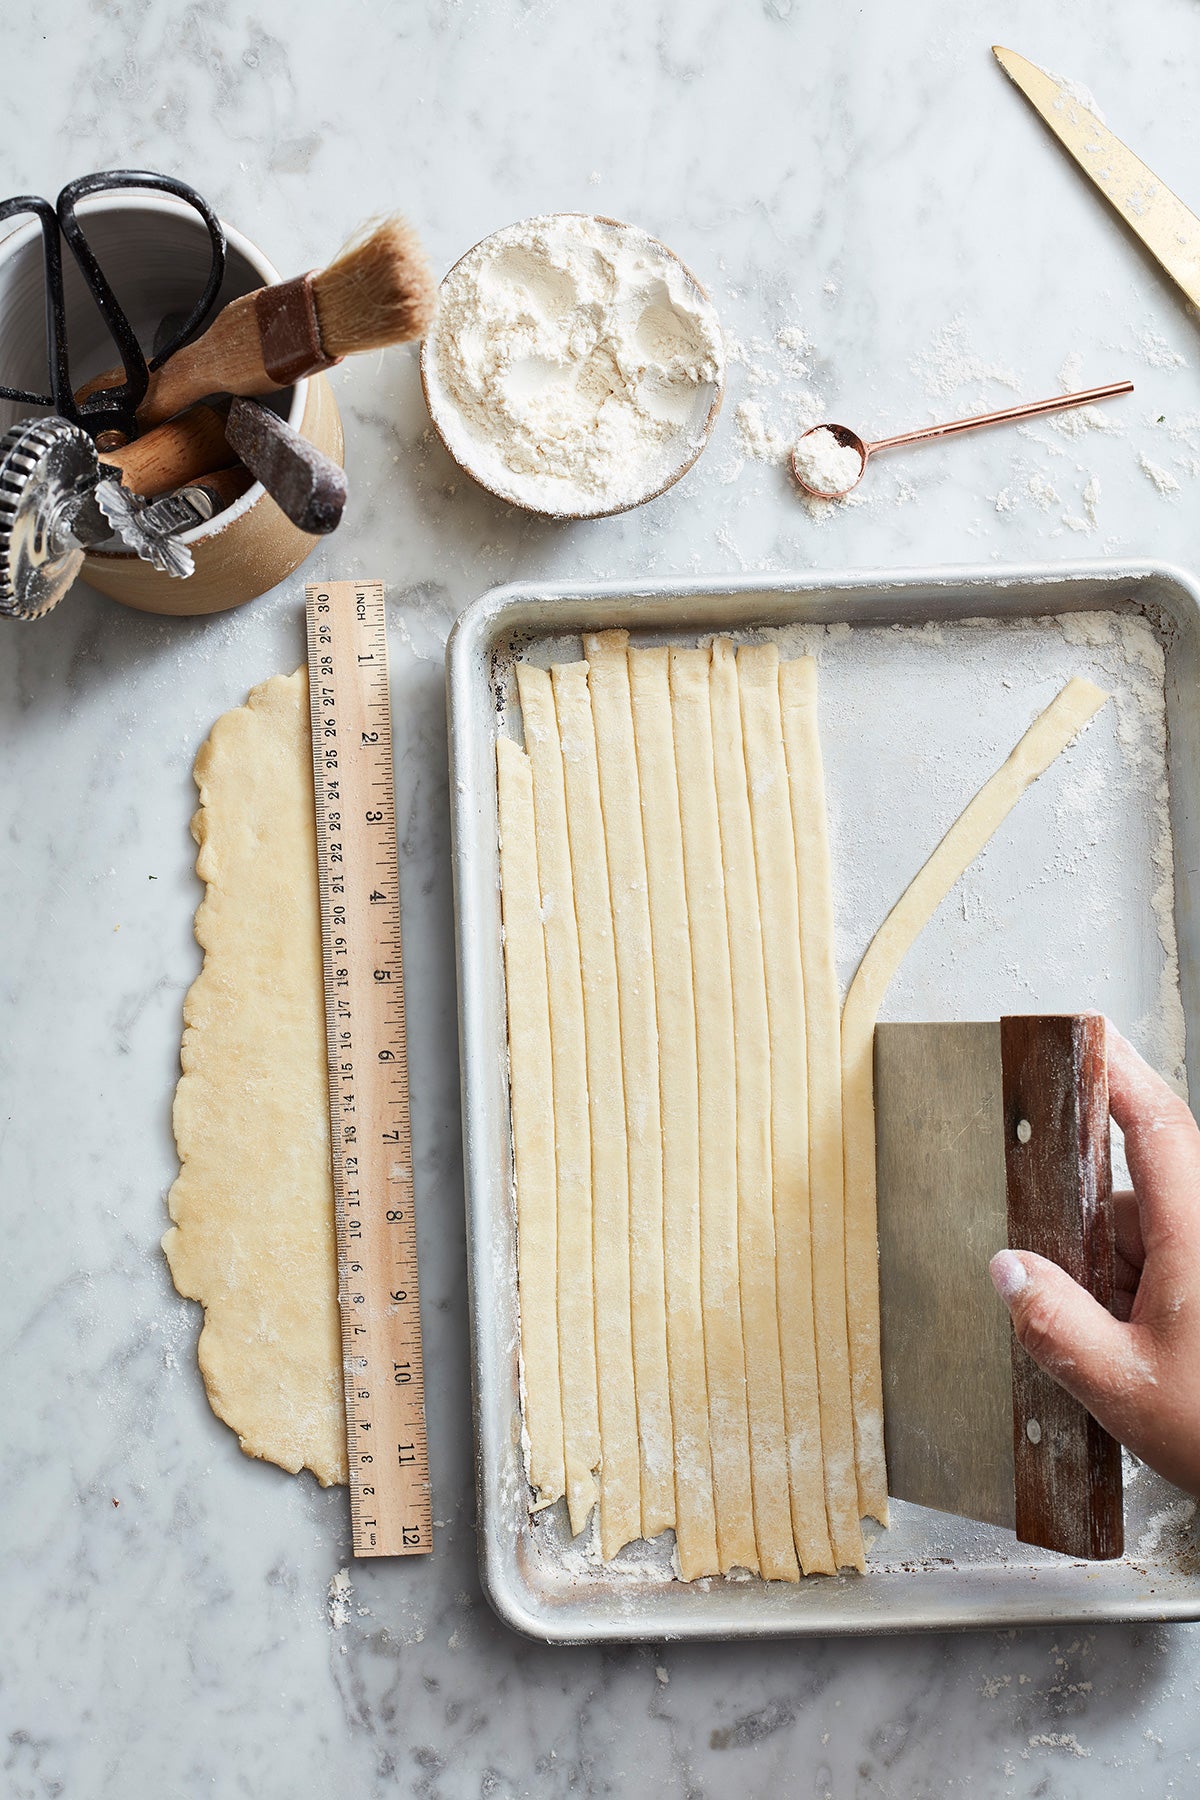
Once you have your even strips, transfer them to a baking sheet. (I like rolling and cutting my strips on parchment paper so they can easily be moved.) Chill the strips in the fridge for about a half hour so they firm up.
Now you're ready to braid! Gently weave the three strips around each other following the pattern shown in this video.
If you're new to braiding, consider practicing with string a few times before you use your pie dough.
When you reach the end of the strips, don't seal them. You'll be pinching off the ends once you place them on top of your pie. Place the completed braids on a baking sheet to chill while you finish the rest of your fancy pie decorations.
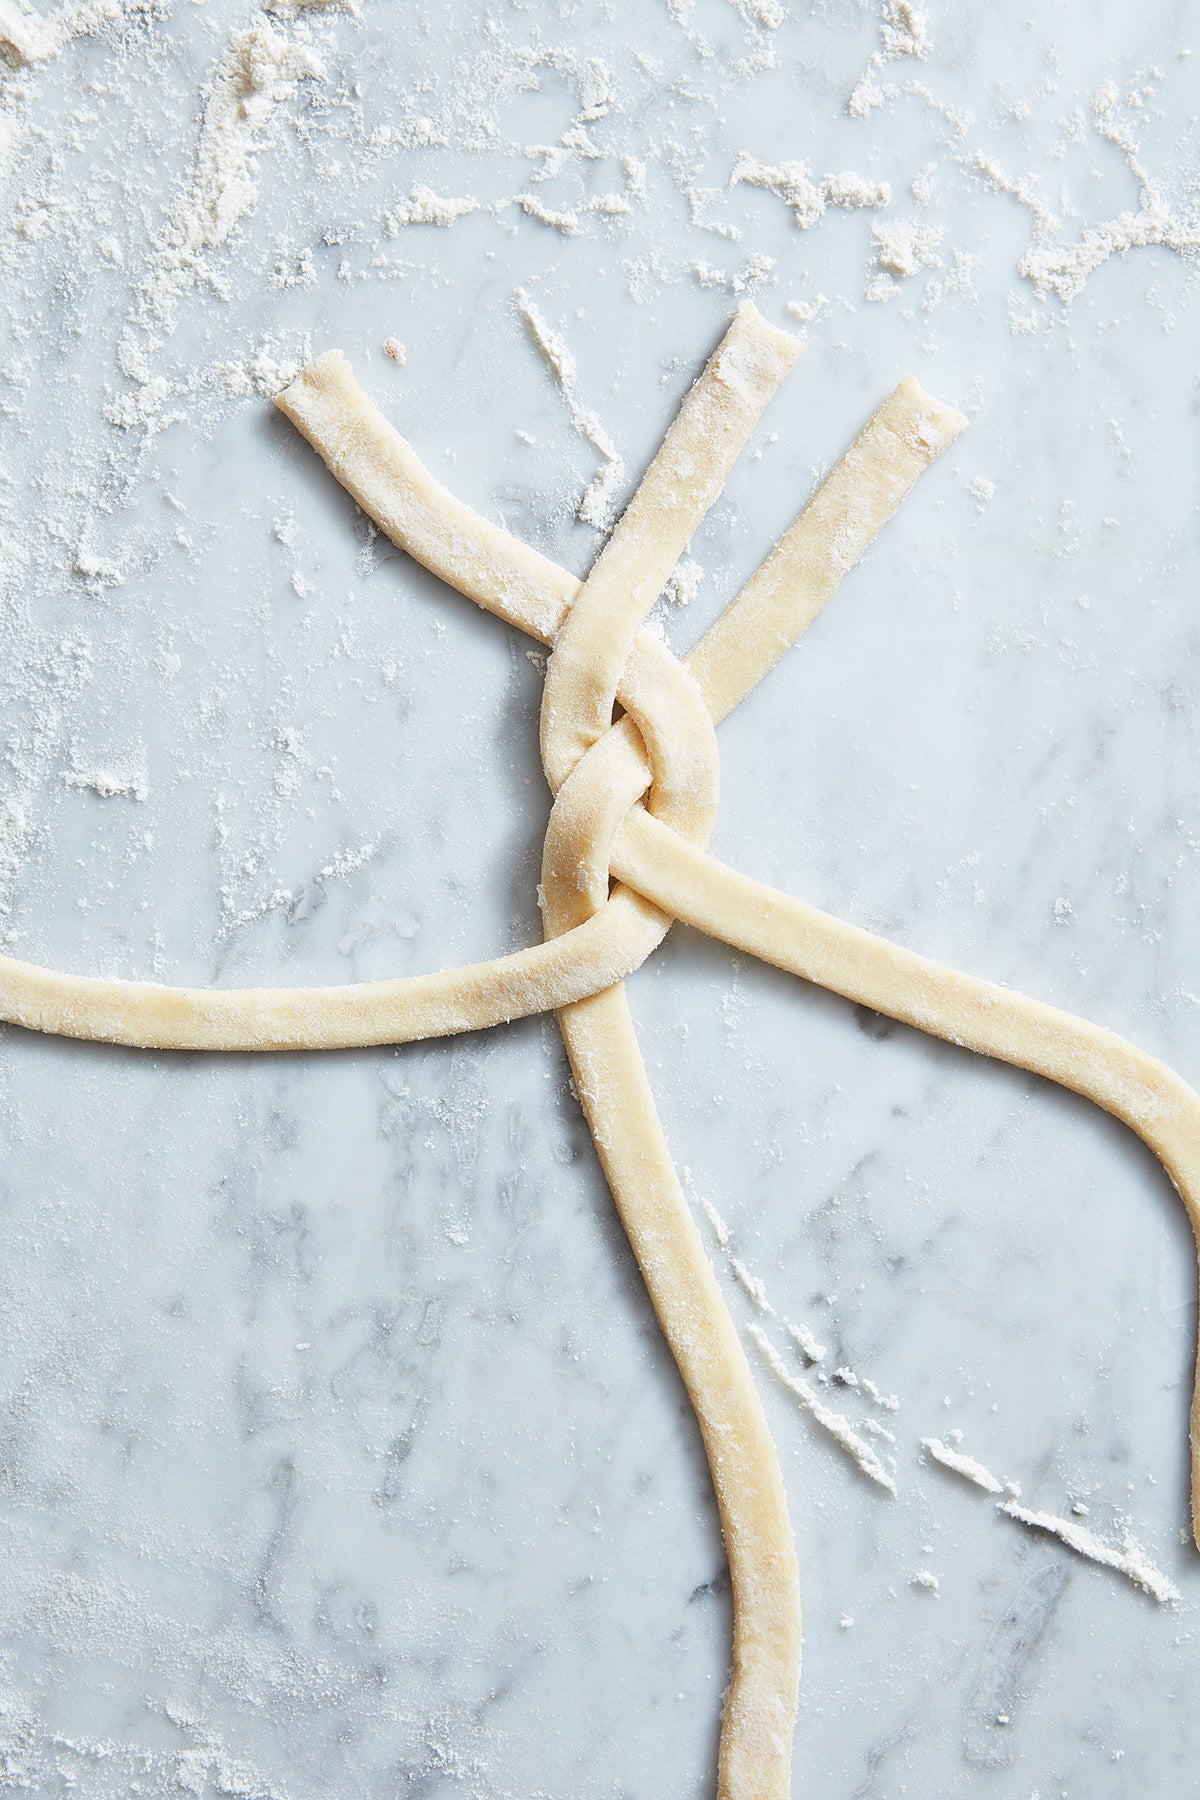
Tip from Judy: By starting a few inches down, you have more leverage to begin the braid. If you make the braids near the edge of your counter and leave a little bit of each strand hanging off, it's easier to pick up without damaging the dough.
If braiding seems a little too complex for your first fancy pie, consider making a cable knit pattern instead.
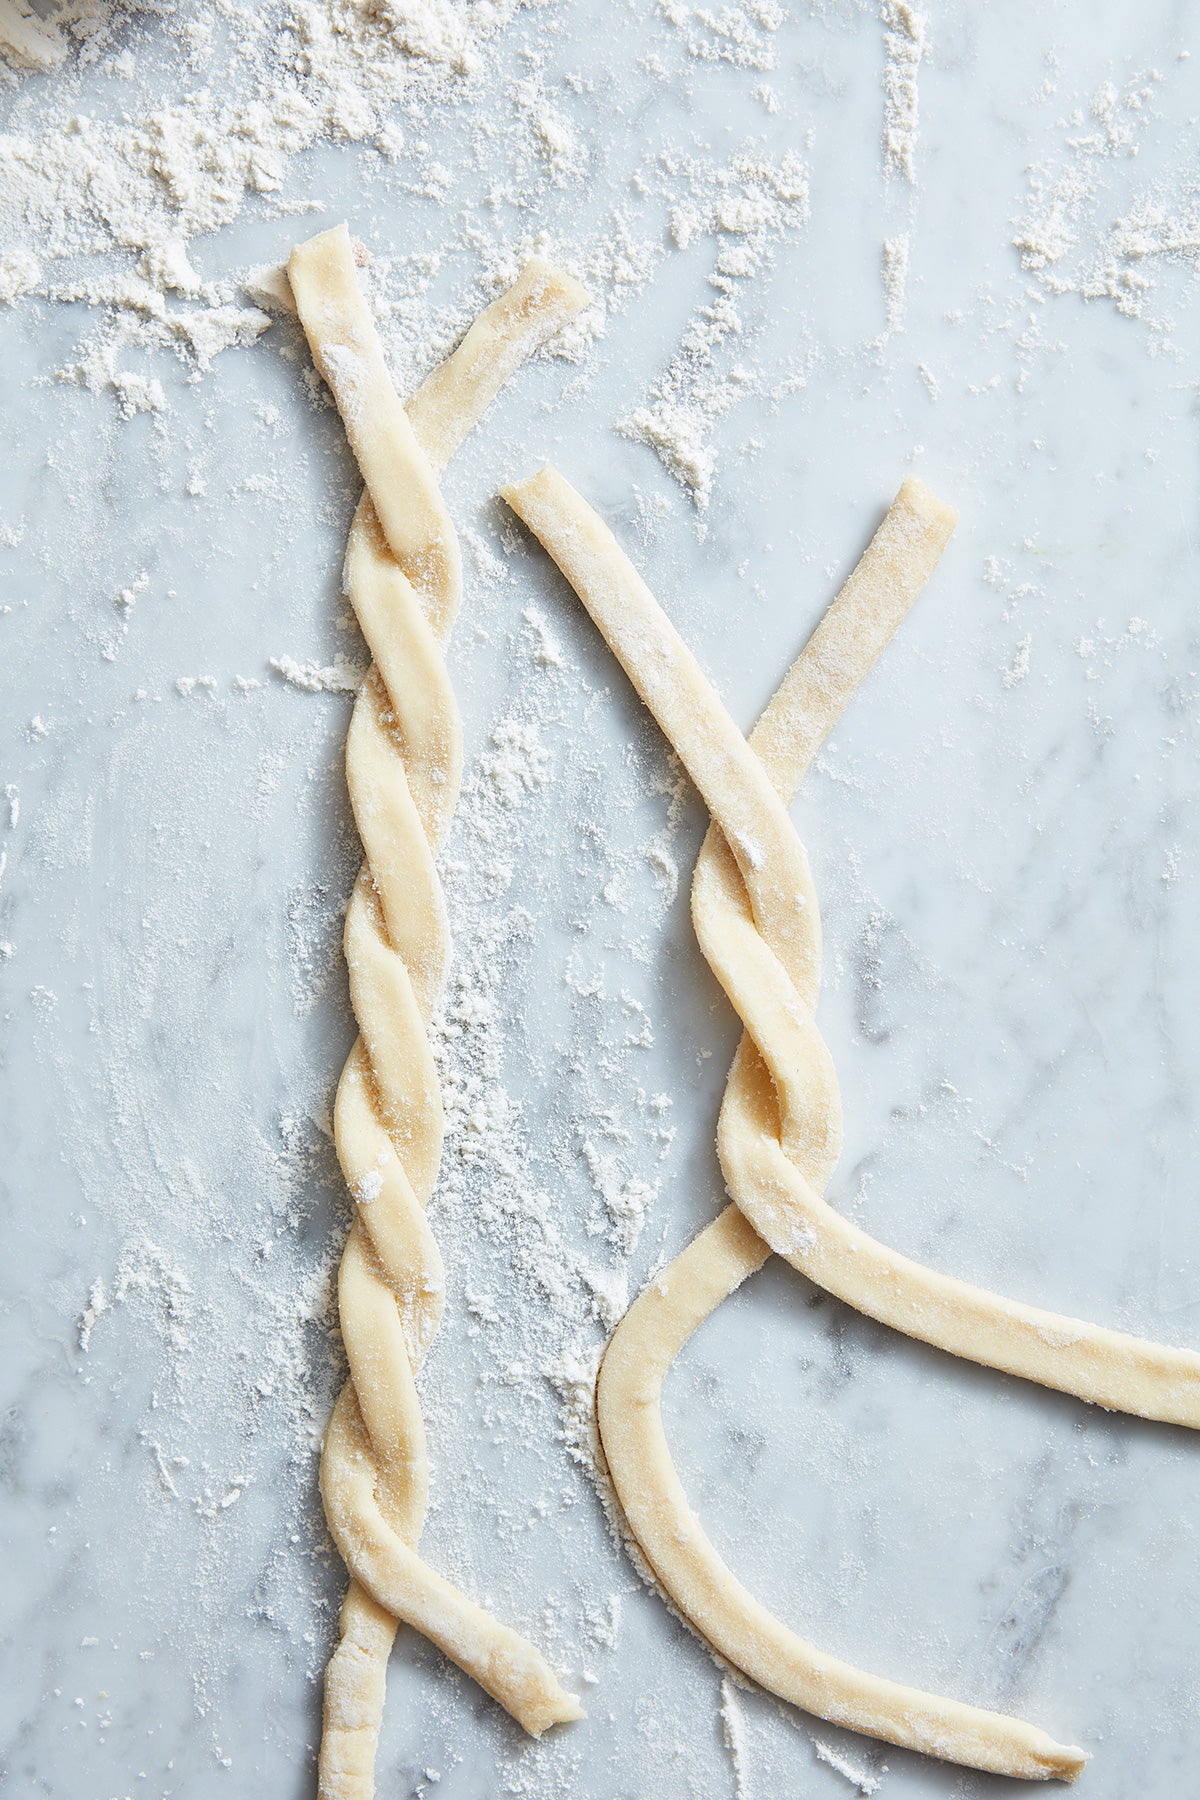
Start by following the same process for rolling out your dough and cutting 1/2" strips. Then make an "X" with two strips about 3" from the top. Take the left piece and bring it over the right, keeping the strand flat.
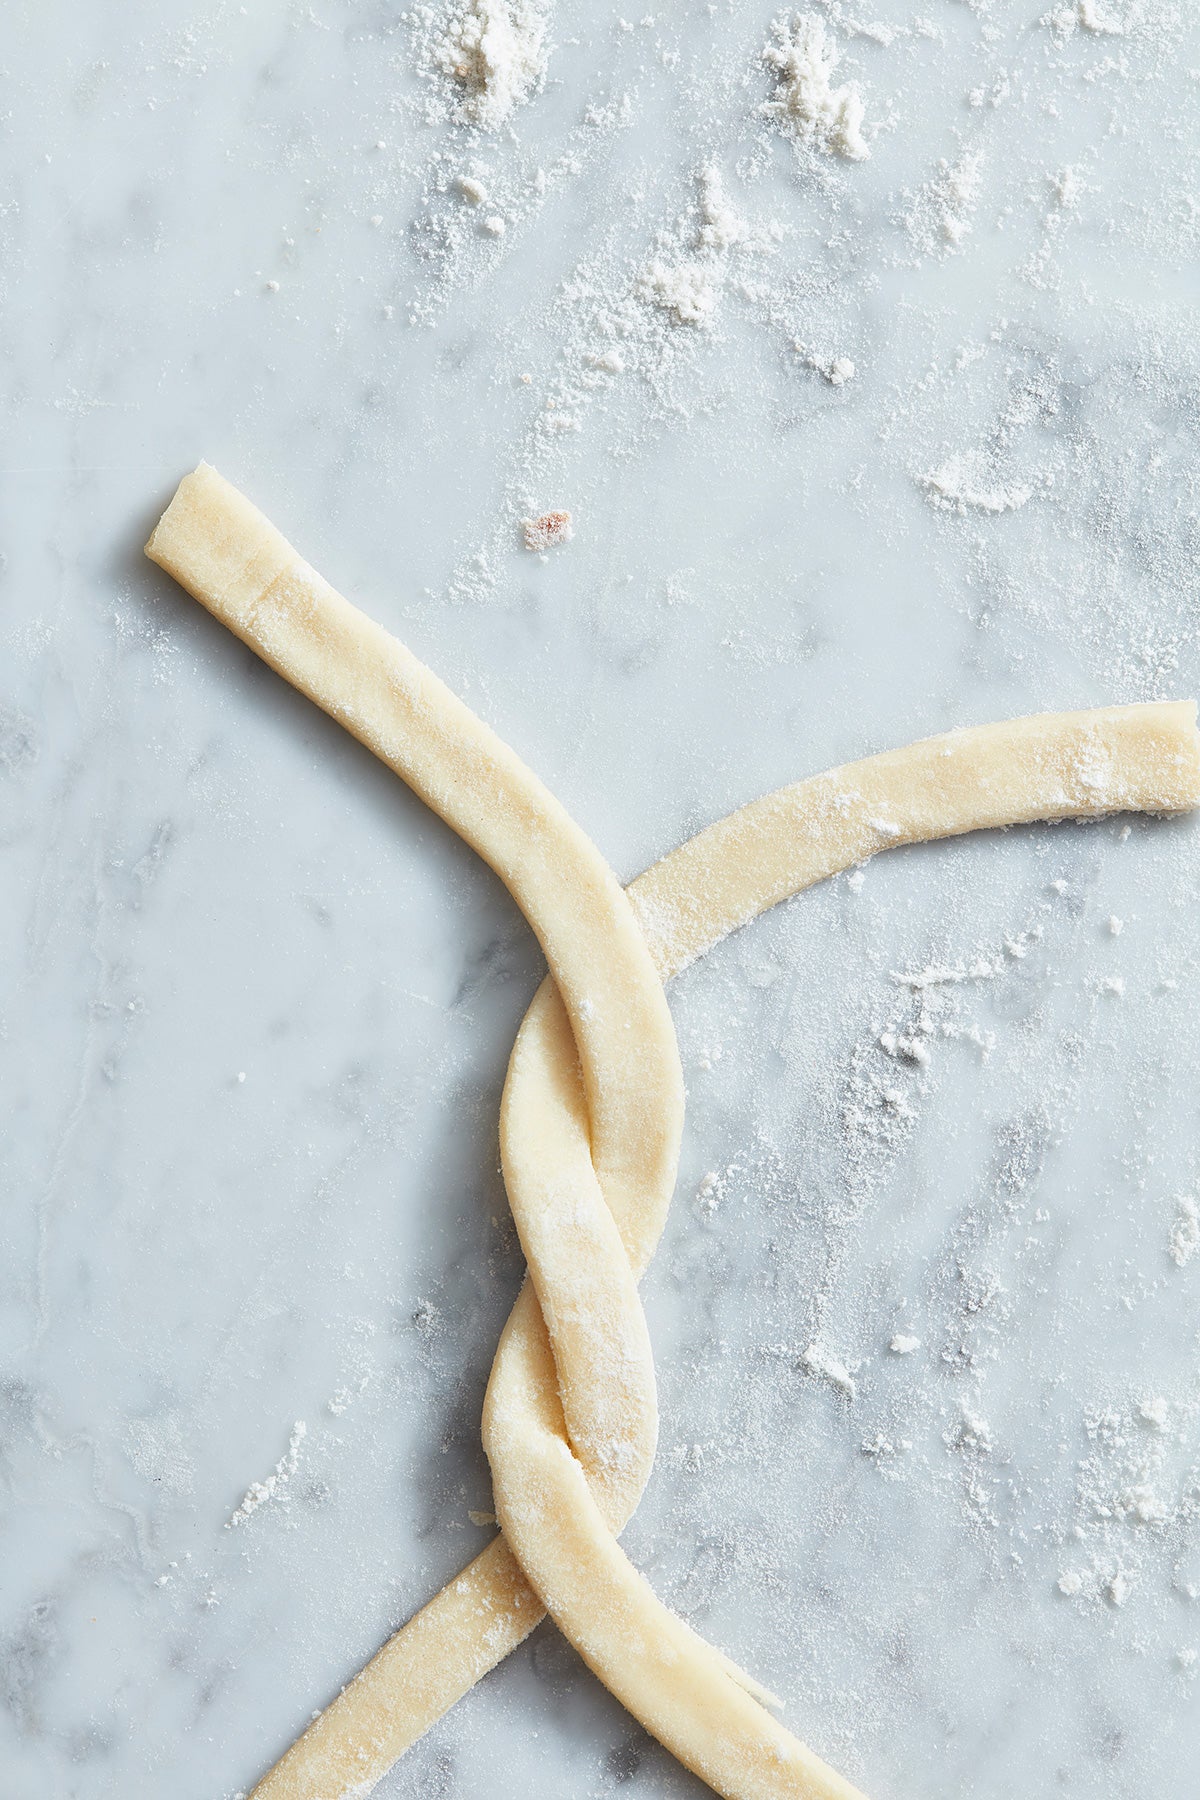
Alternate strips, bringing the right strip to the left. Keep the pie dough taut to keep the twists from unfurling. Repeat until you've twisted the full length of the strips.
Refrigerate the finished cable knit until firm. Repeat with two more strands until you have enough cable-knit strands to top your fancy pie.
Tip from Judy Kim: To create uniform cables, after completing one piece, make the next cable knit alongside the first so you can compare how taut they're pulled. This small nuance will be noticeable when all the elements are placed next to each other.
Roll about half the dough on a lightly floured surface into a rectangle that's about 1/8" to 1/4" thick. (The exact size of the rectangle doesn't matter at this point; the thickness is more important.) Move the rectangle onto a piece of parchment paper; this will make it easier to move the squares later and preserve their sharp shape.
It's time to pull out your ruler! Precision is the key to making this impressive-looking pattern. Mark 1" notches along one edge of the dough. Then use a pastry wheel or a pizza cutter to cut the dough, making 1" strips.
Now cut 1" notches along the width, then cut the dough into even 1" squares. Use a thin spatula (an offset spatula works well here) to remove the squares from the work surface. You can even dip the spatula in a bit of flour to help prevent sticking.
Move the squares to a baking sheet to chill for 30 minutes.

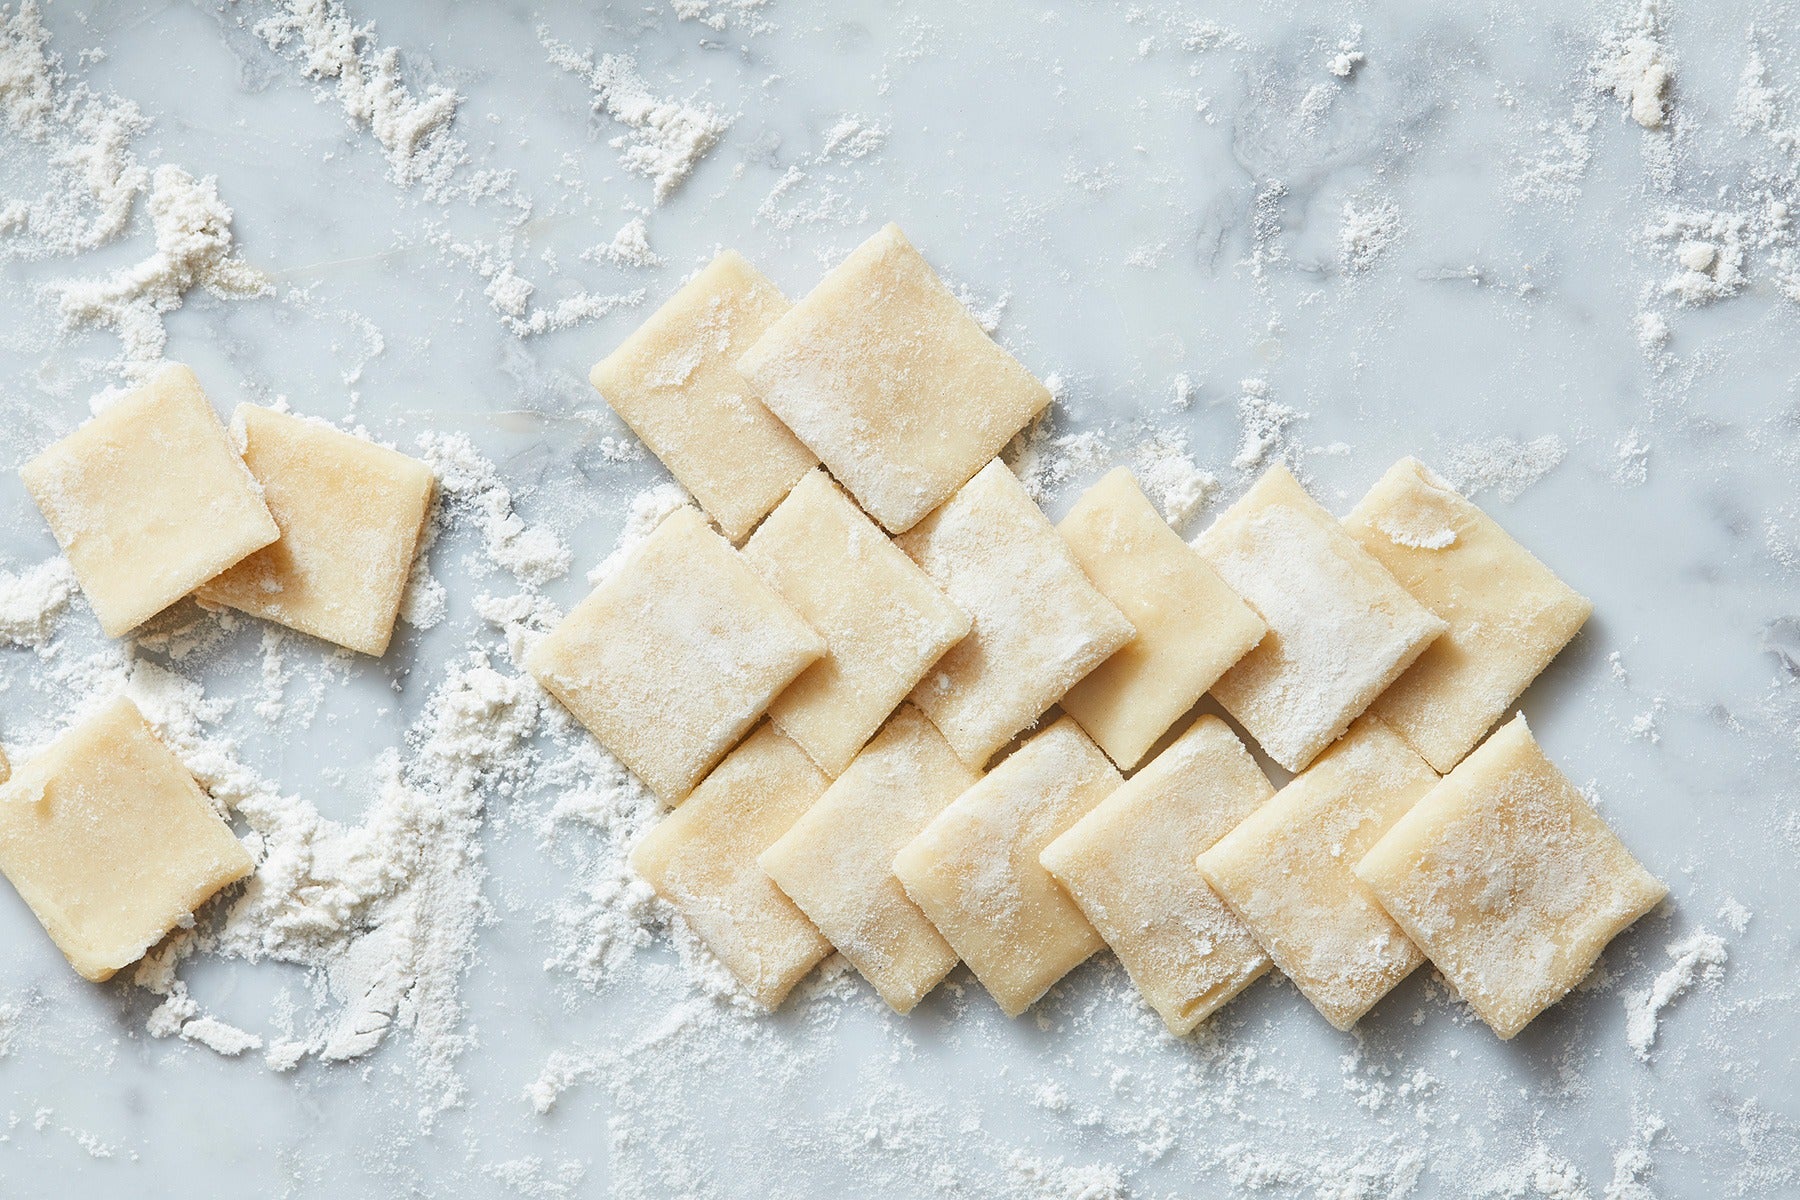
Time to layer 'em up! You can create a herringbone effect by overlapping the squares in a diamond pattern, as shown above. Brush a bit of egg wash on the top of each dough square; this will keep the squares attached.
Place the tip of each square so that it touches the center of the previous square. Layer the squares until you have a strip of dough that's the same length as your pie dish.
Carefully move the completed herringbone strip to a baking sheet to chill for 30 minutes. Place the strips on top of your pie so that the squares are nice and snug, close together. You'll start to see the herringbone pattern come to life right before your eyes. It'll look best if you've cut your squares precisely.
Tip from Judy: It's easier to create an even pattern if you place the rows next to each other. If one square doesn't fit, try using another piece that may be cut more accurately.
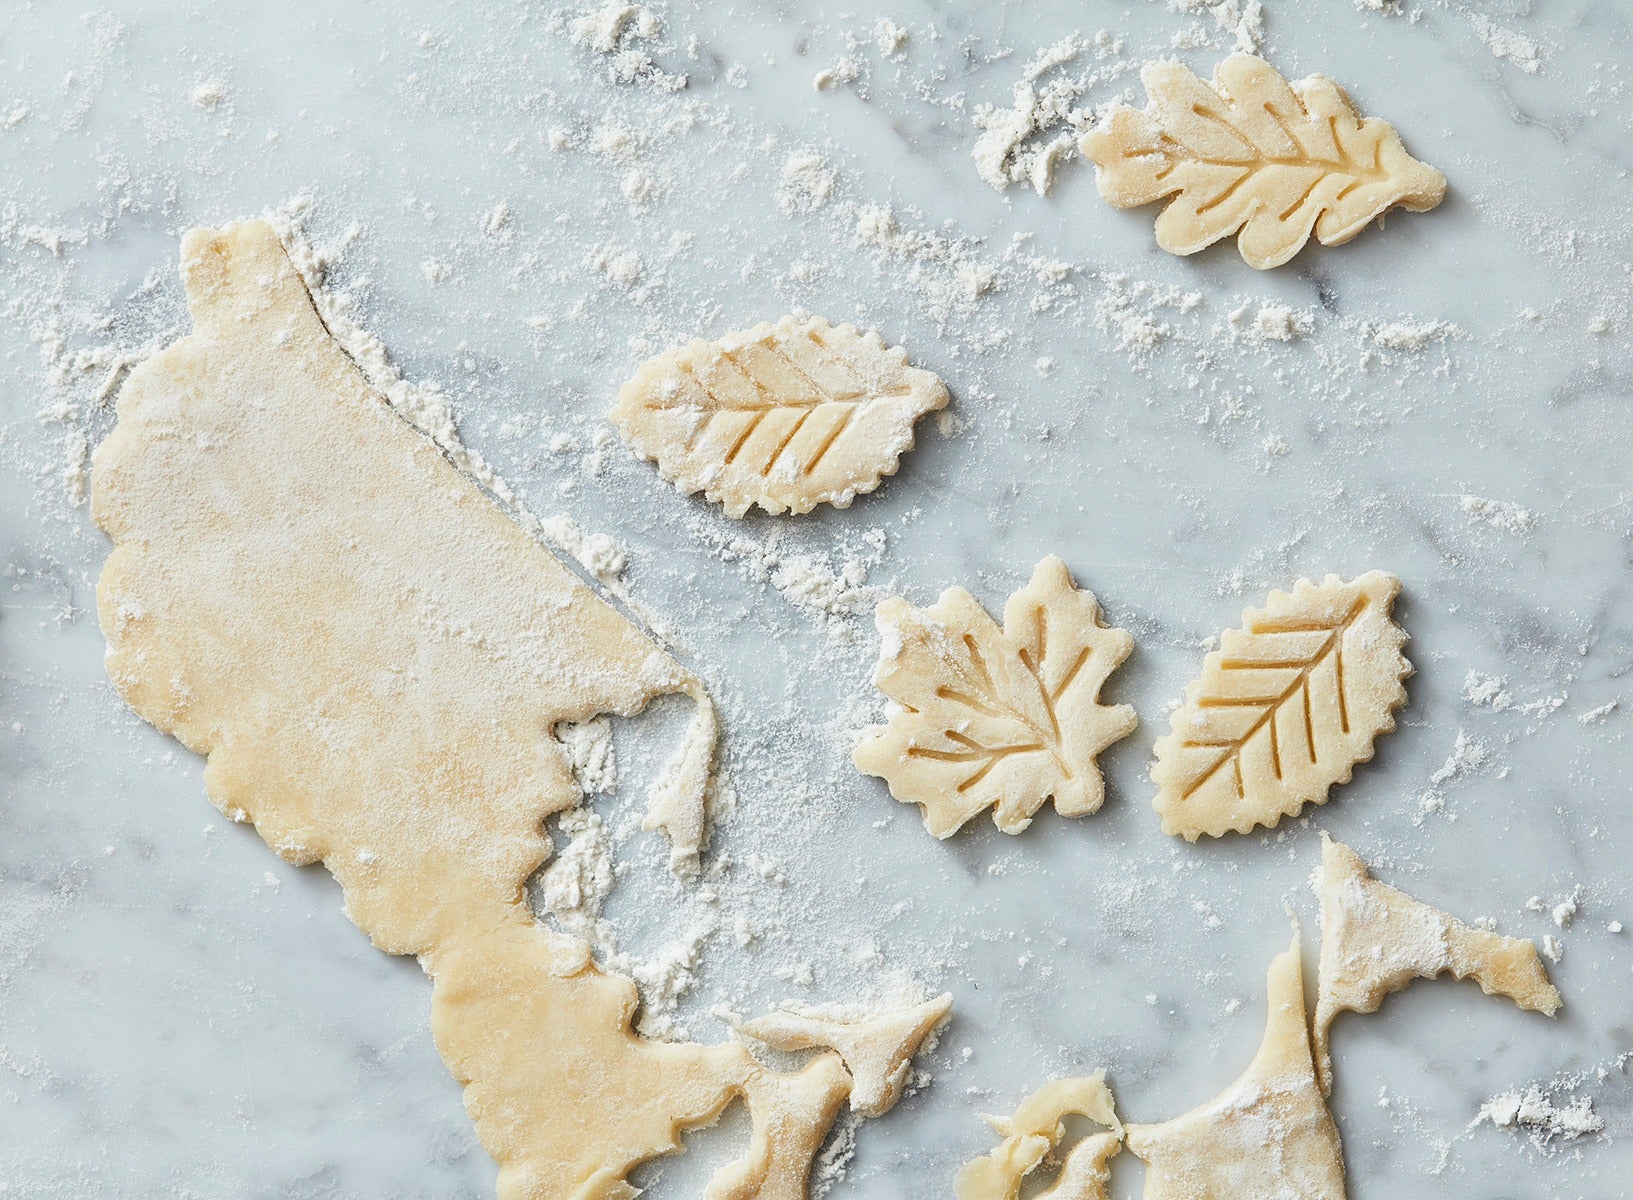
Time for my favorite (and perhaps the easiest) way to turn your run-of-the-mill pie into a fancy pie. We're going to make pie crust cutouts that look like leaves. It's a beautiful and seasonal way to add a bit of extra flair to your pie. Let's see how it's done.
Start with as much pie crust as you'd like. You can make just a few leaves for garnish, or you can cover your entire pie.
Roll your pie dough about 1/8" thick.
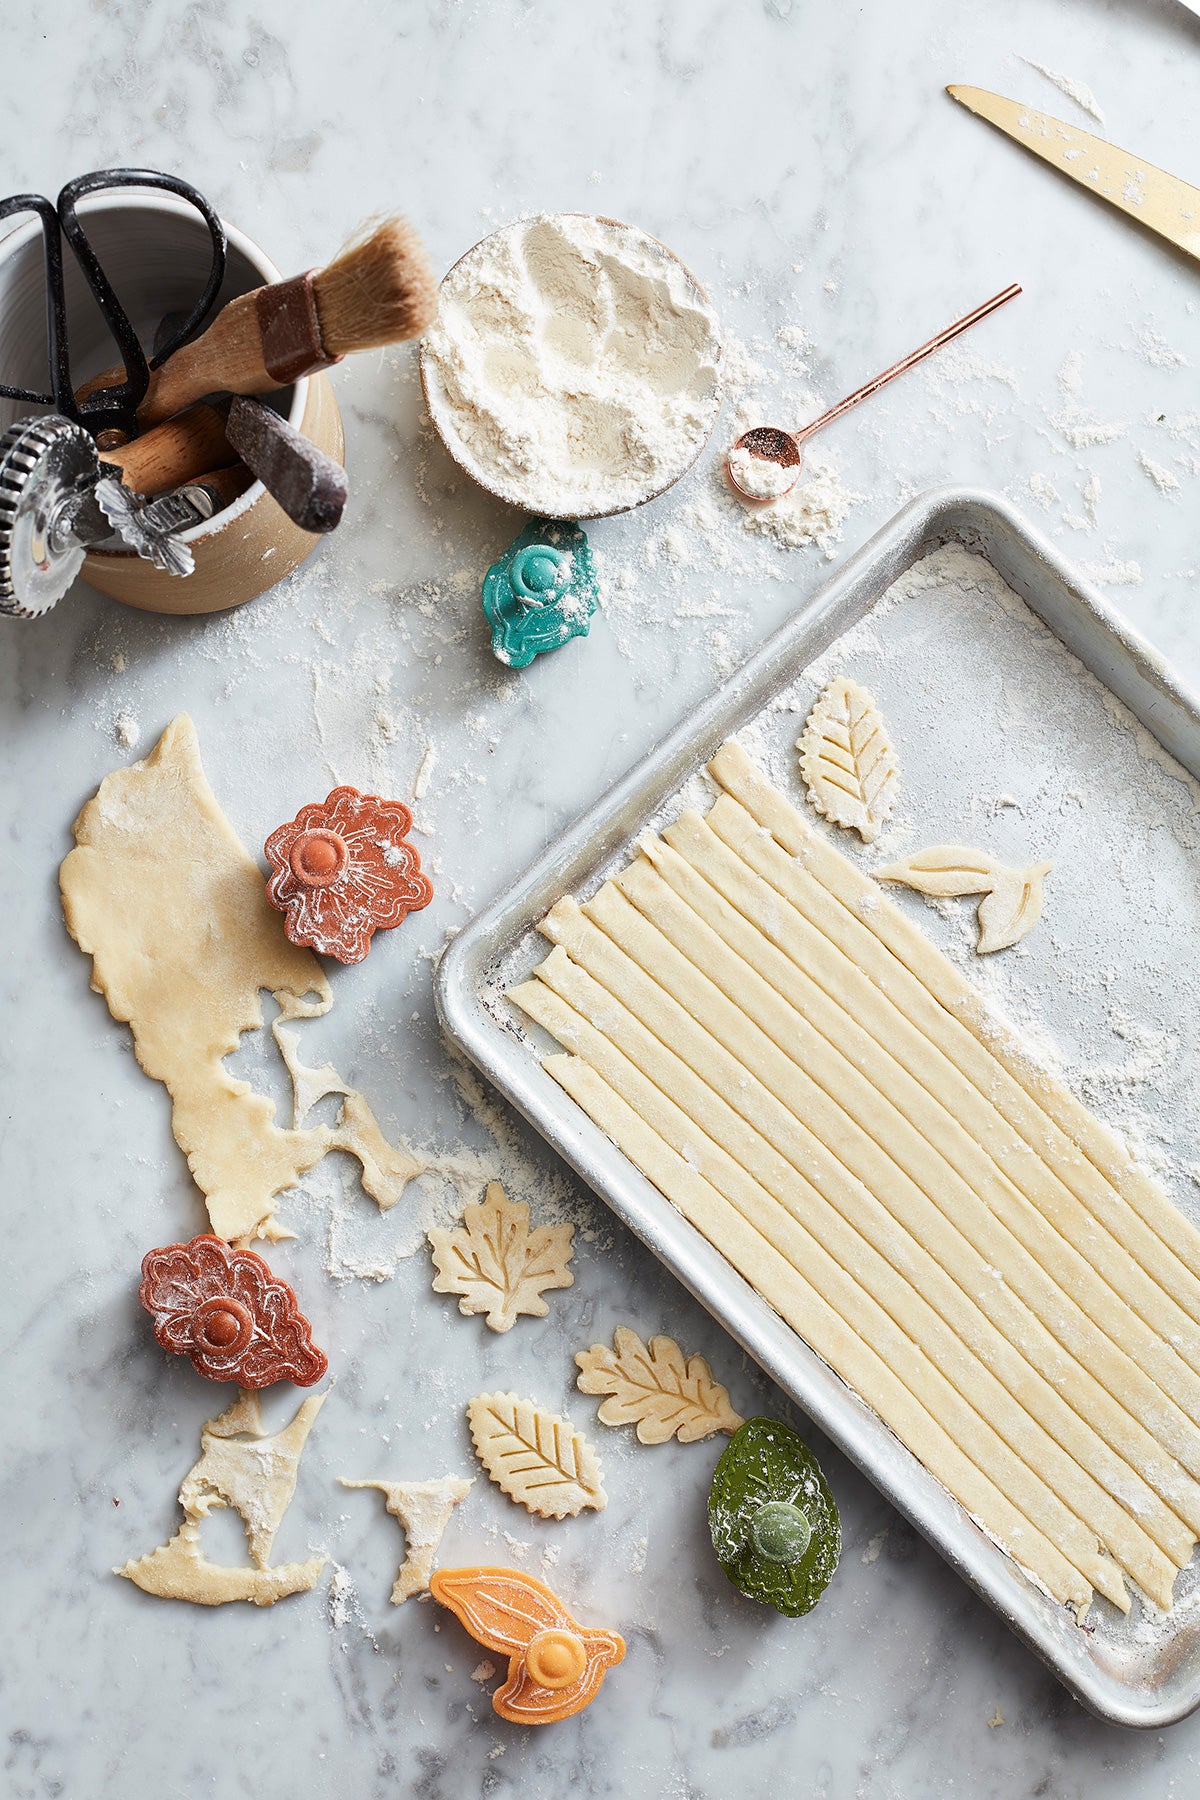
Ideally, you'll pull out your spring-loaded pie cutters. If you don't have these tools, you can get creative by making designs with cookie cutters and a paring knife instead.
Dip your cutters in flour and get ready to make some cutouts.
Use as many different kinds of cutters as you like; we think three or four kinds of leaves looks classy.
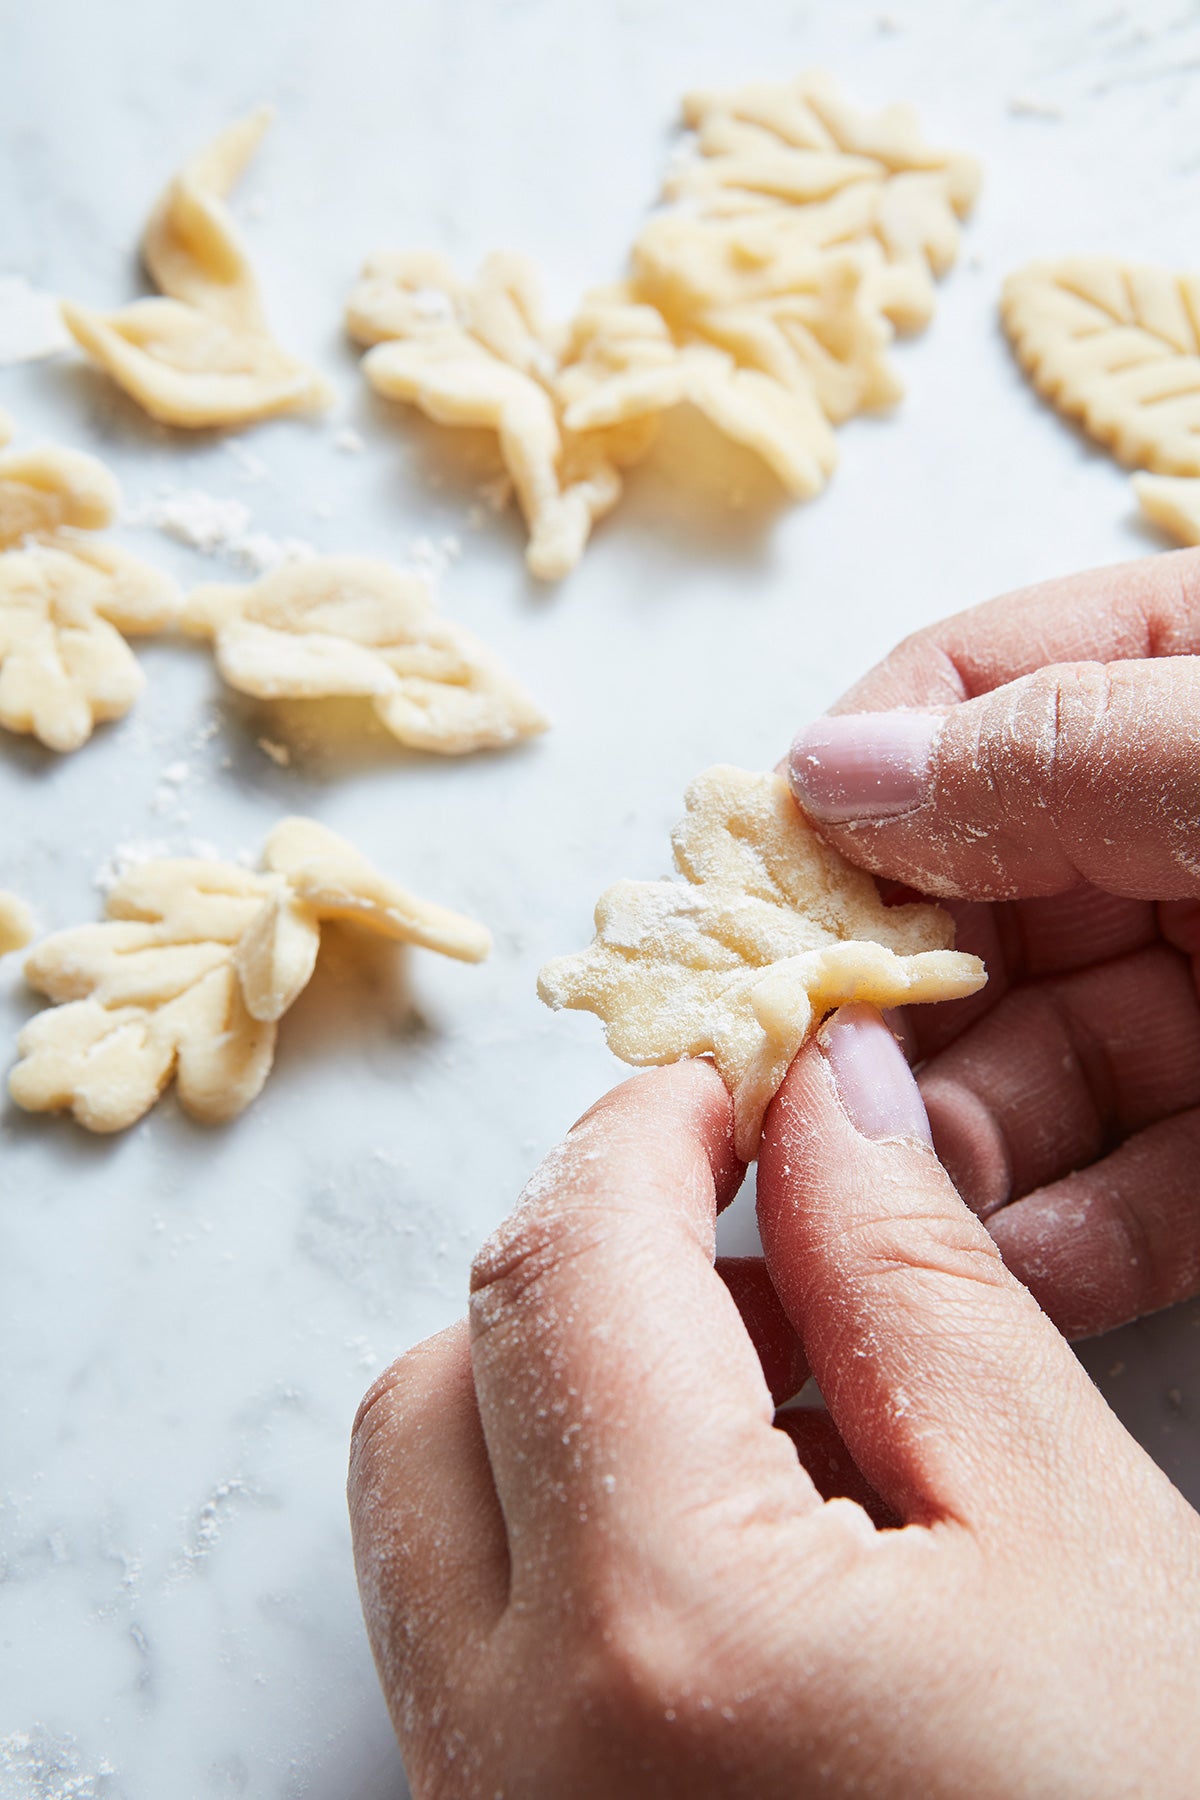
Tip from Judy: Place the leaves in an uneven, haphazard manner, similar to the way they may fall in nature. Mix up their direction and type, and reshape creases and curves to make them look more realistic.
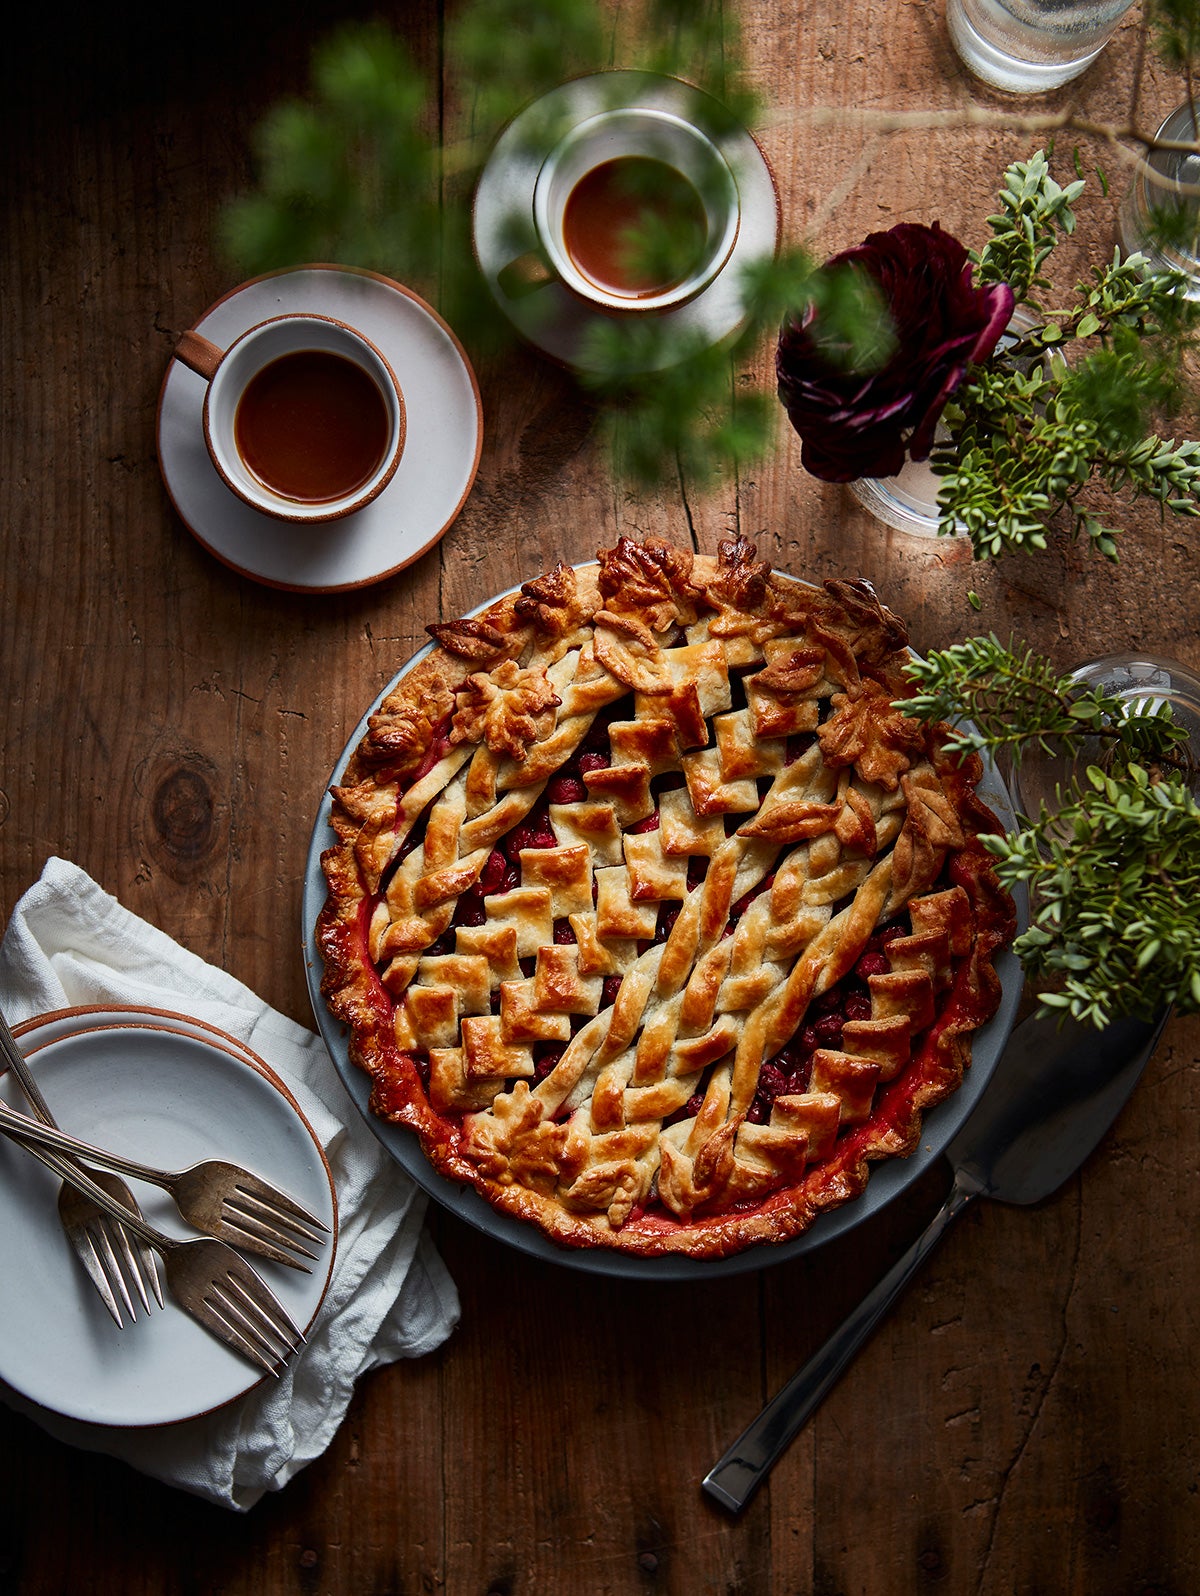
Now you've got all your parts and pieces, it's time to put them together and see the magic that happens.
Remove your braids, cable knits, herringbone squares, and/or leaves from the fridge and layer them on top of your filled pie. (Looking for delicious ways to fill your pie? Check out some of our favorite fruit and nut pie recipes.)
You can layer the designs nice and close together so that they're touching, making a solid top crust. Alternately, you can leave some space between each design to allow the pie to vent, like a lattice-work crust.
Think outside the (pie) box: You can even place designs like braids or leaves around the rim of the pan, making a fancy top edge.
Once your design is in place, brush the top with a bit of egg wash (1 egg mixed with 1 tablespoon of water) before baking. (This helps your pie turn deep golden brown in the oven.)
You've come this far — consider going the extra mile and sprinkle your designs with Sparkling White Sugar or turbinado sugar for a glitzy garnish.
All that's left to do is bake your beautiful pie! Follow the baking instructions included in your pie recipe, as they'll vary based on what kind of filling you made.
Keep an eye on your top crust towards the end of baking. The last thing you want is for all of those decorative pieces to become over-baked or worse, burned. You can always cover the top of your pie with a piece of foil if you notice the crust is getting dark. You're aiming for golden brown perfection.
Thanks to Judy Kim and her Rustic Milk Pie Crust, you have what you need to make a fantastic pie that people will remember forever.
Tell us what fancy and impressive recipes you're baking this season in the comments, below.
Photographs by Mark Weinberg; recipe and technique by Judy Kim.