The classic Cubano gets a pizza treatment
A Latin-inspired sourdough pizza from Bryan Ford


We're excited to welcome back award-winning bread baker and cookbook author Bryan Ford to help us expand our pizza-making prowess. Below, he offers insight on New York-style pizza and his recipe for a Cubano-inspired pie.
* * *
I’m not going to lie: I’m a much bigger fan of New York-style pizza than any other style. Why? Because of how deliciously crisp every bite is. Cooked at a lower and more consistent heat, New York-style pizza offers a balance of chewy, crispy crust along its edges, with a thin, pliable center. And best of all, you can very easily make it in your home oven. No need to stress about having a wood-fired oven or baking at extremely high heat, as is the case with some other types of pizza.
Now, let’s talk about flour types, and why it matters which flour you choose to make specific styles of pizza. You’re probably used to using all-purpose or bread flour in the kitchen, both of which are defined by their protein content percentages. This protein level is important because it gives you an idea of how the flour will perform in your baking. And, truthfully, you can make good pizza with most types of flour — if all you have on hand is all-purpose, don't let it stop you from pursuing your pizza dreams.
But protein content isn’t the only factor that defines flour — how it’s milled is also relevant. When wheat berries are ground so finely to the point that the flour meets the '00' standard (a European classification of flour – read more here), the quality of your dough and pizza is taken to another level.
And that’s certainly the case with this new King Arthur '00' Pizza Flour, milled to precise '00' standards. Made from a blend of hard and soft wheat, this flour gives you the exact balance of bite, chew, and elasticity that you’re looking for in New York and Neapolitan pizza styles.
For this New York-style pizza, I decided to draw on my heritage and infuse Latin American flavors into my recipe. Let me tell you, it’s hard to beat the flavor combo of a sanguich Cubano. (You don’t want to call it a sandwich, by the way. Sanguich or bust!) Taking inspiration from these wonderfully delicious sanguiches, the Pizza Cubano was born and is absolutely delicious on this New York-style pizza base.
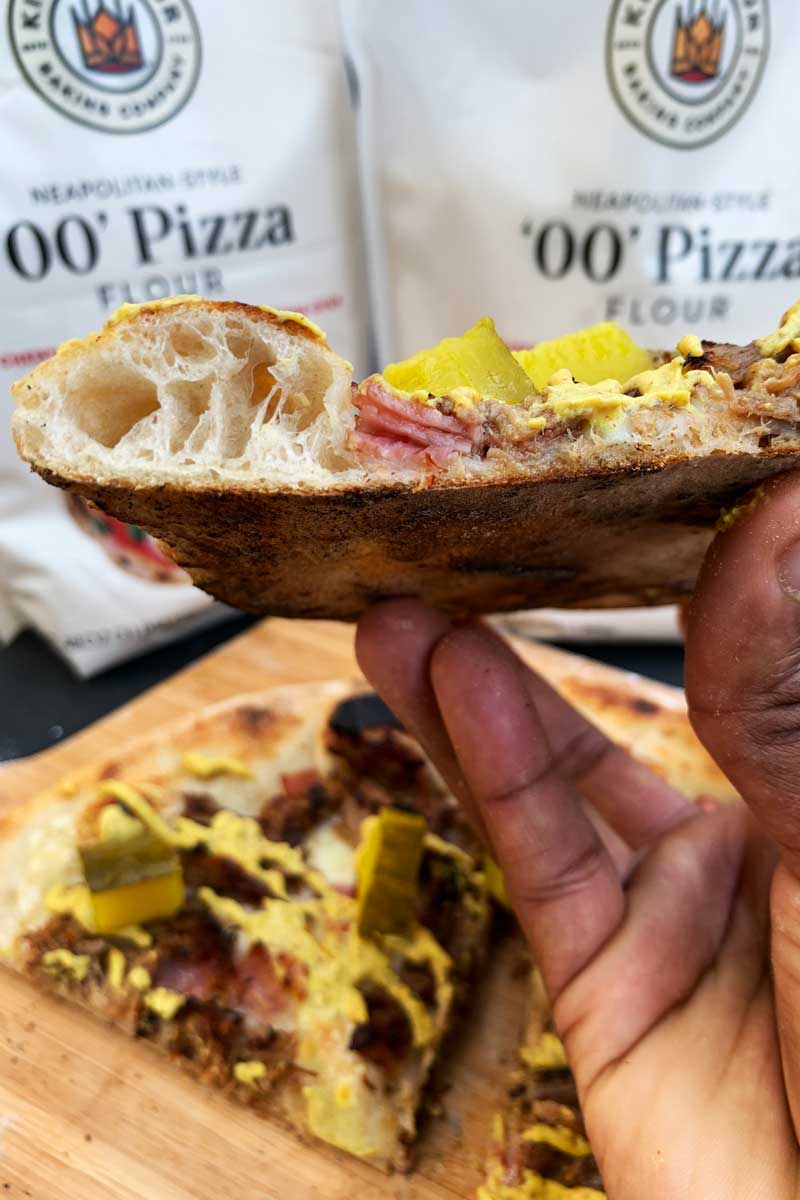
Forget about tomato sauce and cheese; instead this pizza is topped with pork, ham, dill pickle, and spicy mustard for an entirely different flavor experience. (If you don’t have time to roast a pork shoulder on your own, I’m sure your local grocery store sells some sort of roast pork!) Baking it up on a naturally leavened pizza base made with sourdough starter adds even deeper, more nuanced flavor.
Note: This recipe was developed using metric measurements, but if you want an approximation using American volume measurements, see the “tips” at the bottom of the recipe page.
For the levain:
For the dough:
For the toppings (per pizza):
*For instructions on slow-cooking a pork shoulder for this recipe, see "tips" at the bottom of the recipe page.
Baker's tip: The recipe yields enough dough for eight pizzas, so if you’re not planning to eat that many at once, you can parbake whatever topped pizzas you won’t immediately eat, then freeze them for future meals. Directions for this step are included at the bottom of the post and the recipe page.
You'll want to get started making your pizza at least one day before you plan to eat it, as the dough will need a minimum of 24 hours in the refrigerator.
Start by building the levain. Combine all the ingredients in a tall jar or medium bowl. Cover and leave in a warm place (72°F to 75°F) for 3 to 4 hours, or until doubled in size. You can use your levain immediately or refrigerate it up to 12 hours (or overnight) to use the next day.
In a large bowl or the bowl of your stand mixer combine the water and salt, stirring until the salt’s completely dissolved. Stir in 400g of the levain you built. You’ll have some left over; discard or save for another use. Slowly incorporate the flours; adding flour a bit at a time allows it to hydrate fully, shortening the rest (or autolyse) before you start kneading.
Once you’ve added all the flour, cover the bowl and let the dough rest for 10 minutes. Then get ready to knead, which you can do either by hand or in a stand mixer.
To knead by hand, place the dough on a clean unfloured work surface and use the palm of your hand to push it in a forward motion to the point that it’s almost tearing. Pull the dough back onto itself, rotate it, and push with your palm again. Once you get to the point where the dough is coming together and getting tight, you may need to let it rest for 5 minutes before continuing to work it. Remember that the key to making dough is to watch it. If the dough feels too dry or overly sticky, add more water or flour, a tablespoon at a time.
If you're using a stand mixer to knead, fit with the dough hook attachment and turn the mixer to medium-low speed.
You'll know your dough is ready once it’s smooth and bouncy. You should be able to squeeze it and pull it without any tearing. This will take about 20 minutes by hand, 10 minutes in a stand mixer.
Let the dough rest (bulk ferment) until nearly doubled, about 4 hours.
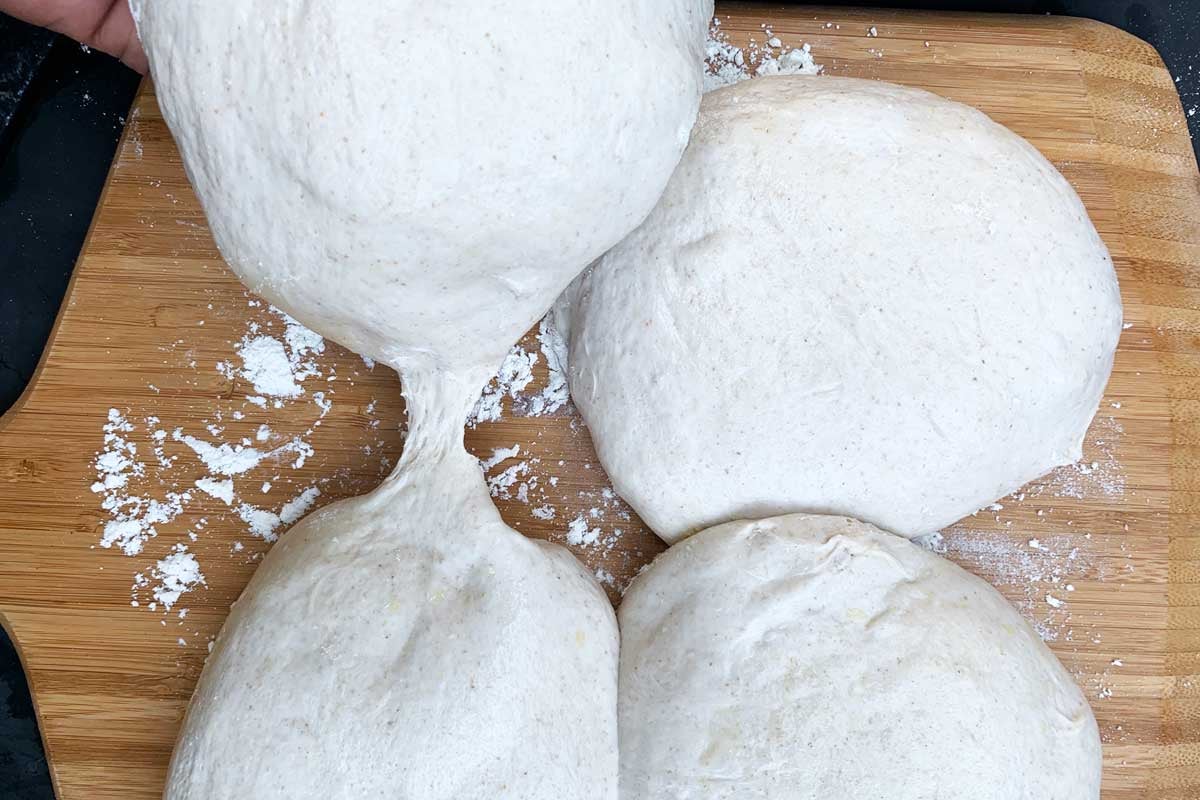
Divide the dough into eight pieces (225g to 235g each) and use your palms to round them into balls. Place the balls on a parchment paper-lined tray, baking sheet, or into a large lidded container. Cover the balls loosely and let them rest (proof) at room temperature for about an hour.
Wrap the balls of dough well with plastic, or put the lid on the container. Place the dough in the refrigerator for 24 to 48 hours.
About 2 hours before you’re ready to bake pizza, remove the dough from the refrigerator and leave it at room temperature.
About 1 hour before you’re ready to bake pizza, place a rack with a baking or pizza stone in the top third of your oven and preheat the oven to 500°F.
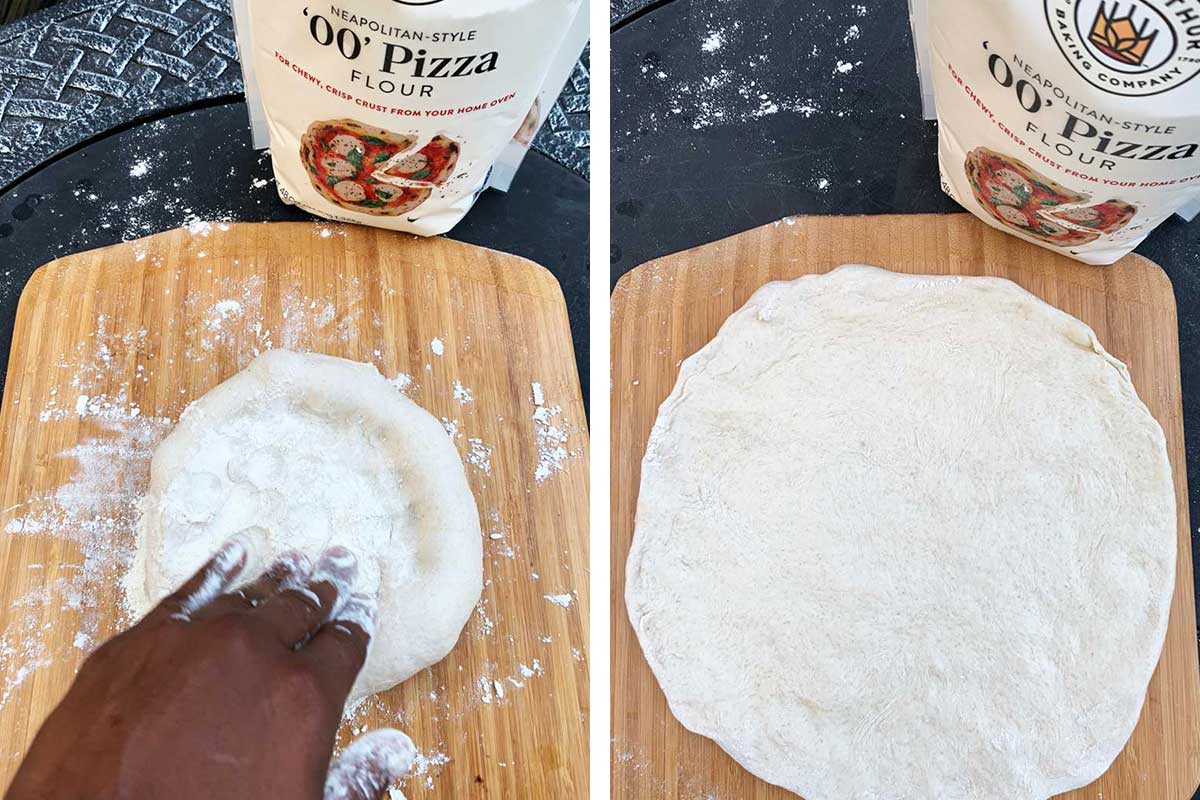
Flour your work surface liberally (semolina is a good choice here, but any flour will work) and place one of your dough rounds in the center. With your fingertips, push from the middle to the outer edge of the dough. There are various techniques you can use after you've done a preshaping on the work surface. The simplest is to take the dough and hold the edge with your fingertips. Gently press toward the outer edge and rotate in a circle, making sure you’re stretching it out as you go along, until the circle is 10” to 12” in diameter.
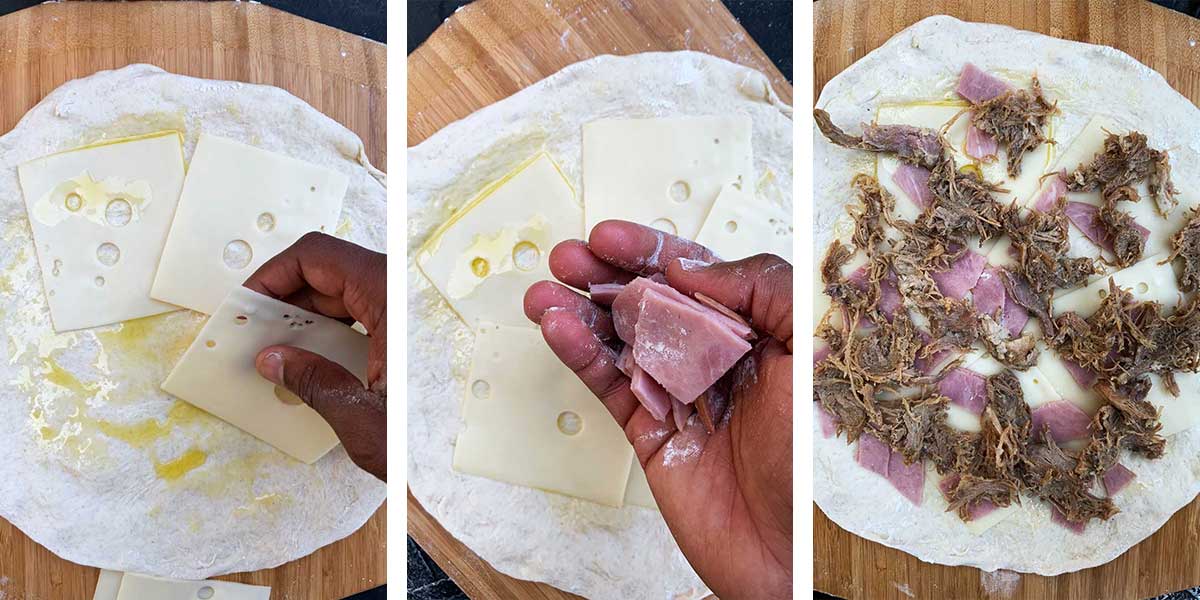
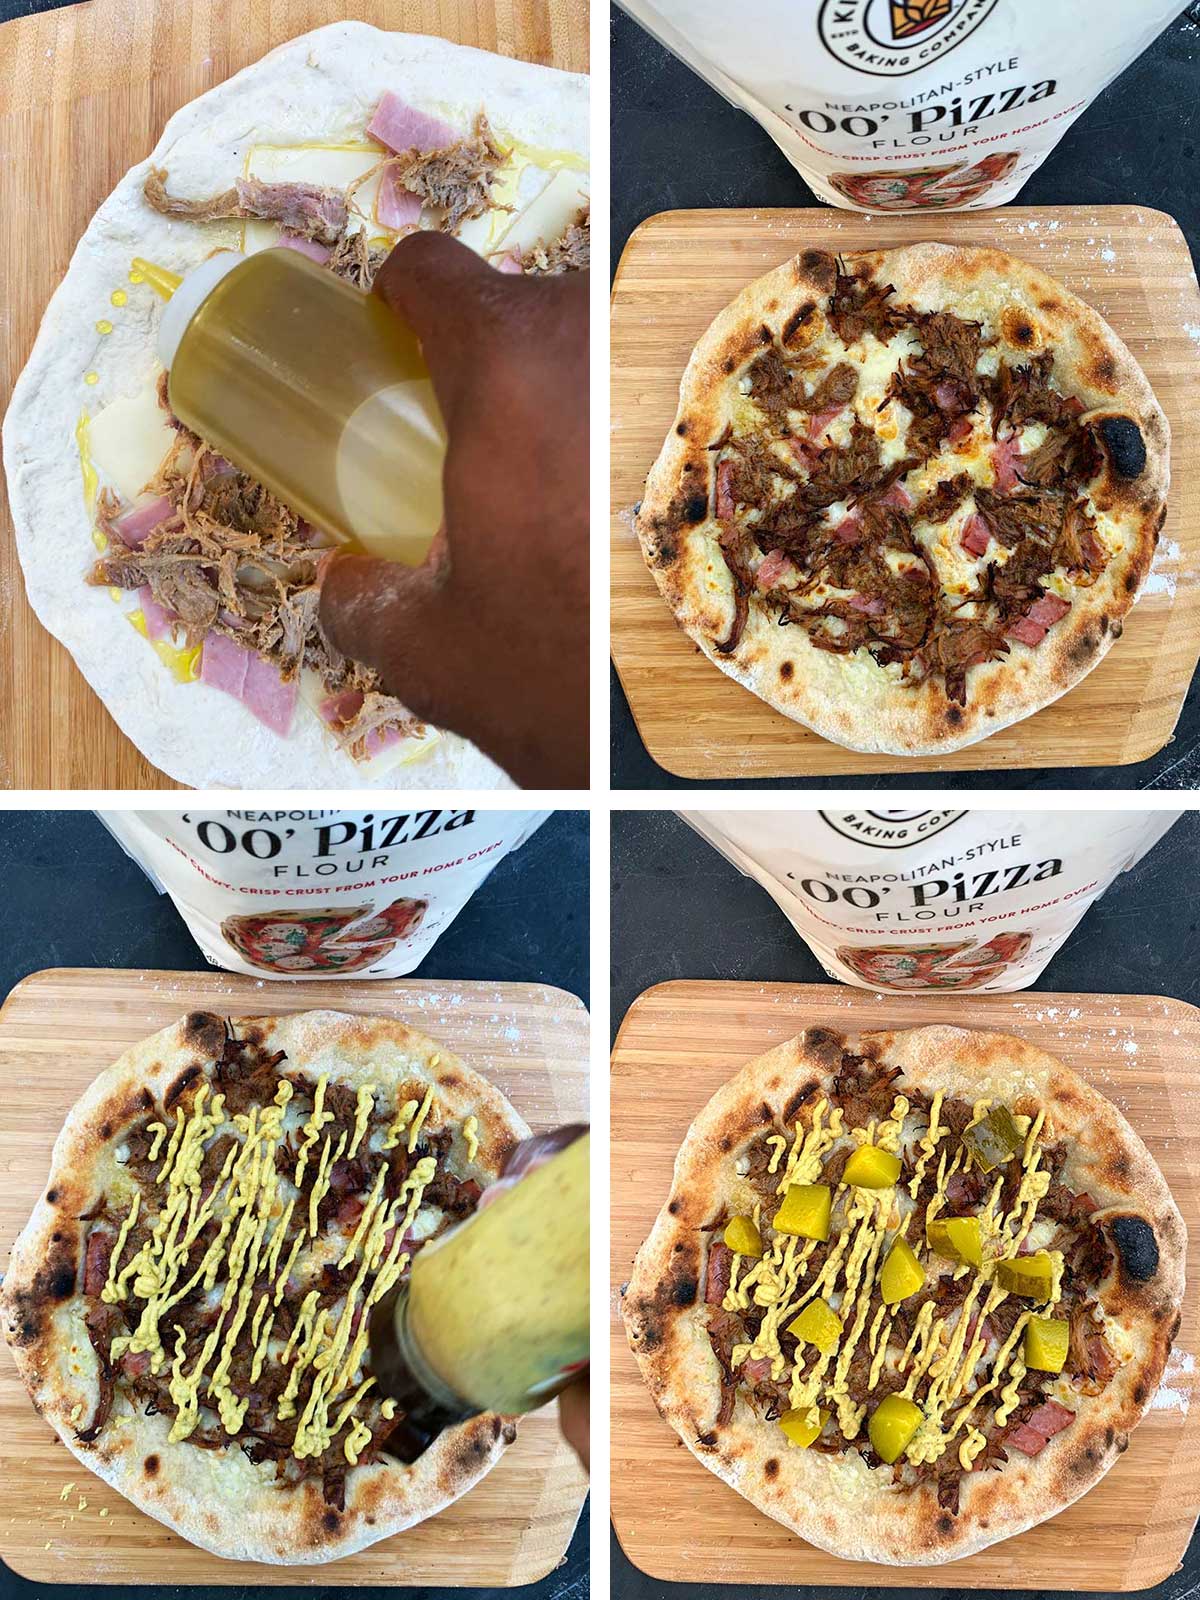
Place the shaped pizza onto a piece of parchment, or a semolina or cornmeal-dusted baking peel. Spread a thin layer of oil onto the center of the pizza, avoiding the outer crust, then add the cheese, followed by the pork and ham.
Alternately, you can spread the mustard on the pizza before it bakes, as opposed to drizzling it over the finished pizza as I've done here. To do so, simply spread a thin layer of mustard over the crust before adding the cheese, pork, and ham.
Drizzle a bit more oil on the pizza. Then transfer the pizza to the hot stone and bake until the crust is as dark as you like and the cheese is bubbling, 10 to 15 minutes. Remove the pizza from the oven, top with the pickles and a drizzle of mustard, and enjoy.
If you're planning to freeze your pizzas to enjoy later, parbake the topped pizzas for 5 minutes, remove them from the oven, and allow to cool completely before wrapping well and storing in the freezer.
If you're ready to start pizza-making, you can order our '00' Pizza Flour through our online shop, and maybe pick up a few other handy tools to make your pie. And for more recipes like this from Bryan, visit his blog Artisan Bryan.