


This is the story of a recipe involving cocoa, egg whites, great joy, frustration, and guilt.
Lots and lots of guilt.
Let me elaborate. I'm the person nominally in charge of the online recipe site here at King Arthur Flour. I say nominally, because there are lots of us from the test kitchen contributing recipes; and I'm simply the one who tries to keep them organized.
I've been shepherding recipes at King Arthur Flour for nearly 25 years; they feel like my children. And, like children, I love them all – often for very different reasons.
Almond Puff Loaf looks and tastes REALLY elegant and fancy, yet it's simplicity itself to make. English Muffin Toasting Bread, also an easy recipe, makes perfect toast. Famous Department Store Blueberry Muffins pique long-ago memories: the top-floor tea room at Jordan Marsh in downtown Boston, my little-girl self surrounded by "ladies who lunch."
Doughnut Muffins are a joyful surprise: hey, this muffin tastes EXACTLY like a cinnamon doughnut! Golden Butter Buns just plain make me happy.
And Fudge Brownies are DA BOMB – that's the only way to put it.
Bottom line, I care about our recipes. I care a lot. And thus, when I notice one going off the rails, I feel guilty. How many readers have had a bad experience? How has that affected their trust in King Arthur Flour as a baking resource?

Flourless Fudge Cookies – what's your problem?
Elisabeth, one of our baker specialists, spends a lot of time on the phone with all of you out there. If you call our hotline often, you've probably spoken with her. Elisabeth buttonholed me the other day, and said, "We need to do something about those Flourless Fudge Cookies. People seem to be having trouble."
A discussion, and some followup research, reveals that indeed, despite mostly 5-star reviews, a significant body of bakers isn't happy with the recipe.
"Horrible, horrible, sticky, bitter cookies," says Lolly from North Carolina. "This might be the only 'failure' I've ever had with a KAF recipe," adds Jess from South Jersey.
On the other hand, Toni writes, "I love this fudge cookie!" And Jenphifer01 adds her approval, writing, "These are quite possibly the best cookies I have ever had, much less made myself."
What gives? How can a cookie be "the best" and a "failure" – all at once?
Clearly, I needed to put this recipe to the test.
Which I did – for two solid days. And I'm happy to report, I've learned a lot about this particular recipe. Let's take it from the top, and see what makes these cookies a raving success for most of you – and what causes them to crash and burn for others.
Let's start with the recipe ingredients, which thankfully are pretty simple:
2 1/4 cups (255g) confectioners' sugar
1/4 teaspoon salt
1 teaspoon espresso powder, optional but good
1 cup (85g) unsweetened cocoa, Dutch-process or natural
3 large (106g) egg whites
2 teaspoons vanilla extract
2 cups (227g to 340g) chocolate chips, chopped nuts, and/or chopped dried fruit, optional
Notice I've added weights here; using a scale will absolutely help you ensure success with this recipe.

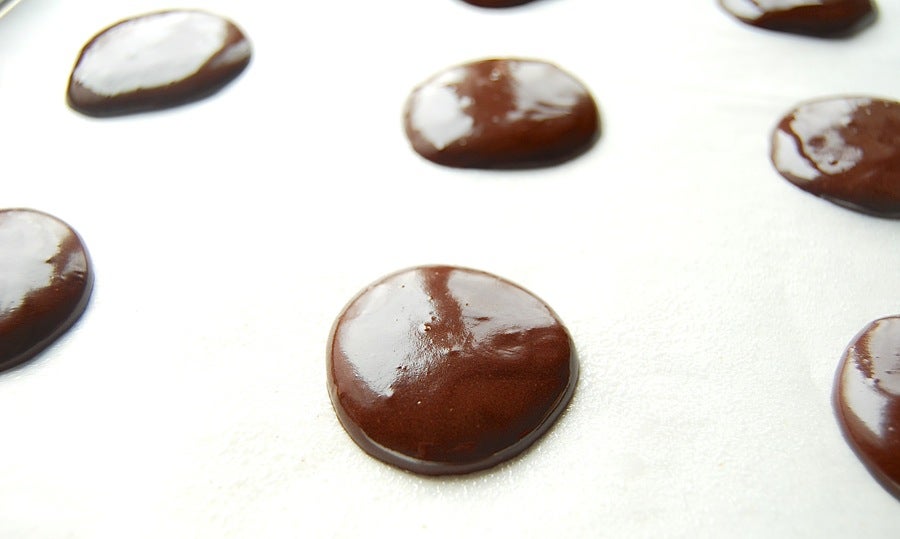
Use large eggs; or extra-large, in a pinch. Using medium or jumbo eggs will yield batter that's either too dry, or too liquid. If you have a scale, 106g of egg whites is your goal; if not, a scant 1/2 cup of whites is what you're aiming for, as shown in the photo above.

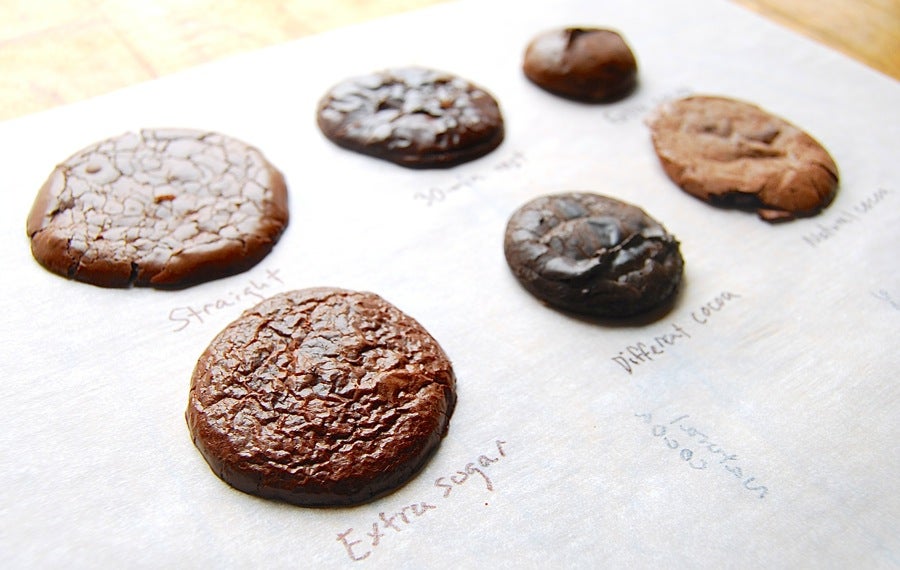
For testing purposes, I compared King Arthur's Triple Cocoa Blend (a combination of natural and Dutch-process cocoa) with Ghirardelli natural, and Hershey's Special Dark (again, a blend of natural and Dutch-process cocoas).
Each cookie had its own distinct flavor. I preferred the King Arthur cookie (and not just because I work here!). I found it chocolate-y, without being bitter or astringent. The natural-cocoa cookie tasted flat and too sweet to me; the Hershey's, just a bit "off."
If you use Hershey's cocoa, be aware that your batter will be thicker than what you'll see pictured below; and the resulting cookies will be mounded, rather than flat/smooth.
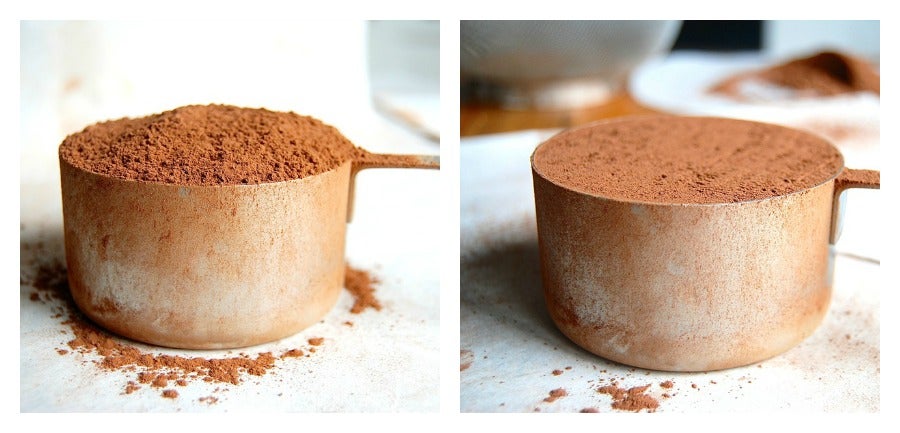
See the cup of cocoa on the left? It's pretty much a cup, right? Well, "pretty much" doesn't cut it in this finicky recipe. Spoon cocoa into your DRY measuring cup (please don't use a glass liquid measuring cup; it's not accurate enough for this use). Level off any excess off with a table knife. You should have 85g of cocoa.
Measure confectioners' sugar the same way. You need 255g; that's 2 1/4 dry measuring cups.
Or, better yet – use a scale. You're right – I'm going to harp on this scale thing till the cows come home!
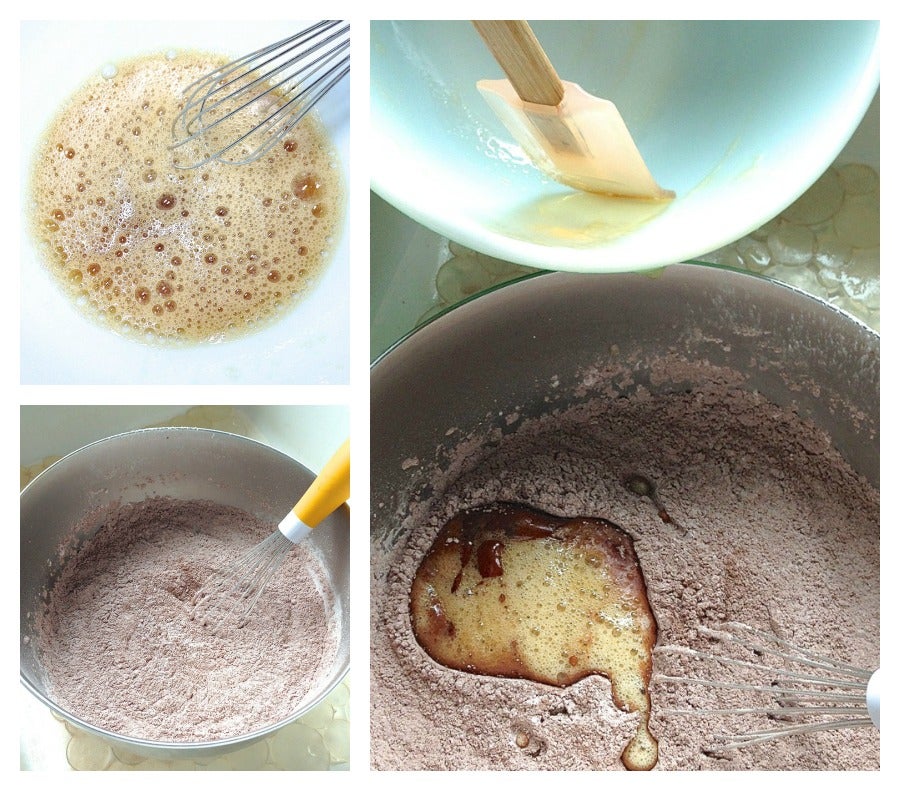
Whisking the egg whites separately breaks them down a bit, making it easier to combine them with the cocoa and sugar.
I find it helps to work with the dry ingredients in my sink; cocoa and confectioners' sugar are notoriously "poofy," and will coat any work surface with a fine, brown and white dust as you whisk. Placing the bowl in the sink helps with cleanup; be sure to swivel your faucet out of harm's way first.
Scrape every last bit of liquid ingredients out of the bowl; or, instead of pouring the liquid into the dry, add the dry to the liquid (but watch out for a major "dust storm"!).
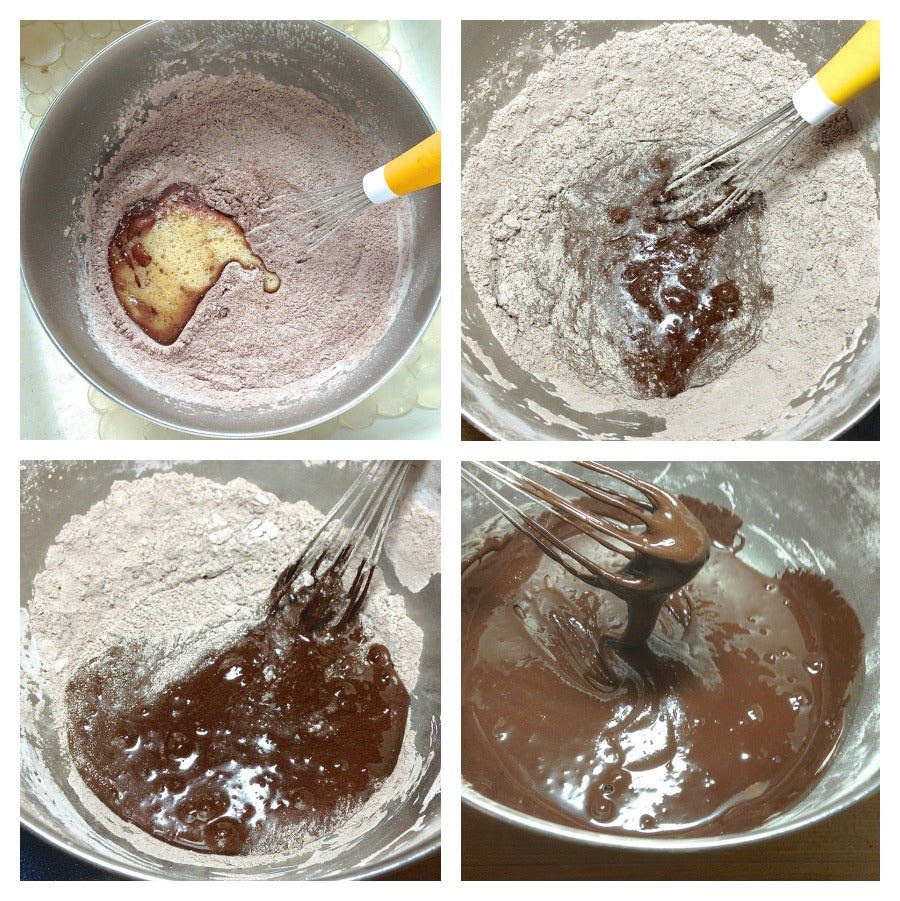
As you stir, you'll think, "This isn't happening. There's not enough liquid." RESIST the urge to add more egg whites, milk, water, or anything else. The mixture will seem terminally dry – until suddenly, within a few strokes, it becomes a thick, syrupy batter.
If you've stirred and stirred and the batter's still thick, drizzle in additional beaten egg white sparingly, until it becomes syrupy, as pictured above.
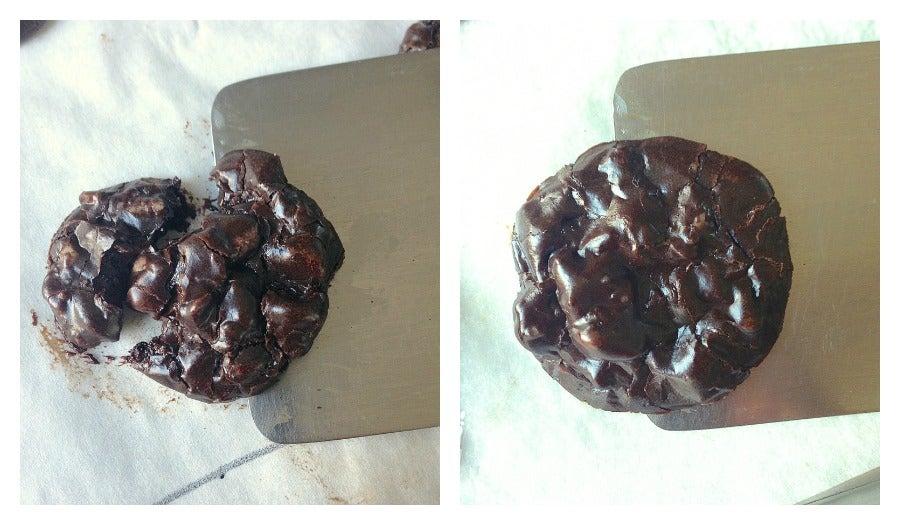
This is imperative. Use shortening or non-stick vegetable oil spray (not butter) to grease your pan or, yes, your parchment.
The cookie pictured at left, above, was baked on ungreased parchment. I was unable to remove it from the parchment in one piece. At right, the parchment was greased; the baked cookie slid right off.
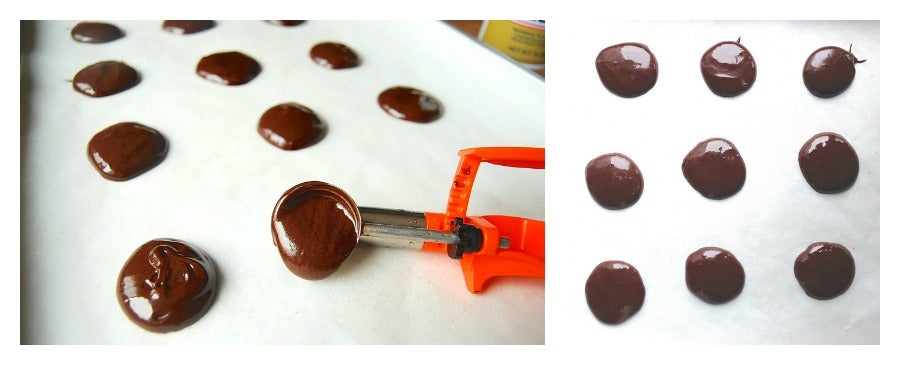
I'm using a teaspoon cookie scoop here to portion out 1 3/4" to 2" circles of batter. This will yield thin, delicate 2" cookies. I find the larger these cookies are, the harder they are to handle, store, and transport.
Exception: If you add the optional chips/nuts/fruit, making larger cookies is fine; they won't be fragile.
When you first deposit the batter onto the pan, it'll be very sticky. After 30 minutes, each circle of batter will have developed a thin crust; you'll be able to very gently poke it without it sticking to your finger.
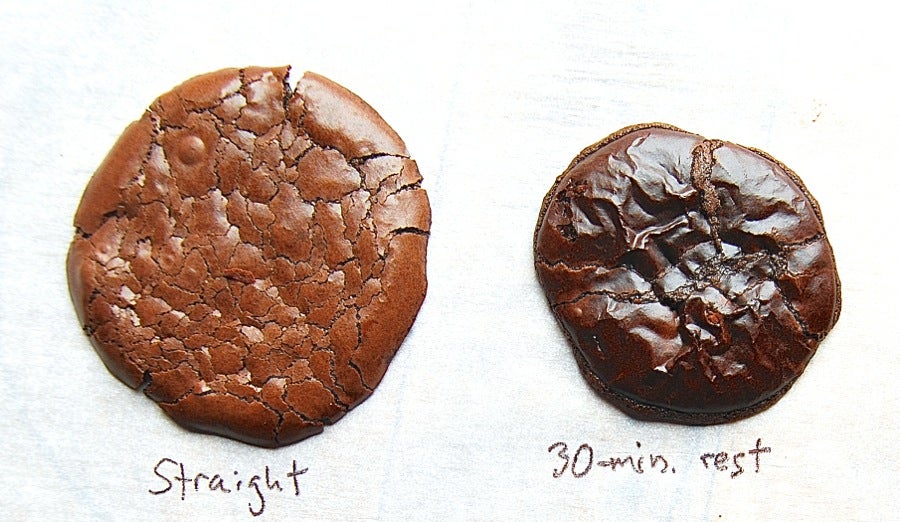
Why the rest? Because these cookies spread as they bake, and the rest helps temper that spread. While cookies baked without resting may spread so much they're too fragile to handle, "rested" cookies hold their shape a bit more.
You'll notice the rested cookies also bake up darker. This is because the cocoa has had a chance to become fully hydrated – which is also partly why the cookies spread less. While both cookies taste the same, I prefer the look of the darker one.
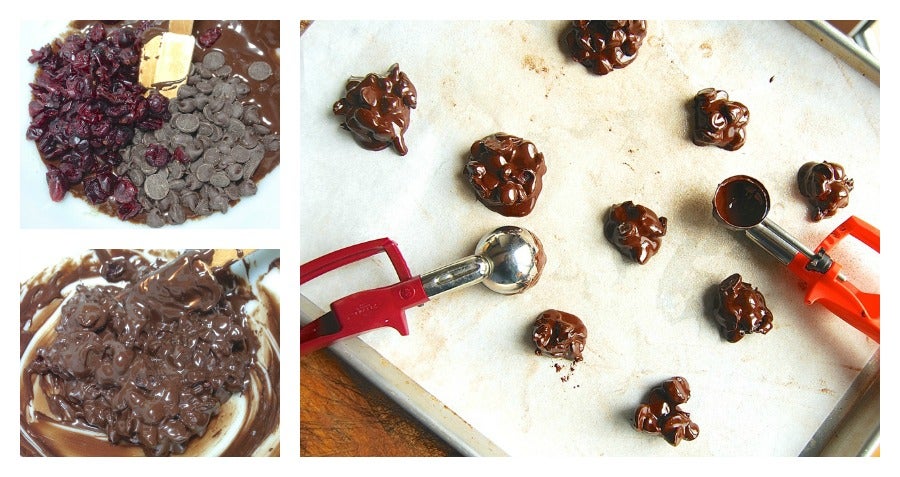
If you simply don't want to deal with potentially fragile cookies – say, you're taking these to a potluck or church supper – opt for the add-ins.
I've used chocolate chips and dried cranberries here, but toasted nuts also pair well with chocolate, of course. These extra ingredients add structure, and also yield a very different cookie: one whose flavor goes beyond chocolate, and its texture from delicate to sturdy/moist/chewy.
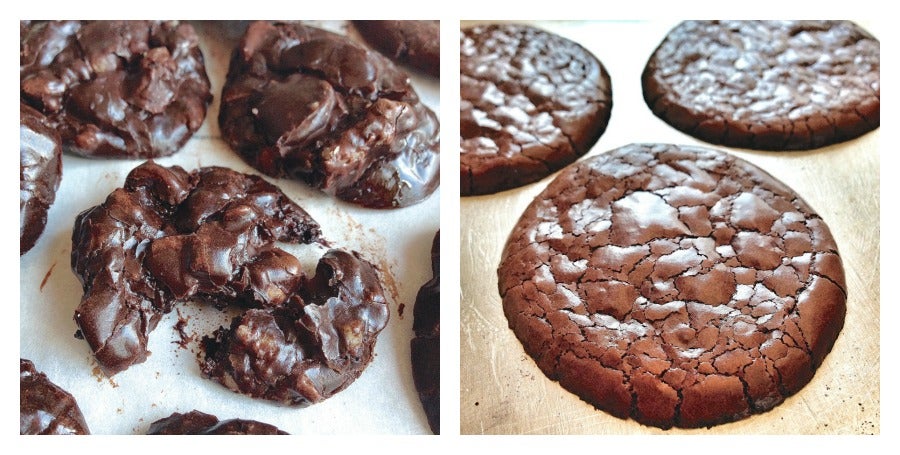
Small cookies without add-ins will be perfectly baked at 7 minutes. Larger cookies, with nuts/chips/fruit, will take 10 minutes. These cookies are supposed to be very, very moist – don't be tempted to leave them in the oven to "firm them up."
The "perfect" cookie will develop a shiny, crackly top surface, like the one pictured above. Too much sugar, too much cocoa, or not enough/too much baking will all tone down this effect. So if you achieve it – congratulations, you've baked the perfect Flourless Fudge Cookie!
Well, as with any child, sometimes you need to correct behavior; and with that in mind, I've tweaked some of the recipe's directions to clarify them fully.
But in the end, it's often simply a matter of managing expectations.
Yes, these cookies are moist and chewy. For some, this translates to "not baked enough." For others, to "decadently fudgy." And yes, these cookies are VERY chocolate-y. "Bitter" – or "Best ever"? That's for you to decide.
And finally, like any child that you love – it was totally worth the time it took to bring this recipe to its full potential.
Yes, test baking can be a dirty job...
...but someone's gotta do it! As we say here at King Arthur Flour, "We make the mistakes so you don't have to."
Please bake, rate, and review our recipe for Flourless Fudge Cookies.
