


I stopped buying cultured butter — now I make my own
It's easy, affordable, and of course, delicious.

Date
March 19, 2026


A warm slice of toast with a swipe of butter is one of life’s simplest pleasures. And it’s especially good when those components are a homemade slice of bread and high-quality butter. You may be thinking about blocks of pricey European-style butter from the grocery store, but that’s where homemade cultured butter steps in. All it takes is a quart of heavy cream, half a cup of yogurt, and a day or two for fermenting and chilling.
Compared to regular butter, cultured butter is more flavorful due to fermentation. But while it’s fermented, it doesn’t taste funky. Rather, its butter flavor is deeper, richer, and nuttier. A more buttery butter, if you will. It’s often more expensive at the store – $8 for half a pound at my local supermarket! But making at home is cheaper and super easy.
If you’ve ever made butter from scratch, the process to make cultured butter is similar; you just need to allow the heavy cream to ferment before mixing.
You’ll need 1 quart (approximately 900g) of heavy cream and 1/2 cup (113g) of unsweetened whole milk yogurt. Add the two ingredients to an airtight container and whisk to thoroughly combine, cover, and leave at room temperature overnight, and up to 24 hours. The mixture will thicken and develop a tangier smell. This is the fermentation that gives cultured butter its signature rich flavor.
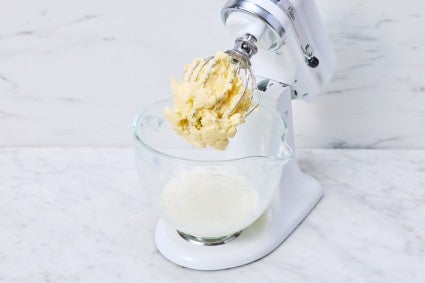
Next, refrigerate the cream mixture for several hours, or overnight, to thoroughly chill before mixing. Pour into the bowl of a stand mixer with the whisk attachment and mix on medium speed for 4 to 5 minutes, until the fat solids and buttermilk completely separate; the solids will look like curd-like lumps, while the buttermilk will be a cloudy liquid sloshing around in the bowl. This can also be done with a handmixer, though it will take a few more minutes.
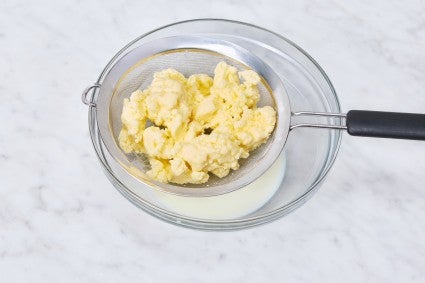
Prepare a cheesecloth-lined strainer over a large bowl. Pour in the mixture to fully separate the butter and buttermilk, pressing to drain as much liquid as possible. Reserve the cultured buttermilk for another use (like pancakes!) and rinse the butter under cold water until the water runs clean.
Pat the butter dry, then salt to taste. To store, pack the cultured butter into an airtight container, and refrigerate for up to 1 month or freeze for longer storage.
We recommend spreading cultured butter onto your baked goods (like pancakes, biscuits, and slices of toast). The nuances of cultured butter are often lost when baked with (for example, the chocolate in brownies would overpower the butter’s flavor). Plus, its butterfat content is higher than conventional butter, which could alter the result of your recipe.
Cover photo by Patrick Marinello; food styling by Yekaterina Boytsova.
