




Pumpkin-Shaped Pumpkin Bread: The holiday centerpiece you can eat
Martin shows us how to turn pumpkin challah dough into a beautiful pumpkin. Then, he tops it with whimsical leaves and acorns made from decorative "dead" dough, a non-yeasted moldable dough made to hold its shape.
- Hey y'all, it's Martin. I'm here in the studio today, and I'm celebrating the season with a nice big loaf for your gathering table. Today we're doing something a little different. I've made this Pumpkin Challah dough ahead of time, and I'm gonna show you how to create these decorative designs using what I call dead dough or a decorative dough. I've made leaves, I've made acorns, I've got some tendrils on there. We're doing it up here holiday style. It's pumpkin season. Let's make a pumpkin bread.
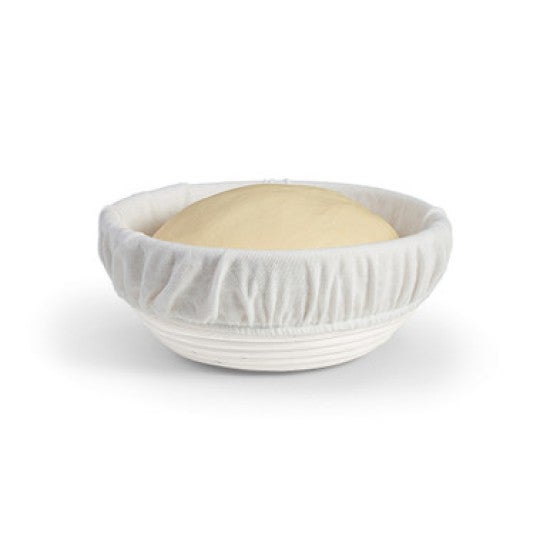
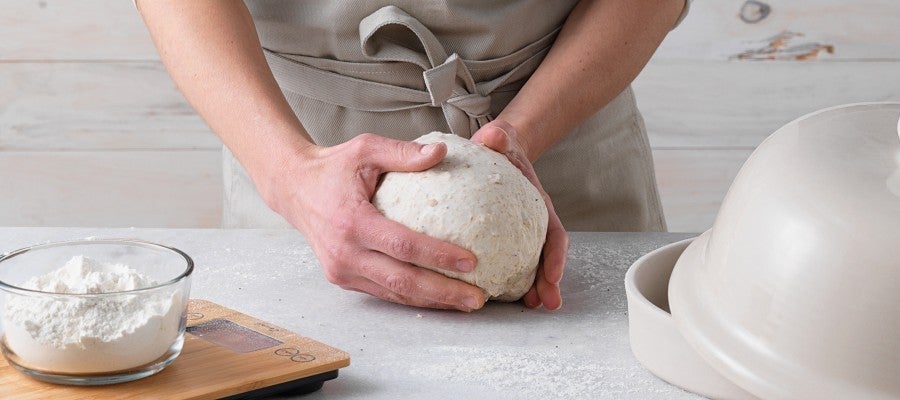
While I'm following King Arthur's Pumpkin Challah recipe, I want you to see this more as a method that will work with sourdough loaves, challahs, and many other bread recipes. Let's fast-forward through the mix steps, but if you want a full walkthrough, we have a great video on challah that we'll link to. Follow your recipe of choice through bulk fermentation and shaping, for Pumpkin Challah, that's step six. All right, so we're back. This dough had about two and a half hours. It's happy. It's definitely doubled, and it's ready to come out of this container. In the regular Pumpkin Challah recipe, you divide this into two even pieces. But in this case, I'm gonna leave it whole. I'm gonna leave it with just one dough. I want to make a nice big pumpkin, and so I'm not gonna divide it. If you wanted to divide it, though, you could, you could make some smaller ones, and I'm going to give it just a regular old boule shape. You've seen me do this a hundred times, maybe even more. So from the outside, I'm gonna stretch and just press to the middle, working my way around the loaf, pressing with the force required to sort of seal it in place. And then I might just give it a couple of rotations on the bench, nice and sort of tight round, and that's good. So that's the beginning of our beautiful pumpkin loaf. Smells good. I can actually smell the cinnamon in there. So here I have a banneton, and I've got a liner in it. For those of you who are out there making beautiful sourdough loaves, you recognize what this is. If you don't have one at your house, you could use a bowl of similar size and shape and then put a nice tea towel inside of it. This is about maybe 9, 10" across and maybe 5" or so deep. So something like that. Doesn't have to be perfect. You just need something with some linen or some cloth in it that you can put this loaf into as a way for it to sort of rise and hold its shape. So I've got that. Mine is already a little bit floury from use. I might add just a little bit more additional flour, just a little bit. And I'll just make sure that it's sort of even into the basket. And then I'm gonna put a cover on it. If you don't have a cover like this, you could use a plastic bag or something like that. You do want to make sure that it doesn't dry out during proofing. So protect it from your sort of ambient conditions. I'm gonna put this in a warm spot to rise until it crests the top of this basket. Should be 60, maybe even up to 90 minutes, depending on what your house is like. So put it in a warm, comfortable spot to rise for 60 minutes at least, maybe even up to 90, okay? Before we bake it, we want to make sure that it feels somewhat marshmallowy in its interior. Towards the end of rise, you're gonna want to preheat your oven 350 degrees Fahrenheit with a rack set in the middle of the oven, okay? So 350 Fahrenheit, get that thing preheated and ready to bake as you begin to see this thing getting close to being ready. So when we come back, I'm gonna show you how to make the pumpkin shape. I'm gonna go put this in a warm spot to rise, and I'll see you in just a minute. It's been a solid 90 minutes. It may have even been a little bit longer than that. There's really no downside case for making sure that this loaf is really well-proofed. So again, I'm in a 10" banneton here, and this has definitely crested the height of it. When I press on it with my finger, it feels marshmallowy. It's a well-risen loaf. Challah is one of those breads that you can really push the proof on, and it's really to the betterment of the eating quality. You want it to be sort of light, right? So beautiful loaf, well-proofed, ready for the next phase. Let me show you what we're gonna do. First things first, I've got some kitchen twine, just regular cotton kitchen twine, same stuff that you would truss a bird with or something like that. And I'm gonna cut some pieces, a couple feet long, 24", 26", somewhere in that range. If you're making a smaller loaf, you don't need to have a string that's that long. What I would tell you, though, is that you don't want to be in a situation where you don't have enough string, right? So cut a little bit extra length. You can always take the excess off after you tie the knot, and that'll make sense in a second here. So four pieces of string, 24, 26" long, something like that. So now what I'm gonna do is I'm gonna place these strings, and what I'm gonna do is just sort of go with like an east-west axis first and then north-south. And I'm forming an intersection right at the center of my sheet tray, okay? And then the next one I'll go with is crosswise. What is that? Northwest to southeast, something like that. I'm just basically subdividing this so that I've got eight segments to my pumpkin. That looks good. It's ready to go. If your loaf is tacky at all, you may want to give a little bit of flour. Mine doesn't really feel tacky, but if for some reason when it comes out of the basket and doesn't land exactly where I want it, if I've got a little bit of flour, I'll be able to move that thing. If I don't have a little bit of flour, it may adhere, and you might find yourself a little bit sad. I'm gonna turn it out onto the sheet tray, and I'm gonna try and place it so that the center of the loaf lands right on the intersection of my strings. Doesn't have to be perfect. Pumpkins in nature are not perfectly symmetrical. They just don't work like that. So now what I'm gonna do is I'm just gonna bring the strings up, and I'm gonna tie 'em at the center. Now, when I first started messing with this as a shape, the first ones that I did, I sort of tightened the string to such a degree that it was sort of cinching the loaf in a way before it even went in the oven. And what I wasn't accounting for was the fact that the loaf is really gonna grow in size, right? So if I just tighten them against the side walls of the loaf, but not to such a degree that they're sort of cinching inward, I found that to be the sweet spot. As you sort of make your way through your loaf in your house and your hands and however it is that you want to do it, you may find that they need more or less of that sort of tensioning. But in general, I have found that they do a little bit better when they're not too constricted. So that looks good to me. If you want to try and gather these loose ends, you may. I haven't had any problems with them. Sometimes I have enough length that I can sort of tie them. Sometimes I don't. It doesn't really matter. So looks good. Happy loaf. Now what I'm gonna do is I'm gonna give it a little bit of a spritz. Traditionally, we would egg wash challah. I don't do the egg wash because I'm afraid that the egg wash might cause the strings to stick in a way that when they go to peel off, they might make the surface not look that great. They still will stick a little bit in this method, but it's not quite as much, I think, as if I had put egg wash on here. We're gonna get this into our preheated oven. Now, in the original recipe, the two smaller loaves baked for 35 to 40 minutes. I have found myself with this loaf going a little bit further, up to even 45 minutes. Keep an eye on it and bake to your desired level of color. You can also check the internal temperature if you're someone who has a probe thermometer, and you want to look for about 190 or right around there. But mostly what I want you to do is I want you to bake to the level of color that looks beautiful. Give it a full, beautiful, golden brown and delicious, and you'll have a pumpkin that will look resplendent on any holiday table. So let's get this in the oven. Okay, so now we get to the fun part. So what I'm gonna do is I'm gonna take some whole rye flour and also some all-purpose, and then I'm gonna hydrate it with a little bit of simple syrup. For the simple syrup, all I'm gonna do is take equal parts sugar and water. I'm gonna bring it up to a simmer. I'll stir to combine, and then I'll set it aside to cool while I get the rest of my ingredients together. Today, for the amount of flours that I have, the quantity of simple syrup is 60 grams of water and 60 grams of sugar. So I'm gonna start with my rye flour. This is whole rye, and I'm gonna use 100 grams. You could also use medium rye, you could use buckwheat, you could use spelt, you could use any variety of whole grain. The reason that I'm using this is because it adds some texture. It has this sort of beautiful color to it, but it also has some bran in there. Rye is very extensible, and so it works well in this medium. And then what I'm gonna do is I'm gonna add a little bit of all-purpose because the all-purpose will have a little bit more elasticity. It'll make it a little bit less breakable as I'm working with it. It's almost like the all-purpose is adding some stretchiness to my dough. So 100 grams of rye and then 60 grams of all-purpose. And then my simple syrup, 88 grams. You might have a little bit extra, that's okay. You can put it in your sweet tea or maybe a cocktail, and then just stir that together. And this is gonna be a very stiff medium. If it's wet or soft and too tacky, what happens in the oven when we bake it is that it will change its shape. It will sort of ripple and even bubble in places. And what we want is for these pieces that we're gonna make to sort of hold their form. Just sort of getting it in there, and then at some point I'll switch to my hands or maybe a flexible scraper. Let's see how this feels. Mine feels just a little bit stiff, so I'm gonna go back. I've got a little bit extra syrup here. If you're out of syrup, for whatever reason, you can use a little bit of water. I'm just add just maybe like a teaspoon, just a little bit, just to make sure that I have enough hydration in here to make this firm dough, maybe a little bit like Play-Doh, I guess. So you're just gonna get this together, and then I'm gonna put it out on the bench and just knead it for just a second just to make sure that it's homogenous. So very firm dough, and that's exactly what we want. It's not gonna completely smooth out. This is rye. It's gonna break real easy. So just kneading it for a second to develop just a little bit of gluten and get it homogenous. It looks good. I'm gonna roll it down just a little bit. Okay, that looks nice. The shape you leave it in doesn't really matter. I just want to make sure that it's homogenous and smooth. And then this is very important. While we let that rest, while we get our tools and things set up to go to the next step, what we want to make sure is that we cover it. We want to protect it. So put it in a piece of plastic and press all the air out of the bag, roll it up. And I'm gonna set that aside for a minute while I get the rest of my tools together. When we come back, I'm gonna make some beautiful leaves. I'll make a pumpkin stem. We'll make some little tendrils. We're gonna get all of our decorations ready for our beautiful Pumpkin Challah decorative centerpiece. So we'll be right back. So we've made our decorative dough. Come in here, and I want to show you what we're gonna make. For the top of this loaf, what I thought would be nice were either some pumpkin leaves or maybe some fall leaves, something like that. I wanted to make a stem to sort of round it out. And then when I was messing with it, I thought, "You know what? As long as I'm gonna put like a deciduous leaf on there, why don't I just make some acorns too?" So I made some acorns that look okay. I wouldn't say they look great, but they're gonna be good enough because they sort of give that vibe of like fall and harvest and abundance and things. So a couple acorns and then just a couple of little sort of tendrils, you know, sort of evocative of how that pumpkin plant will sort of grow. To make the leaves today, I've got some cutters. If you don't have cutters, what you can certainly do is just, you know, print some shapes or just draw them yourself and then cut them out. And then what you can do is you can actually, you know, use a small knife to cut the dough pieces yourself. That totally works. So let's get some dough out. And again, this stuff is really susceptible to drying out, so you want to protect it. Keep it in plastic the entire time. The quantity here is about double what you're gonna need for one loaf. But the reason that I gave you extra is that I want you to play, you know, make something fun. Maybe you're having a fancy holiday gathering, and you want to have like napkin rings. You can certainly make napkin rings out of decorative dough. To me, it's one of the really nice ways that you can sort of make a meal special, right? To have that little extra thing that says, like with baking, that says that you care, you know, really beautiful. So a little bit of flour down, just enough to keep this stuff from sticking to the work surface. You don't need too much, but just keep some around because you may want to go back to it. You want this to be floating on the counter. If you feel like it's really stuck, then you do need a little bit extra flour, so you may see me go back to it every once in a while. And what I mean by floating is that I don't want it to be stuck to the surface, okay? I've got a pin, and I'm just gonna go down to 1/8" or thinner. The thinner that you can work with this dough, the better. And the reason for that is that it will look a little bit more lifelike. It's not like we're trying to fool anybody, but if you leave them too thick, they just won't look quite as realistic. And I think it's really nice when they look sort of realistic. So we'll see how thin that is. It feels pretty good. Let's see what we got here, Tucker. Tucker brought his calipers. Let's see what I got. 3/32. There we go. I'm gonna grab my cutter. And what I've found is that doing a couple different sizes of the leaves makes it look a little bit more interesting. If they're all the same, it almost looks a little bit less natural, right? So I've been doing a couple big ones, and then I'll do a couple of small ones. And like I said, there's plenty of extra dough here, so don't hesitate to make yourself a couple extras just because, you know, sometimes accidents happen, and it's nice to have a little bit of insurance. I mean, you've already got it rolled out, right? So then I'll cut a couple of small ones. So I got a couple large, and I've got a couple small. So for the stem, I find that the stem works pretty well with just scrap. So for the stem, I start with a piece that's about 20, 25 grams, 30 grams, somewhere in there. It's about the size of maybe like a golf ball, maybe a little bit smaller. And then I just press it into a tube, and if it's got some imperfections to it or it's got a little bit of a crack or something, I mean, you want to try and resolve any of those that are large, but some of those imperfections are what will make it look a little bit more natural. And then I just flare the base just a little bit. And then what I like to do is usually those pumpkin stems have a little bit of like some ridges to them. So what I do is I go in with my fingers and I just pinch to make a little bit of some ridging to it so that it looks a little bit more natural. And then usually what I do is I sort of pinch where the base flares just a little bit. I just extend those ridges down onto the base. So it looks like it's almost growing into the loaf, right? And sometimes, you know, if your loaf is already out of the oven, sometimes what I'll do is I'll go over and I'll put it on the loaf itself, and I'll just sort of see where the dimples are or the lobes are of the pumpkin, and then you can just match 'em, and it almost makes a perfect form to sit down on top of there. Sometimes what I like to do as well is I'll take a skewer or maybe like a toothpick or something like that, and I'll put it into the base of this so that then when this comes out of the oven, 'cause we're gonna dry this a little bit when it comes out, I have something to affix it to the loaf with, right? So I'll let that dry inside of there. Okay. So pumpkin stem looks pretty good. It's got some cracks in it and stuff like that, but honestly, I think that when that bakes out, it's gonna look good, and we're gonna paint it with a little bit of a coffee syrup so it'll have some nice color, and some of those cracks will pick up some of that detail and accentuate it. So it's okay. Don't fret too much about that. So now what I want to do is go ahead and add some detail to the leaves that I have thus far. And one of the things that I want to do is I want to pin them out just a little bit further. If I leave this sort of blocky, like somewhat square-cut edge, they won't look as realistic. And I want to take just one more step of detail to make that look a little bit better. So with my pin, I'm just gonna flatten 'em a little bit further, and the forms may sort of distort a little bit as you roll them, and that's okay. You know, in nature, not every leaf is exactly the same. A little bit of that is actually better for it. So I'm just rolling them down just a little bit more, and it's gonna make them look a little bit better. So that edge detail is still a little bit blocky. You can see where it was cut with my cutting tool. And what I want to do is go back and just pinch to flatten that edge so that it looks a little bit more like a knife's edge. I want it to be sort of thin and more organic looking, right? In nature, leaves don't look like they were sort of cut with my cookie cutter. So I just press those edges just to sort of flare them a little bit and give them just a little bit more beauty. And so I've got a nice, relatively sharp edge. So it's starting to look like a leaf a little bit, right? So the next thing I want to do is I'm gonna take a knife, and I'm gonna draw some veining onto the structure. And, you know, how do you do that? Oh, just go get a leaf from the yard and just mimic it. Copy. And I wouldn't say I'm great at this. I just add some lines that sort of evoke what I'm trying to make. And I'm just etching. I'm just etching here. I'm not cutting through the dough. I'm just etching in such a way that it just adds some of that natural detail to it. It doesn't have to be perfect. Don't feel like it has to be a carbon copy of the splendor of nature, right? So now let's do a little bit of a tendril. So I don't need a big piece. I'm just gonna take sort of like a gumball size of my dough, and I'm gonna roll it into a tube. And if it's sliding around on the counter a little bit, just grab a little bit of spray and just give it a little spritz, and that will help it to sort of adhere. But I'm just sort of under my palm, I'm just slowly rolling it until I have a nice sharp point. It's probably the hardest piece to make, even though the leaves look like they're, you know, more difficult, in most ways they're not. Okay. So beautiful little tendril. Maybe I go just a little bit thinner on this end. If you try and push it, if you try and roll more quickly than what the dough will sort of extend, you will break. So if you find that you're breaking some, slow down. Okay. So there's that. And if it looks a little bit longer than what you want, just snip some off. That's okay. Let's do one little acorn. So what I'm gonna do is I'm gonna take another smallish gumball-size piece, and I'll break it into about one-third and two-thirds. And then I'm just gonna make an acorn shape. They're on the ground everywhere. If you forget what they look like, go outside and grab one. So I'll just sort of shape it into an oblong piece. I'll give it a nice pointy tip. So now I'm gonna do the cap. Just gonna press this sort of flat. And then when I think of a cap, it's got a little bit of an attachment, and I'm trying to keep it round, right? And then what I'll do is I'll take my acorn. I've got a little bit of syrup left, so I'll grab just a little bit of syrup, and I'll use that as glue, put my cap on top. And, you know, it's not gonna look great at first, but just be patient and just work with it. And if you need to use your knife or some other tool to create an edge where that cap attaches, these don't have to be like hyper-realistic, right? They're just sort of evocative. And if in that process you sort of lose your stem, go back and fix that. And if you want some little detail on your acorn cap, you can grab a fork and just give some impressions to it. Okay. There's a little acorn. Looks okay. I've got a piece of aluminum foil, and I've got a pie pan. Sometimes I will bake these on the back of like a metal mixing bowl. What I'm thinking about is the way that that pumpkin loaf is sort of a round form, right? And so if I bake the leaves flat, they don't look natural, right? I want them to have a little bit of that sort of curved aspect to them. And so what I'm gonna do is I'm gonna bake 'em on something that's slightly curved, 'cause remember, these are gonna dry in the way that we bake them, right? The form is gonna be set. And so I'm thinking ahead to that a little bit. Don't do them all the same. You know, that's what I would say. Like, let some of that organic aspect creep in. When they're really good, they've got a little bit of chaos to them, you know? When I look at some of the ones that I've made in the past few days, the ones that have a little bit of wildness to them are the ones that I'm most compelled by, as opposed to something that's just sort of more two-dimensional, right? So I love seeing that when it sort of works, or like some of these have a little bit more undulation to them. I mean, that to me is just super cool. So I'm just draping 'em on here, trying to let 'em have a little bit of organic beauty and wildness. Don't try and sort of plan everything. It's gonna be okay. I'll get my acorns on here. Those are gonna dry. I've got my stalks. I did a couple different sizes. See what looks good for you. And then on top, I'll add these little tendrils. And I have an oven set to 200 degrees, and I'm just gonna let these dry. And it's a nice low heat, right? Very gentle heat, 200 degrees. I'm gonna put them in there for about an hour, check on them now and again, and just see how they're doing. If you're having a special meal, you can do this days and days in advance. You don't have to wait until the last moment. This is something that you can prepare and then just sort of set aside as I have here. So about an hour in a 200-degree oven, and then we'll come back, and I'll show you how I'm gonna finish this beautiful technique. Dead dough. I've got my loaf out of the oven. This was like 38 to 40 minutes, right in that range. And towards the end, it had the amount of color that I wanted. And just to make sure that it was fully set, I did turn the oven down just a little bit, down to 325, right? So the majority of the bake, 350, and then I turned it down a little bit. Those are some of the adjustments that you, the baker, are gonna make in your home with your oven and your setup and the loaves that you're making. Remember, so just be engaged in that process. Use your eyes, use your nose to adjust as necessary. So the loaf looks good. I think it actually looks really nice. What I'm gonna do is put this on a cooling rack and let it continue to cool. And I'll set that aside, and let's get the rest of our deco together. So our decorations are out as well, and those look great. Again, that was an hour at 200 degrees, and they're definitely set. They're firm. They look great. You're not wanting to put too much color on them. Like, I'm not looking for a brown or golden aspect to them. They don't need that, right? I'm gonna color treat them with my coffee and the other things that you're gonna see here in a second. So I'm not necessarily looking for color on them. And the reason that I'm using that low oven temperature is that if you bake them hotter, they will sort of puff in some cases. You may see a little bit more movement in the oven, so we're really just looking to dry them and set them. The stems look good. The larger one that I made has some cracking in it. And you know what? That's actually appealing to me. It looks more like it might look if we go down the road here and grab one from a pumpkin patch. The acorns got better in the oven. Going in, I wasn't totally excited about them, but they came out looking great, you know? They look natural. And so when I color them with a little bit of this coffee, I think they're gonna be good. And my sort of like tendril looks nice and looks botanical in a way that's appealing. We'll see how that comes out on the loaf. Oftentimes, you know, it's nice to give yourself some options because when we go to assemble the loaf to sort of do the decorative finishing touches, I don't really have a plan. And it's nice when you have a few things to choose from, you can sort of shop and figure out what works well together and what shape you need and just sort of use your intuition. These look good. Let's jump to the coffee syrup that I'm gonna paint these with. So in order to make the coffee syrup that I'm gonna paint these with, that's gonna give them this sort of beautiful brown luster, I'm gonna mix a 2:1 ratio of powder to water. So I'm gonna do 2 teaspoons of powder and 1 teaspoon of water. It's basically just enough water to make a thick consistency. You may find espresso powder is variable, and you may find the one that you have takes a little bit more. You don't want it to be too liquidy. You want it to be more like a glaze. If you're not quite getting the shine that you want, you might have too much water in it, just a heads up there. So that looks good. It looks super thick. One thing I want to do that's not entirely necessary, but you can do because I think it adds a little bit of additional depth and detail is you can take some cocoa powder and just brush it. And as you do so, the veining that we've added to these leaves, it'll catch it, and then we end up with a little bit more detail. So I'm just brushing it across, and a portion of it remains in the leaf. We got a little bit of that cocoa on there, not entirely necessary, but I like the way that it adds some detail, and if I can extend this little moment of play, I'm gonna do it. So that's what I did. I've got my coffee syrup here. I've got just a nice soft brush. I'll dip a little bit, and then I'll just start to add some, just sort of painting the leaves and seeing how they look to me. You're gonna get it on your fingers. It's gonna be okay. I do make sure to get the edges where they wrap. You don't have to paint the underside. You can if you want, but just make sure that you do paint those edges where they exist 'cause they will show. The eye will be drawn to that point that's just sort of missing some of this. So just hit those. Let's see how this stem looks. To me, these almost come out looking like terracotta or something, some sort of like fired clay piece. So after you have everything painted, you will want to let them dry. Let them set up some. If you put them on the loaf right away while they're still wet, they will stick a little bit. So just let them sort of have a moment to dry and set up. If you have an oven that's still cooling off and you want to just put them in there, that would be an option as well. Just in an off oven, that would help encourage them to set up and dry. So I'm gonna finish up these pieces, and then we'll come back and we'll assemble our loaf. Let's finish this loaf. I did put these pieces back into an oven. The oven was off, and it was cooling. It was just still holding some heat from the bake. So I put my pieces back in there and just let them coast for a while until when I touch them, they're not tacky. You want to check for that. If they're still sticky, you may have a little bit of adhesion when you put it on the loaf or when they touch one another, whatever. Not the end of the world, but just be aware of that. I've got a couple loaves here. Got one that I baked yesterday, and then I have this one from today. I just wanted to show you how to take the string off. So I just cut it at the sort of top knot, and it will just sort of peel down. No big deal. If you're trying to do that while it's still a little bit warm, you need to be a little bit more delicate with it, but it will be fine. If you have a spot where the loaf is sort of closed around the string, what I prefer to do is to go to the backside and just snip the strings first. And then what you can do is you can sort of unpeel it. For this one where it's sort of the seam has grown over the string, what I'll do is, like I said, release it from the top side, right? And then I just pull through from the back. Whoop. No big deal. And it works. Beautiful. So let's add some things. I usually start with the stem 'cause it sort of centers it, right? And I look for one that looks appropriate for the size. Like I said, if you've got some options, that's really nice. I had a large one and a small one. Let's see how they look. Small one looks a little bit small. Let's see how the big one looks. Yeah, better. And then in terms of the leaves and the other elements, I don't actually try and adhere them in any way. I've found that for the most part, they just sort of set on there in a way that's nice, and maybe they'll do that for me now. Maybe a couple of big leaves, maybe a small one. Let's see here. Got some acorns and then maybe a little bit of one of these tendrils. Let's see. Beautiful decorative Pumpkin Challah loaves. They look gorgeous. I think that if you have that on your table or maybe if you're going to someone else's house for one of your holiday gatherings, I think they're gonna be excited about this loaf. Let me cut a couple more slices here and show you what the crumb looks like. It's super yellow. You know, I feel like we're looking at the sunshine of summer in this crumb. I really feel like that. It's warm. The cinnamon is in there, so you get a beautiful sort of aroma. It's fine-grained. I've been eating a lot of this with just butter on it, honestly. And don't forget that this is a decorative technique that you can apply to other loaves as well. Maybe you have a sourdough loaf that you'd like to make a pumpkin out of. If you have questions about it, don't forget we're active in the comments. We've also got a Baker's Hotline. Reach out. We're here. We're happy to help. So this is Martin and Tucker and Sam in the studio today, saying thanks for joining us, and I hope that your season is full of rich and beautiful gatherings. So thank you and enjoy this loaf.
Video Credits
Shop this video

Related Videos

Your bread fell flat. Your cookies crumbled. Who do you turn to?