





Baker's Reserve Baguettes
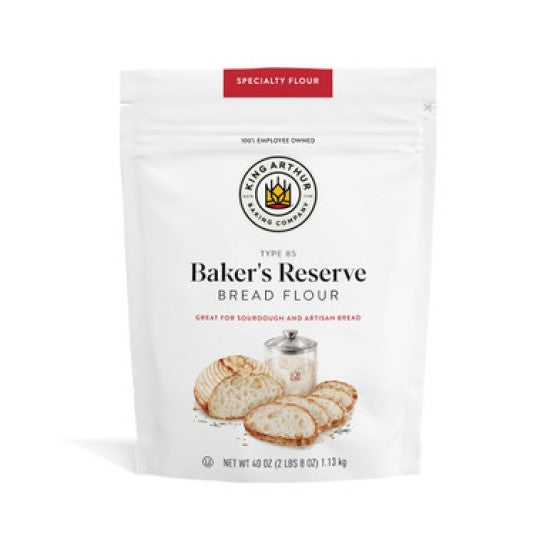
Somewhere between all-purpose and whole wheat sits high-extraction flour: our new Baker’s Reserve Type 85. Martin's diving straight into French baguettes to see what it can do.
- Hey y'all, Martin here in the studio today, and I'm making some beautiful baguettes using our Baker's Reserve Bread Flour. This is a new offering. It's the hero of the show. Recipe is right down there. Let's make some bread. ♪ Ooh ♪
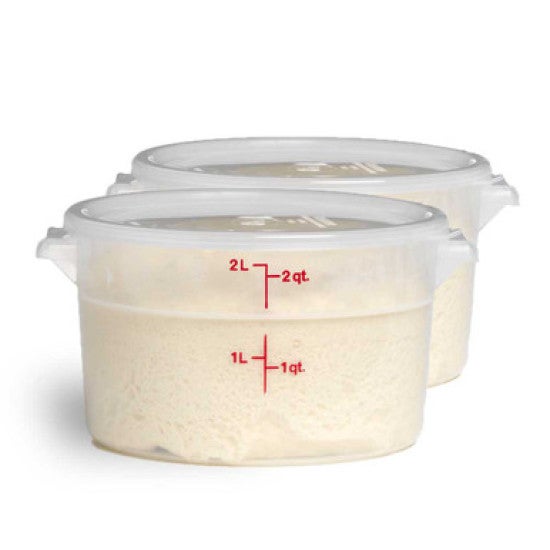
- During my career as a baker, I've made a lot of bread with what we call high-extraction flour, or sometimes T85 flour. And basically, what it is, is it's between white flour, like all-purpose or regular bread flour, and whole wheat. It's kind of like somewhere in the middle. On this tray, I have three kinds of flour. I've got all-purpose over here on my left. In the middle, I have some of this Type 85, or what we call Baker's Reserve, which is a sifted whole wheat flour. And then on the far right side, I've got some whole wheat flour. So what we do to make this flour in the middle is just sift off a little bit of the bran and a little bit of the germ. Everything else goes into the bag, and it has this beautiful sort of café au lait hue to it. It ferments well. It's great for feeding your sourdough starters. It's great for hearth breads. And at my house, I even use it in place of a lot of my all-purpose uses. So Baker's Reserve Bread Flour, great new offering from King Arthur. Let's make some baguettes with it. Okay, so let's make the preferment for these baguettes. I'm going to start with some water in the bowl. This is cool water, and I've got half a cup, 113 grams, into the bowl. And we'll get the yeast in. This is one 16th of a teaspoon, just a pinch, a tiny amount. And that will get the fermentation going. This is a poolish, right? It's a poolish. So we have roughly equal parts of flour and water in the bowl, with a little bit of yeast. If you wanted to use sourdough at this point, you could. I would use about a teaspoon or so of healthy sourdough culture, and that will be enough to initiate this fermentation for the overnight phase. If you do the sourdough version, still use that yeast in the final. It's just going to help these baguettes move at a more predictable rate. And then last, but most importantly, I've got some of this Baker's Reserve Bread Flour, 120 grams, or one cup. It is a sifted wheat flour, which means that we've removed just a little bit of the bran and a little bit of the germ, retaining a lot of the minerals. And with those minerals come a lot of flavor and a little bit more color. It almost has, like, a beautiful café au lait aspect to it. It's one of my flours that I've used for a long time as a professional baker, and I'm excited that now we have it available in retail bags. We're going to give it a stir just to combine, and then I'm going to cover it and let it rise overnight. As I mix this together, you're going to see this sort of color come out, which is this beautiful sort of tan. I didn't plan it, but I wore a shirt today that kind of looks like our new flour. Sometimes when professionals talk about a flour like this, we refer to it as Type 85. And what that means is that we measure and quantify the exact quantity of mineral that's in the flour. There are more minerals in this flour than there are in all-purpose. It's because a lot of the mineral content in wheat is in that exterior, in the bran layer. And during milling, we sift a lot of that off, right? In this flour, we sift less of it off. And so it has more color, it has more mineral content, which basically means that for every kilo of flour, there are about eight and a half grams of just pure mineral content. Everything's in the bowl. It's stirred up. We'll get a cover on it. We're going to put it in a nice, not-too-warm place to rise for the overnight period. And then we'll come back, and we're going to do our mix with these beautiful new baguettes made with our Baker's Reserve Bread Flour. So we've got our poolish that we mixed. I've got water. I'm just going to add it on top of my poolish. I'll stir it in, and then I'll pour everything into this larger bowl for the mix. So water, one and a third cups, or about 303 grams. I'm pouring like it's not scaled. It's scaled because Ryan's here, and Ryan's awesome. Takes good care of me. Thank you, Ryan. Thank you, sir. Okay. The reason I poured it on top of the poolish, and I'll do this if it's a stiff preferment as well, is that it breaks up a little easier if I put it on top of that preferment. Just how I do it. You could put everything in a bowl, you could put it into your stand mixer, you do what you like to do. And now I'll just pour everything into the big bowl. And I'm going to get my yeast in there. This is three-quarters of a teaspoon, or about two grams, right in the two-gram range, just a little bit of yeast. Salt for flavor, two teaspoons, about 12 grams. And then some flour, 420 grams, three and a half cups. I wrote this recipe somewhat on the stiffer side. And what I mean by that is that I wrote it at a hydration level which is slightly lower than what I would normally run for baguettes. I like to work with a baguette dough that is difficult and challenging because that has some effects in the dough environment which open up the structure a little bit, hoping that lots of people would find their way to this recipe and that maybe, if you've never made baguettes before, you might even give it a shot. I wrote it at a slightly more manageable hydration. If you're working with this and you feel like, this feels like slightly stiff versus what I'm used to, add a little bit of water. No harm in that. It's what I've been doing sometimes when I make them. Recipes are living things. They move, they adapt by season, they adapt by your experience level. If you've never made baguettes before, run them a little bit stiffer. You'll find it easier to shape, transfer, score, bake, everything. In my case, I like a sort of a messy baguette that's difficult because I like to make my life hard. And so I've been adding a little bit of extra water. I'm just going to go with about a tablespoon, somewhere in that range. And then, using my flexible scraper, just going to give it a little bit of incorporation. I want a baguette dough to run the edge. I want it to be right on the edge of comfortable for me to work with. And so I add a little bit of water. I would recommend that the first time you run this recipe that you just follow the instructions and don't necessarily do as I say and add a bunch of extra water. Add a little bit, but I wouldn't go much more than what the recipe prescribes. And so now what I'm going to do is just work it in the bowl. You could do this in a stand mixer too, if you want. And so I'm just sort of pretending like I have a stand mixer or spiral mixer attached to the end of my arm. I think that looks pretty good. Clean the bowl. Okay. And into a container, little spritz, and let's get this dough into the container. Putting it in this two-quart. Y'all know that I love a two-quart. It's nice if you're one of those people who wants to judge the level of rise of your bread doughs. Okay. We're going to put it in a nice, comfortable spot to rise. 45 minutes, we're going to come back, and we'll give it a fold. Then it'll have another 45 minutes to rise after that, at which point we'll divide, preshape, and shape, and eventually bake today. Beautiful Baker's Reserve Bread Flour baguettes. Gorgeous, gorgeous loaves. I'll see you in 45 minutes. Okay, so we're back after about 45 minutes, and this dough is ready for its first and only fold. If it's been an hour, you're going to be okay. If it's been a little bit less, you'll be okay too. Just make sure that the dough looks active during the period of bulk fermentation. And this dough does look good. I've got some small bubbles forming on the side. I don't have a noticeable level of rise, and that's appropriate. Like I said, it's only been 45 minutes. This doesn't have a ton of yeast in it, so it should move at a sort of measured rate. And so let's get in here and see what this dough does. Beautiful, right? Gorgeous, gorgeous, smooth dough. In those 45 minutes, not only have the yeast gone to work, but also the flour has hydrated. It looks beautiful. One of the things that I really love about this dough is just the color, the sort of, like, café au lait tan hue to it that, again, is in there because of the mineral content in this flour. So I'm giving a pretty strong fold because I'm only going to touch this dough once. I want to make sure that I'm building some strength and just seeing where we are. So I'm just making my way around the container. And once I feel like it's sort of tensioned to the degree that it's able to, I'm going to turn it over. Again, still working in my little two-quart container here. And I'm just going to give it just a little bit of a rounding to sort of smooth it out. And then we'll cover it. We'll put it back in a comfortable spot to rise for another 45 minutes. When I come back, we'll divide, we'll shape, and we'll proceed to baking. Okay. Ready for divide? You ready? Tucker's ready. Ryan's ready. Martin's ready. Dough's ready. So I'm staying right on track here. At 45 minutes exactly, we did the first fold, and hour and a half, 90 minutes, we're going to divide it. It looks good to me. It doesn't look over. It doesn't look under. It looks happy. So let's just jump in. Little bit of flour on top. I'll go in with the flexible scraper and just sort of release it a little bit. We're in that phase with this dough where I'm thinking about the structure that I've built during fermentation, and I'm thinking about, at a level, like, not being so heavy-handed that I lose a lot of that beautiful structure. And so prereleasing it in the container helps it come out in one fell swoop. It means that I'm just sort of tearing the dough less. I'm just sort of maintaining this beautiful matrix of this beautiful, beautiful flour. Little bit more flour on top, just to keep my bench knife from sticking as I go to divide. And these pieces should be in right around the maybe 315, somewhere right around there in terms of grams. So three even pieces. And you want to have a landing spot, so give yourself a little bit of flour on the bench. And let's see where I am here. One high, 360. Okay. So let's give these doughs a preshape. You can do this a couple different ways. You can do some rounds. That's fine. If you do rounds, just make sure they're gentle. Sometimes when I see bakers preshaping rounds for baguettes, they're a little bit heavy-handed. They want to make a nice, tight ball because they know how to do that. The tight ball is not going to serve our final structure for this bread as well as a more gentle approach. Remember, we don't want to drive all of that sort of fermentation structure out of this dough during shaping. So my preference with a dough like this, with a baguette, is to actually preshape into tubes. So that's what I'm going to do. So I'll fold right side to left side, or left side to right side, doesn't really matter. And I'll overlap them just a little bit. And then, starting at the top, I'll come down and just gently, gently, pressing only with the force required to get that dough to stick to itself, right? I'm not being real heavy-handed here. I'm being as gentle as I can while still sort of maintaining this form that I want to achieve. And at the end, I should have a nice little tube. And for the rest period, I'm just going to put them directly onto my baker's linen here. It's a great place because I can fold it on itself, and they'll be protected during the short rest between preshape and final shape. Okay, so one more time, I'm going to fold right towards the left, and then I'll fold left towards the right, just enough so that they overlap. And then I'll gently fold down from the top. And I usually find it's about three turns. And what I want is a tube which is even, right? I want it to be cylindrical, okay? Setting up that cylindrical form at this point is what's going to give us a beautiful, beautiful baguette. It's going to make shaping a little bit easier. Cover these, leave them in a warm spot to rise. 15 minutes, we'll come back and do our final shape. All right, so 15 minutes or so. Give them a chance to relax. These are ready to go. One thing that I should have said at the end of the preshape was that that would be a good time to go ahead and turn your oven on. Remember, we're going to bake these on a stone, and we're going to use a steaming system. So I have some cast irons in my oven. Those are preheating. You want to make sure that that's fully preheated, 450 degrees. You know your oven. Maybe you need 475 or something like that, like at my home oven, which tends to be cool. I need to be a little bit higher. These ovens here in the studio definitely run a little bit warm. So there's a little bit of art there, but the moral of the story here is that when you do your preshape, get your oven on, get everything plenty ripping hot. Okay. Let's go ahead and shape. So I have these resting on the linen, and I'm just going to move them over onto my work surface. They've got some flour on the bottom. I don't need a ton of flour additionally here because I feel like they're well-floured enough, but I'm going to move them over here, get them ready to shape. I do want to add a little bit of flour to my baker's linen. I want to make sure that they do not stick. If you've ever put a few hours into a baguette and had it stick on the way to getting it off the couche or something, you know how crushing that is. So take an extra moment, make sure that your couche is well-seasoned, and I'm just using this Baker's Reserve here. Some people like a little bit of rice flour blended in. I don't do that. Okay, so I've got my floured couche here. I've got my baguettes. Let's work on a little bit of flour here, just a wisp, just a wisp of flour. And let's get over here. So I should talk about this. I should do this and tell you what I'm doing instead of just shaping, which is what I love to do. Okay. I have them resting over here, seam down. Okay? They're resting on my surface, seam down. I want to have that seam on the interior of the loaf. So when I brought them over here without thinking about it, I immediately turned it so that it's seam up now, okay? So gentle pats to sort of make sure I don't have any large bubbles, just working on that east-west axis. And listen, this isn't our only baguette video. We've got a bunch of them, and some of them are even dedicated, like, tips for making better baguettes. Be sure you watch those too. You're not going to learn everything from one video. You're not going to learn everything from making baguettes one time or even 100 times. I don't know how many times I've made baguettes, but I still feel like I come to them as a beginner in so many ways, okay? So, "Patience, grasshopper." Patting on the east-west axis, I'm going to fold it about two-thirds of the way down, and without too much pressure, but also with a sort of deliberate fashion, I'm going to press to seal, and I'm going to give it 180 degrees, and I'm going to come about two-thirds of the way down again, using my hands as paddles. I'm not doing this, like, piano-player thing, right? Hands as paddles, pressing to seal. Maybe pause for a second and make sure you're not adhered. And then I'm going to go all the way to the leading edge, and you could do that with fingertips sort of pressing. My preference is to use the heel of my hand, and with only the force required, I'm pressing gently to seal as I make my way down the loaf. I should, at the end of that, have a nice tubular, cylindrical sort of aspect to the bread. Now, in terms of rolling, I'm going to go to the center, and I'm gently going to push the loaf back and forth with only the force required to get it to sort of turn. Just that turning process alone is enough. You don't need to add a lot of downward pressure here. And as I get to the tips, I put a little bit of downward pressure just to make sure that I have a nice taper to the loaf. And then I look for my seam. My seam's right there. Perfect. I'm going to put a little bit of flour down here, and I'm just going to roll through it. Again, I'm managing this loaf in such a way that makes sure that I don't have something that sticks to the couche when I go to release it. Then I go over here. If you're new to baguettes and you're not quite sure what the length of the baguette should be, maybe you want to turn your tray over here with your linen on it so that you know, okay, that's exactly the length that I need. So a nice, high pleat in between the loaves. Come back over here and grab another dough piece. Gentle pats. If you haven't done this that many times, maybe you want to sort of rewind the video and watch this section a couple times. Okay, beautiful. Cover that up. You want to protect them. You never know what's going on in a room. The studio is air-conditioned, so we've got some dry air moving around, so I might take an extra step just to make sure that they're not going to dry out during that final proof. Like I said before, make sure your oven's preheated, 450 degrees, with a steaming system in place. We put a 30-minute timer on these because sometimes things in the studio take a little bit longer for us to get organized, but I'm guessing that these are going to be loaded right around 40 minutes, which means that I want to have my lame ready as well, and I'm ready to score these. We'll be baking them in no time. We'll be right back. All right, so it's been 35, 40 minutes, somewhere in there. Baguettes are one of those things where you don't want to be trying to make up time. You know what I mean? Don't let them get ahead of you. If they get ahead of you, you're going to have trouble. So stay ahead of them. Get ready to load, get all your tools in place after maybe 30 minutes, maximum, right? These look good. If I press on them, you'll notice that, in this case, they have a little bit of bounce-back left. That's good. Remember, like I said, I'm trying to catch them in this sort of, like, youthful state, right? Baguettes do better in a youthful state as opposed to being sort of overrisen and difficult to handle. I have them rising on the linen, seam-side up, and now I need to get them onto my half sheet of parchment paper, seam-side down. So I've got a little bit of sort of maneuvering to do. And what I'm going to do is, with my transfer peel, I'm going to roll them so that they're seam-side down, and then I'll roll them back onto my transfer peel. So now I have them back in this aspect where the seam is up, and all I have to do is go over to my parchment and just roll them over, and I'll use the straight edge of the transfer peel to do any adjusting that I need to. If you don't have a transfer peel, I've been in a pickle before and had to make one out of cardboard. It works very well. Use a double thickness. I like them to be the length of a half sheet tray, actually just inside that length, so that I can fit them into the half sheet tray, right down onto the couche where I need them to sort of capture that as I roll them over. Watch me do it again. So on the linen, seam side up, I'm going to roll them over so that they're oriented the way that I want to have them when they're on the parchment, and just roll them over right into the position that I want. And you want to distribute them sort of left, right, as I'm looking at them, because I want the maximum amount of space around them that I can get. I don't want them touching, right? If they're touching, they won't brown as well. So last one, roll it over, roll it back, and then come over here and transfer it. Now what I'm going to do is I'm going to turn them so that they are running perpendicular to sort of my aspect here, right? I want them left, right in front of me. And the reason for that is that it's easier for me to score on this axis, right? My arm moves better on this axis as opposed to sort of, like, this north-south situation. When I'm going to make my cuts, I'm thinking about placing the cuts on the sort of highest portion of the loaf. If I look down at the loaf and I sort of take my fingers along, I'm looking for this sort of zone right there in the middle that forms the highest portion of the loaf, and that's where I want my cuts to land. You don't cut it side to side. If you do that, you end up with something that looks more like a barber pole, right? They're really sort of central lines down the midsection of the baguette, and they're slightly overlapping. Nice, sharp lame. And I like this style because it allows me to see what I'm doing. If I have one of those lames that are small or sort of round, it's hard for me to actually see what's going on there. So I like this style. Now, onto a peel of some sort. If you don't have a peel that can hold an entire half sheet of parchment, just make one out of cardboard or take a piece of luan from your home improvement store, cut it to size. That's a very handy tool to have around the house for large pizzas and other things. We're going to get these in. The oven's well-preheated. I've got some water that's preset. We'll get them steamed, and we're going to bake them for at least 25 minutes. I think the recipe says 25 to 28, something like that. Ryan's nodding. Thank you. So we're going to let them bake. Nice, full color. We'll check back when we got something exciting to show you, which is hopefully in a few minutes. Baguettes are out, and I think they look great. I love the color. You can sort of get a little bit of a view into what that interior crumb color is. It's beautiful. I can see the sort of tan peeking through. The cuts on this one look really good. They start and end where I want them to. They're sort of lightly lifting. You can hold it up by the ear, which is sometimes a sign of something done well. They look beautiful. They're definitely fully baked, nice and crunchy. Let's let them cool, and then we'll cut them open and see how they look. The interior is great. I love that amount of sort of thumbnail bubbles. I don't always get that, especially if I'm running a little bit lower hydration, so I like that amount of open. So these are our Baker's Reserve Bread Flour baguettes. You know, baguettes are a journey, y'all. It's one of the things that I continue, every time I make them, to work at, to try harder with, to learn about, right? If you're new to this journey, this is a great place to begin. If you're looking for another way to further your bread-ucation, you can check out our "On-Demand" series. We've got a great class on baguettes taught by my colleague, Amber. This is Martin and the whole team in the studio here saying thanks for joining us. We'll see you in the next one.

Video Credits
Shop this video

Related Videos

Your bread fell flat. Your cookies crumbled. Who do you turn to?