






Apple Cinnamon Sourdough Bread
By folding grated butter and cinnamon-spiced apple filling into soft sourdough, Martin bakes up the coziest fall loaf. The buttery flavor of tender pie dough and spiced apples give this stunning bread serious apple pie vibes, without being so sweet that you can't enjoy it in a savory sandwich. A touch of cocoa in the filling lends a rich, dark color throughout. Don't worry about that masking the flavor – this sourdough bread is ALL apple and spice. Have your pie and toast it too!
- Hey, y'all. Martin and Tucker here in the test kitchen today. We've got a little change of scenery, and we're making a beautiful Apple Cinnamon Sourdough Bread. Come along for the recipe.
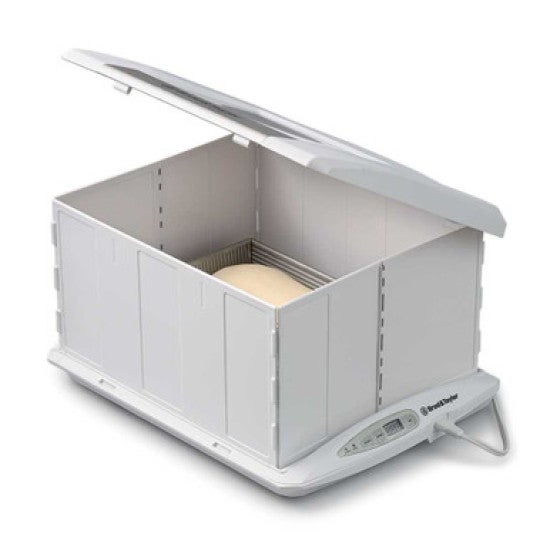
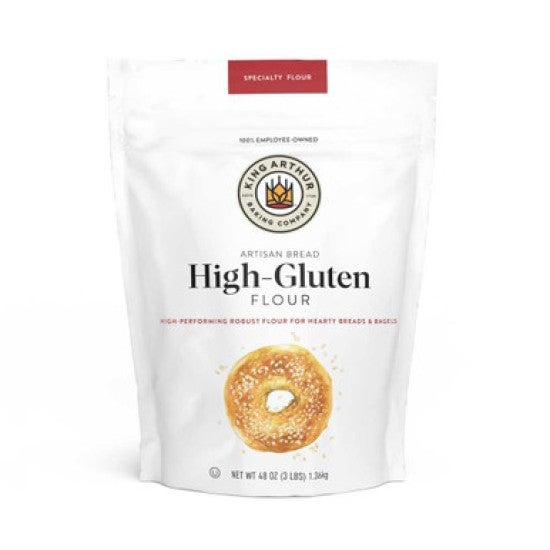
Okay, so I'm gonna mix this preferment. It is basically equal parts flour and water by weight with a little bit of sourdough culture. I'm gonna start with my water in the bowl. I've got just some regular water, lukewarm, 140 grams going into the bowl. And then I've got 19 grams of beautiful, healthy sourdough culture going into the bowl. I'm doing the water and the levain first just so that it's a little easier to incorporate. So I'm just getting that sourdough culture in there. And then I'm gonna add 135 grams of this high-gluten flour. The recipe is all down there in the description. The link is there. Just go down there and click on it. And if you like how this bread goes in terms of you love this sort of laminated, enriched sourdough hearth loaf, which is kind of a rare bird, we have some other options too. There's a really good Sourdough Croissant loaf that I wrote that is very good. Very good. So my ingredients in the bowl. Because we're using high-gluten flour, which has high absorbency, this may look a little bit thicker than your regular liquid levain. But the reason that we're using this flour is because of strength. It has a lot of strength. We are gonna load this thing down with dried apples and butter and everything else. And in order for me to get that nice high rise, I decided to use high-gluten flour. Why not? So scrape the bowl down. Don't leave a bunch of stuff hangin' out up there on the edge if you can avoid it. Cover it, put a cover on there. Put it in a comfortable, you know, warm but not too warm, not too cold environment to rise, let it do its thing. There it is, preferment. So before we jump into the mixing portion, first thing I'm gonna do is prepare my apples. I have these beautiful apples here. They are organic, unsulfured. They're dry but not crisp, if that makes sense. They're pliable, just like any other sort of dried fruit that you would buy. Before I use 'em, I wanna hydrate them. If I put 'em into a bread dough without soaking them a little bit, they're gonna pull water out of the dough environment and I would rather sort of control the hydration in the dough. So what I do is I put 'em in at a sort of moisture-neutral state the same way that I would do, say, if I were using a soaker with grains or something. So 100 grams of apple into the bowl. And now I'm gonna grab some super-hot water out of the tap, between 120 and 130 degrees. I don't wanna use cold water. Think about guiding fermentation and all of those factors. And this is 284 grams of that hot water. You may find that the amount of water that the apples take may be variable. The thing to know is that after these soak for, say, 5 to 10 minutes or something like that, I'm gonna strain 'em and I should have about 170 grams of this sort of apple-soaking liquid. If you're short, you'll wanna make up for that difference with a little bit of warm water. Or if you're over, you're gonna wanna sort of pour some off so that you end up with 170 grams of strained apple water going into your dough mix. So we're gonna let these sit 5 to 10 minutes. And while those hang out and hydrate, I'll go ahead and get my dry ingredients together in the bowl. Into the bowl, I've got 240 grams of high-gluten flour. This is a couple points higher in protein than our bread flour, okay? It's just a little bit higher. And then 28 grams of whole wheat. And then a little bit of salt. Salt today is nine grams. I'm working at Molly Marzalek-Kelly's station today, test kitchen legend. And so we try and take care of things. So mix together my dry ingredients. And then what I'm gonna do is grab my levain. Got my sourdough here, fed it last night. And then what I can do is I can pour my apple liquid right onto that. So I know that I need 170 grams of this apple liquid. I had a little bit extra liquid. So the 284 left me with just a little bit extra liquid. And when I go to actually chop these up before they go in at the lamination stage, I'll make sure that I don't include that in the recipe. I just need 170 grams of that. I'll give this just a little stir. You could pour all of this in the bowl. That would be perfectly fine as well. What I find is that if I stir it up with the liquid first, it's just easier to incorporate over here. Apple levain mixture straight into my flour. And then I'll give it a stir. When I initially wrote this recipe, I was only adding enough water to sort of hydrate the apples. And then I think it was Sarah Jampel who said, "What if you had a little bit extra liquid in there and you use that for the dough hydration?" And I was like, "Well, duh, that's a good idea. I can't believe I didn't think of that. That's a very Martin thing to do." And so I immediately changed the recipe to incorporate that, 'cause I thought that was really wise. So just use my wooden spoon stirring to combine, and then I go in with my flexible scraper. And the first thing that I do, once that dough is together and I switch to this tool, the first thing that I do is I scrape down the sides because anything that hangs out up there will immediately dry and then it just becomes waste, and I don't like that. And that looks pretty good. I'm gonna mix this by hand for just a second just to confirm that it feels homogenous and that I don't have any lumps or anything in there. So wet hand into the bowl, and I'll just sort of work it around for a second. This is a motion that I feel like emulates a spiral mixer in a bakery a little bit. It's like the Martin mixer method here. So I'm just workin' the dough around. That feels pretty good. Scrape the bowl down one more time just to make sure that it's nice and clean. And you could leave it in here for the folds. That would be perfectly fine. I think I'm going to put mine into a two-quart. The two-quart takes up a little bit less space in my Brod & Taylor proofer. And so if I put it into there, I could put two doughs. Or if someone else has somethin' else that they want in there, there's still space. So a little bit less of a footprint. So I've got a beautiful dough here. It doesn't have much organization to it. It's just sort of combined. I know it's a good temperature. I'm gonna let it rise for 15 minutes, and then I'm gonna come back and I'm gonna give it a bowl fold. So I'll see you in 15. Hope you have a nice nap. We'll be back shortly. So let's do first fold. Okay, dough looks soft. Wet hand, I'm gonna go in and work my way around the bowl, folding it 8 or 10 times. I'm just looking for it to sort of come together and tighten up. I'm basically stretching it until I feel like it won't stretch anymore. I'm not counting. I'm just making my way around the container, and I feel it sort of tightening. Feels great. I'm gonna turn it over. Maybe I just round it up in the container just a little bit. See how that looks beautiful and springy now, whereas before it didn't have that tension to it. So that's just a chance for me to check in, feel how the dough's doing, make sure that it's homogenous, make sure that it feels like it's beginning to get a little bit of activity, put it back in this nice comfortable spot to rise. We'll be back in 15 minutes for the next fold. 15 minutes roughly since our last fold. I'm back in here with a wet hand, reaching under the dough and stretching up. Look at that gorgeous, gorgeous structure. That's the magic of time. That's the magic of a good dough hydration and also great flour, great, great flour. We're using the extra superpower of high-gluten flour today to support a nice high rise in this bread that I've really loaded down with inclusions. So beautiful dough, feels very good. Just a couple folds, making my way around, and then maybe I just round it up just a titch in the bowl. You don't have to. It's just sort of part of my tidy dough-making process. Lid goes back on. Let it rest for another 15 minutes or so. We'll see you back for the lamination. Bada bing, bada boom. All right, so the dough has had its rest. You know, it's a mix, rest 15, give the first fold, another 15, give the second fold. And then ostensibly 15 minutes after that, it's how I wrote the recipe, we would come to the lamination stage. The truth is that you could go longer than that, so don't feel too uptight about that timing. Just like a lot of timings in baking, it's flexible. The apples were soaked and drained. And now I'm just chopping them up. I have found in testing that if I left the pieces too big, you would just have too much room between dough and apple layers. So it just looks better, it tastes better, it functions better if you mince these up. I think in the instructions, I say something like, you know, no piece bigger than an inch. And that's definitely accurate, but I would say that probably the average size is half inch or so, somewhere around there, maybe even a little less. I think that is good enough. Set those off to the side for a second. Grab my dough. I'm gonna put a little bit of water down on the bench, and that's gonna keep this dough from sticking. Could you use flour? I guess you could use flour, too. But I find in this situation, similar to some other breads that I've made where we spread them thinly and then fold them up, I tend to like water for that purpose. I basically want an amount of water on here that sort of allows the dough to be floating at least to a certain degree. Get our container here, and I'm gonna gently let it fall out onto the bench. I'm gonna save my container, and I'll put it back in there after we do the lamination. Now what I'm gonna do with wet hands is just stretch it a little bit. In the instructions, we say 12 by 12. And I would say even if you get it just sort of close to that, that'll be good enough. Because when you put the apples on there, you're gonna have another chance to sort of spread it slightly. On with my chopped apples. I'm just gonna put 'em all in the center, and then I'll distribute 'em. So apples on the dough. And then just sort of move 'em out, evenly covering the entire surface. You don't need to leave a border. There's really no reason to leave a border here. Next up, some spices, right? We need the cinnamon element of this dough, and I have that. I also have some of this Triple Cocoa Blend. And the reason I'm using that is not because I want this to taste like chocolate. It's that when this hydrates, it has a super dark aspect to it. It's really pretty. And so when you cut that final loaf open, you're gonna have these beautiful layers of dough and then dark flavorful apple mixture. The way I'm gonna do this now is I just put a sifter right on top of my dough and apples, and then I need two teaspoons, and then two teaspoons of cinnamon. So two teaspoons of cocoa powder, two teaspoons of cinnamon. And I'll just dust it over the surface, trying to be even, full coverage. A lot of spice in here, but I really like how it goes. It would also be good to put something like coriander in there or maybe some Christmas mulling spices or something like that, some beautiful aromatics. Okay, next up, a little bit of butter. And this is not a normal thing to do with a sourdough loaf. It's rare that I would add, you know, grated butter into the interior of a sourdough loaf with inclusions, but I really liked it in our sourdough croissant loaf that I wrote. And I came back to it as a technique that might be interesting in an apple cinnamon bread. So I tried it out, and I was really happy with it. One thing that I'll tell you about this step, and this is a little bit of an admission, is that I have messed this step up a lot of times by forgetting to add the butter. So you may find that it's one of those things where yes, you wanna keep it cold until the last minute and it's much easier to do this if the butter is cold, but just don't forget it. Like, maybe you chill your grater and then put it right next to the dough so you use that as a reminder that, "Oh yeah, that's right. I gotta put butter inside this loaf." And then once it's on there, just try and distribute it a little bit. If the butter is super cold, you should be able to move it around without any problems. And what's gonna happen is that this butter is effectively going to stay intact until the loaf goes into the oven. And then when it goes into the oven, it's gonna melt and it's gonna sorta support this layered interior aspect that I really like with this bread. And in some spots where that layer is close to the exterior of the loaf, you get this flaky, almost peel-apart sort of crispiness to it that is truly unique. So now what I'm gonna do is I'm gonna fold it up. And what I'm gonna do is start at the edge, which is furthest from me, and I'm just gonna roll it down. Maybe a tool that will be helpful for you to have at hand just in case you need it is something like a bench scraper, okay? If you don't let it sit too long, I think you're gonna be fine, though. Even though it might feel a little bit like things are gonna go south on you, just sort of persevere. Okay, so I'm almost to that leading edge of the edge closest to me. And now what I'm gonna do is go back. And what I found easiest here is to actually fold that bottom towards the top. So folding and stretching, pressing to it here. And we're just gonna sorta tidy up our little package here. And then what I'll do is I'll just roll it down end to end over itself. So I'm just creating a really layered interior to the dough. Back into the container, put a lid on top, and I'm gonna put it in a comfortable spot to rise for two to three hours. One thing to note with this dough is that now that we have some butter in there, you wanna make sure that it doesn't go above, say, 85 degrees maximum. You may see some butter begin to melt and leak out, as you would with any other butter-laminated product. So put it in a comfortable spot, maybe not above, say, 78 or 80 degrees, and let it rise for two to three hours until it's nice and puffy. When we see that condition, we'll come back and we'll shape this dough. We're well on our way with this beautiful Apple Cinnamon Sourdough Bread. In the recipe, it says after the lamination, we go for about two to three hours. This has been 2 hours and 45 minutes, and the dough looks very happy. It's high, it's bubbly. Every time I make this dough, I'm a little bit surprised by how well it moves. I don't know why that is, but it always moves really well. Maybe part of it is that the high-gluten flour just holds air better and it just kinda puffs up in a way that's really beautiful. But for only having sourdough in here, it looks great. I'm very happy with that. Because it is sticky, though, you do wanna use a generous amount of flour on the bench. So now onto the floured surface, I'm just gonna invert the container and let it fall out. It should come out in one fell swoop, especially if you grease that container just a little bit. Maybe I'll give just a little bit more flour on top. Be very judicious. Anytime you're flouring a dough surface that will become the interior of a loaf, you wanna add as little flour as possible. Because what'll happen is if you overflour, you'll have some white rings inside the dough. It's unattractive and it's not appetizing either. So just be super-judicious there. Now what I'm gonna do is just pat it a little bit, and then I'm gonna make my way around. I'm going straight to the shaping here. I'm not gonna do a preshape, okay? I'm going straight to the final shape. So same as it ever was: outside edge to inside, outside to inside, outside to inside. You can see I'm being somewhat gentle here. I don't wanna tear through this exterior of the dough. And that's it. That's all it needs. Let's prepare this basket just a little bit. I'm gonna put some whole wheat in here. I like whole wheat for dusting flour in a basket, especially in a loaf that's gonna be on the dark side. If it were a loaf with only white flour or white inclusions, I wouldn't use a darker sort of basket flour. But because this has some darker colors going on, I think it fits with the vibe to use a little bit of whole wheat. Invert it straight into the basket. Whole wheat will also help the loaf to release because it has a lot of bran in it. I'll get my cover on. And we're gonna leave that to rise for one to two hours at room temperature. I'm gonna come back and check on it. And when I check, what I'm looking for is that the loaf is beginning to recover from the tension that I added during the shaping phase. I want it to feel marshmallowy and lighter than it does right now. I'll give it a couple hours. Two and a half even would be fine, especially in the cooler months. If it's a warm summer day, you may leave it maybe an hour and a half or something like that. As always, you're in charge of the dough, watch the clock, but more importantly, watch the bread. So I'll leave that out for a couple hours and then I'll put it into the fridge for the long overnight rest. We'll come back tomorrow, and we'll bake these beautiful loaves. We're to the baking phase. We've waited this long. This is an extended process bread, right? Day one, you got a preferment to set. Day two, you're gonna mix and then ferment for a long time. And then it rests overnight in the fridge, developing flavor and all of these beautiful attributes that we love from a good sourdough. And now we're to the baking phase. I've got my loaves, or I got this loaf down here. Where is it? In the fridge. So after shaping yesterday, it got a couple hours at room temperature, allowing it to sort of rise further before it went into the fridge. During the fridge period, it's rare that dough will move much, right? When it's in the cold, it just doesn't move that much. And so what I'm trying to do, by giving it that period at the end of day, is to get a nice high rise and then sort of shut it down on the overnight so that it can develop flavor and also some crust attributes, which are really nice as well. And now we're to the point where we can bake it. You wanna preheat your oven 45 to 60 minutes. In this case, we're preheating at 475 degrees. And then after we load, I'm gonna turn it down to 425, okay? I'm using a covered baker today. So whether you've got an Emile Henry or whatever it is, it's something where you can put your loaf into a Dutch oven or similar, put a lid on it, and then you let it bake for about half the time, take the lid off and let it finish the bake. Taking the cover off, let's see what we got. Looks beautiful. The loaf firms up in the fridge, which is nice, but I can also feel that it's got this beautiful sort of light, gassy interior structure. With this loaf and also the Sourdough Croissant loaf, both of which have butter in 'em, I like to bake them on a piece of parchment that I sort of make a little baking tray out of because some butter does come out of the loaf. If I just let it spill into my covered baker, it can get a little messy and this makes it a little easier to clean up. And so I make this little tray. So I'm just taking a sheet of really good parchment paper, and I'm just making it into a little tray. Perfect. So let me talk about my little sort of setup here just a little bit. I've got a place where I can put my hot covered baker. Remember that's gonna be very hot. It's preheated to 475 degrees. I'm gonna place it here. I'm gonna put my loaf onto my little parchment tray that I've made. I'll put it onto my covered baker, and then I'll score it with my lame. So I've got my razor right here. I also like to use, inside my covered baker, I like to use a little bit of ice. It increases the amount of steam. So I have some ice cubes here. I'll drop one of those in, and it will steam better than just using the moisture in the loaf by itself. So I'm adding a little bit of ice. We even have a video on that about how to get a blistered crust. This is how you do it. So I'm gonna grab my hot covered baker. I'm just gonna leave that in the thing there. Okay, I've got my parchment tray. I'm gonna put it right on top of my loaf in the basket, and I'm gonna invert it. Loaf plops out, put it into my covered baker. And then I'm just gonna give a nice deep score. And I'm just gonna make a cross. I think that's good enough. I don't know if you can see in there, Tucker, but you can see the sort of structure of this beautiful loaf already forming. You can see the layers that I'm looking for. See how we've got that apple, cinnamon, and everything else? Gloves back on. I'm gonna drop a piece of ice right in there. And you wanna get your lid back on there as quick as possible, otherwise you're gonna lose that steam. And then the loaf goes right back in. Turn it to a 425, and we're off. 20 minutes at 425. I'm gonna come back, and I'm gonna take that lid off. And then for the second half of the bake, I'm gonna bake it with the lid off so that it gets nice and brown. Here we go. All right. Halfway point. Let's get the lid off. Woo! So you can see I got a little bit of butter comin' out here, but loaf is beautiful. The steam really helped it to expand. I'm gonna get it back in there for the second half of baking, another 15 to 20 minutes. So it's out. It looks great. I'm gonna get it onto a cooling rack. Let me set that there. As always, don't just cut into this thing. Let it cool. It's still baking until it's down to about room temperature. And at that point, things are starting to set up. The crumb structure will hold a little bit better. If you cut it before then, you're gonna lose a lot of moisture and it's gonna affect the eating quality of the loaf. So let it cool. If not fully, at least let it get down to where you're not gonna burn yourself. So we're gonna give this a few minutes to cool, and then we'll come back and we'll cut into it. Apple Cinnamon Sourdough loaf out of the oven and it's cooled. I even put these in the fridge for a little bit just to take the temperature down a little bit more quickly. You can do that if you need to, if you wanna slice into a loaf a little bit sooner. There are a few things that I wanna comment on. One is the level of bake. This is golden brown and delicious. It's well-baked, baked to full color. Remember that the hydration in this loaf is really like apple-soaking liquid. It's not exactly apple juice, but it does have a lot of apple in it. And with that, it brings sugar and the ability to brown really well. So it takes color beautifully. Towards the end of baking, you're gonna wanna keep an eye on the bottom of this loaf. Some baking containers, especially if you're using a metal one like this Challenger Bread Pan that I used today, those may impart a little bit more color, so just keep an eye on it to make sure that the bottom crust has the level of color that you like. I love seeing the energy that was in this loaf when it went into the oven. You saw me steam, you saw me bake in a closed baking chamber. Those things support a nice full rise or full amount of oven spring during the baking process. So we have cuts that opened really well. And then in places on the exterior, it almost has this croissant look to it. You can tell that it's a dough that's been thinly stretched and has some butter behind it. So there's a little bit of bubbling. There's a little bit of flaking. I love seeing that in this loaf. Let's cut it open and see how the lamination came out. Ooh, crispy. Love hearing that. And it looks beautiful. Man, I don't even need to look at the interior. I'm just gonna sit here and gaze at this beautiful slice for a second. It looks well-fermented to me in the streaks of dough that sort of run throughout. We've got some beautiful, beautiful, fine bubbling. This is our Apple Cinnamon Sourdough Bread. Perfect anytime of year, but especially as we are into cooler months and all of those flavors. Bake some of this up, use it as aromatherapy in your house. This is Martin and Tucker, and Molly and DT, and everybody else here at the test kitchen saying thanks for joining us. We'll see you on the next video.

Video Credits
Shop this video
Related Videos


Your bread fell flat. Your cookies crumbled. Who do you turn to?