Using the autolyse method
Unleashing the power of the pause in sourdough and other bread recipes.

If artisan bread baking is a passion of yours, you’ve no doubt come across the autolyse method (a short rest after combining flour and water) in recipes or baking books, particularly when making sourdough bread. Have you wondered how using the autolyse method might transform your bread baking? Are you uncertain how best to incorporate this powerful pause?
An autolyse is the gentle mixing of the flour and water in a bread recipe, followed by a 20 to 60 minute rest period. After the rest, the remaining ingredients are added and kneading begins. This simple pause allows for some rather magical changes to occur in your bread dough. Let's explore exactly what's going on during the autolyse, and how it can improve your bread baking.
French scientist and bread expert Prof. Raymond Calvel developed this technique in 1974, in response to what he saw as a deterioration in French bread production.
In the 1950s and '60s two-speed electric mixers came into use in France, and bakers adopted more aggressive mixing practices. According to Calvel, this resulted in “very white and high in volume” bread — which to his dismay began to gain popularity in France.
This intensive mixing caused the dough to mature more quickly, which meant less fermentation time was required. Unfortunately, reducing fermentation resulted in bread with less flavor and keeping quality. Excessive mixing also damaged the carotenoid pigments in the flour through over-oxidation. This caused a loss of crumb color (whiter bread) and a reduction in aroma and flavor.
Calvel saw this as a grave degradation of traditional French bread, and sought to bring back the wonderful breads he'd known in his youth.
Calvel demonstrated that using the autolyse method affects dough development in many positive ways:
I was trying to explain the autolyse method to my sister, who's a pathologist, and her eyes lit up: "Autolysis!" In her world, this process describes the self-digestion or destruction of tissue by its own enzymes. As it turns out, this is exactly what's going on during an autolyse.
Two enzymes that are present in flour — protease and amylase — begin their work during the autolyse:
Proper dough development requires a balance of both extensibility and elasticity. By delaying the addition of yeast, sourdough starter, and salt (all of which can have a tightening effect on gluten), the extensibility of the dough has a better chance to develop. Once kneading begins, the dough develops elasticity, which is the quality that allows the dough to retain its shape.
When I began this project I was convinced it would be easy; how hard could it be to demonstrate the well-documented positive results of using the autolyse method?
Then things got a little messy.
My test loaves didn't always illustrate the promised dramatic results, and using the autolyse method wasn't always as easy as I expected. While I certainly don't dispute Calvel's findings, sometimes production baking practices need a little tweaking when it comes to utilizing them in your home baking.
Let's see what my tests reveal about the best way to add the autolyse method to your bread-baking routine.
Strictly speaking, an autolyse includes just the flour and water in a bread recipe. Salt tends to tighten gluten, as does the fermentation brought about by the addition of yeast or sourdough starter. Since these ingredients work against the development of extensibility, they are omitted from the autolyse.
However, when a recipe includes a liquid sourdough starter or a preferment, it's added to the autolyse as well. Without the significant percentage of liquid contained in these starters it would be impossible to properly hydrate the flour during the autolyse.
For testing purposes, I chose recipes that either didn't include a liquid preferment, or called for a stiff sourdough starter that could be added after the autolyse. While an autolyse can be added to almost any bread recipe, my rationale is that these recipes will show the purest results when it comes to the effects of adding an autolyse.
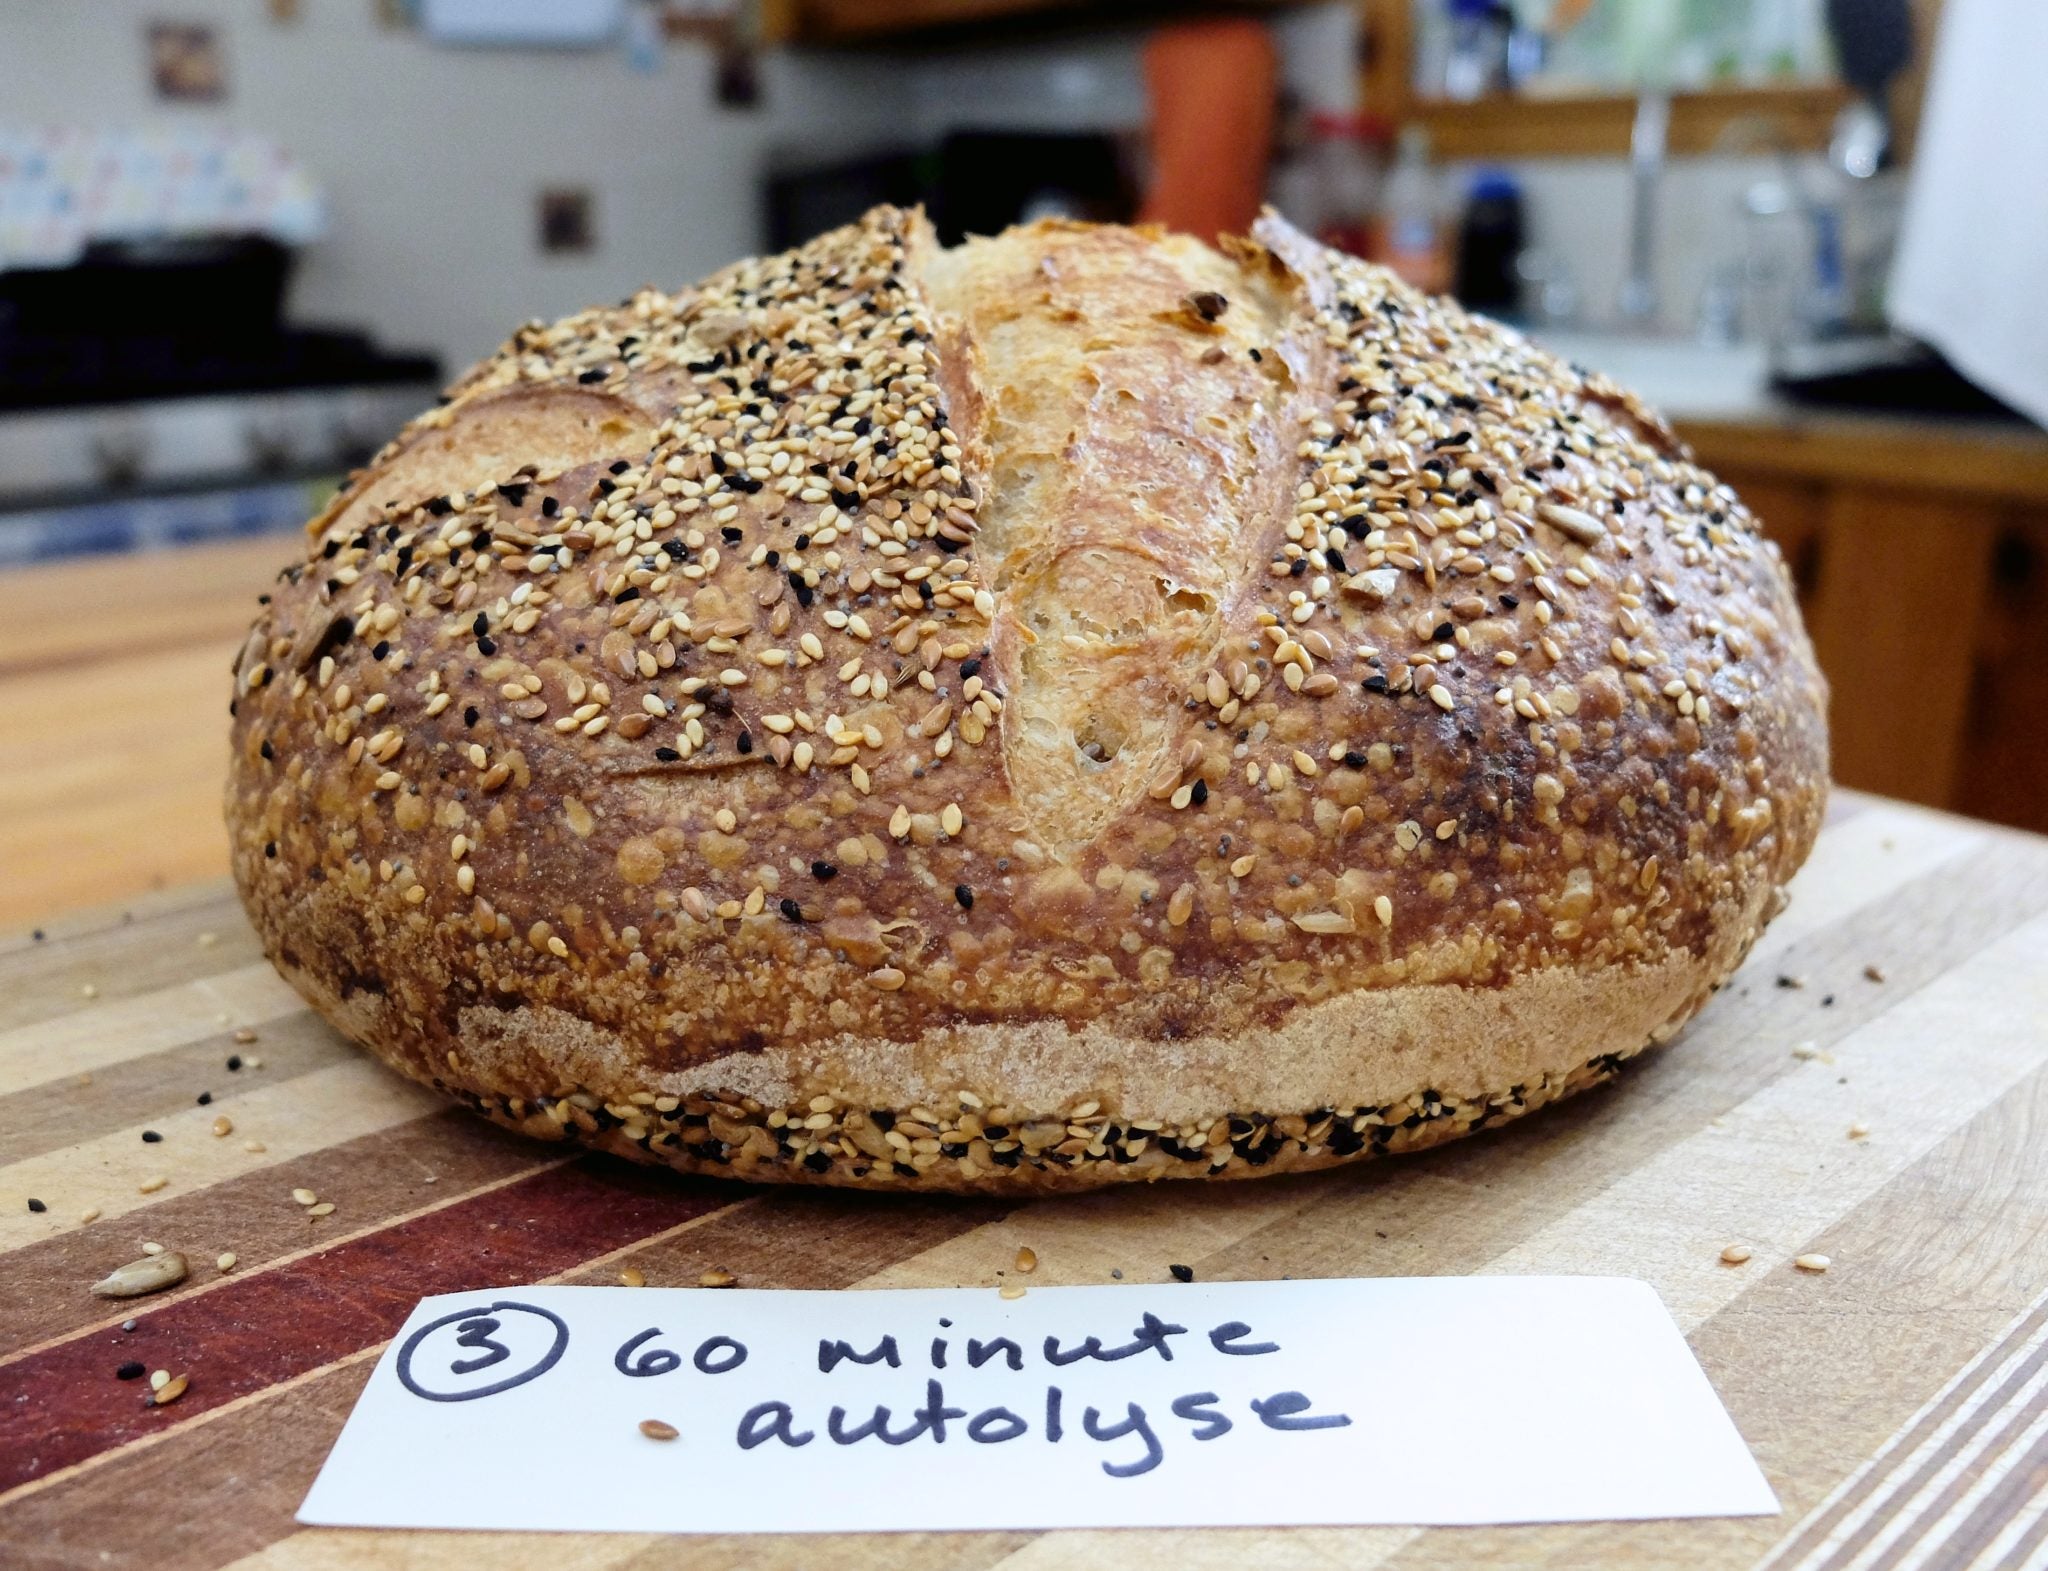
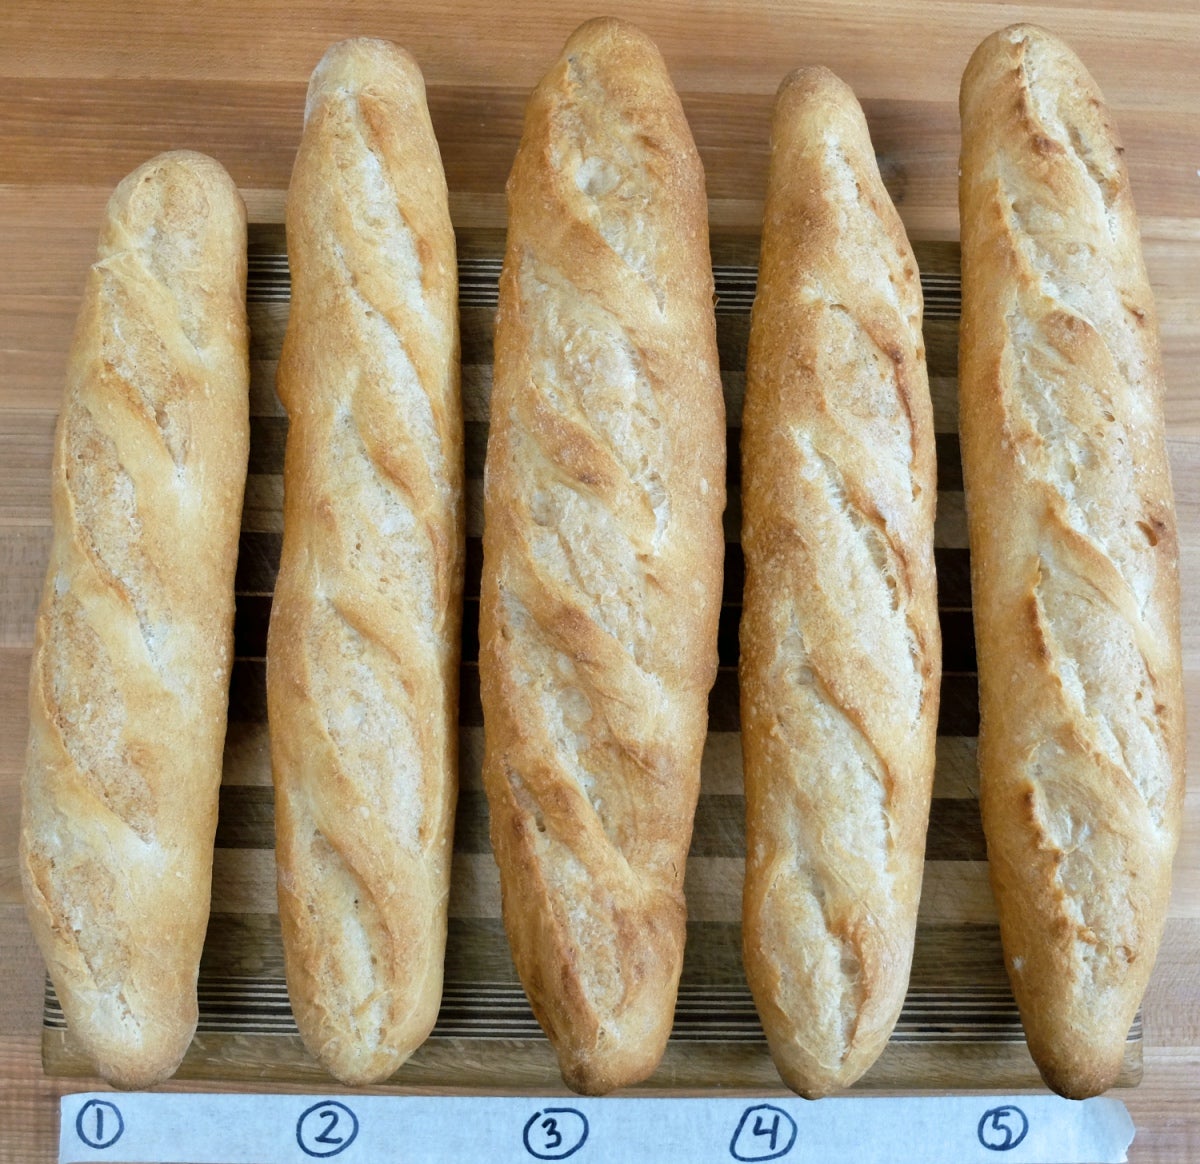
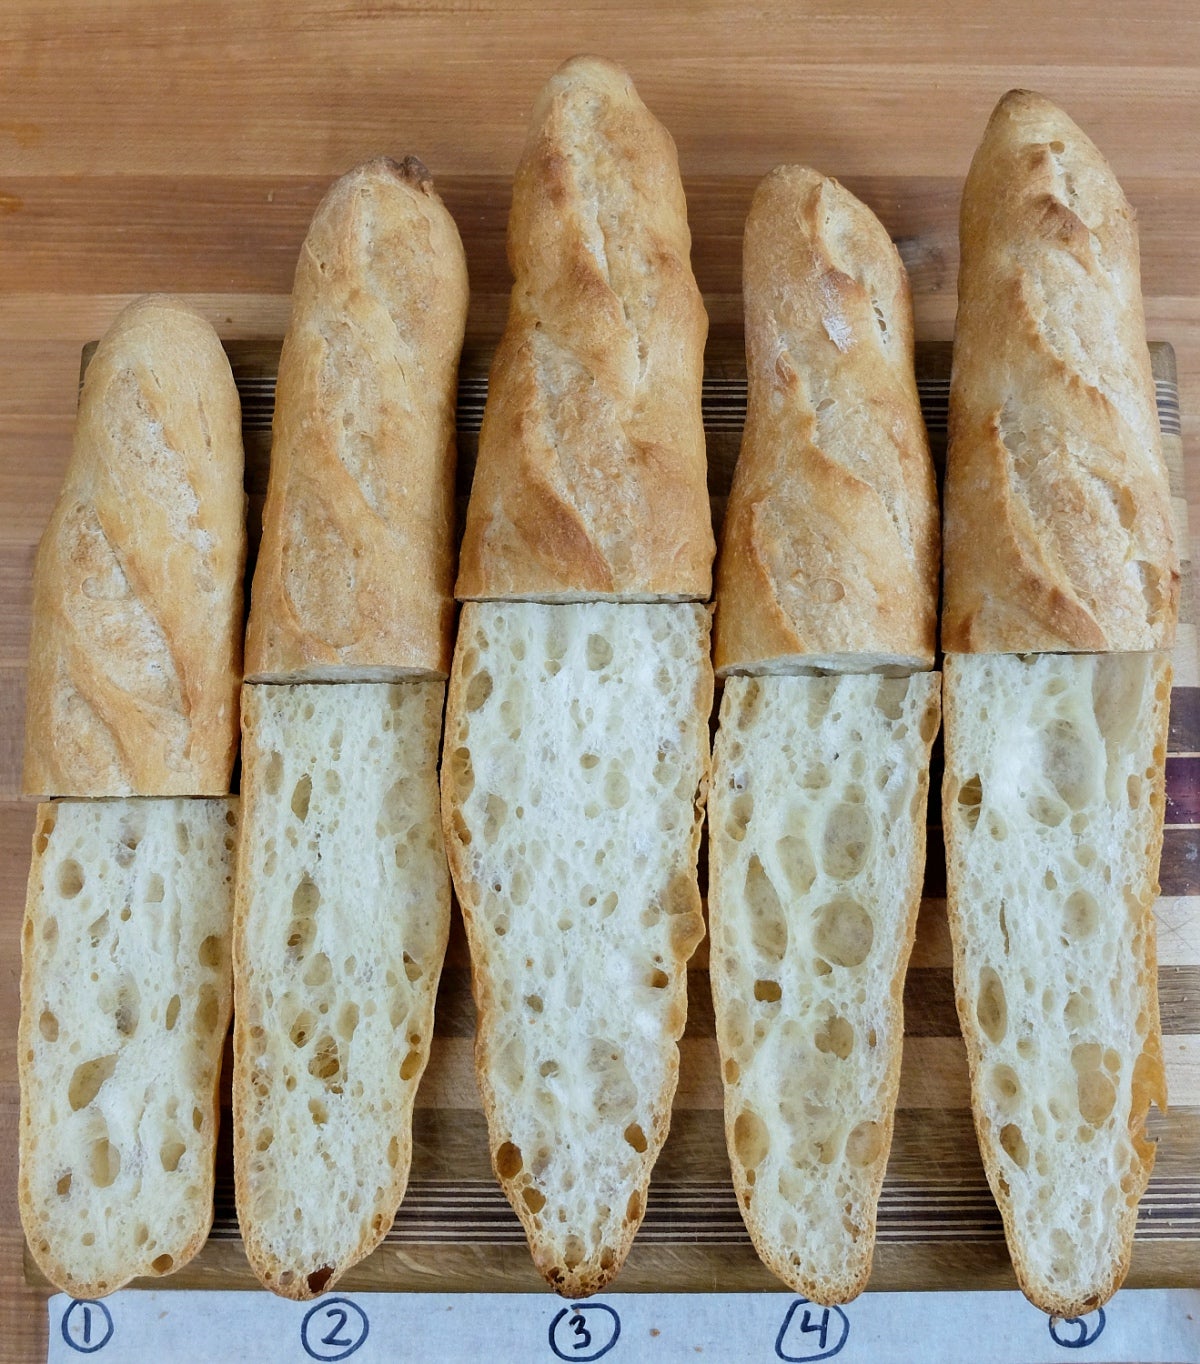
Our Artisan Sourdough Bread made with a stiff starter makes one large boule, but I'll cut it in half and make sourdough demi-baguettes; baguettes make for an easy side-by-side comparison.
For consistency's sake I'll use my KitchenAid mixer with the dough hook, and try to keep the mixing and kneading times the same for each dough. My standard mix time will be 3 minutes on the lowest speed (stir). Kneading time will be 2 minutes on speed 2.
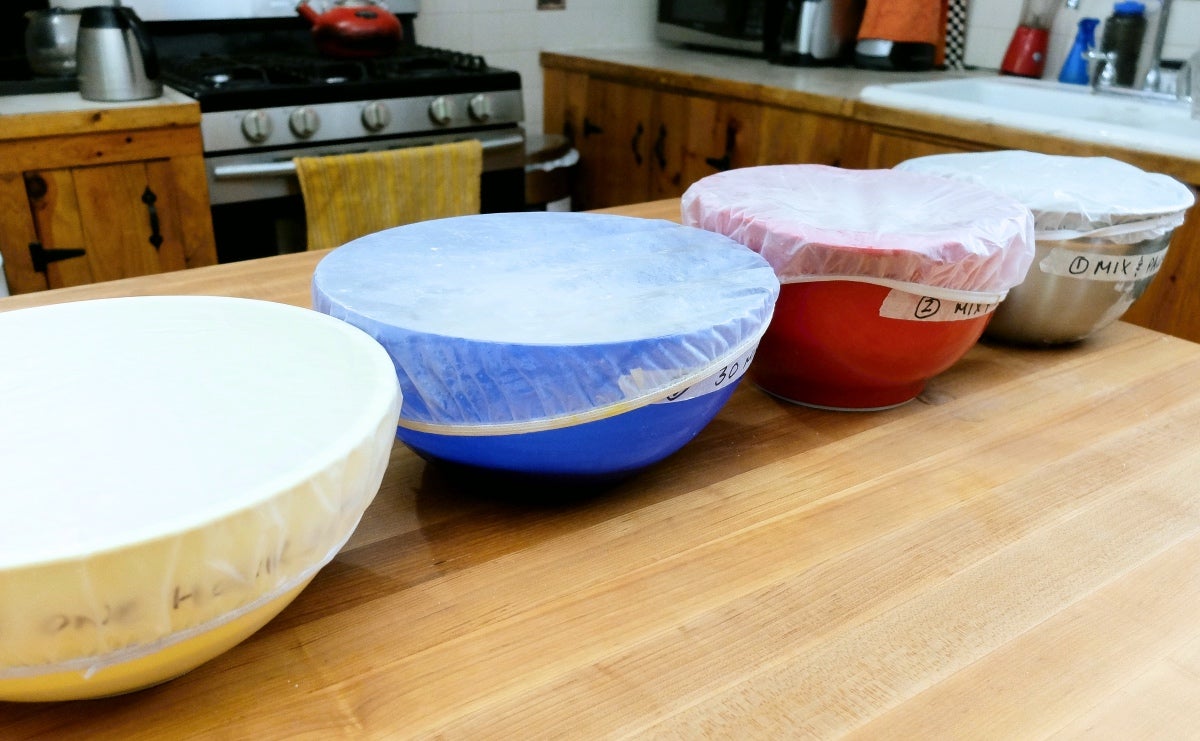
The dough is always covered during a rest period.
Here's what I'll test with this recipe:
Dough #1, no autolyse or pause: All the ingredients are added at once and immediately mixed and kneaded. Mix/kneading time is 3 minutes on "stir" and 2 minutes on speed 2.
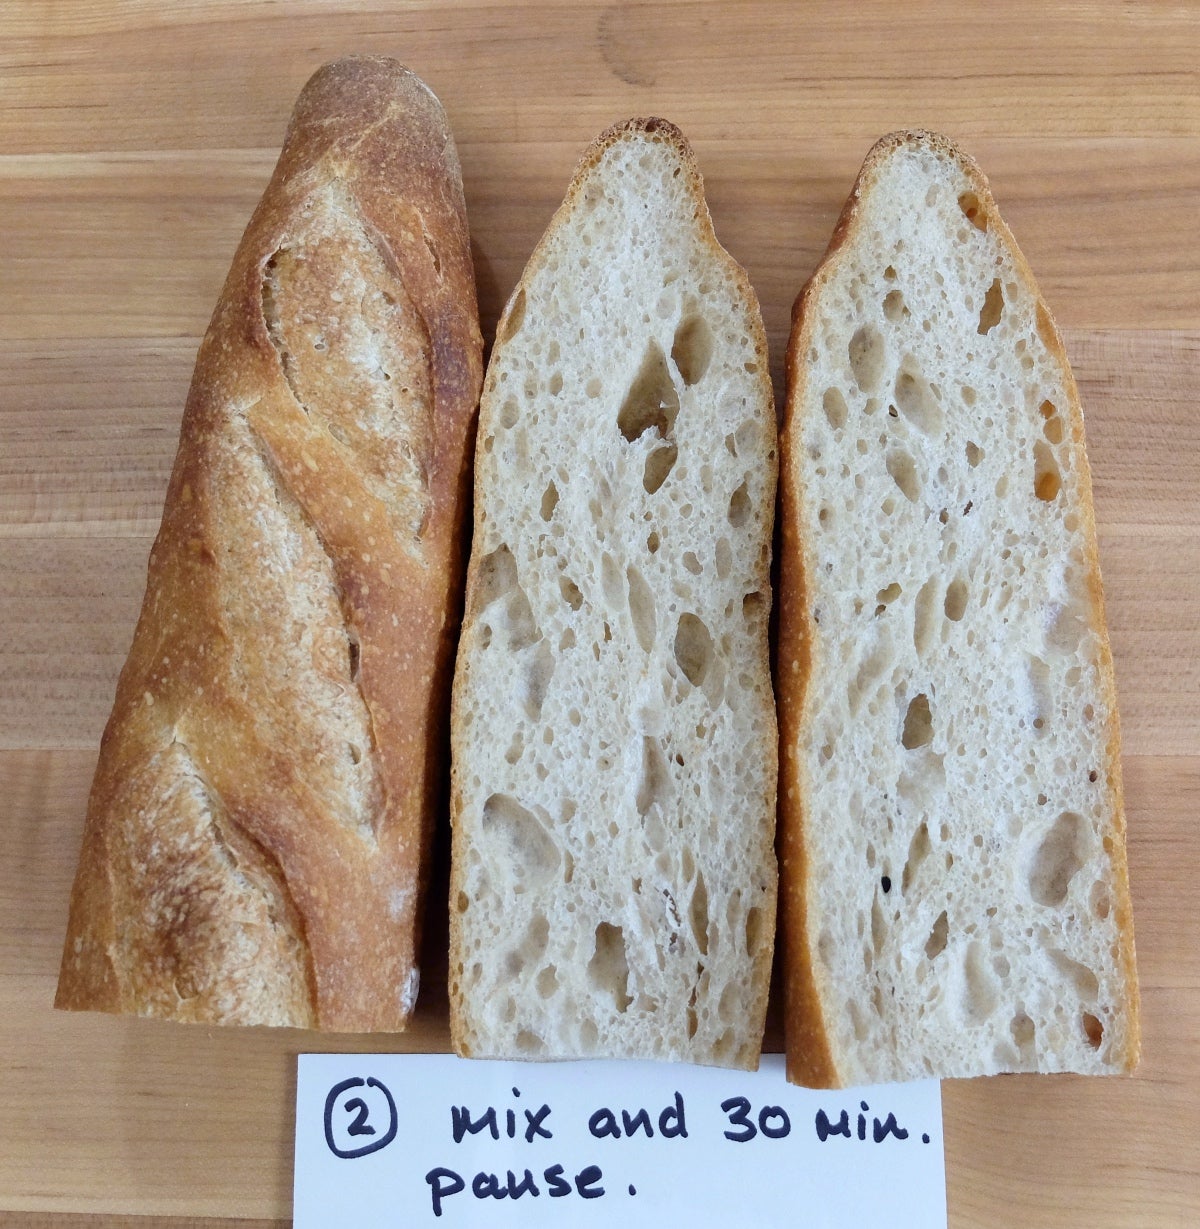
Dough #2, mix and 30-minute pause: A gentle mix of all the ingredients, followed by a 30-minute pause. The dough is then kneaded.
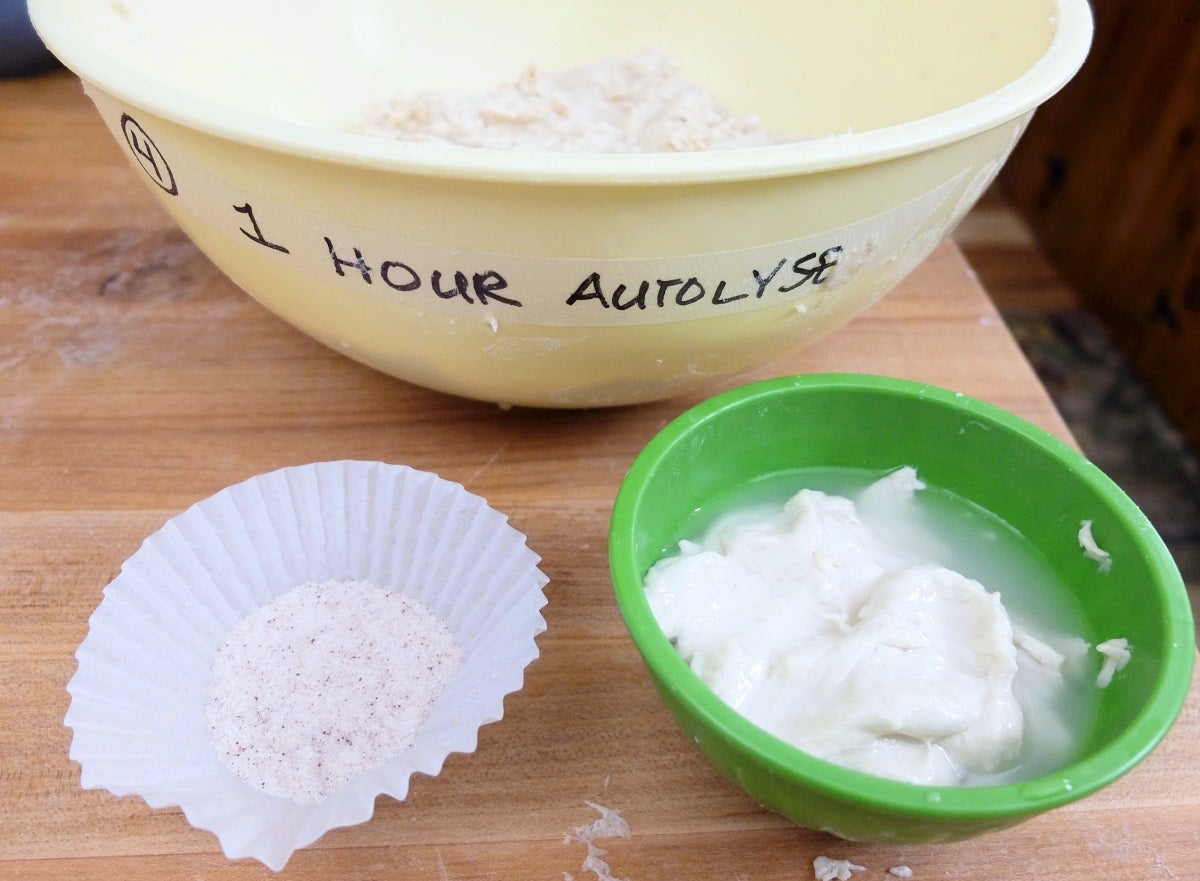
Dough #3, 30-minute autolyse: The flour and water are gently mixed and the dough is allowed to rest for 30 minutes. After the autolyse the salt and sourdough starter are added and the dough is kneaded.
Dough #4, 60-minute autolyse: The same process as the 30-minute autolyse, but with a 60-minute rest.
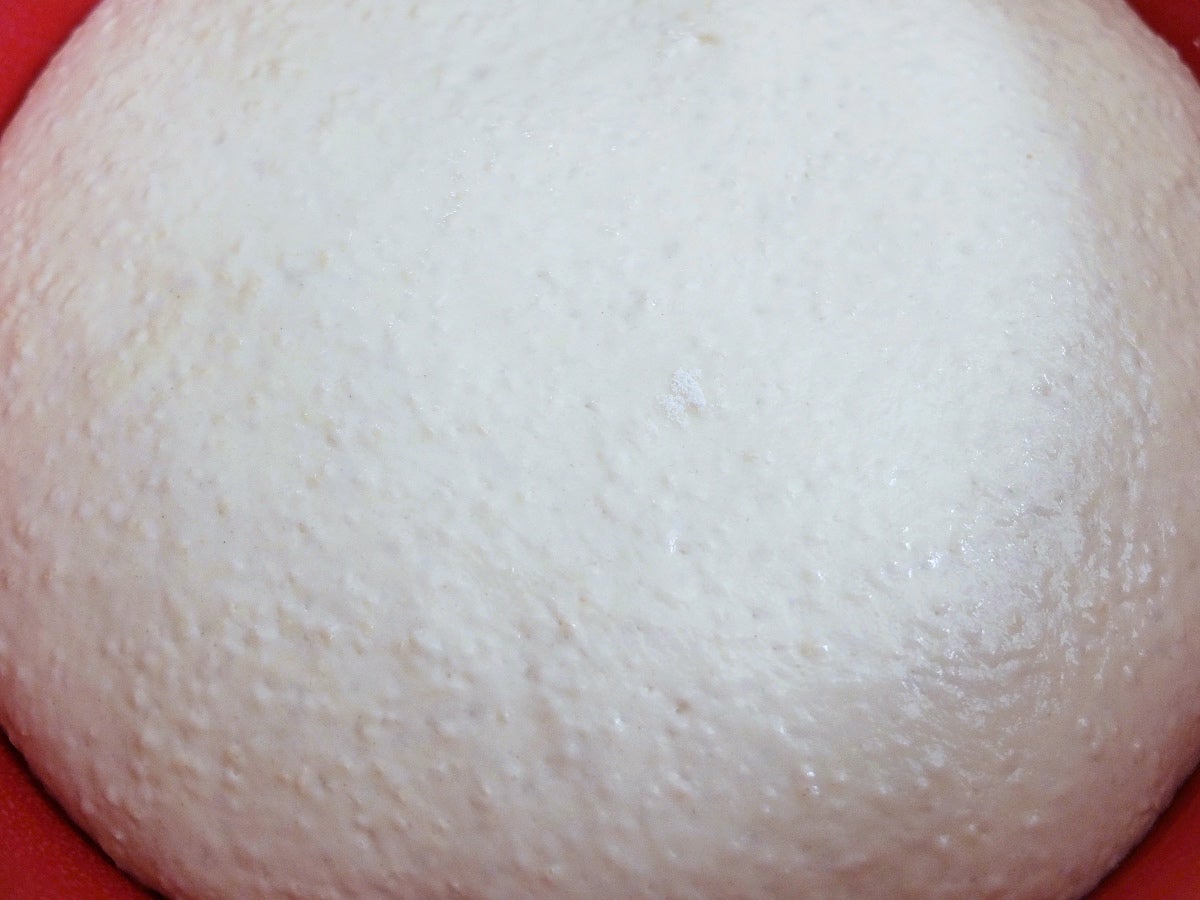
Dough #1 and dough #2 come together easily, and dough #3 starts out nicely as well. For the autolyse, I simply mix the flour and water together until the flour is fully moistened. I then cover the bowl and let the dough rest for 30 minutes.
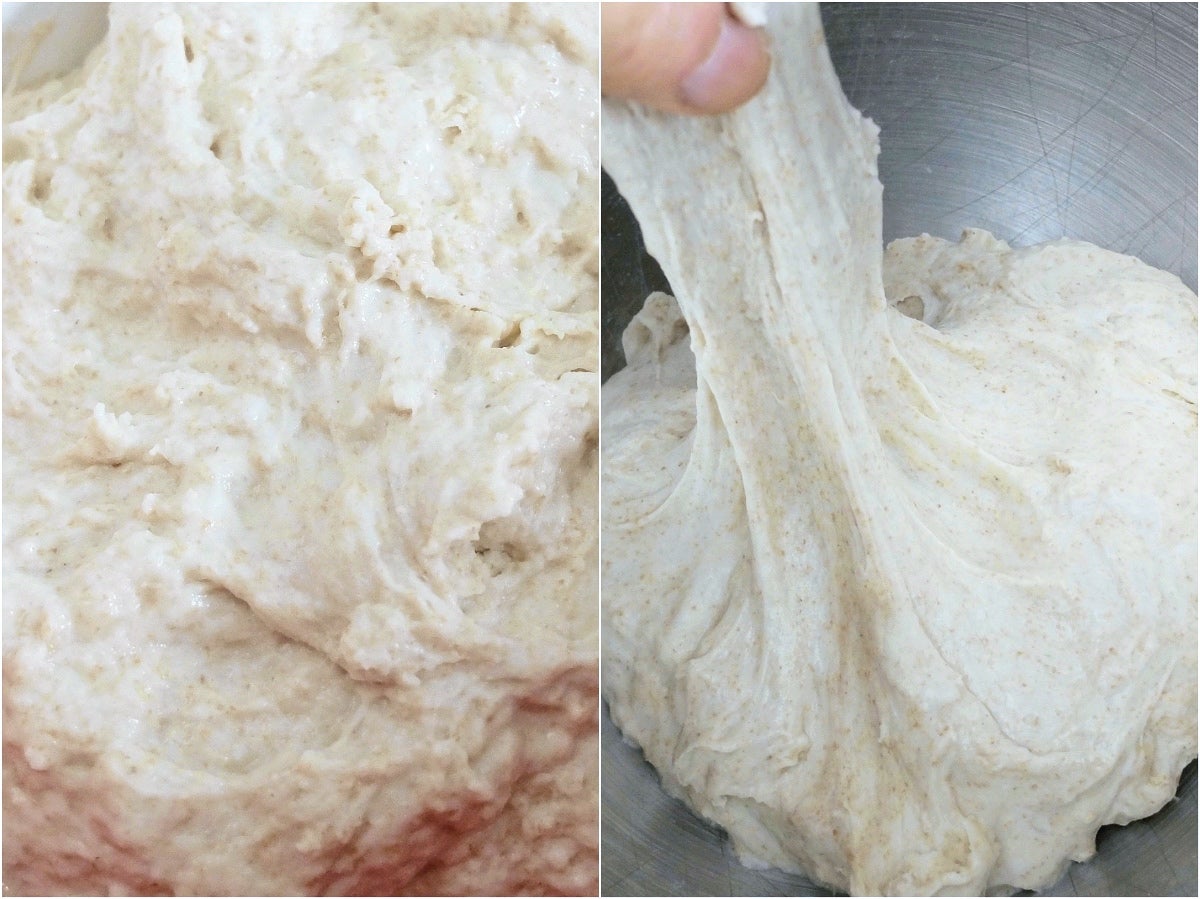
It's truly miraculous to observe how the dough transforms in 30 short minutes from a rough blob to a smooth and stretchy dough.
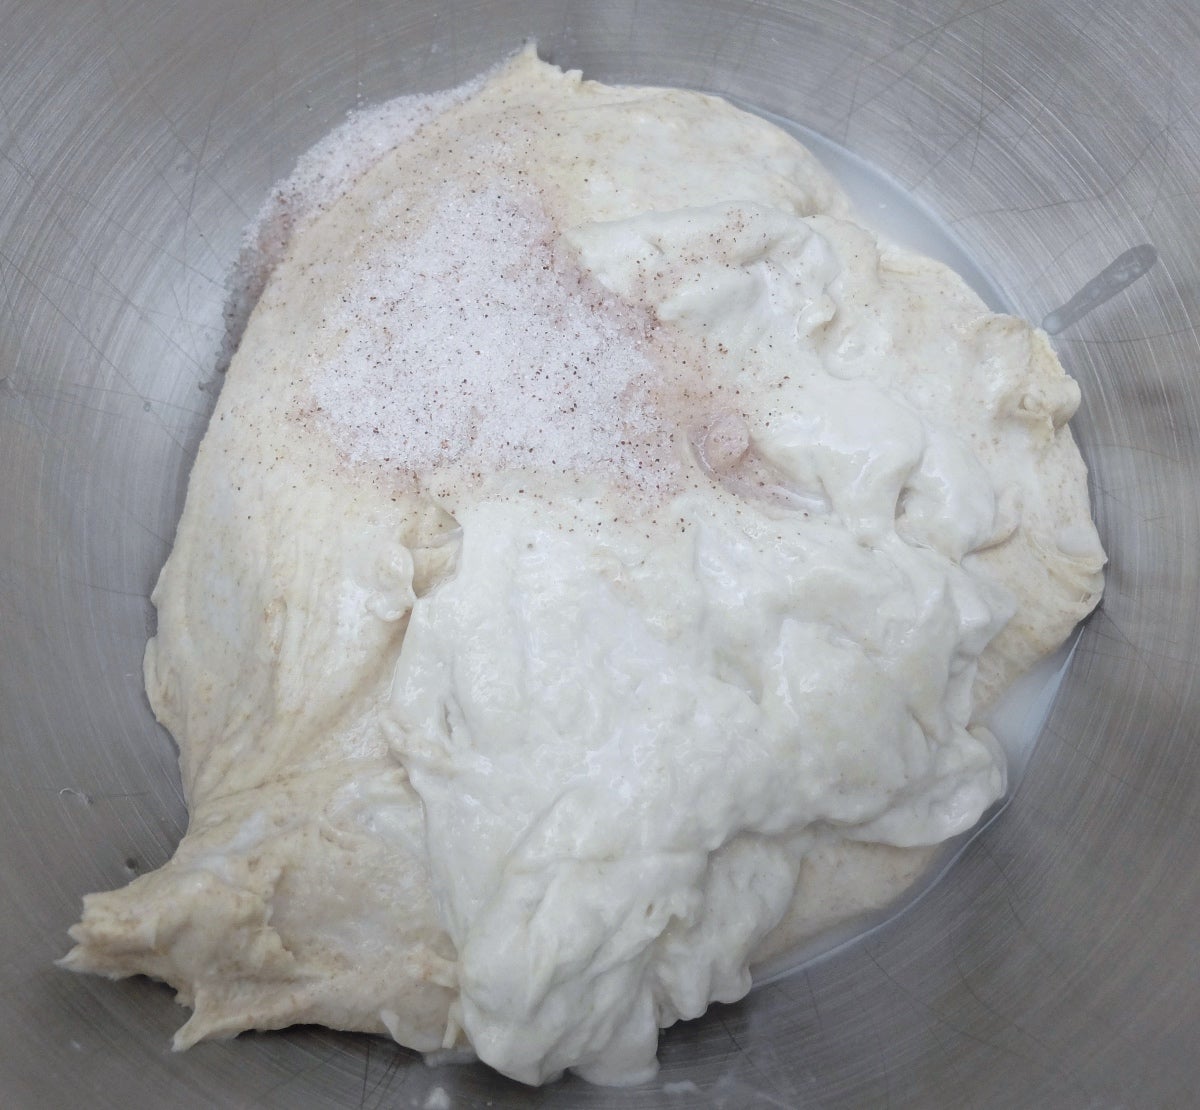
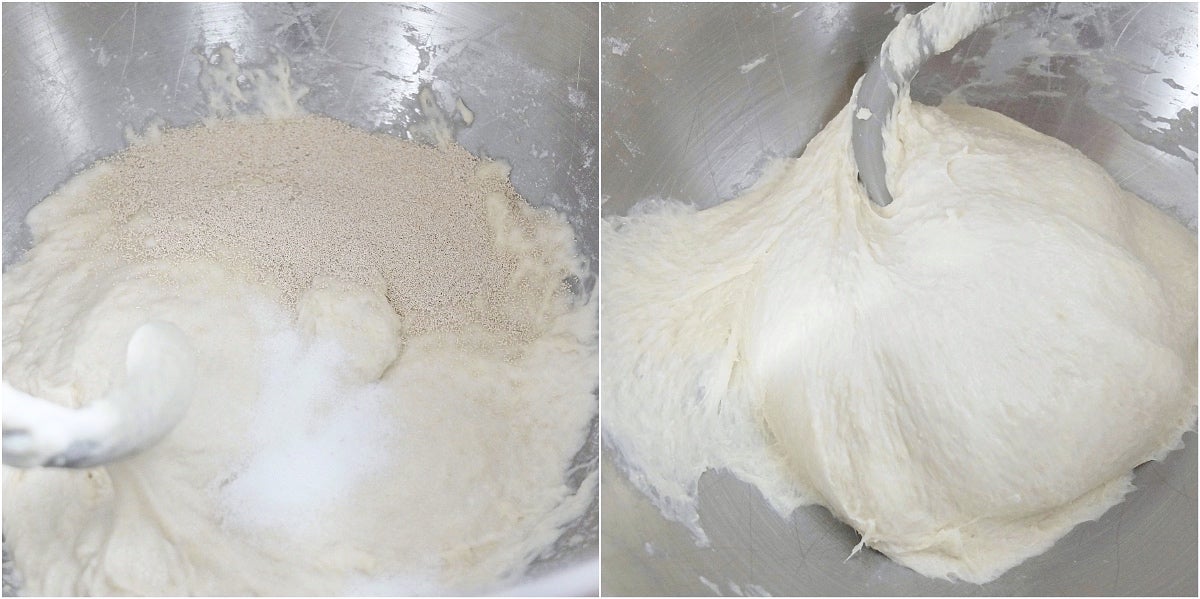
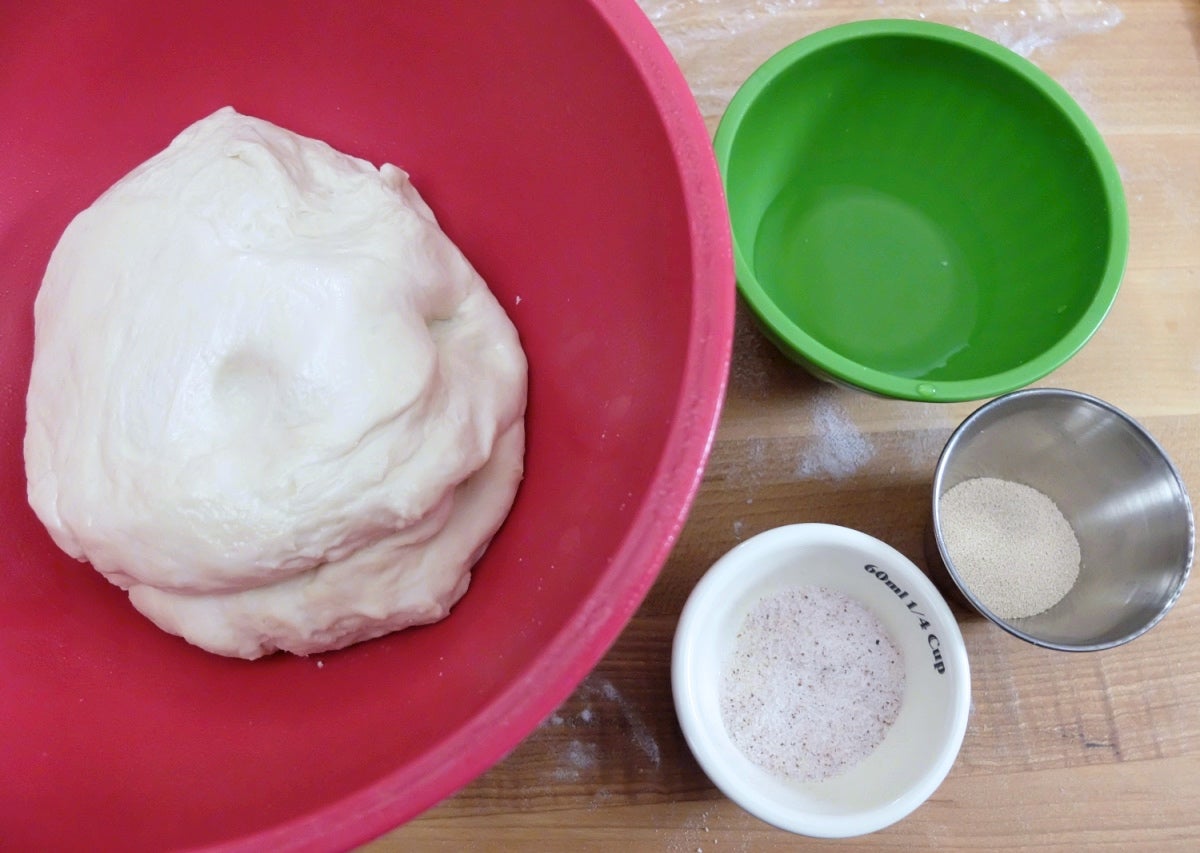
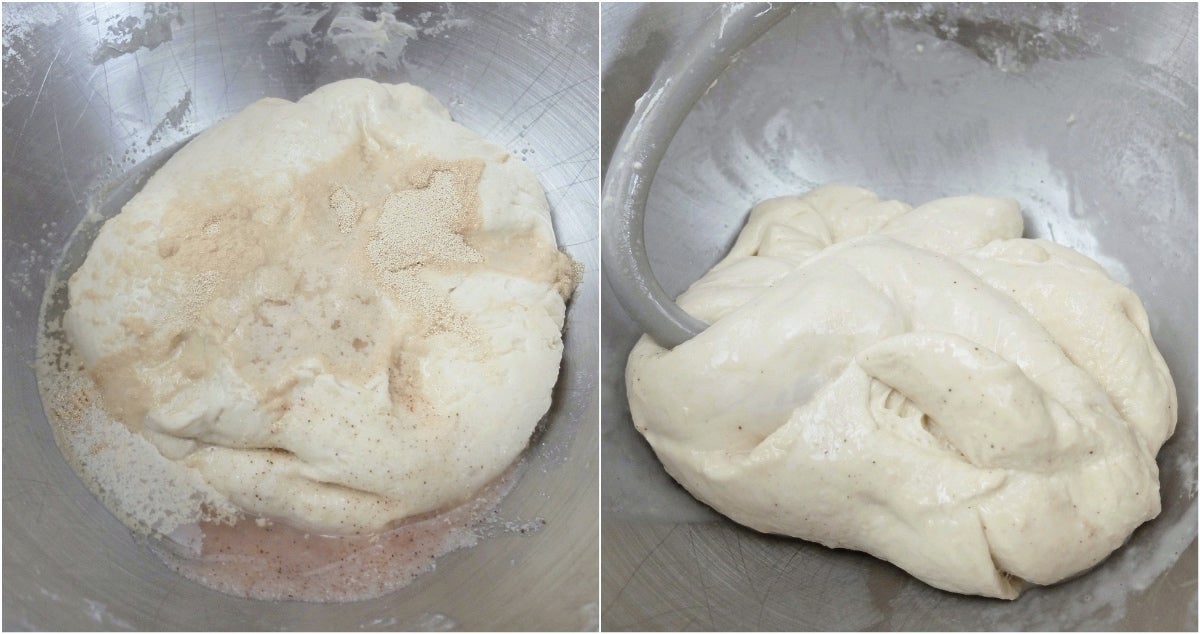
However, when it comes time to add the stiff starter and salt to dough #3, I run into a small hitch: The starter and dough don't want to come together.
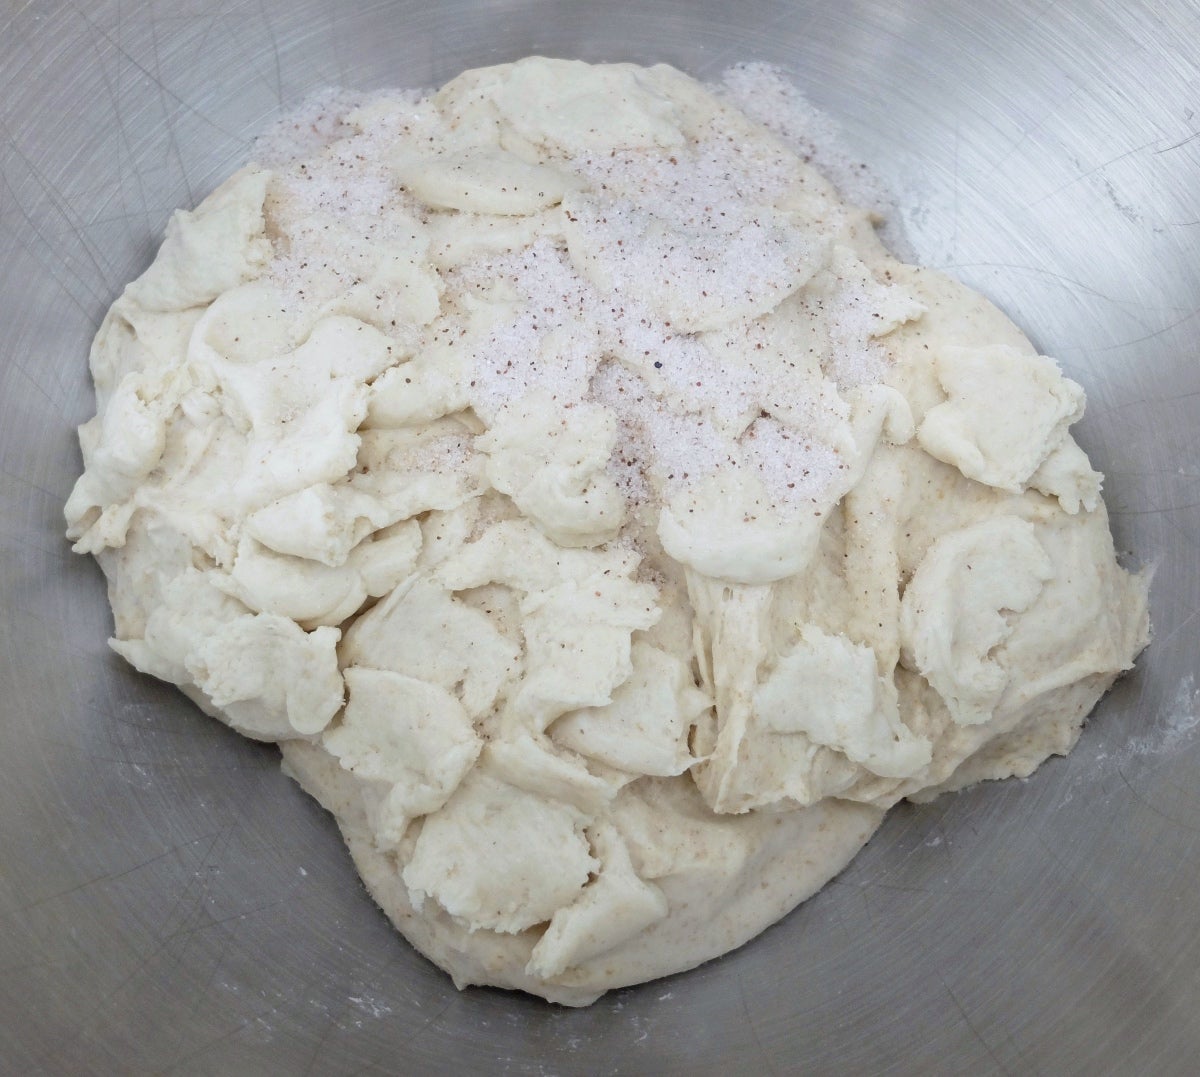
I first try ripping the starter into small pieces and sprinkling the salt on top of the dough, but little bits of starter remain intact, even after kneading for 2 minutes on speed 2.
When I mix the 60-minute autolyse for dough #4, I try a different tactic.
I decide to reserve a small amount of the recipe's water (20g) to soften the stiff starter prior to adding it (along with the salt) to the dough and kneading. This also proves challenging to mix because the water causes the dough to slide around in the mixer, preventing the hook from engaging.
It's necessary to gently mix on the lowest speed, pausing frequently to fold the dough and help it engage with the hook.
While these added precautions work, they definitely take more time. If less required kneading is a positive result of using the autolyse method, struggling to incorporate the starter before you can begin kneading is definitely a drawback.

With all that extra effort to incorporate the starter properly after the autolyse, I'm a bit disappointed to see so little bang for my buck. The loaves that include an autolyse (#3 and #4) do show greater expansion, but there's not a dramatic difference.
Dough #1: The mix that received no autolyse or pause produces a slightly smaller baguette, with a more erratic crumb structure than the other test loaves.
Dough #2: The mix and pause method produces the best color, crumb, and scoring.
Dough #3: The 30-minute autolyse yields a robust loaf with a decent crumb, but nothing to write home about.
Dough #4: The 60-minute autolyse produces the largest baguette, but the crumb isn't as open as #1, #2, or #3.
The winner of this round is dough #2 (full mix and pause).
For this recipe I'll use the same mixing/kneading process as I did in the first test: 3 minutes on "stir" to blend the ingredients, and 2 minutes on speed 2 to knead the dough. The only exception to this will be the intensive mix (Dough #1).
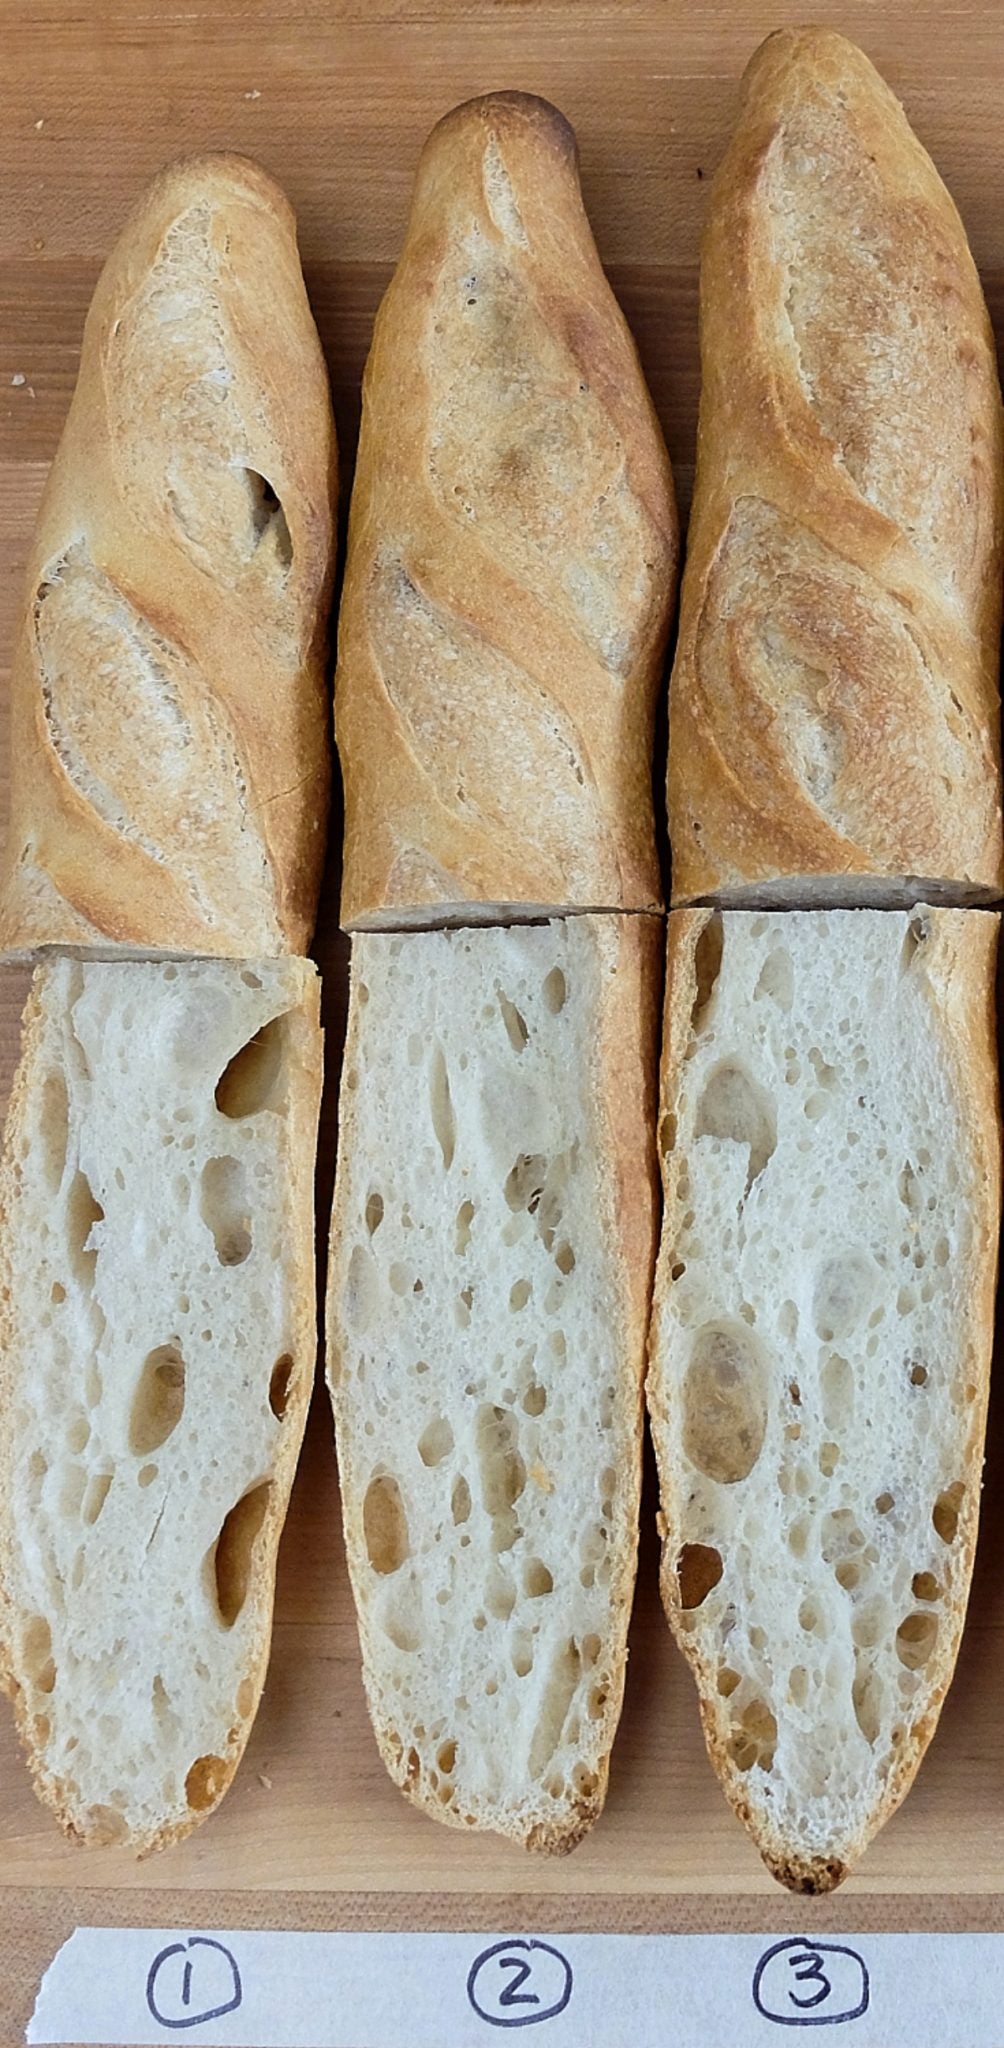
Here's what I'll test with this recipe:
Dough #1, intensive mix: Replicating the intensive mixing practices that drove Calvel to develop the autolyse method risks destroying my mixer — don't try this at home! I mix all the ingredients and then knead for a full 15 minutes on speed 2 in my KitchenAid mixer.
Dough #2, mix and pause: All of the dough ingredients are mixed together and then allowed to rest for 30 minutes. After the pause, the dough is kneaded.
Dough #3, 60-minute autolyse: The flour and water are gently mixed and allowed to rest for 60 minutes. After the rest, the salt and instant yeast are added and the dough is kneaded.
Dough #4, 30-minute autolyse with yeast: The flour, water, and instant yeast are mixed together in the autolyse. After the 30-minute rest, the salt is added and the dough is kneaded.
Dough #5, 30-minute autolyse: No salt or instant yeast are added to the autolyse. After the 30-minute rest, the salt and instant yeast are added and kneading commences.
Doughs #1 and #2 come together without incident (my mixer doesn't die)! But when I get to dough #3, I discover an issue that I hadn't anticipated.
I mix the flour and water and allow the dough to rest for 60 minutes.
After the autolyse, the yeast and salt are added and I knead on speed 2 for 2 minutes.
Uh-oh!
The instant yeast doesn't dissolve properly when added to the fully hydrated flour. The dough is riddled with undissolved yeast granules at the end of the first rise.
Back to the drawing board.
This time when I come to dough #3 and dough #5 I reserve a small amount of the water (1 ounce) from the autolyse, to add in along with the instant yeast and salt after the autolyse is complete.
This method has its own issues. The yeast dissolves nicely; unfortunately, the dough has difficulty accepting the water/yeast/salt mixture: It's necessary to stop and start the mixer repeatedly to make it happen.
Another option is to add the yeast with the autolyse, as I did with dough #4. This is what bakeries using instant yeast normally do; but how do the resulting baguettes compare?
Let's bake them and see.
Dough #1: The intensive mix actually turns out better than expected, with a decent crumb structure. However, it's much more difficult to roll out, and the resulting baguette is small and pale: definite proof that more isn't better when it comes to kneading bread dough.
Dough #2: The mix and pause method also yields fairly positive results. Good crumb, decent volume, and cuts that open reasonably well.
Dough #3: Wow! The 60-minute autolyse really shines in this test (though the loaf may have been a little over-proofed). Great color, volume, and crumb, along with decent cuts.
Dough #4: The 30-minute autolyse with yeast yields another beautiful baguette. While not quite as big as #3 and #5, it's next in line for size, and has a very open crumb.
Dough #5: The 30-minute autolyse without salt or yeast is the winner of this round. Beautiful crumb, color, and volume. I even get some ears!
The winner!
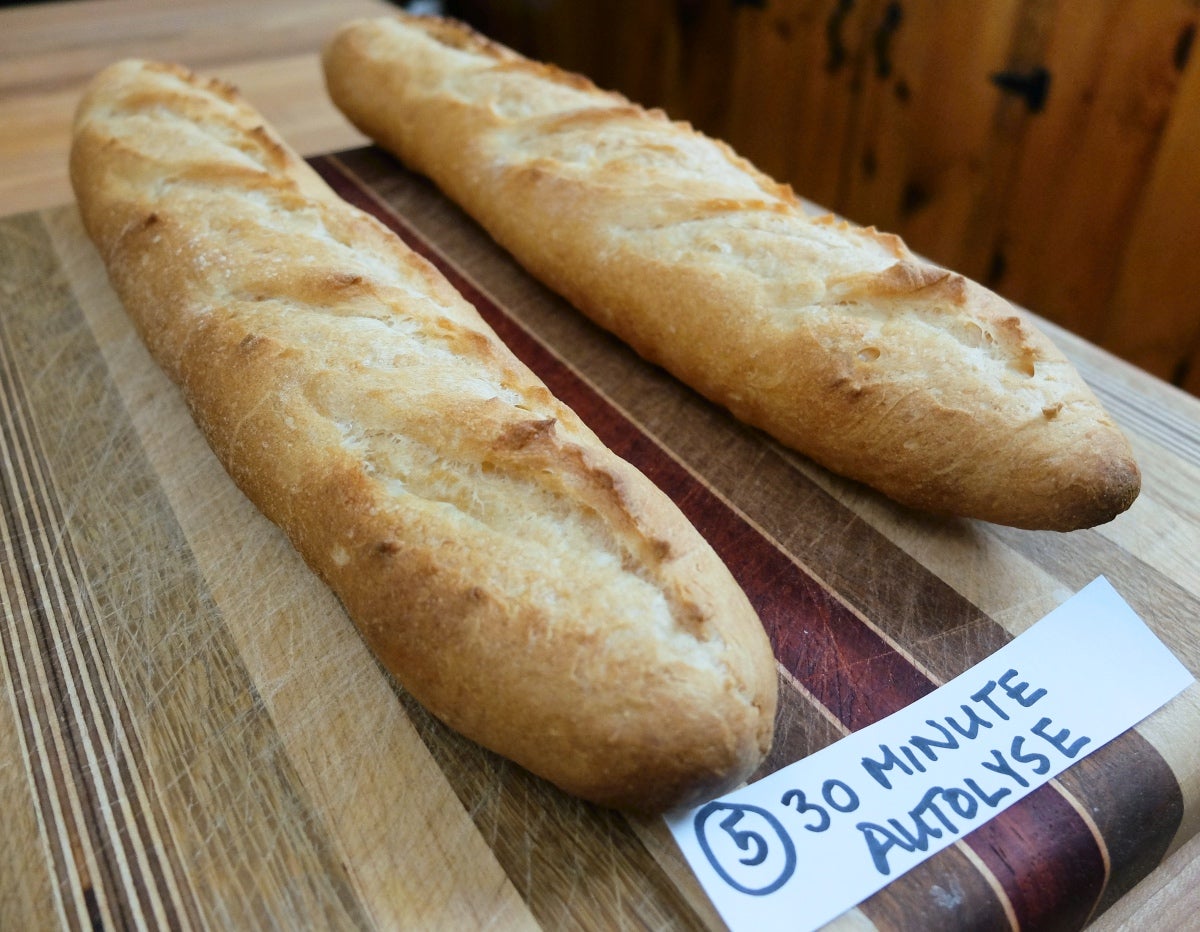
Baking 5 rounds of baguettes is just about my limit for one day, so I decide to refrigerate some of the extra baguette dough from test #2-A and shape and bake it the next day.
Dough #1: After refrigeration, the intensive mix once again produces a small, pale baguette. None of the baguettes have as open a crumb structure as the baguettes that were baked the day before, but the interior of this baguette looks particularly tough and ropey.
Dough #2: The mix and pause method yields a reasonably nice baguette, but it's also paler and smaller than dough #3.
Dough #3: The 60-minute autolyse is the clear winner of this round. It yields the largest baguette, with a great crust color and cuts that open beautifully.
One advantage of using an autolyse that I haven't been able to capture in these photos is the tremendous difference it makes in the feel and workability of the dough. Calvel called French bread made using the autolyse method "more seductive." I think he was referring to the baked loaves, but dough that's undergone an autolyse feels more seductive. It has a soft and yielding strength that makes rolling out baguettes a true pleasure. It's worth giving the autolyse method a try for this reason alone.
I hope you'll feel inspired to start using an autolyse in your bread baking.
And let us know how using the autolyse method works for you!