The baking trials: What's the best way to line cupcake pans?
From paper liners to silicone baking cups to nonstick spray, here are our results.
Date
April 10, 2023

Have you heard? It’s officially Cupcake Season!
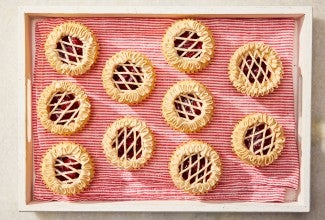
We’re celebrating with a lineup of brilliant, creative cupcake recipes that take inspiration from cream-filled cakes (our Boston Cream Pie Cupcakes), pies (check out these Cherry Pie Cupcakes, topped with frosting lattice), diner breakfast (here’s looking at you, Blueberry Pie Cupcakes), churros, and more.
Of course, we didn’t stop with the recipes. We also considered the very best way to line your cupcake pans to ensure your creations turn out perfectly.
Perhaps most obviously (and importantly): Lining your cupcake pan is the primary way to prevent cupcakes from sticking. No one wants to waste time and ingredients on cupcakes that crumble when you try to pry them from the pan.
Not only do liners prevent sticking, but they can also affect the shape of your cupcakes, how they brown, and the overall presentation. And because there are a lot of options and recommended methods out there, we decided to test them all to see which works best.
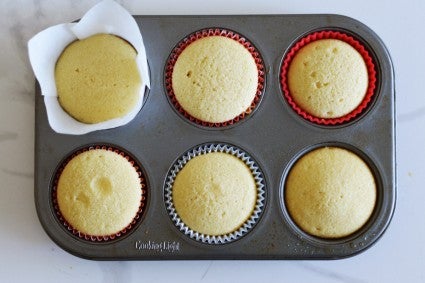

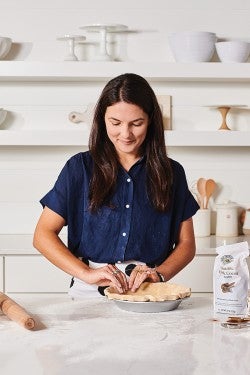
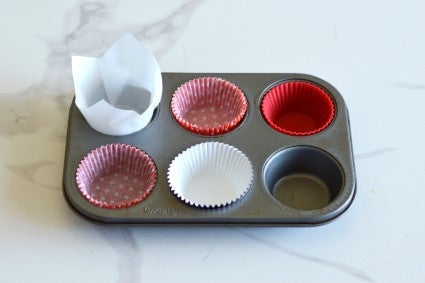
I used the base recipe for our new Cherry Pie Cupcakes, a simple vanilla cake batter made with cake flour. Per the recipe, the cupcakes baked at 350°F for 20 minutes, all in the same pan. I used a different liner for each well in a six-cup muffin pan, and I filled each cup 2/3 of the way full. I didn’t grease any of the cupcake liners — the only time I used nonstick spray was for the empty cup.
Here are the methods I tested:
single paper liner
double paper liners
foil liner
nonstick silicone baking cups
tulip papers
nonstick spray (no liner)
Let’s see those results!
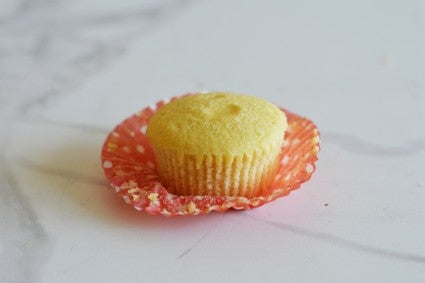
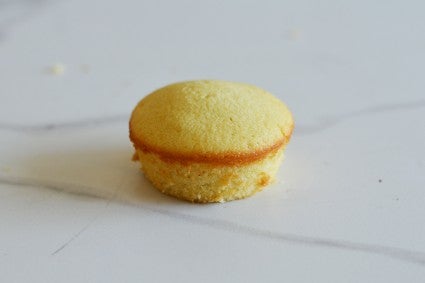
The method: The most common choice — a single paper liner. For this test, I used our cute and effective cupcake papers. Crucially, these are sturdy papers (because nothing is more aggravating than a flimsy paper liner that barely holds its shape when you place it in the pan).
The results: The cupcakes turned out wonderfully! They released easily from the pan, the paper pulled away seamlessly without sticking to the cupcake, and the cupcakes themselves baked evenly. Overall, a success that proves sometimes simple is best.

The method: Many bakers advocate for using two papers to double-line your cupcake pan, which supposedly helps the cupcakes bake more evenly and allows the papers to retain their color for a prettier presentation.
The results: I couldn’t detect any difference between the double-liner and single-liner results. This method certainly worked well — the cupcakes were easy to remove from the papers and there was no sticking. Both cupcakes baked evenly, and with our cupcake papers, at least, the color remained just as bright in the single liners as the double liners. (With that said, our papers have a grease-proof lining that keeps their color vibrant after baking. If you’re using another brand and you’d like to ensure bright color, consider double lining.)
Because the results were so similar, I’d say there’s no need to double-line your pan; a single liner works just as well, as long as you’re using high-quality cupcake papers.
The method: Foil liners are another popular choice, and I was particularly interested to see if this different material would affect how the cupcakes baked because of a potential difference in heat conduction.
The results: Overall, this cupcake test went much like the paper liners, though a piece of the cupcake’s edge stuck to the liner, causing a small but noticeable tear. It’s hard to determine if this is unique to the foil liner or just bad luck that could have happened with the paper liners, but it is worth noting. (Consider greasing foil liners if you’re nervous — there’s not as much of a downside to spraying foil liners compared with paper ones, which can become damp, look greasy, and/or bleed color.) I couldn’t detect any difference in how the cupcakes baked; the results were identical to those baked in paper liners in height, shape, and color. If you’ve got foil liners in your cupboard, they’ll work well.
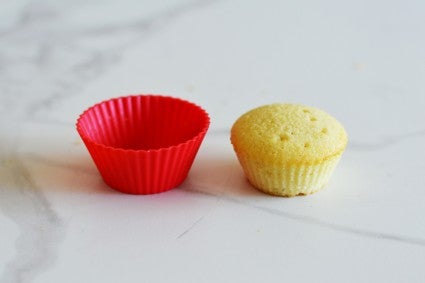
The method: These reusable baking cups are made from flexible silicone. I was curious to see how this different material would affect the height, shape, and bake of the cupcake.
The results: Because these sturdy cups hold their shape, the batter didn’t spread much while baking, translating to slightly smaller cupcakes. The cupcakes also didn’t rise as high. They were easy to pop out of the pan, though it was a little finicky to remove the cupcake from the silicone cup. That’s because the cup doesn’t spread the way paper liners do so it can be hard to pull it away from the cupcake, but ultimately not too hard once you get the hang of it. And because the silicone is nonstick, the cupcake came out cleanly without any sticking or tearing.
I love that these are reusable, which is handy if you frequently bake cupcakes or muffins. If you were baking for a bake sale or gathering, however, you’d want to pop the muffins out of the cups before serving. Another benefit is their versatility: They can be used to bake chocolate lava cakes, mini quiches, and even melt butter in the microwave.
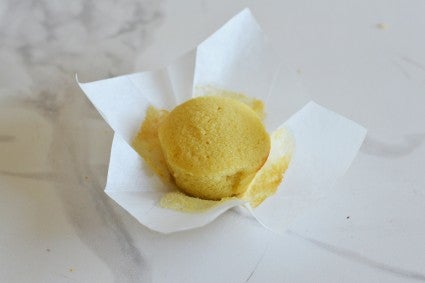
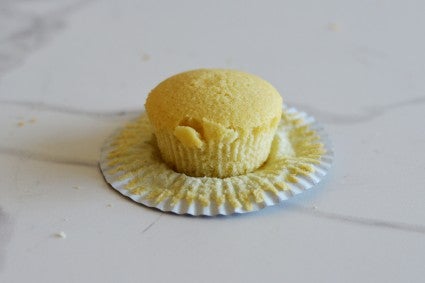
The method: Elegant tulip papers are frequently used for muffins, and I was interested to see if they would make a good choice for cupcakes too.
The results: The tulip paper’s distinct folded shape translated to a slightly squared cupcake, with noticeable divots where the creases pressed into the batter. What’s more, the paper’s high sides made it difficult to fill the paper cleanly with batter, though a muffin scoop helped; that height would have made it difficult to frost the baked cupcakes without first removing the paper, too. The paper did release cleanly from the cupcake, thanks to the easy-to-unfold creases. Overall, I’d recommend these for muffins, whose rustic nature would endear themselves to the slightly squared-off shape created by these liners, and which are unfrosted, and choose other options for more aesthetically pleasing cupcakes.
The method: What happens if you skip the liner entirely? That was the question I asked with this test, which just featured an even coating of nonstick spray in the well and nothing else.
The results: This method was the least successful. The outer rim of the cupcake’s surface was noticeably browned, the only cupcake of my tests with uneven coloring. Meanwhile, the edges of the cake stuck slightly to the pan. By running a sharp knife around the edges and gently easing it out, I was able to release the cupcake without any noticeable flaws. But having to do so was both stressful and annoying — I wouldn’t want to have to individually coax out 12 such cupcakes in a full batch. And a minor gripe: The edges of the cupcake were rough and shaggy — not as pretty or professional as most of the other options. Overall, this method technically works, but only as a last resort. If you have liners, use them!
For cupcake baking, I recommend cupcake papers, foil liners, and nonstick baking cups — all were successful and easy to use. Avoid tulip papers and nonstick spray used alone, if possible. They have their uses elsewhere (tulip papers are particularly great for muffins) but aren’t a first choice for cupcakes.
Check out our brand-new lineup of creative cupcakes and start embracing cupcake season.
Cover photo by Rick Holbrook; food styling by Kaitlin Wayne.