


How to make sourdough waffles
The ideal use for your discard starter

Date
June 27, 2019

Despite baking on and off with sourdough for decades, I'd never really taken a shine to either the process or product — until quite recently. What finally turned me into a believer? Waffles. Since I discovered this recipe for Classic Sourdough Waffles or Pancakes, my weekend breakfast (and my starter) have new life.
No longer do I ignore my poor starter for months on end, grudgingly sighing when I see it huddled, dispirited and gray, in the back of my fridge. These days I actually look forward to feeding my starter — because the starter I'd normally discard as part of the feeding process goes into these waffles, undoubtedly some of the best I've ever eaten.
With their mild tang, tender interior, airy texture, and crisp crust, these are everything a waffle should be.
Since falling in love with this waffle recipe, I keep two starters: one strictly for waffles, so I can make them every weekend; and one for everything else. Like Buttery Sourdough Sandwich Biscuits. And No-Knead Sourdough Bread.
Sometimes I simply take 8 ounces of starter — fed or unfed — and substitute it for 4 ounces of the water and 4 ounces of the flour in another favorite recipe, like this Classic Sandwich Bread. For more on this technique see how to add sourdough to a recipe.
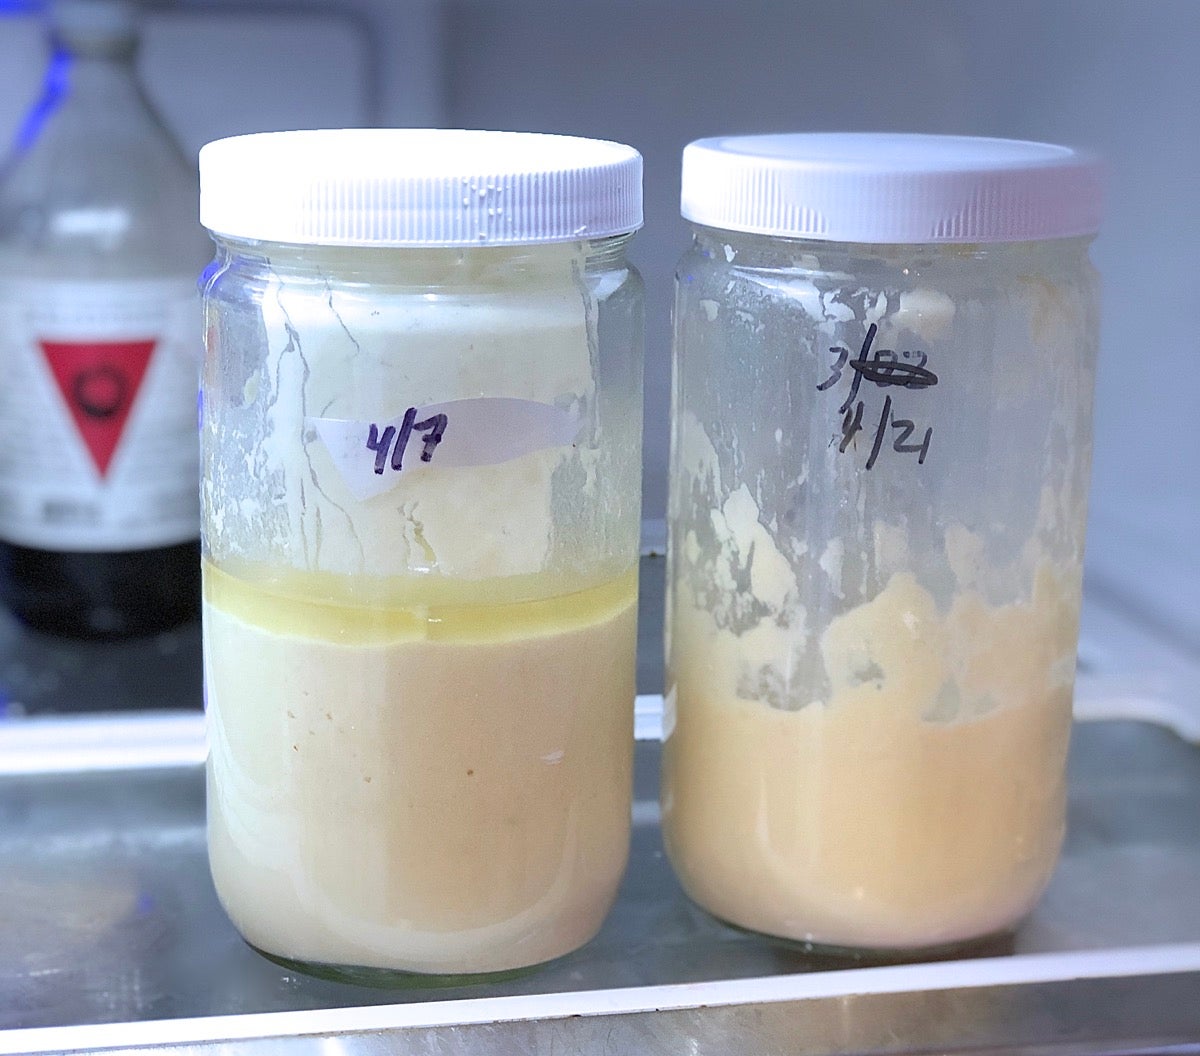
I try to feed my starters weekly. Sometimes I forget, but it really helps having them in these clear jars: it's easy to pick them out of the jumble of items in my fridge, and I can always see how hungry they are. The starter on the left, last fed two weeks earlier than the starter on the right, clearly needs some attention.
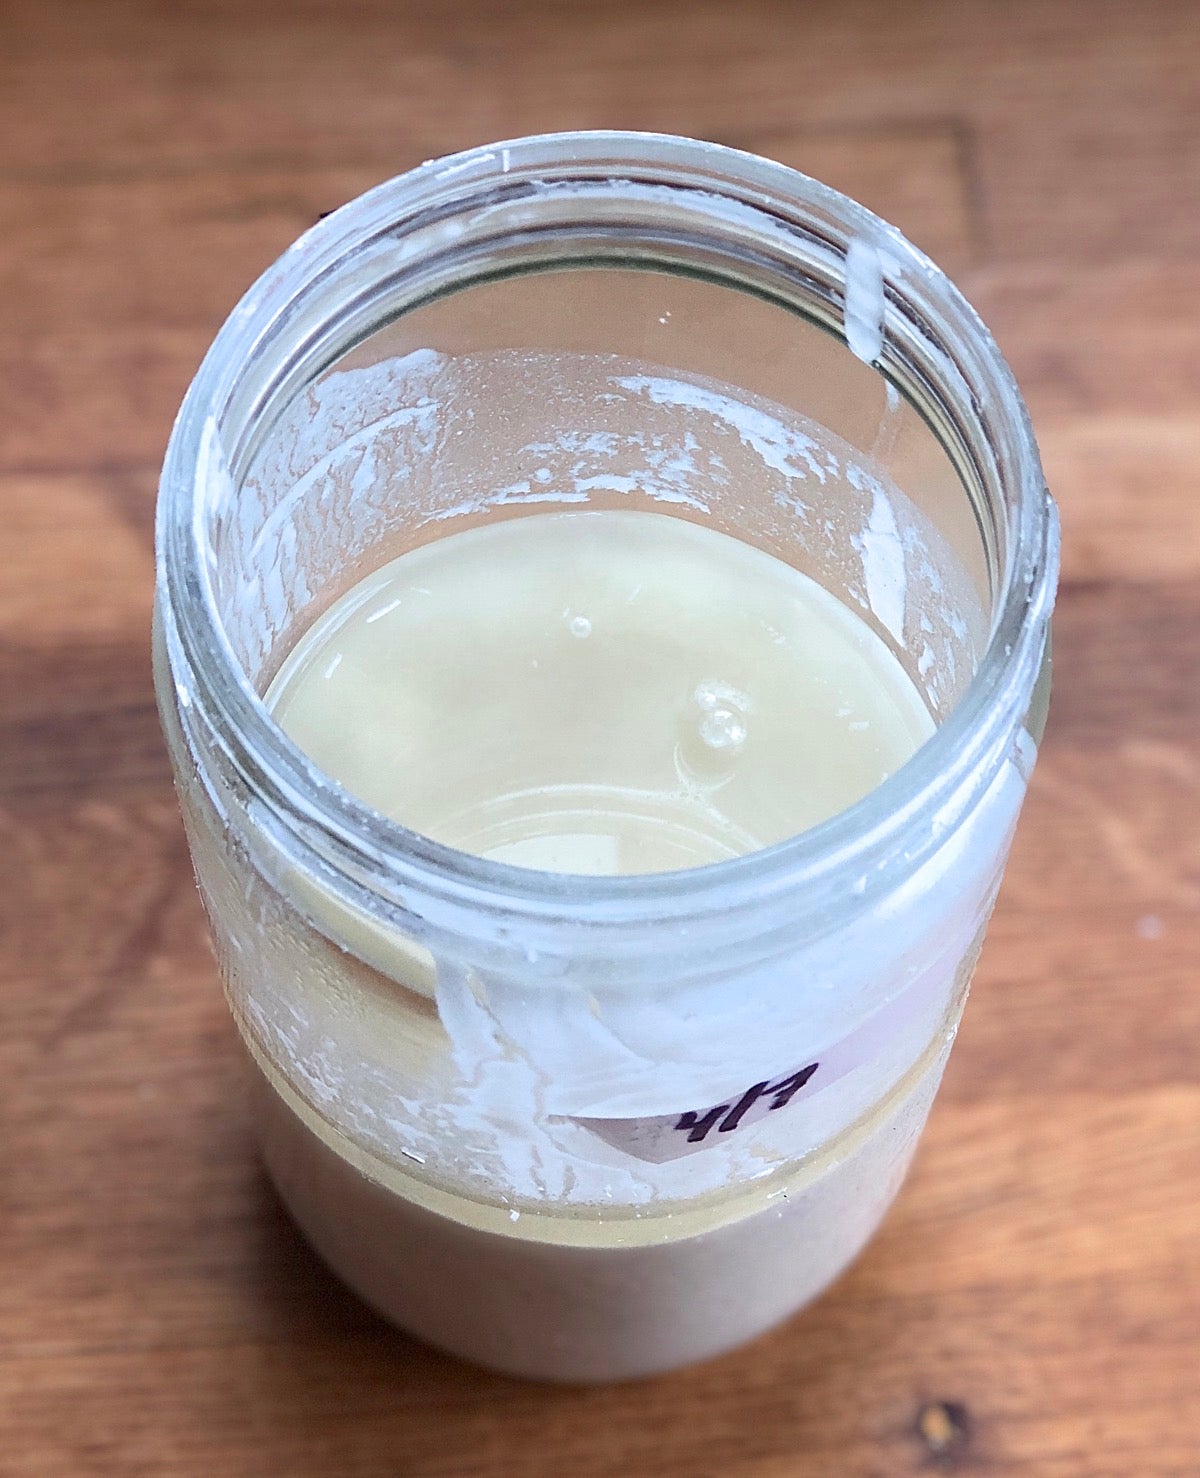
See that liquid? That's alcohol ("hooch," in professional parlance) given off by the wild yeast as it ferments. The appearance of hooch signals it's been a while since the starter's been fed. Eventually the liquid will turn dark, and if you're really a neglectful starter steward it'll dry into a gray crust. Usually my hungry starters just exhibit 1/2" or so of hooch, which I stir back in before feeding them.
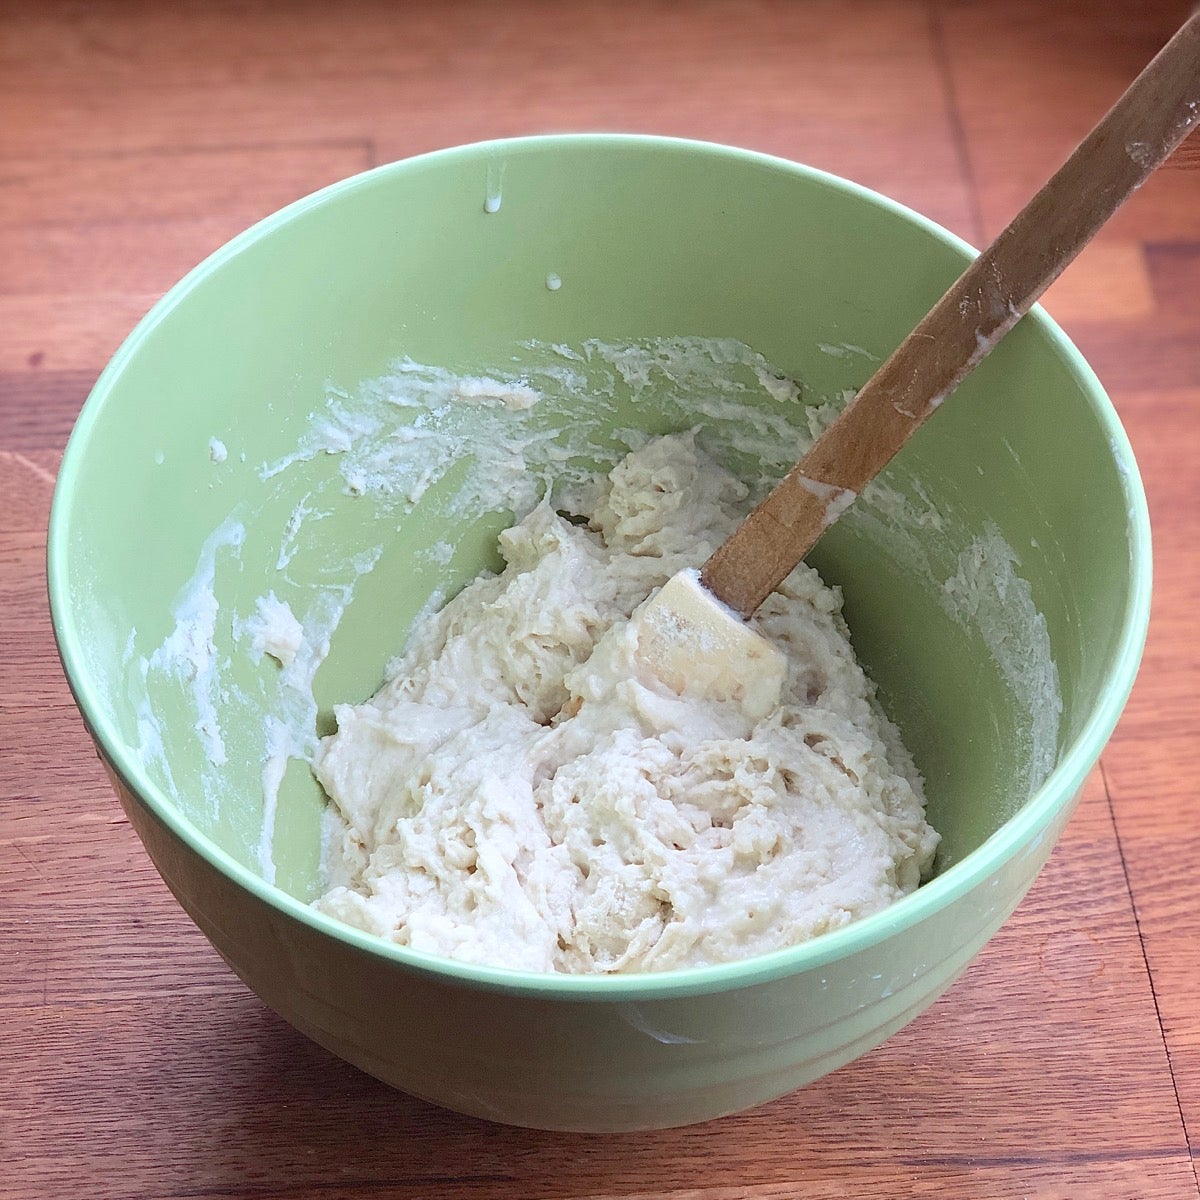
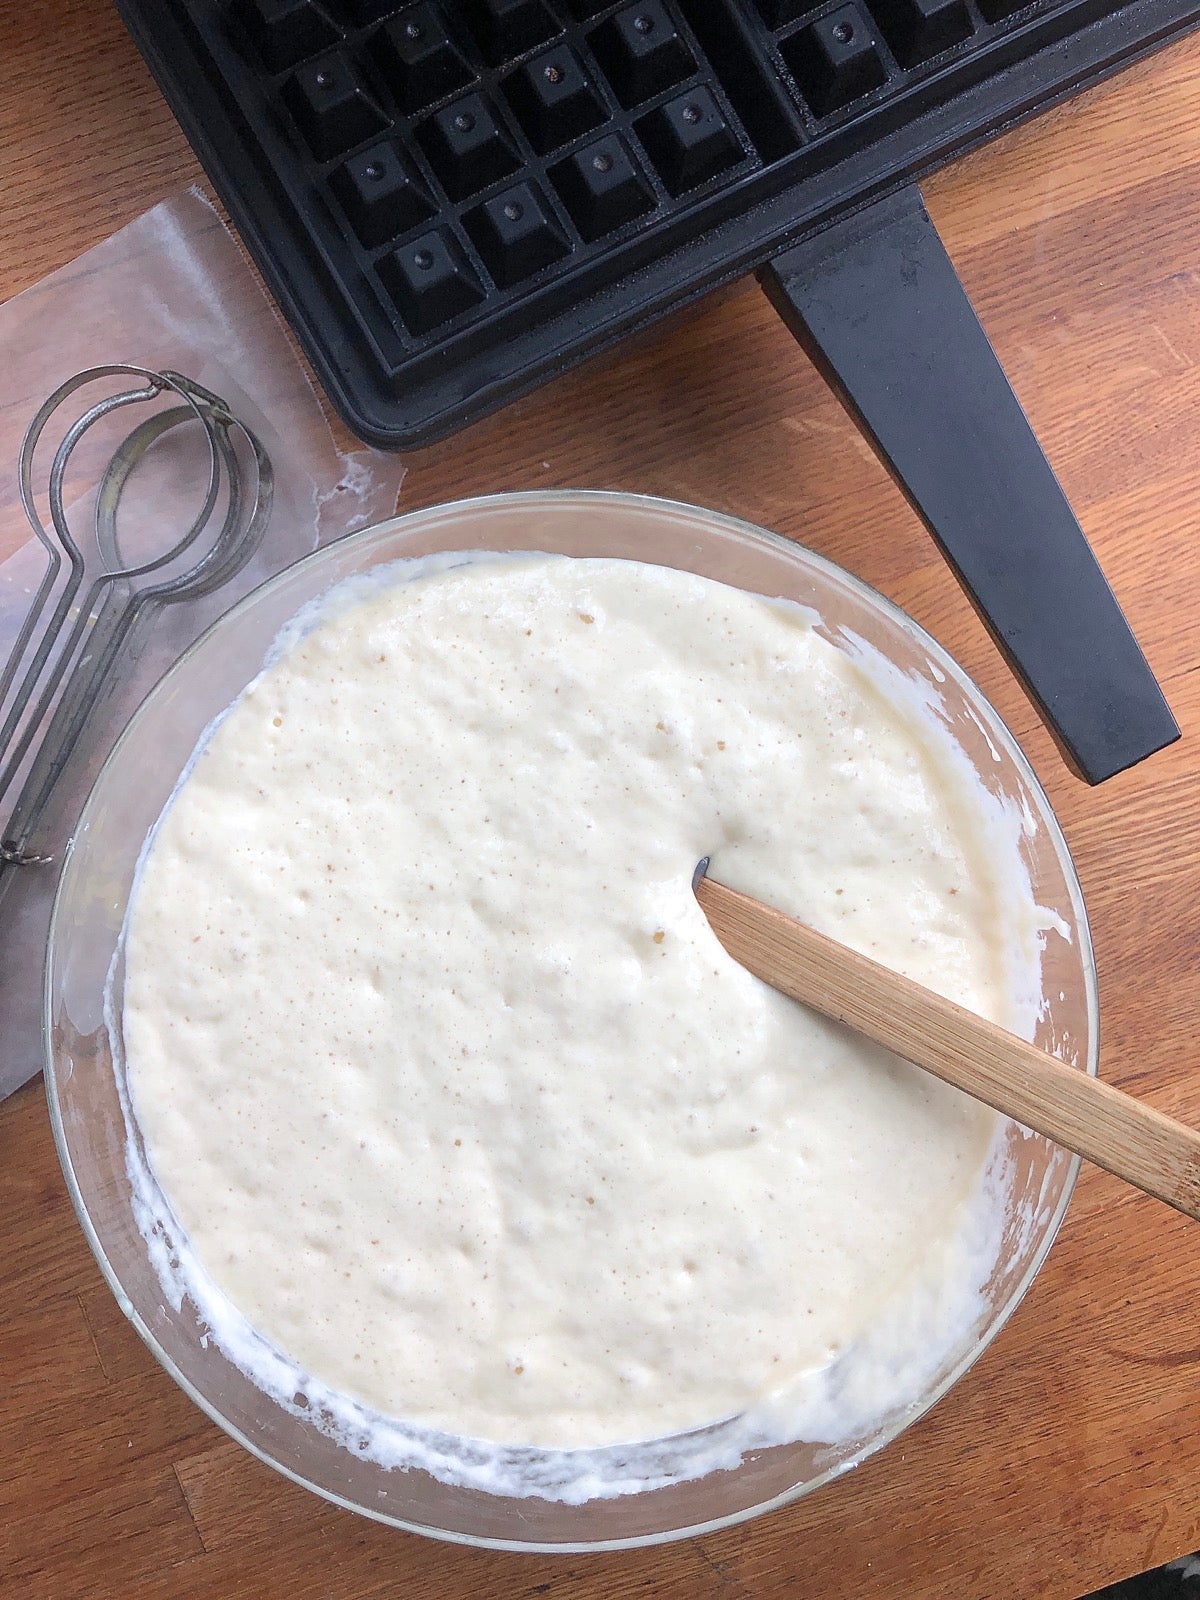
With 12 ounces (340g) starter in my jar, I remove 8 ounces (227g) — this is the discard — and set it aside for my waffles. I feed the remaining 4 ounces (113g) with 4 ounces (113g) each King Arthur Unbleached All-Purpose Flour and lukewarm water. That's what you see in the bowl pictured above.
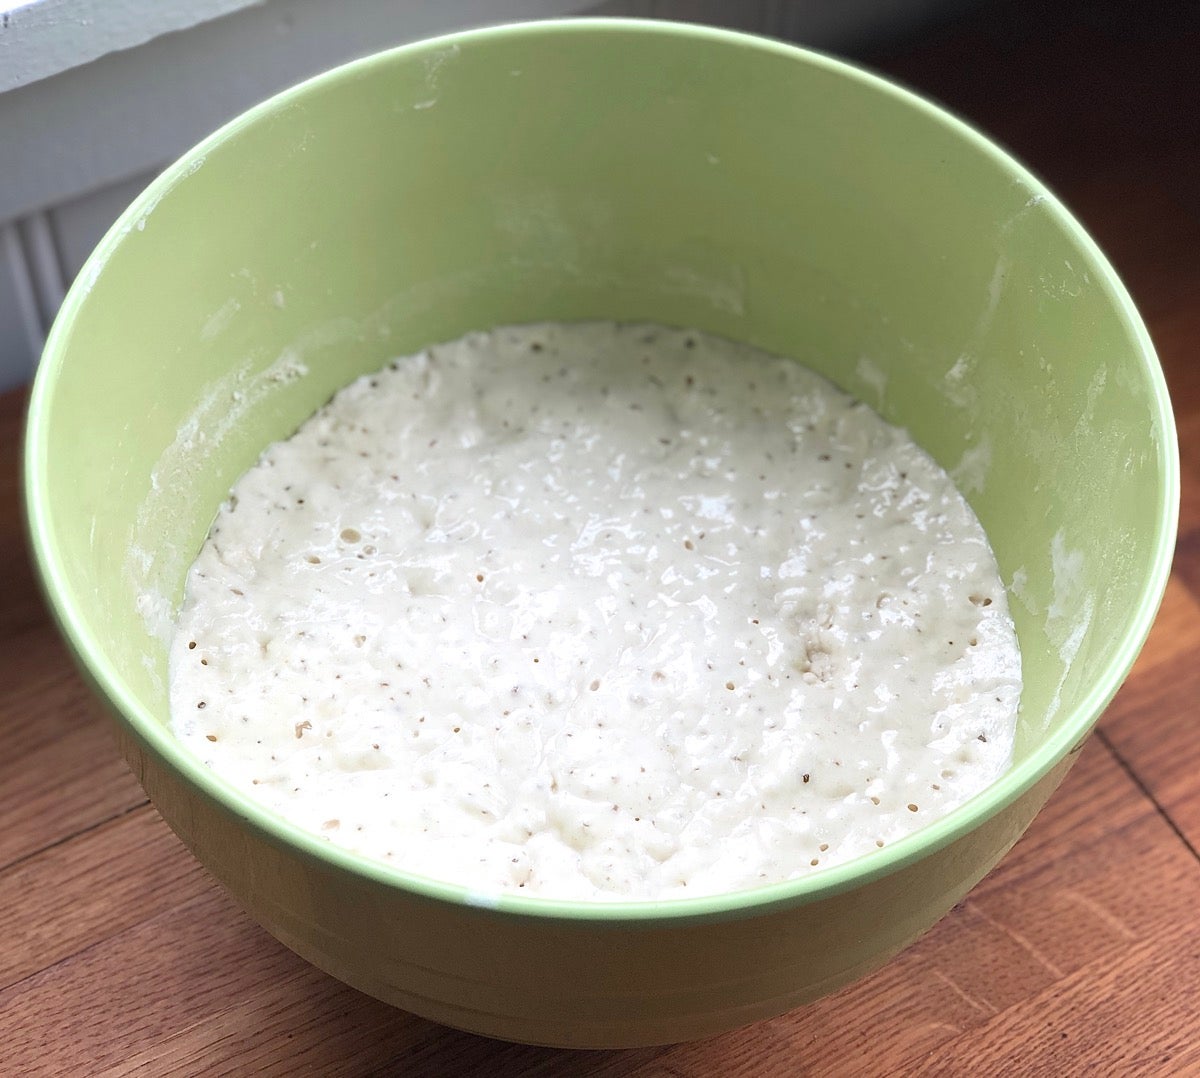
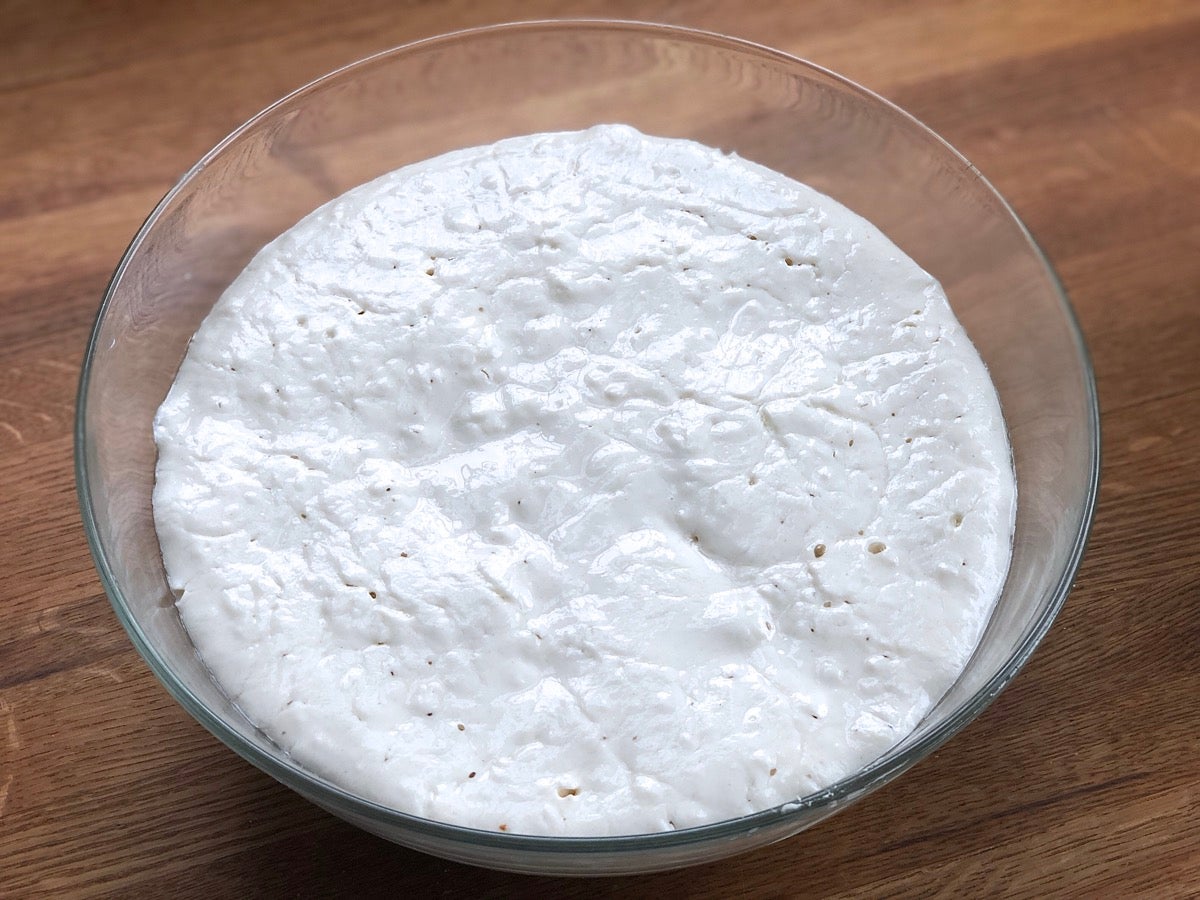
And here's what that fed starter looks like anywhere from 6 to 8 (or more) hours later: expanded and bubbling happily.
Why the time range? It all depends on how long since you last fed your starter, and the temperature of the feeding environment. I usually put my fed starter in an unlit oven with the oven light on, which keeps it at about 85°F to 90°F: nice and cozy.
Once your starter is bubbly, spoon it into its jar and stash it back in the fridge. Remember to date the jar. Next time you feed it you'll either pat yourself on the back for being on schedule, or take a nice long guilt trip for ignoring your starter.
OK, back to that 8 ounces of discard starter.
We'll start with an overnight sponge, a "prequel" to the actual waffle batter.
1 cup (241g) sourdough starter, unfed/discard*
2 cups (241g) King Arthur Unbleached All-Purpose Flour
2 tablespoons (28g) sugar
2 cups (454g) buttermilk
*Do you need a starter? Our Classic Fresh Sourdough Starter jump-starts the process, putting you in business in just about 12 hours. If you have more time to spend, see how to build your own starter from scratch.
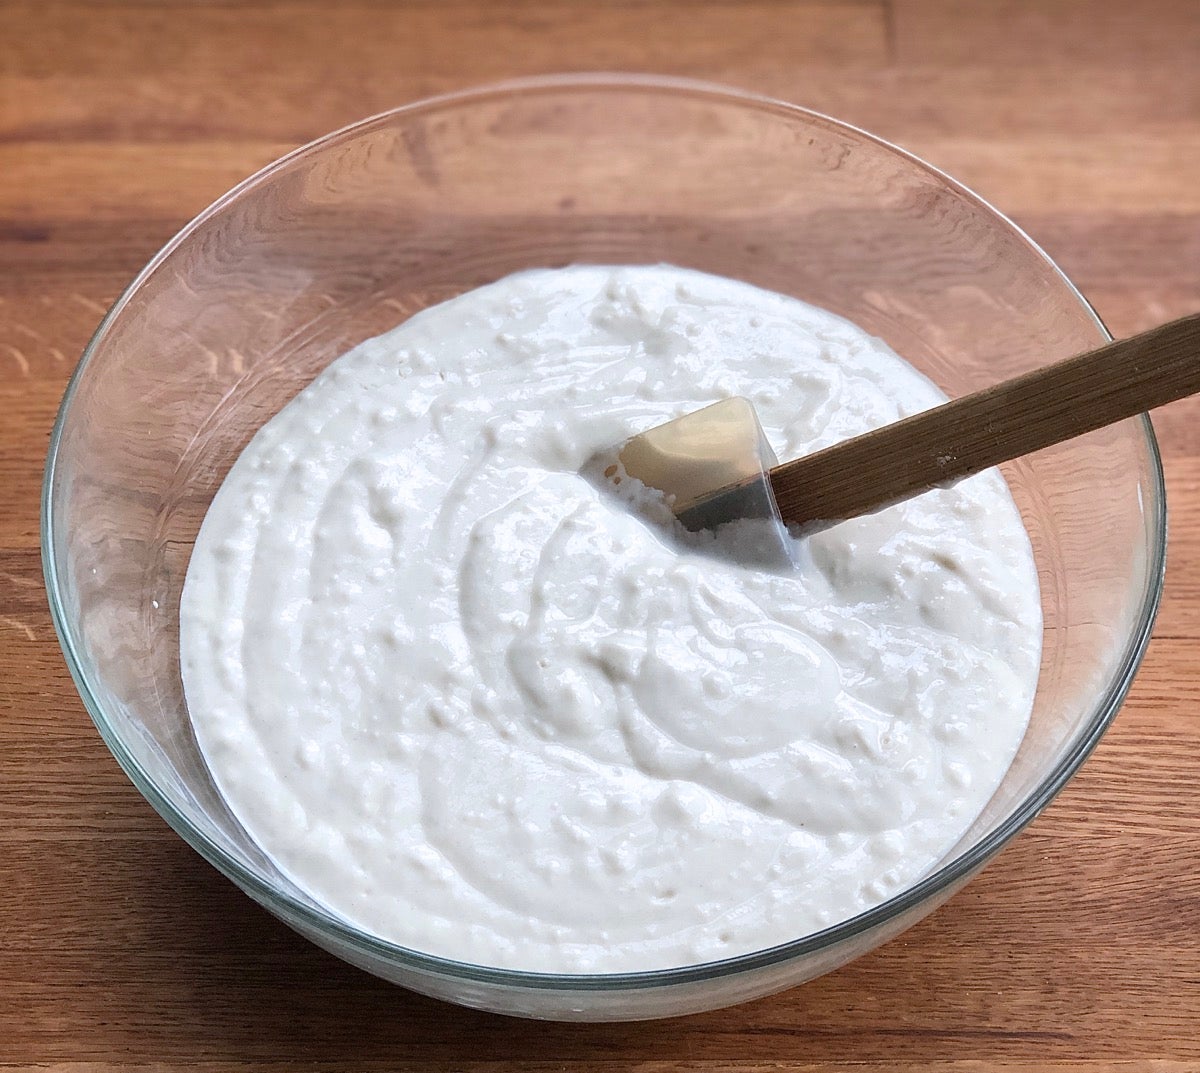
In a large mixing bowl, stir together the discard starter, flour, sugar, and buttermilk. Make sure the mixture doesn't fill more than about two-thirds of the bowl, at most; it's going to need room to expand.
Cover the bowl and let the sponge rest at cool room temperature (about 65°F to 70°F) for about 12 hours, or overnight.
Some of you may wonder about leaving this dairy-based batter unrefrigerated overnight. Milk left too long at room temperature may indeed turn sour; but since the buttermilk is already sour, it basically has nowhere else to go and it's fine. If you're at all worried, though, feel free to refrigerate the batter.
I love this second part of the process. You add eggs for structure, fat for texture, salt for flavor — and baking soda for the magic it works, turning the batter from a goopy puddle into an airy, bubbling cloud.
all of the overnight sponge
2 large eggs
1/4 cup (50g) vegetable oil or melted butter
3/4 teaspoon salt
1 teaspoon baking soda
In a small bowl or mixing cup, beat together the eggs and oil or butter. I use oil; I think oil gives the waffles crispier crust than butter without any noticeable sacrifice in flavor.
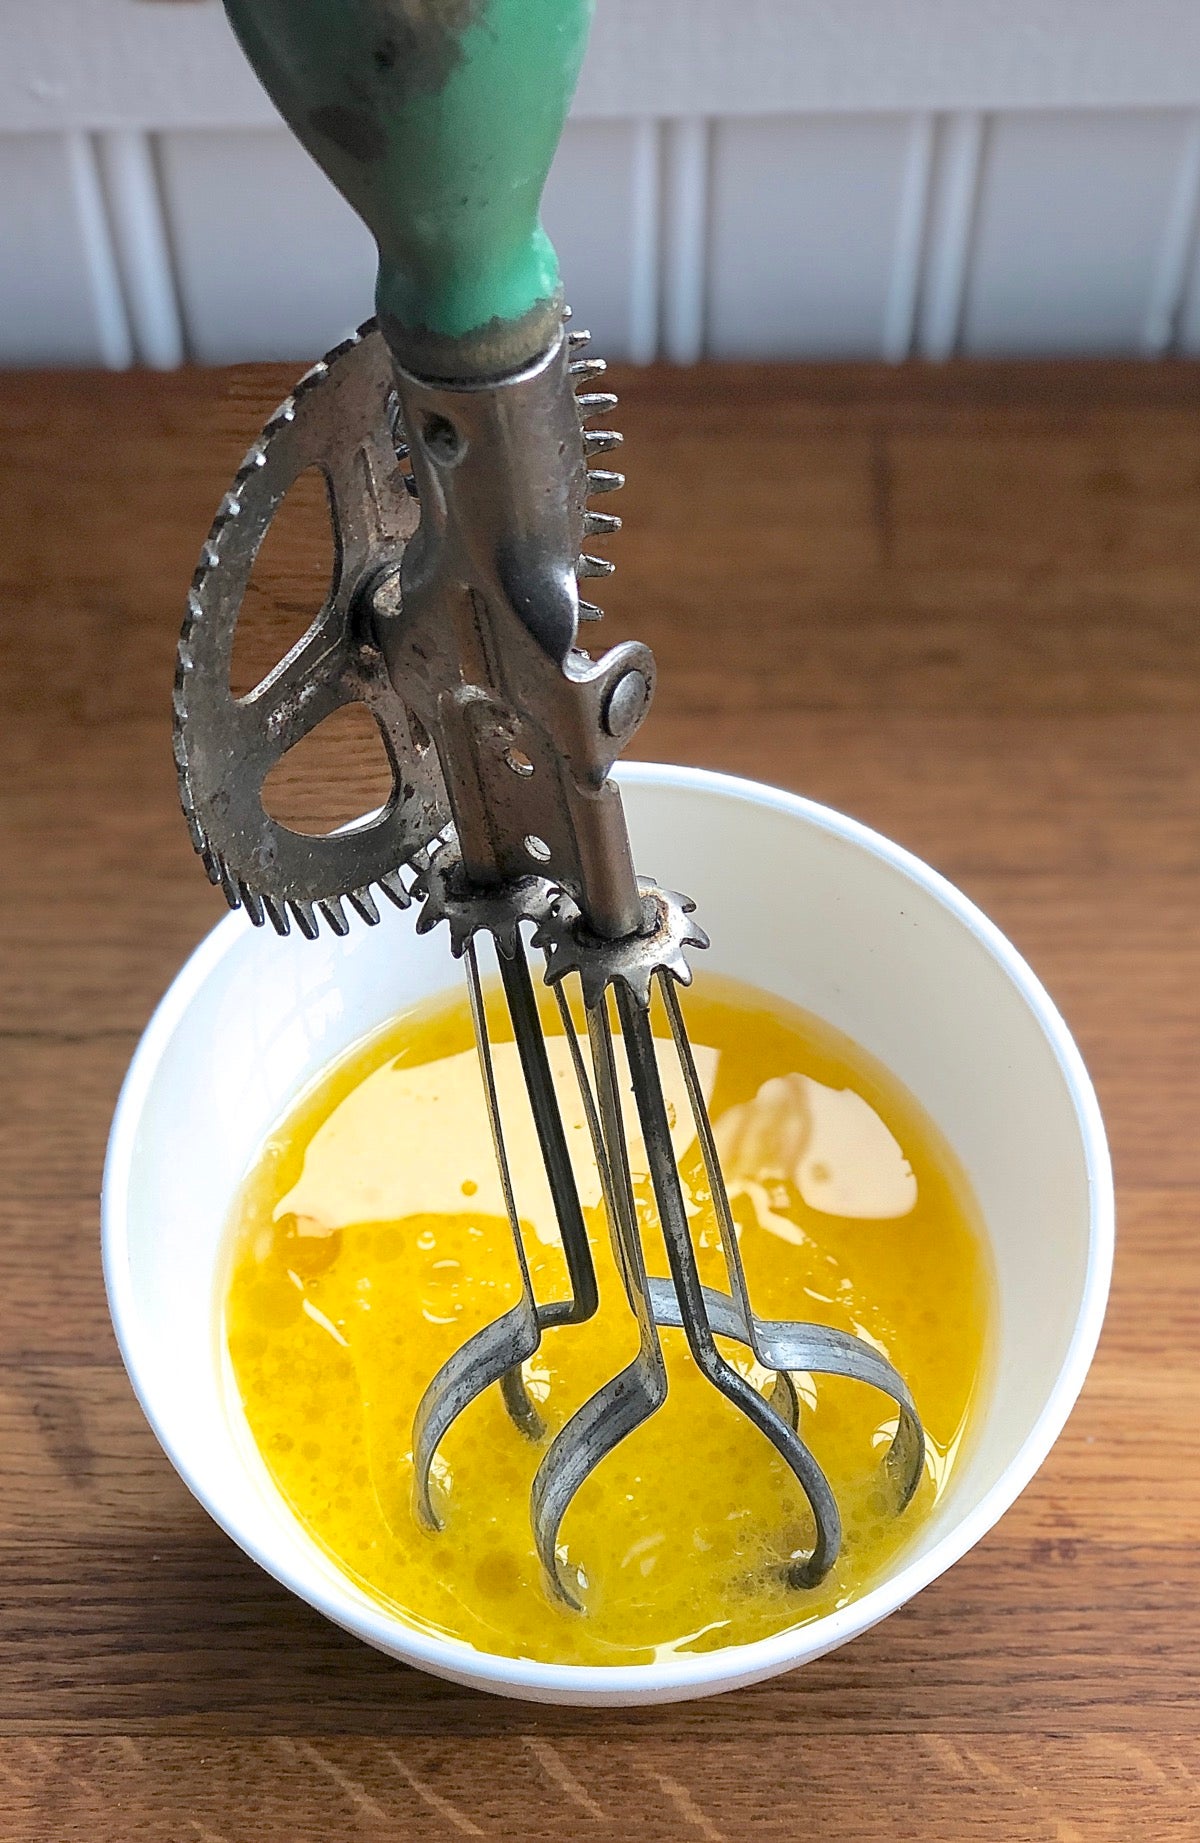
Since these are "classic" waffles, I use my classic eggbeater. This old tool works like a charm; a few quick spins and you're good to go. At the risk of mouthing a well-worn cliché — they just don't make eggbeaters like they used to!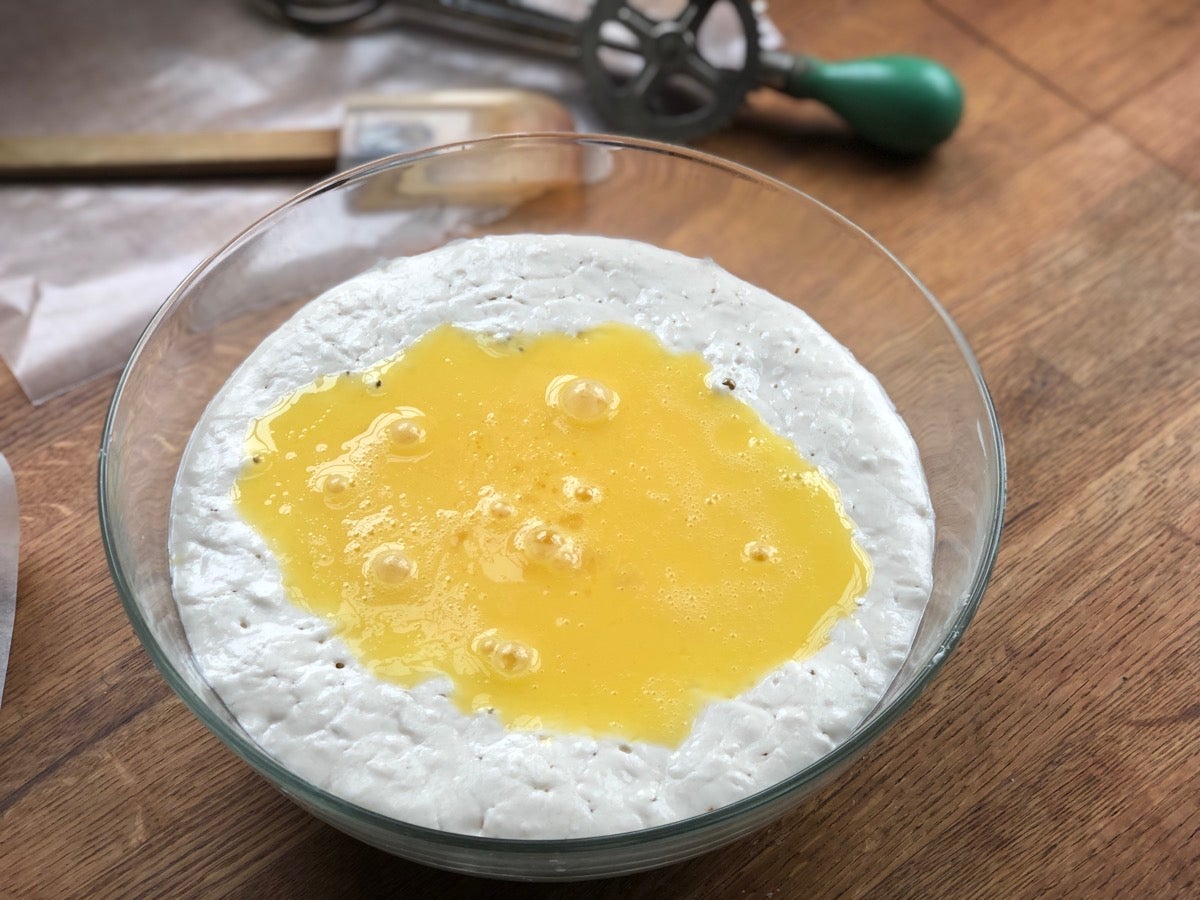
Add the eggs and oil to the overnight sponge. Stir in thoroughly.
Add the salt and baking soda.
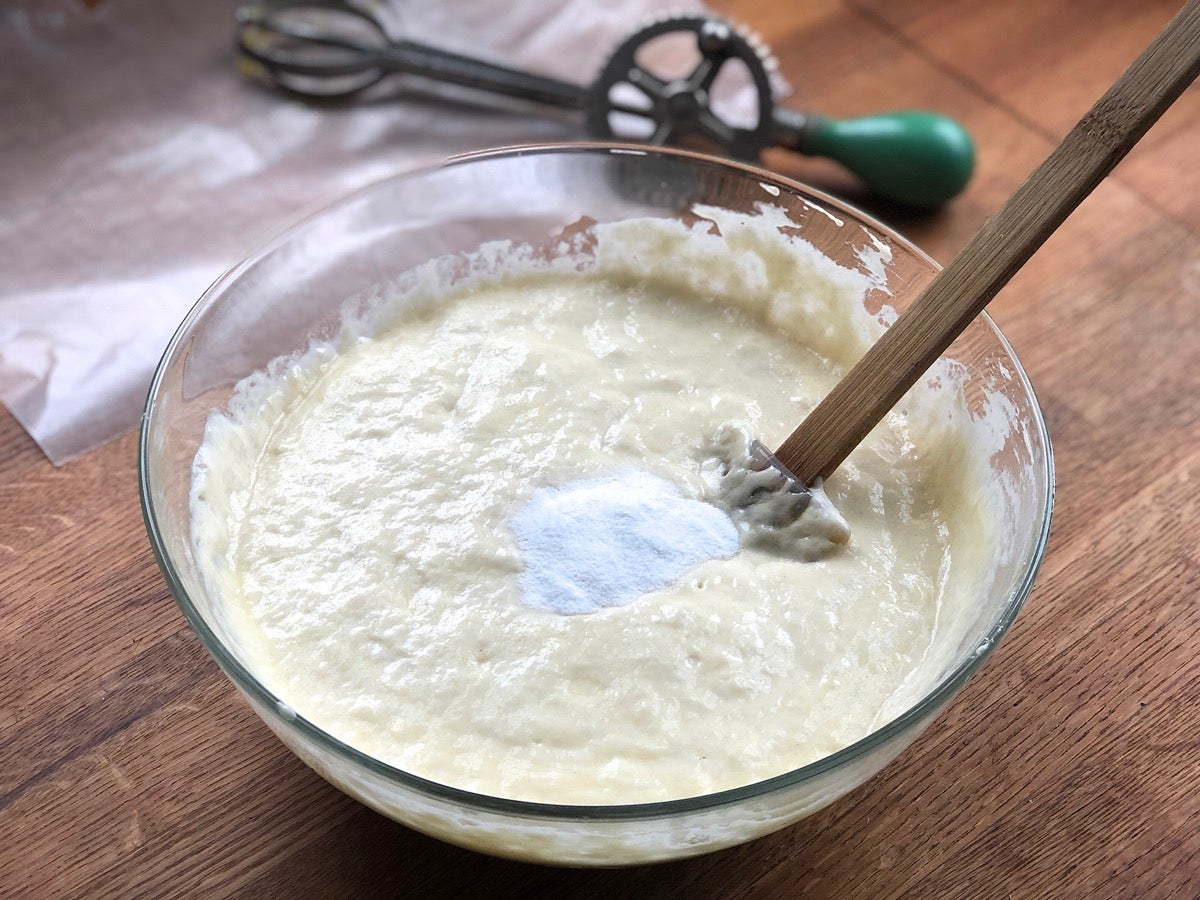
Fold everything together just to combine. The batter will immediately expand — that's the baking soda reacting with the acidic starter. You can actually watch the batter rise up the sides of the bowl, burping a few bubbles along the way. Very light and almost frothy, you can tell it's just itching to be made into waffles.
Do you need to worry about deflating the batter? Not really; the baking soda/acid reaction is really strong. That said, don't beat the batter vigorously; folding briefly with a spatula works just fine.
In the past, some bakers have asked why you'd add baking soda to a sourdough recipe — won't the soda tame the sourdough's tang? It does, minimally; but it also adds a huge amount of leavening. Made without soda, these waffles tend towards dense and leathery rather than light and airy.
At last — it's time to bake your sourdough waffles. First, heat your iron. Whether you use a classic gridded American iron or a Belgian-style iron with deeper pockets, make sure to get it up to temperature. If you're using a nonstick iron (as I am here), you probably won't have to grease it.
But an older iron, like the hand-me-down from your grandma you might have? You definitely need to apply grease. After many years of scraping baked-on waffles off a meagerly greased iron, I've found that melted vegetable shortening works best.
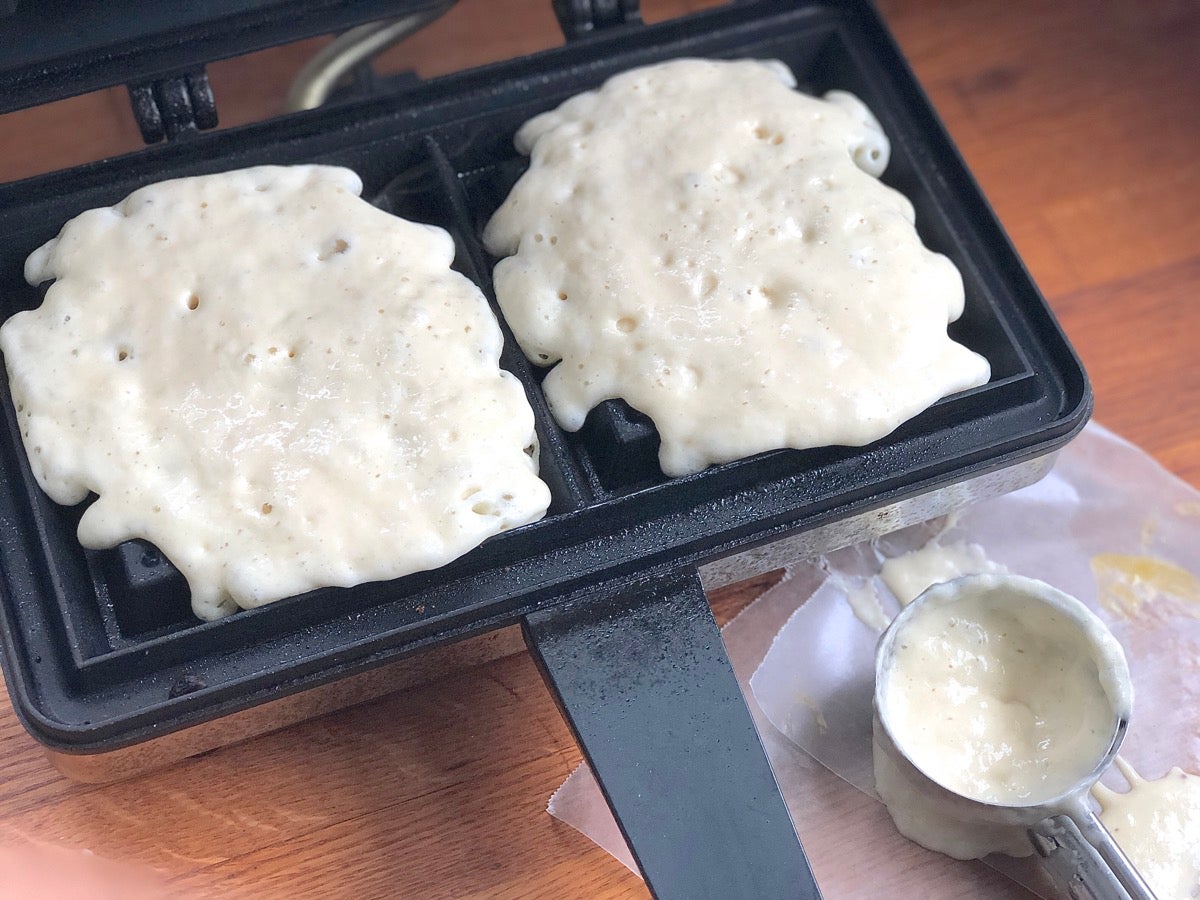
Pour or scoop the batter onto your preheated iron. A muffin scoop, generously filled (to overflowing) with batter, is the right size for a single waffle in my iron, which makes two 4" x 4" square waffles at a time.
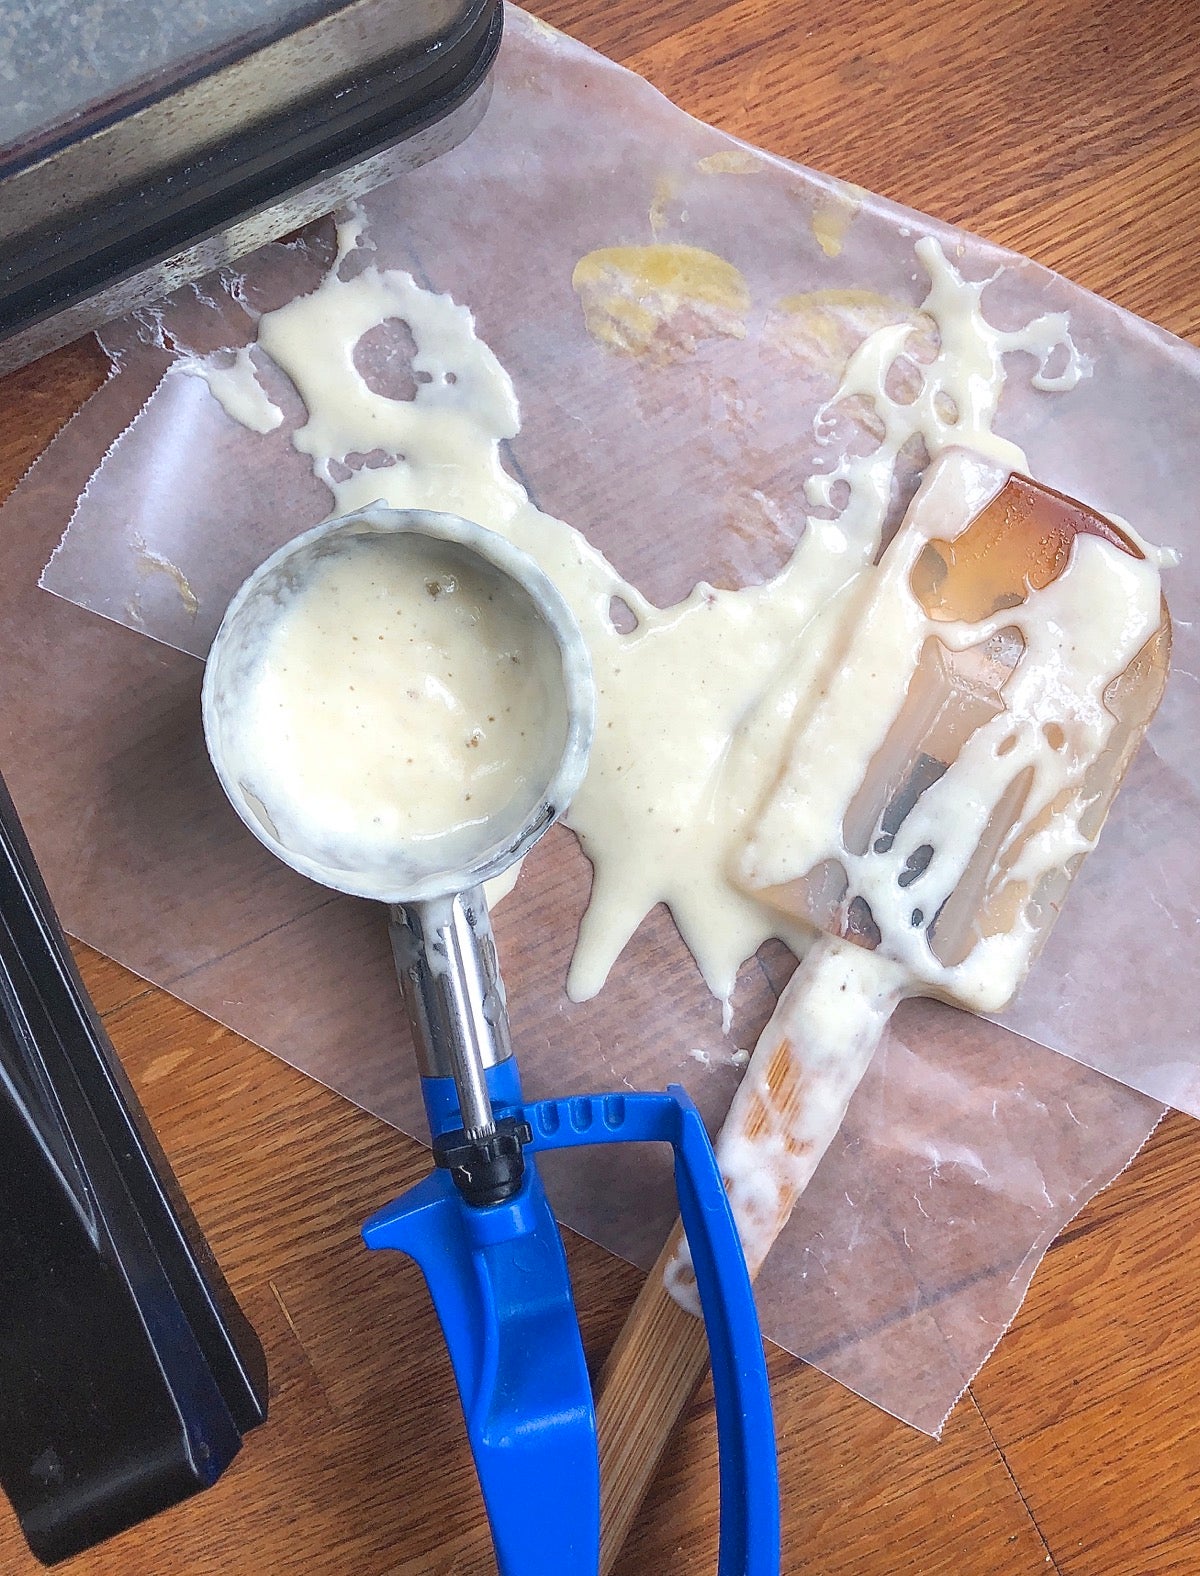
Yes, things can get messy. A sheet of waxed paper or square of parchment set beside the iron will definitely save on cleanup later.
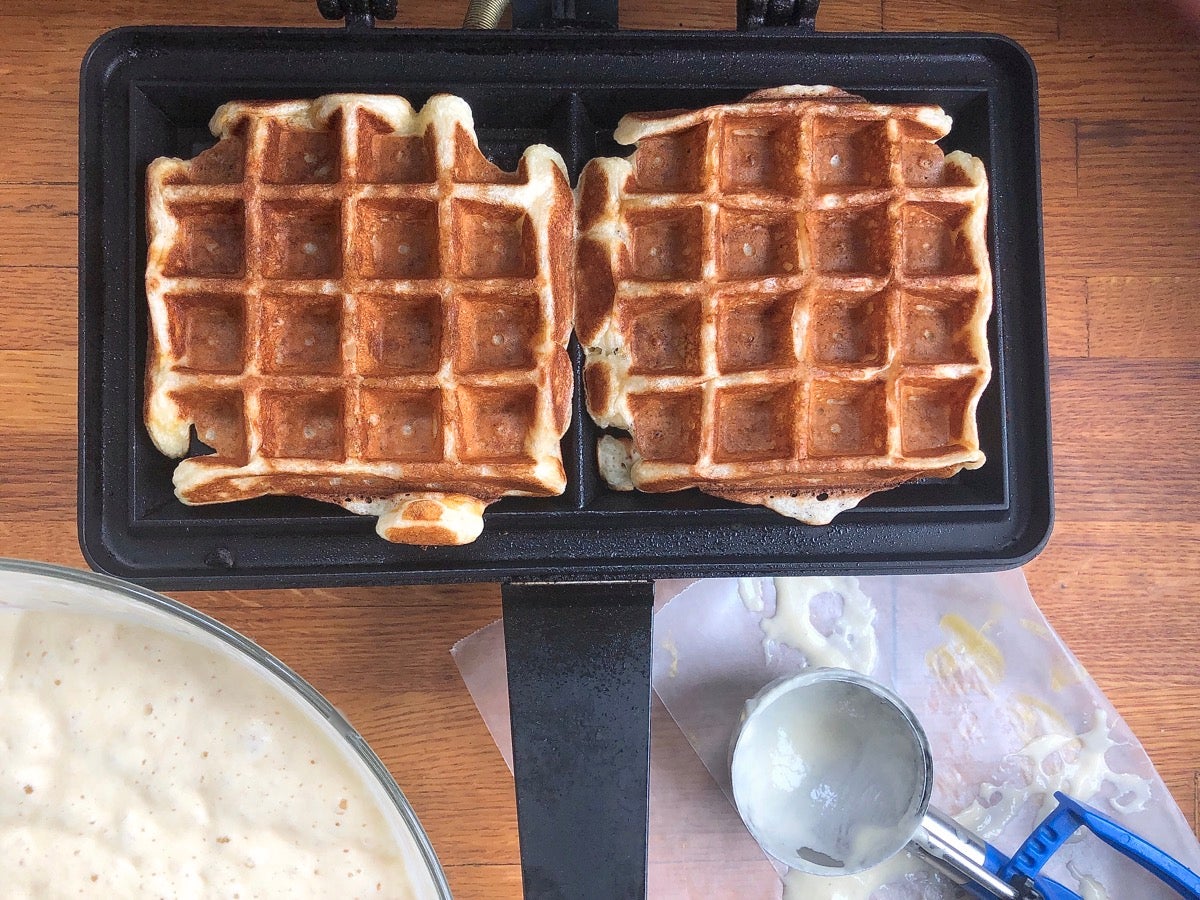
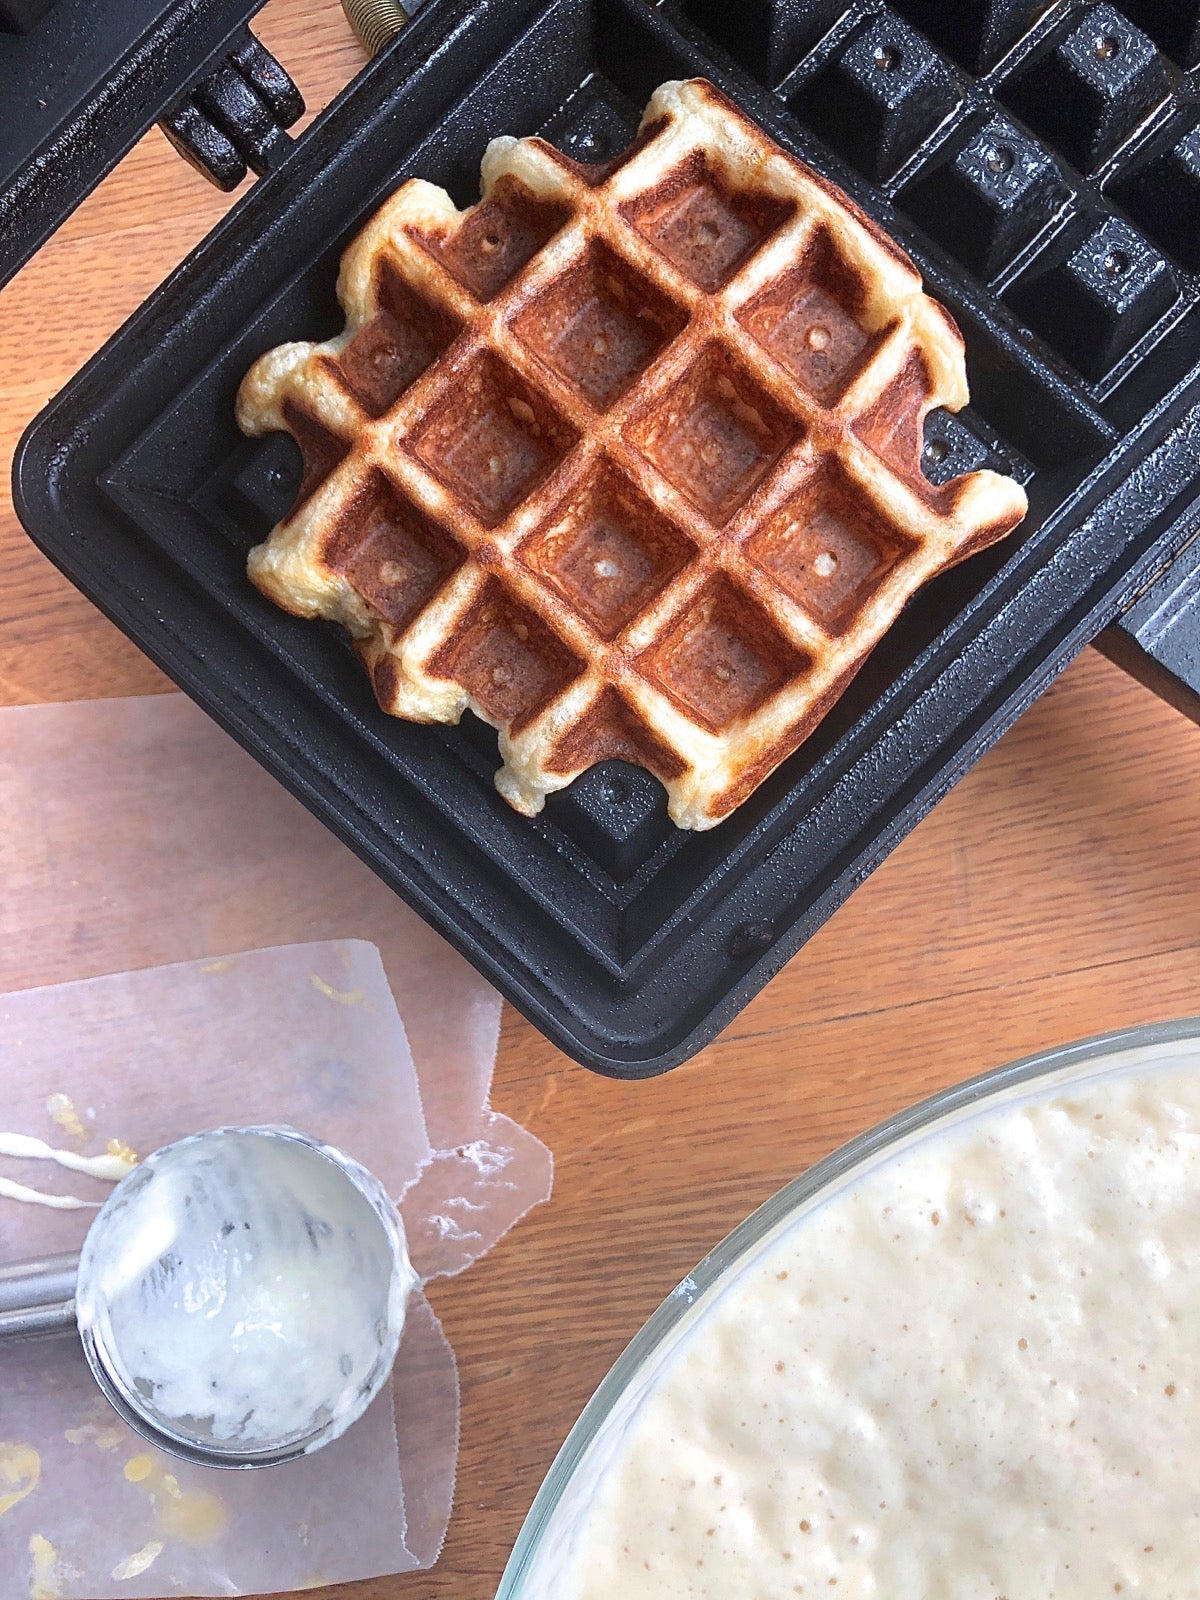
Two scoops into the iron, close the lid, and just over 2 minutes later (for my iron): two golden waffles.
Be sure to bake the waffles until they're done. Waffle irons vary wildly in how hot they get, and how long it takes to bake a waffle — so how do you know when your waffle is done? A couple of hints: steam will have stopped emerging from the iron. And when you very tentatively lift the handle, the iron will open easily, with no sticking.
 Sourdough waffles, hot off the griddle
Waffle-mania! I usually get 14 to 15 waffles out of this recipe. After my husband and I eat our fill the remainder goes into the freezer, ready to pop into the toaster for a quick breakfast.
If you're feeding a crowd, lay the baked waffles on a rack set on a baking sheet and keep them warm in a 200°F oven until you're ready to serve.
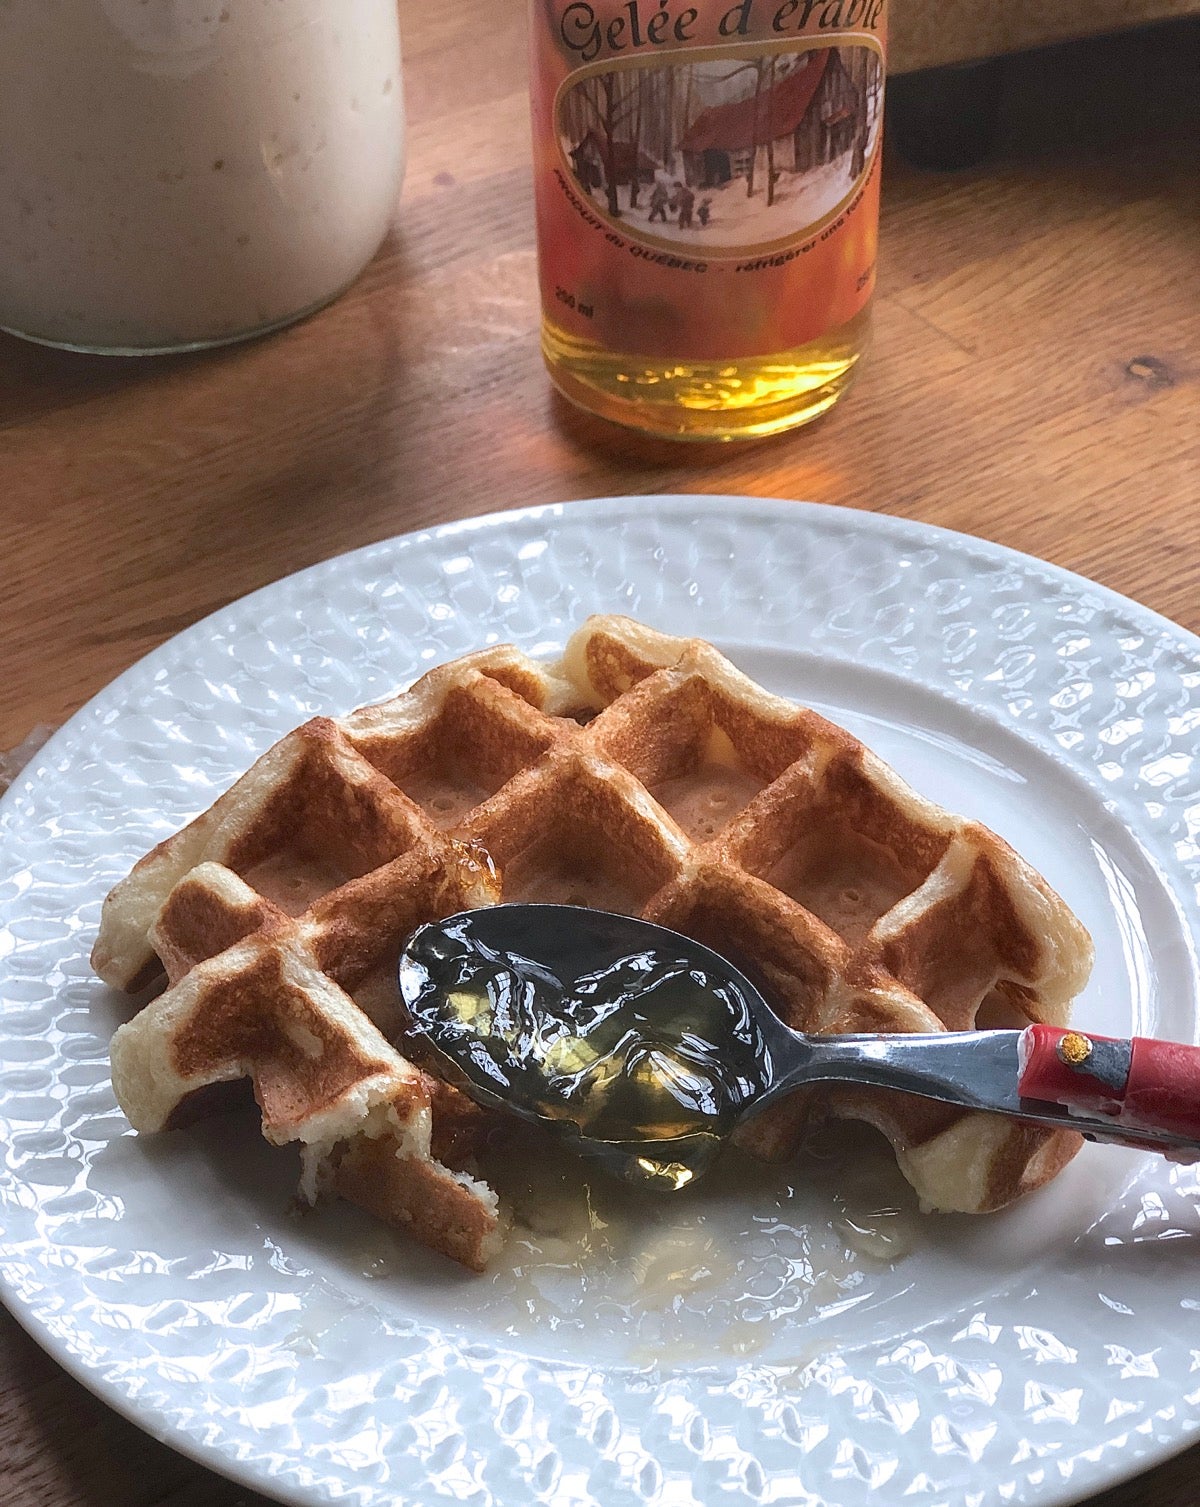
What, no maple syrup? I'm a fan of maple jelly myself; it doesn't soak into the hot waffle (that's butter's job), and when I take the time to spread it judiciously across the face of the waffle, I get a nice hit of maple with every bite. If you prefer maple syrup, go for it; for the most robust maple flavor, choose a dark or dark amber rather than light syrup.
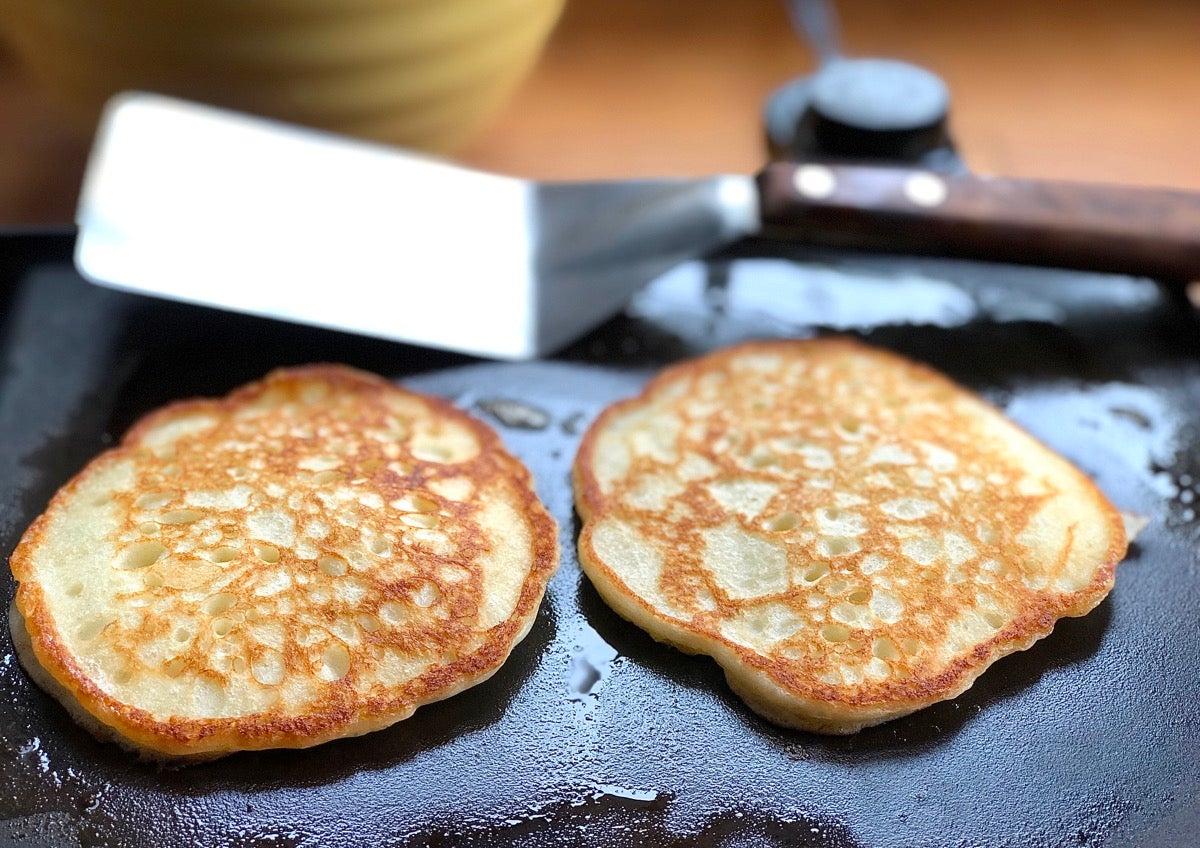
Same batter, different process. Simply pour the erstwhile waffle batter onto a hot greased griddle, and get ready for the best sourdough pancakes ever!
Absolutely. Make sure to use a gluten-free starter; and substitute our Measure for Measure flour for the all-purpose flour called for in the recipe.
If you haven't fed a crowd, you no doubt have waffles or pancakes left over. Thankfully, both freeze very well once they're completely cool. I layer them in a zip-top plastic bag with parchment or wax paper between the layers; then close the bag, label it, and date it. Into the freezer it goes. When you're looking for breakfast beyond the usual bowl of cereal, pop a waffle or pancake into your toaster and you're good to go.
Have you been a reluctant sourdough baker? Let these waffles be the impetus that makes sourdough a regular part of your baking routine. Still hesitant? Our sourdough baking guide offers both inspiration and practical information.
