I've said it before: I'm more of a cake girl than a pie girl – that's just me.
BUT I also love bite-sized goodies, and pretty much any food on a stick (barring corndogs. Blech.) So I was thrilled when the opportunity came along to make pies that fit both bills.
That's right, bite-sized pies, and on a stick to boot! Welcome to the wonderful world of Pie Pops.
Pie Pops' origin is credited to Andrea Smetona, owner of Cakewalk Desserts in Laguna Niguel, CA. The buzz generated during our giveaway of her book, Easy As Pie Pops, was incentive enough for us to make batch after batch from her recipes, and to try out our own, too.
Sweet pies, savory pies, and everything in between.
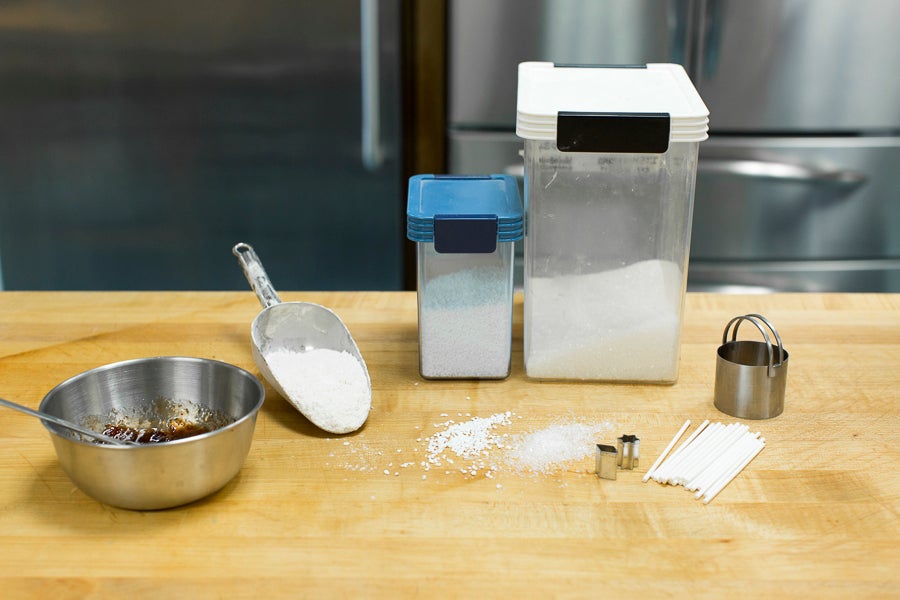
In addition to a batch of chilled pie crust from your favorite recipe or our mix, you'll need pie filling, flour for rolling, sugars for topping, a round cutter between 2" and 3" in diameter, and some lollipop sticks.* Tiny cutters for making decorative windows are a plus, too.
*I found sticks in the cake decorating section of the craft store.
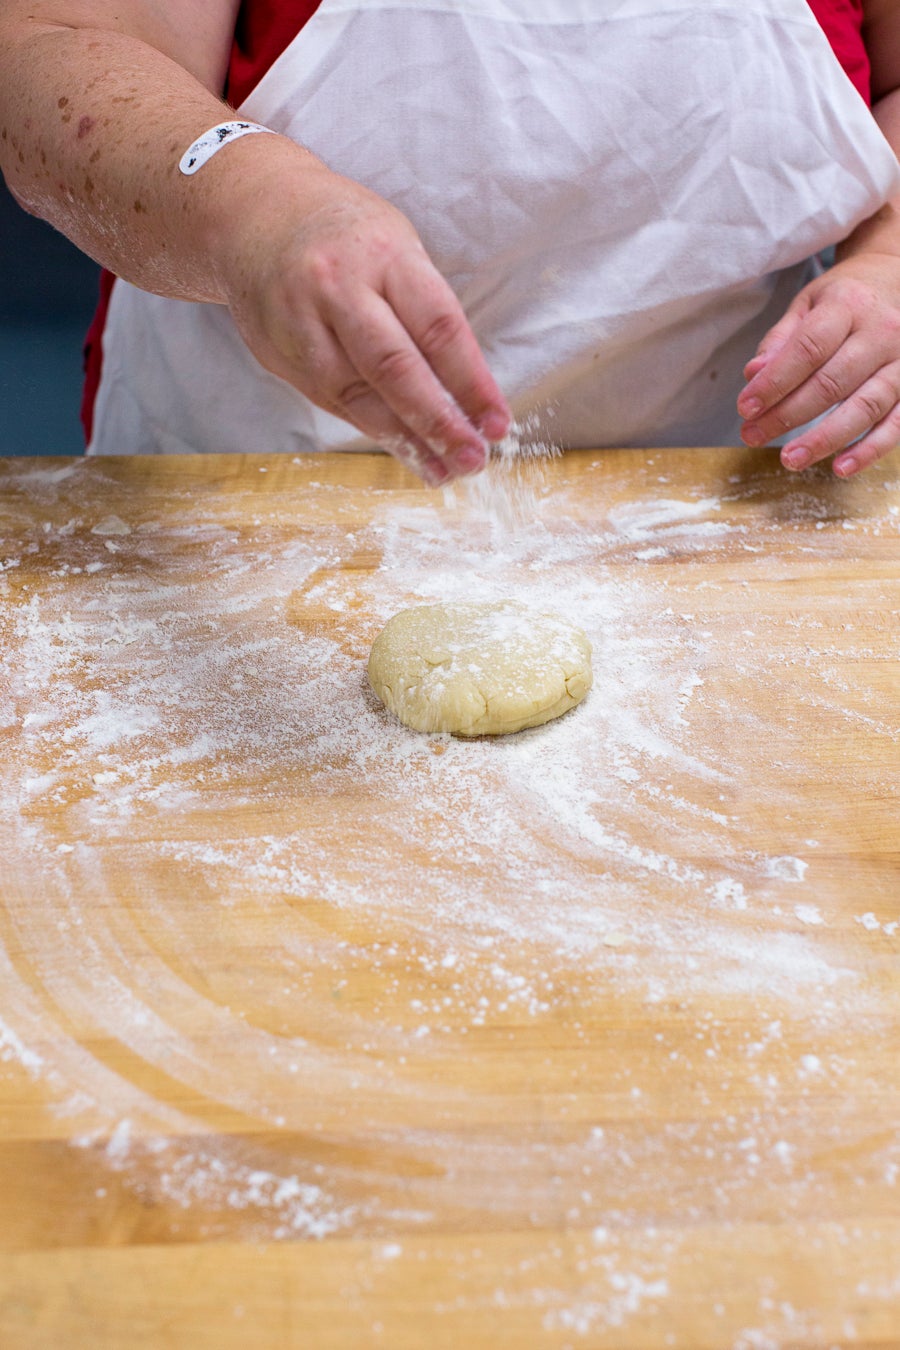
Generously dust your rolling surface with flour and roll your dough just under 1/4" thick. Because you'll be cutting out discs of dough, there's no need to roll a circle with your crust. In fact, I found rolling a long rectangle much easier.
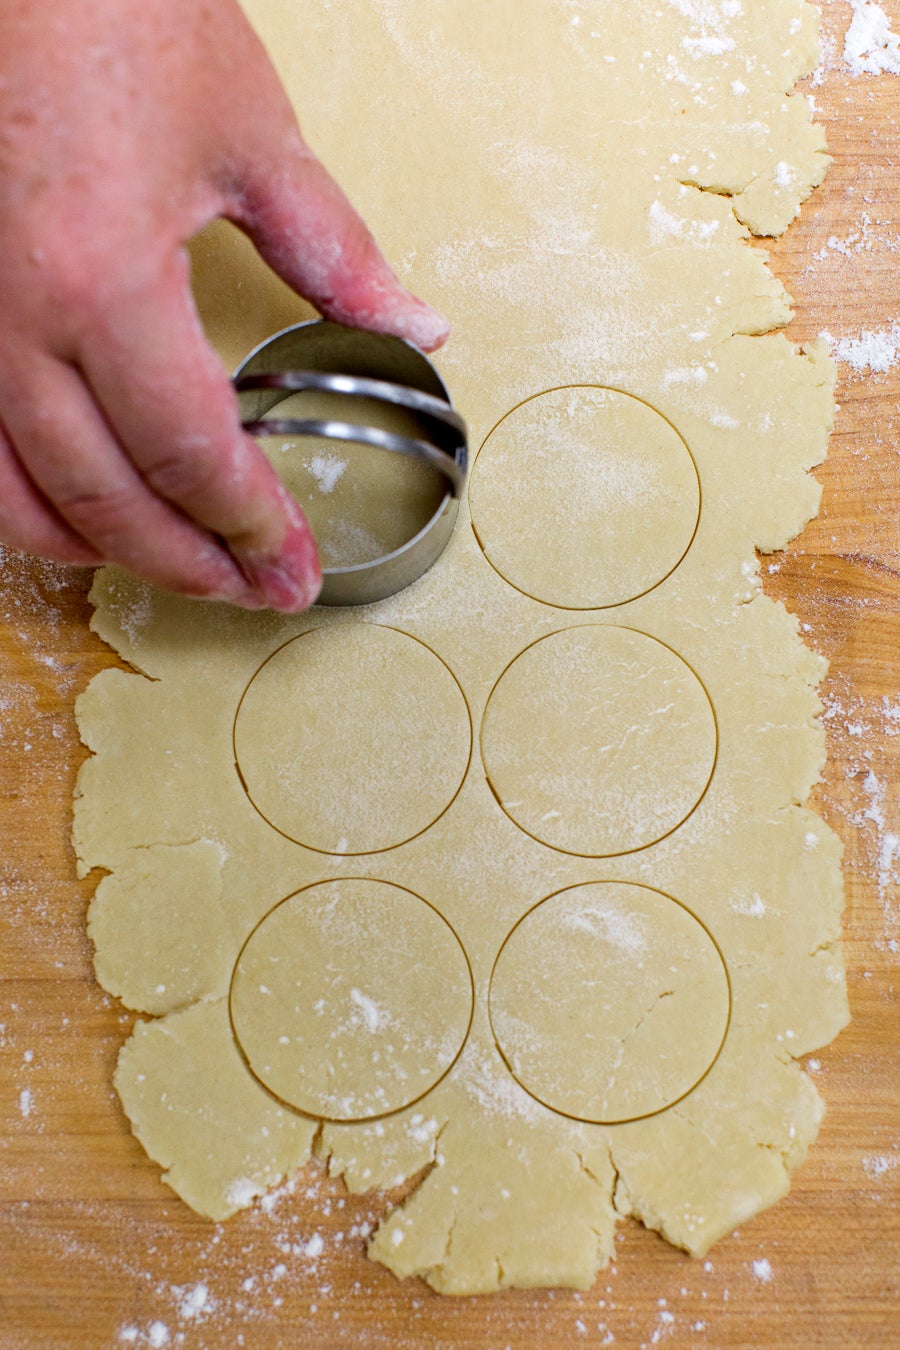
See? If you roll a rectangle, you can cut out pairs of discs much easier, keeping them side by side.
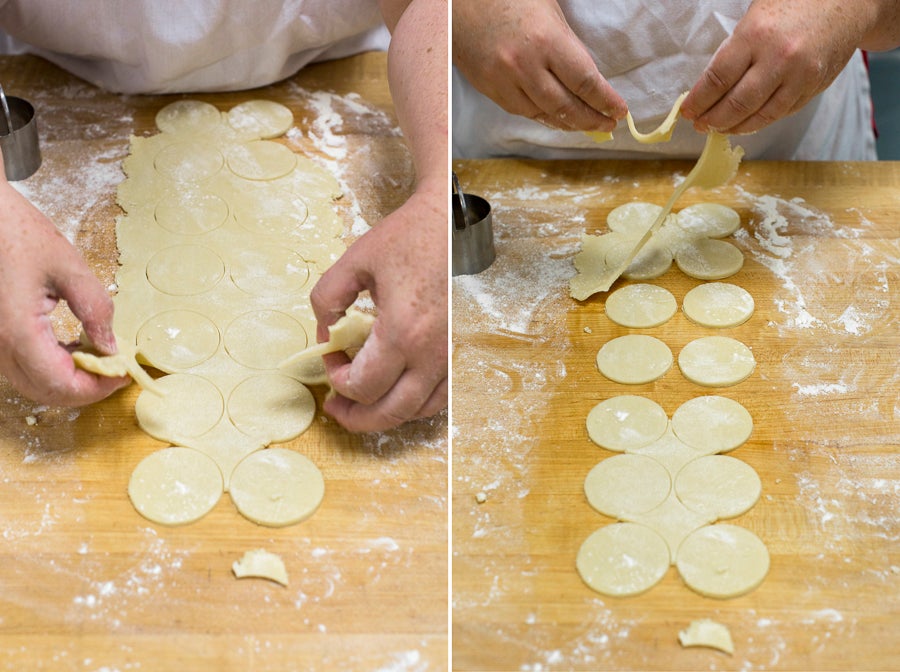
Cutting the discs, and then peeling up the excess dough is a lot easier than picking up each disc individually. Give it a try!

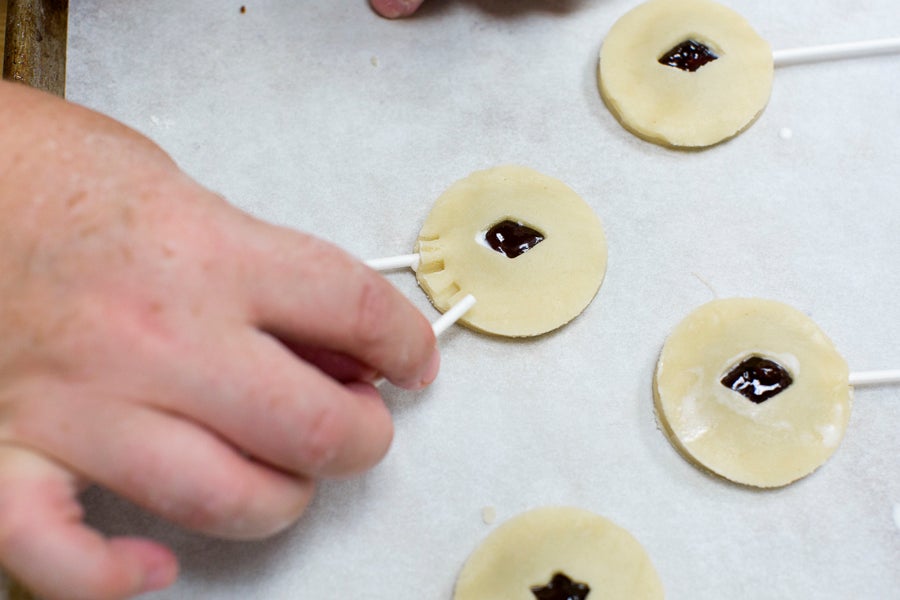
If you've ever used mini cutters on dough, you know they're notorious for sticking. A good flouring and the use of a pop stick to push out the dough makes this task a breeze.
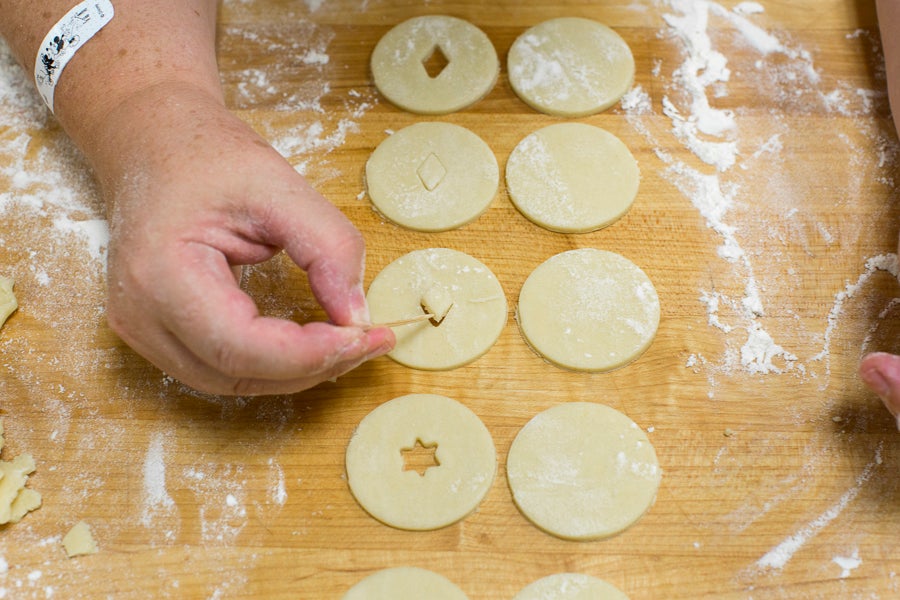
Stubborn pieces can be removed with the help of a toothpick as well. Sometimes simple tools are still the best.
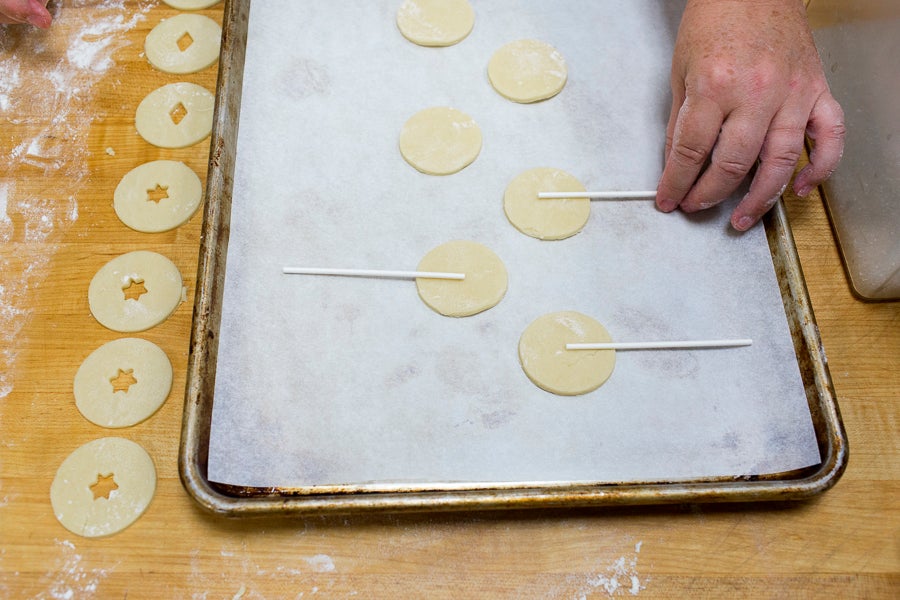
Transfer half the cut discs to a parchment-lined baking sheet. Gently press a lollipop stick into the dough. The tip of the stick should be in the center of the disc.
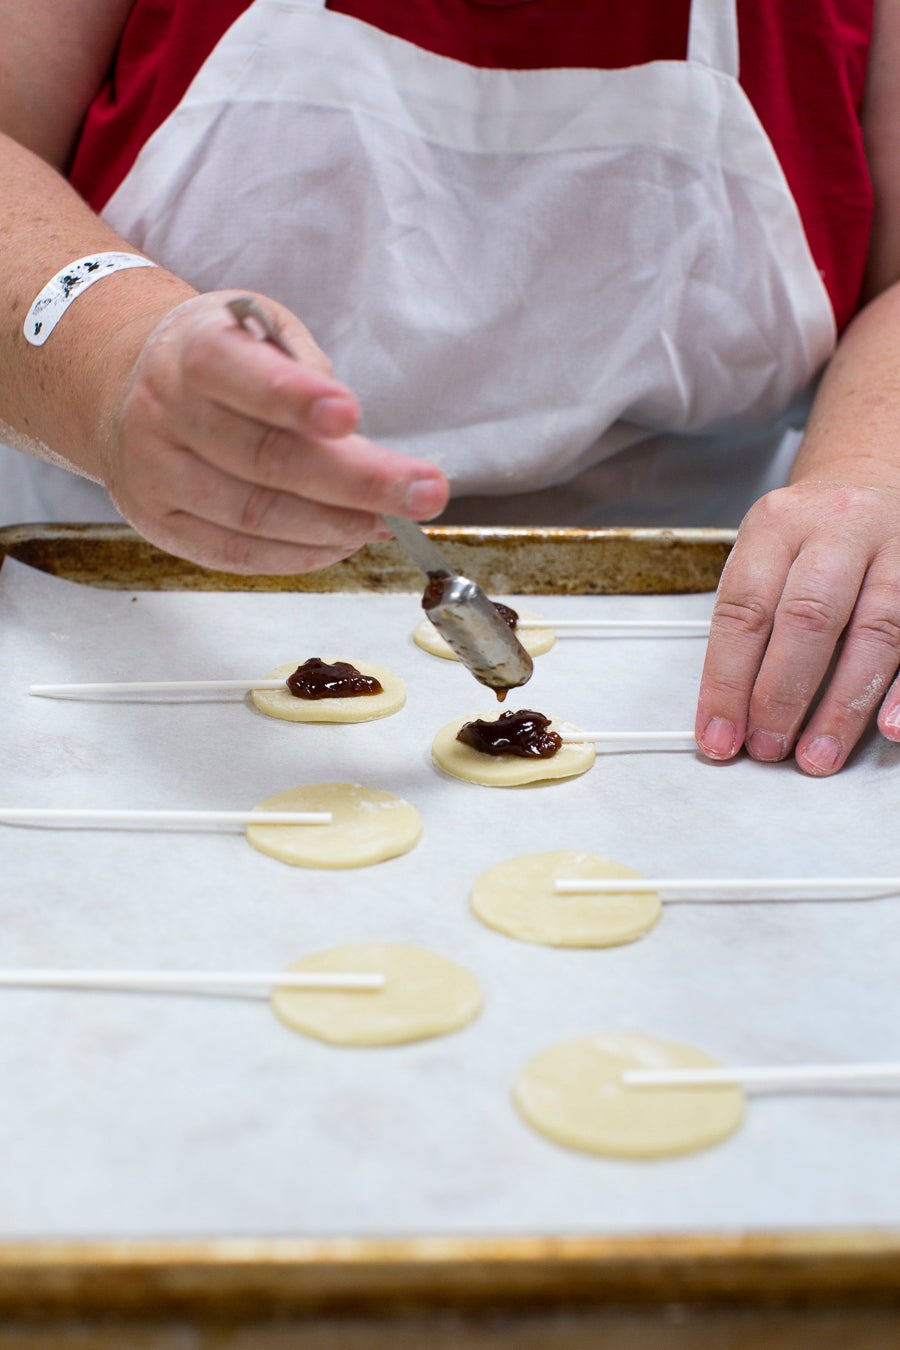
Top each stick with a small dollop of your favorite pie filling. I've used blueberry, strawberry, apricot, and even chocolate schmear. Oh, yummers.
Now, you need to be careful not to overfill, especially if you're using cutout tops. It's a hard balance, as you want plenty of filling, but not too much. I found with 2" discs, a generous 1/2 teaspoon of filling was plenty.
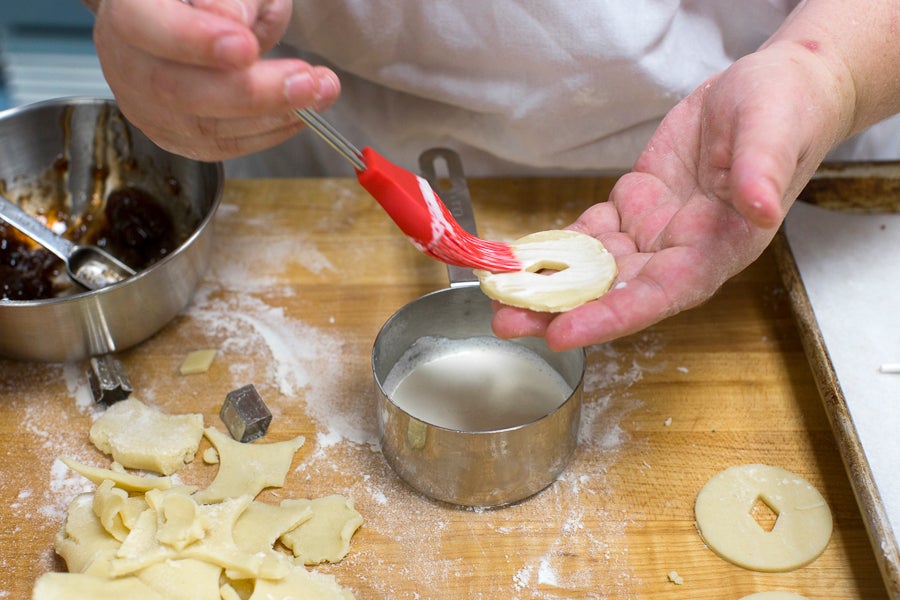
Once all of the filling is down, brush the top discs with a little milk or beaten egg white. No need to stick to the edges; you can brush the whole disc. The moisture will act as glue to help hold the halves together.
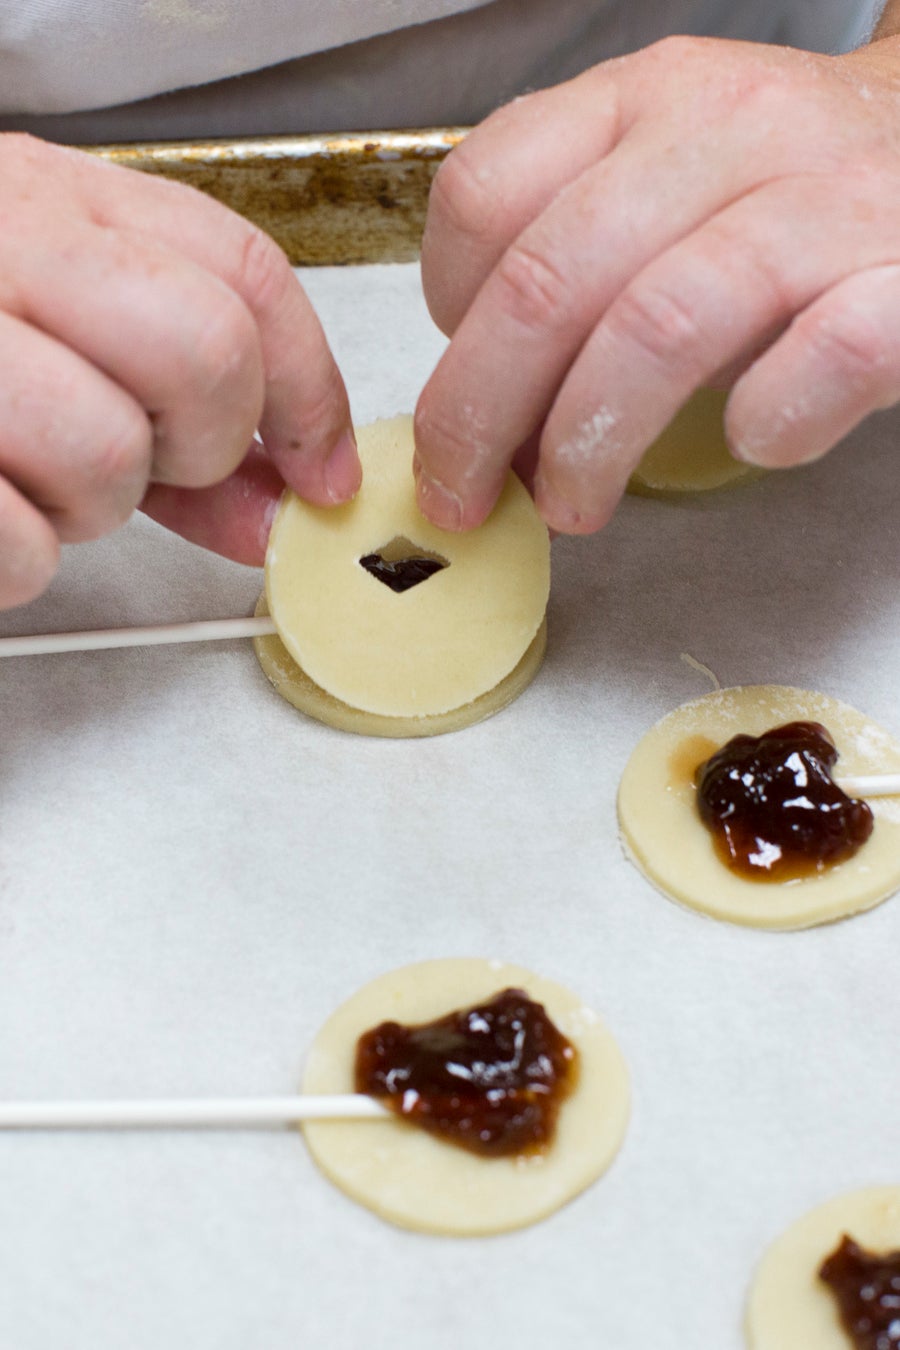
Lay on your covers, trying to keep the cutouts centered over your filling.
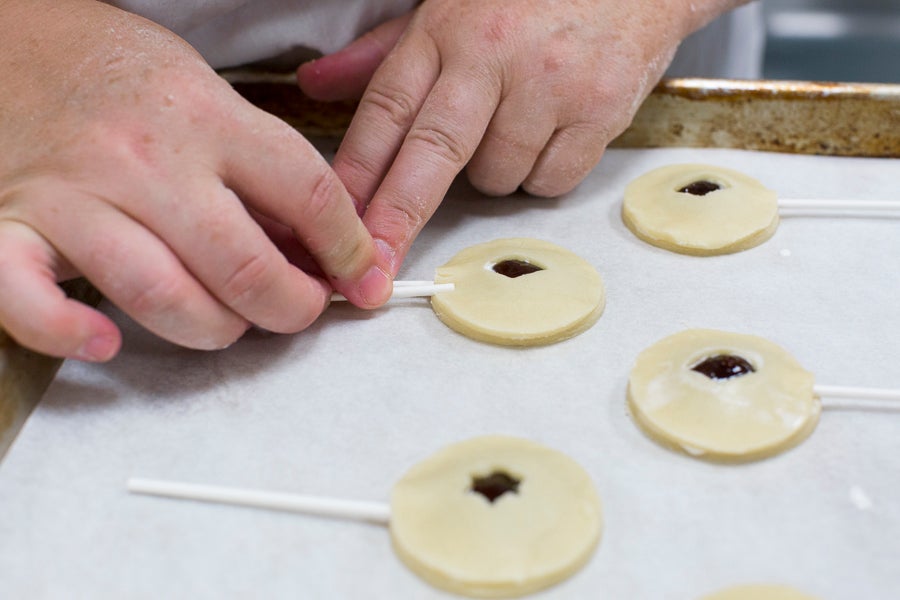
I have to say, one of the best tips I got from Andrea's book was using a broken piece of lollipop stick as a tool to press the two halves of your pie pops together. It's the perfect size, and make a nice, tight seal.
You can use the stick to seal all around the edges, or you can use a small fork, crimper, or other fun tool in your kitchen. I like to use the back end of my measuring spoon for a cute dimpled look.
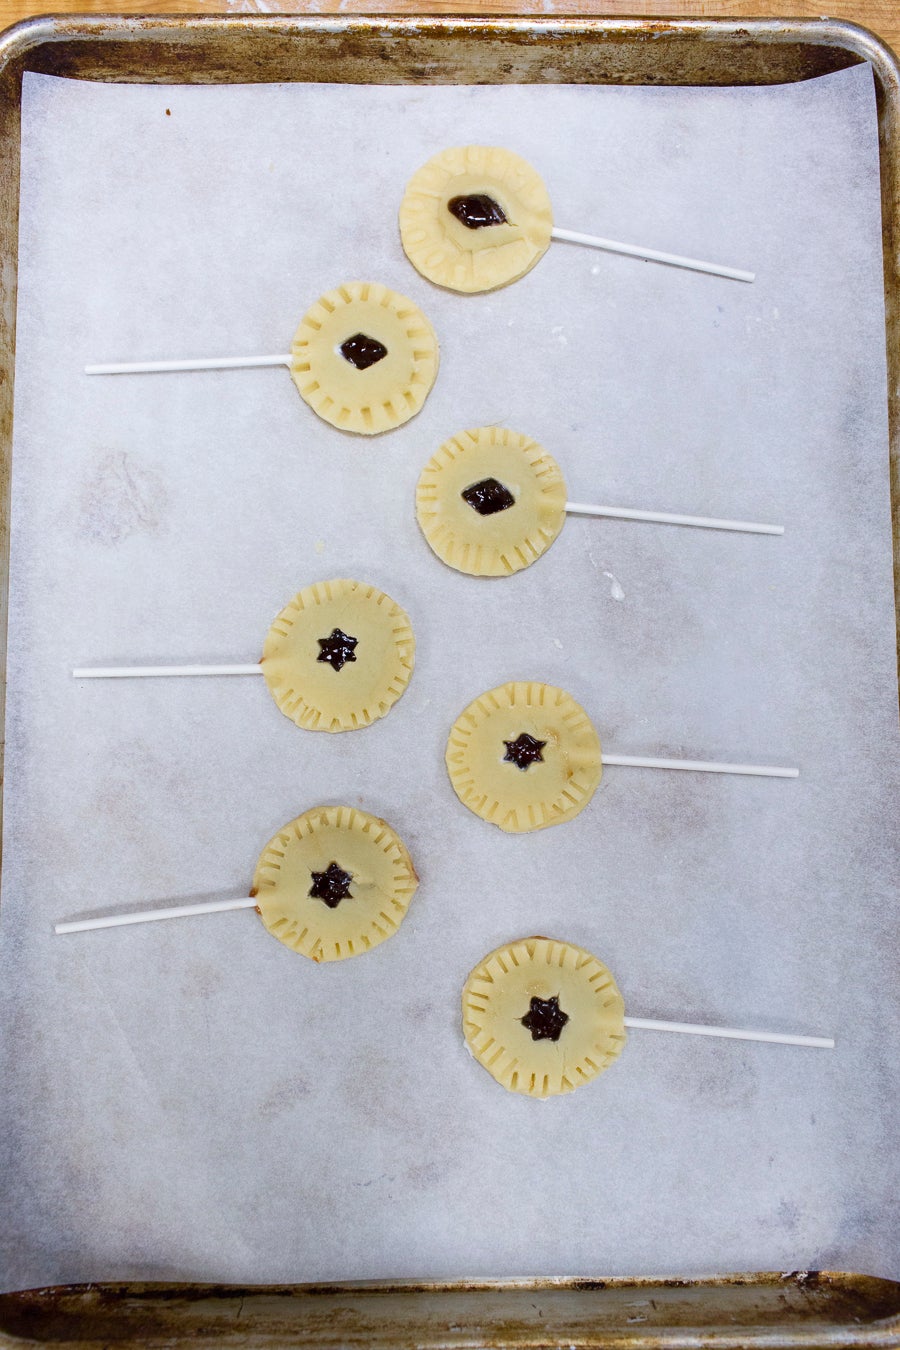
Voilà! A tray full of perfect pops, ready for the oven.
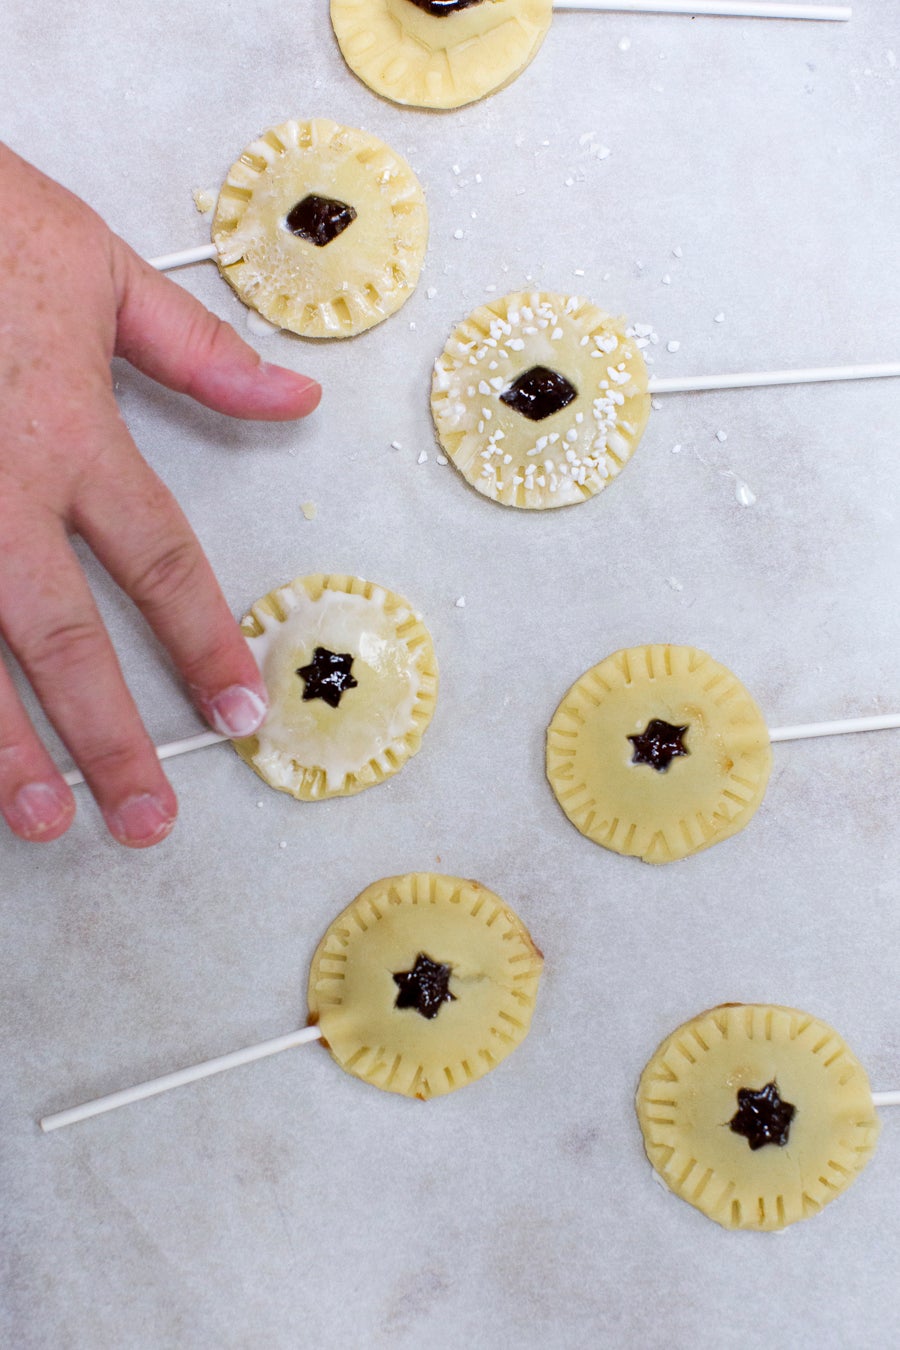
You can leave your pops unadorned, or spread on a little more milk or beaten egg white and decorate with your favorite sparkling sugars. My family found we really liked the extra crunch and sweetness from the sugar toppings.

And now for a little troubleshooting. At least once, you're going to put the filling in before the sticks.
Dang it! Now what? No worries, just add the stick, bake the pies as usual, and then use a spoon to add a touch more filling over the top of the stick; no one will ever know.
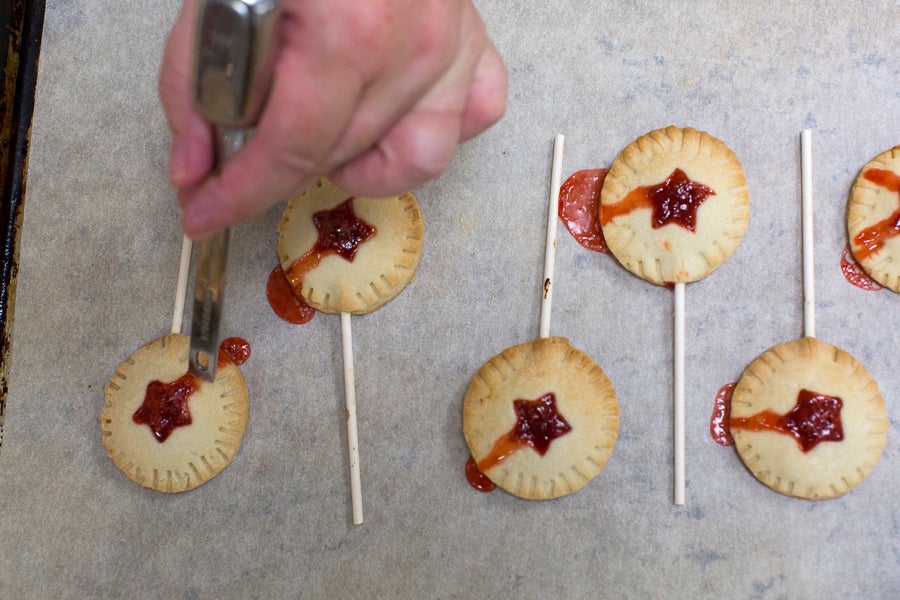
Bake at 350°F for about 10 to 14 minutes or until browned around the edges.
Gasp! Generous me has overfilled each pie, and the filling has spouted out like tasty strawberry lava.
Quickly take the back of a spoon or a butter knife and pull off the hot filling before it firms up. I was able to rescue the whole tray this way. A dusting of confectioners' sugar or a drizzle of glaze can help mask any overflow issues, too.
All in all, these pie pops are a delight to make and honestly, not as fussy as you think they might be. Even Julia, our King Arthur Flour photo guru whose pictures illustrate this blog, was impressed with how easily everything went together.
We could definitely picture a whole display of these pops for a party, or a big tray full of mini pies (sans sticks) for a great movie night-dessert.
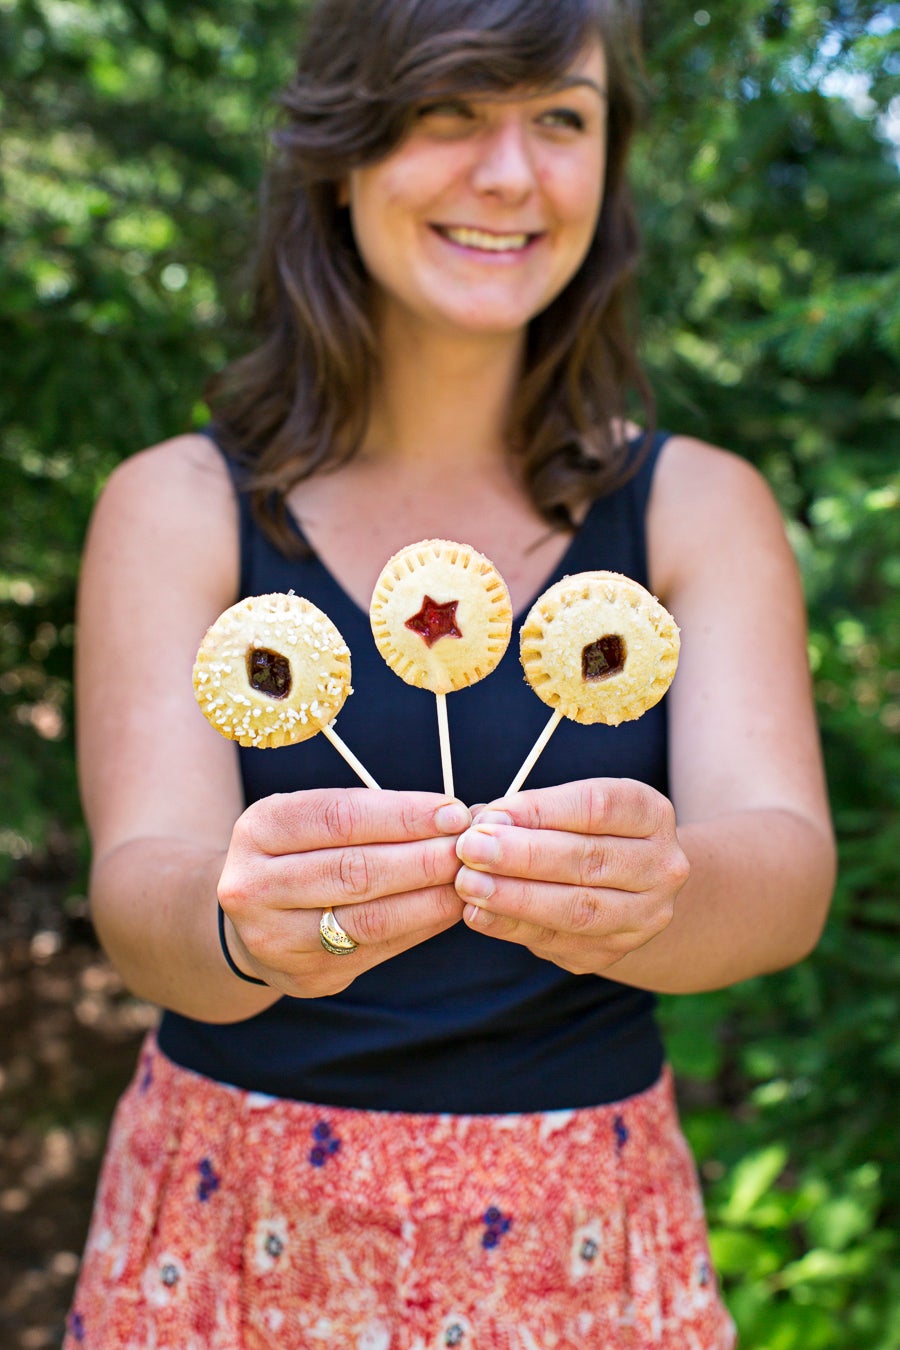
Rebekah, a member of our creative team, is always happy to model for us – especially when it means keeping these scrumptiousness-on-a-stick goodies as payment!
We hope you get a chance to check out Andrea's book online, or in your library or bookstore. As the saying goes, "Try it – you'll like it!"
Have you tried pie pops before? Let us know your thoughts in the comments below! Any favorite filling and crust combos to share?