

How to make fancy French madeleines
Even if you don’t have a specialty pan

Date
January 8, 2021

Madeleines are a charming combination of two beloved desserts: cookies and sponge cake. Using only a handful of ingredients, these delicate baked goods melt in your mouth.
They can seem fancy with their signature seashell shape and rich flavor. But the batter can also be baked in an everyday pan, something readily available in your pantry. The resulting treat, while not strictly a madeleine, offers the wonderful flavor and texture of that cookie in a new and different shape.
We’ll show you how to achieve two madeleine experiences — the classic French treat with its signature look, and the approachable cookie made with pans you have in your pantry.
Let’s get started with the recipes, beginning with a look at flavor options.
The madeleine recipes on our website will please both chocolate and vanilla lovers. All you need are these two foundational versions — Chocolate Madeleines and Vanilla-Scented Madeleines.
Depending on what you're looking for, you can adjust the nuanced flavors added to each recipe. The chocolate version includes both orange zest and fresh orange juice for a pleasant note of citrus alongside the chocolate base. Replace the orange juice one-to-one with another flavorful liquid like coffee or even rum for a jazzed-up version of chocolate madeleines, if you like.
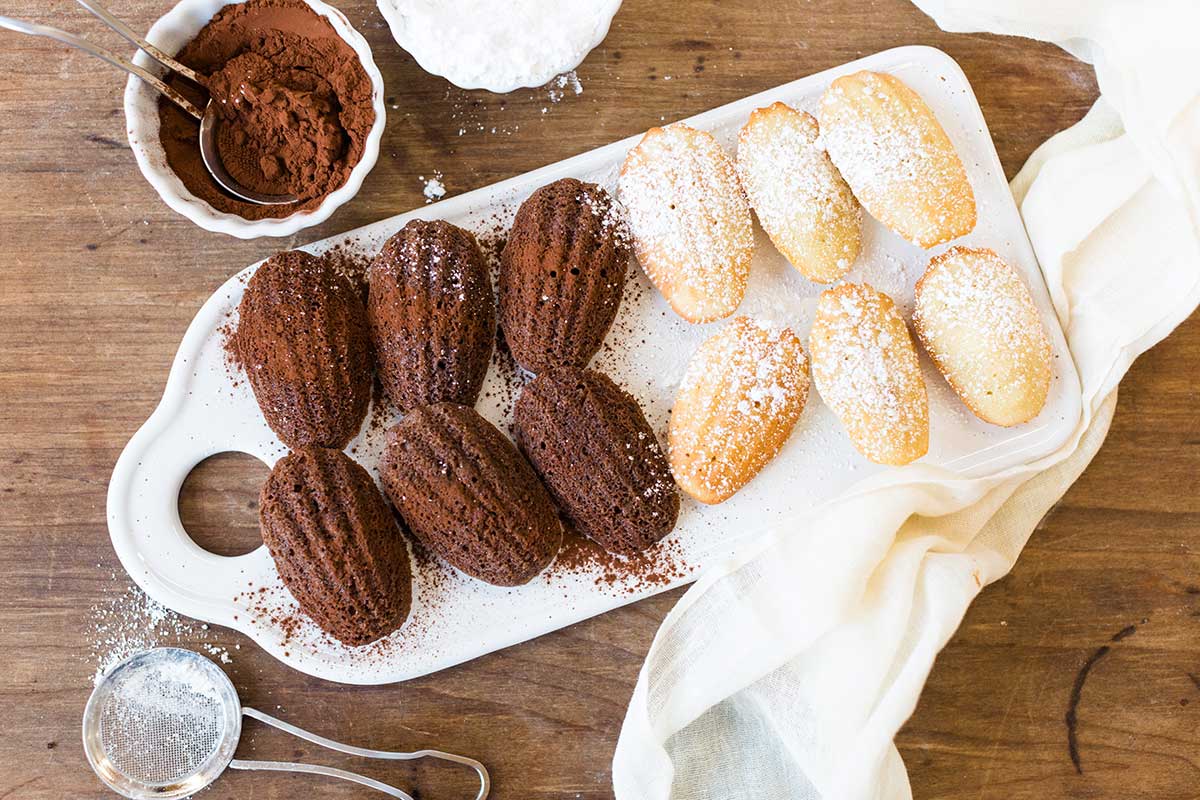
The vanilla version is “scented” with vanilla extract, a term that means you’ll be able to smell these babies baking from far beyond the kitchen. Feel free to replace the vanilla extract with another flavor of your choice — lavender, coconut, or even fiori di Sicilia-flavored madeleines all are delightful. Choose what sounds tempting to your palate.
Once you have your recipe and flavor combination down, it’s time to start baking!

We’ll begin with the classic seashell-shaped madeleine — the kind you’d see served at afternoon tea or a French café.
The key piece of equipment for this style is a madeleine pan, preferably non-stick.
To make fancy, French-style madeleines, start by mixing up your batter. Let it chill in the fridge if directed in the recipe. (Some recipes include this step to allow the gluten to relax and the flour to hydrate, making the final madeleines delicate and tender.)
About 10 minutes before you're ready to bake, grease the seashell-shaped wells of the madeleine pan with butter, shortening, or non-stick spray. Then sprinkle flour (for vanilla madeleines) or cocoa powder (for chocolate madeleines) into each well.
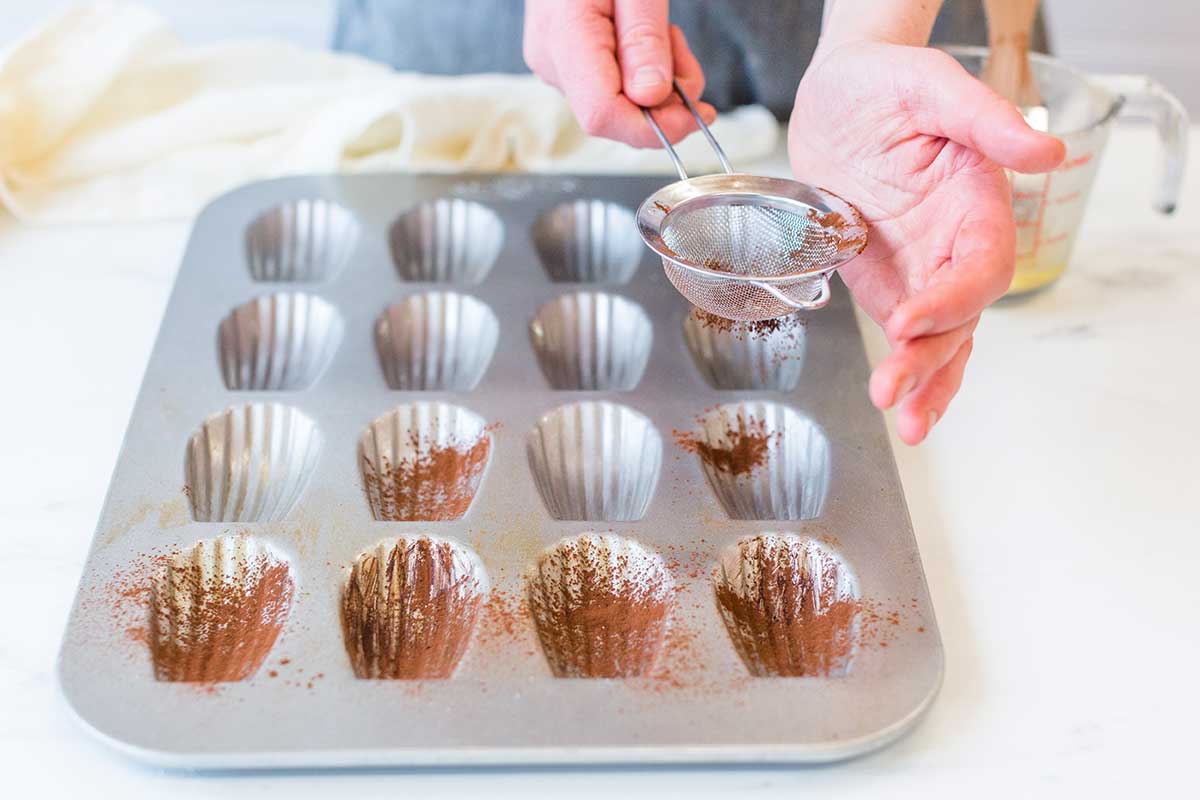
Chill the pan in the freezer for 10 minutes. (The temperature contrast of the cold pan and hot oven helps create the signature bump in the center of the madeleines.)
Evenly portion the batter into the wells and bake as directed in the recipe. If you're using a dark-colored pan, check for doneness 2 minutes early; they tend to bake more quickly than lighter-colored pans. When the madeleines are done baking, they should feel set and slightly springy to the touch. Don't overbake the madeleines or they'll be dry.
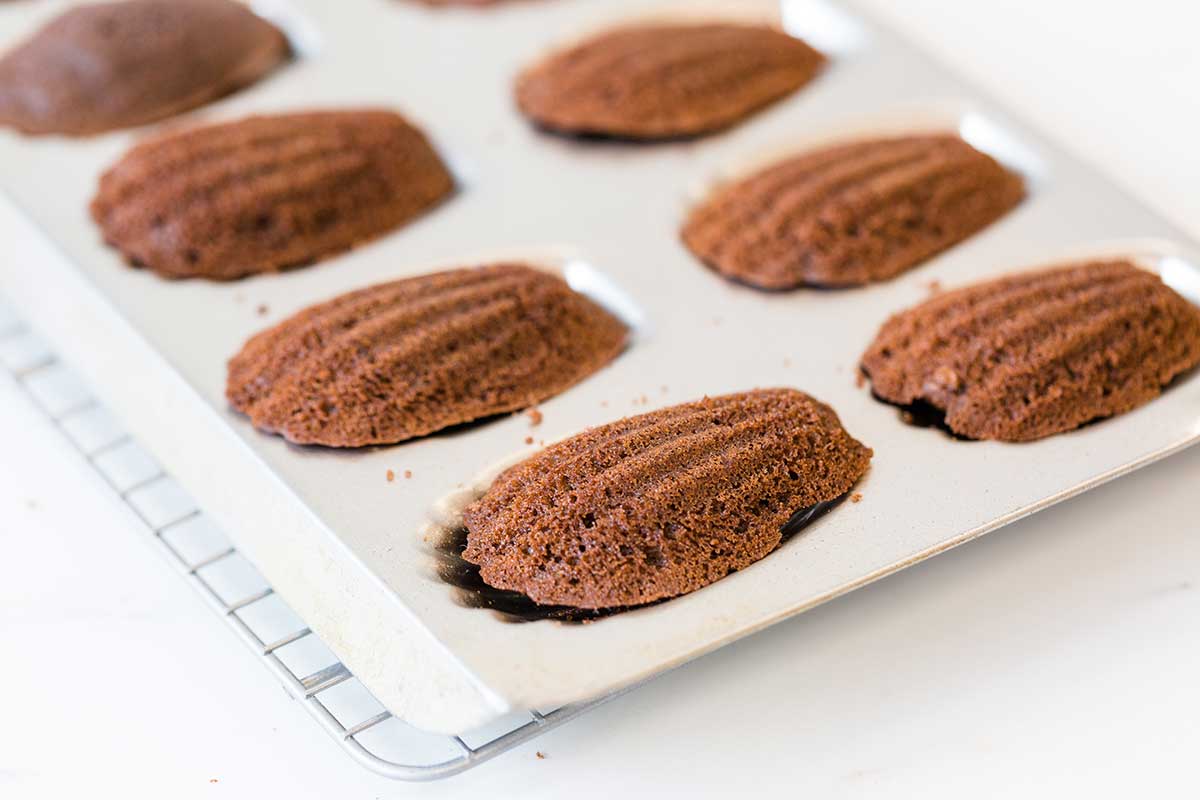
Use an offset spatula or a dull knife to quickly loosen the madeleines from their wells as soon as you remove them from the oven. (They’re notorious for sticking if you wait too long.)
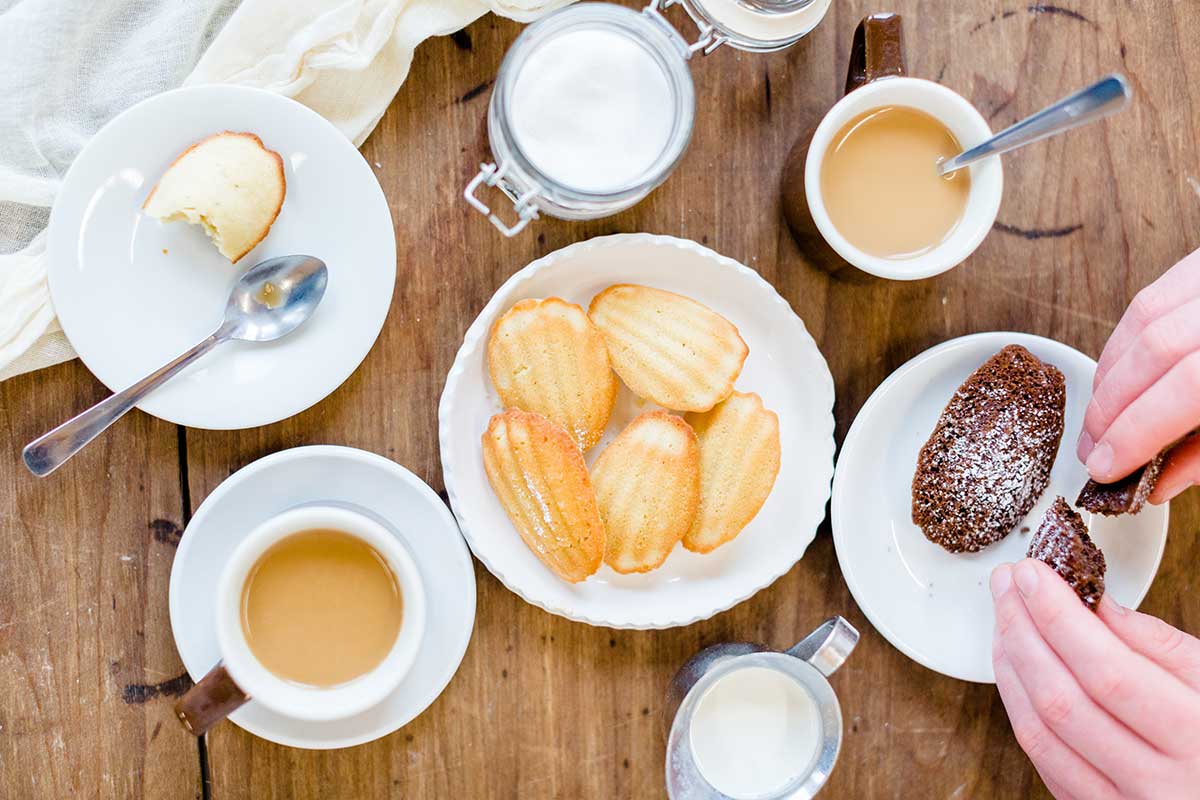
Prepare your kettle of tea or French press coffee, and settle in for a blissful moment enjoying your madeleines.
If you’re the kind of person who, as Paul Hollywood would say, prefers “substance over style,” then this DIY method is for you. Or perhaps you've simply never tasted a madeleine before, and you want to see what all the fuss is about before investing in a madeleine pan. Here's how to make these buttery little cakelets without the specialty pan.
Start by preparing the madeleine batter as described in your recipe, chilling it if called for. Next it’s time to grease and flour your pan of choice — this is where things get interesting.
Here are a handful of alternative pan options, as well as some things to keep in mind while you make your selection:
Perhaps the most straightforward alternative is to use a mini muffin pan. Most hold just the right amount of batter to make madeleines — about 2 teaspoons of batter per well. (Despite the name, our teaspoon cookie scoop actually holds about two teaspoons in each scoop, which makes it a perfect tool for these cookies.)
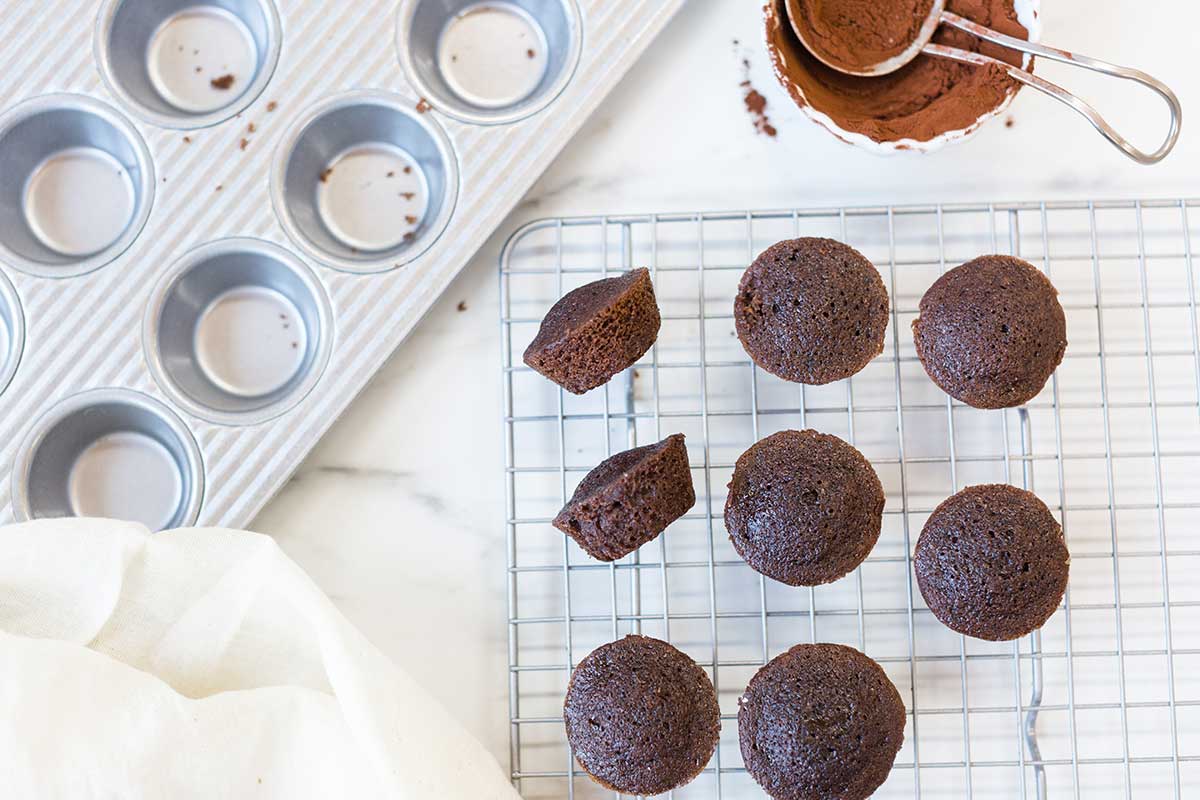
Bonus: Since most madeleine recipes call for using about 2 teaspoons of batter per madeleine, you won’t have to adjust the baking time if you use a mini muffin pan. Use the baking time included in the recipe as a guide, and check for doneness a few minutes early.
You'll end up with unassuming-looking treats that resemble mini cupcakes. (Dust them with confectioners' sugar or cocoa to add a little pizazz!) But just one bite will reveal that these are something incredibly special.
If you happen to have mini tart pans (sometimes called mini tart molds or mini tart shells), you can use them to make adorable, bite-sized madeleines. These are perfect for a brunch party or dessert buffet because they're a one-hand snack!
To make them, prepare the madeleine batter as described, including the chilling step. Grease the pans, dust them with flour or cocoa if desired, then place the empty tart pans on a baking sheet. Chill for at least 10 minutes in the freezer.
After the pan is nice and cold, portion a heaping teaspoon scoop of batter into each mini tart pan. The madeleine batter shouldn't quite fill the pan to the very top, otherwise it'll overflow during baking. (The baking sheet provides extra insurance against overflow — it'll catch any drips.)
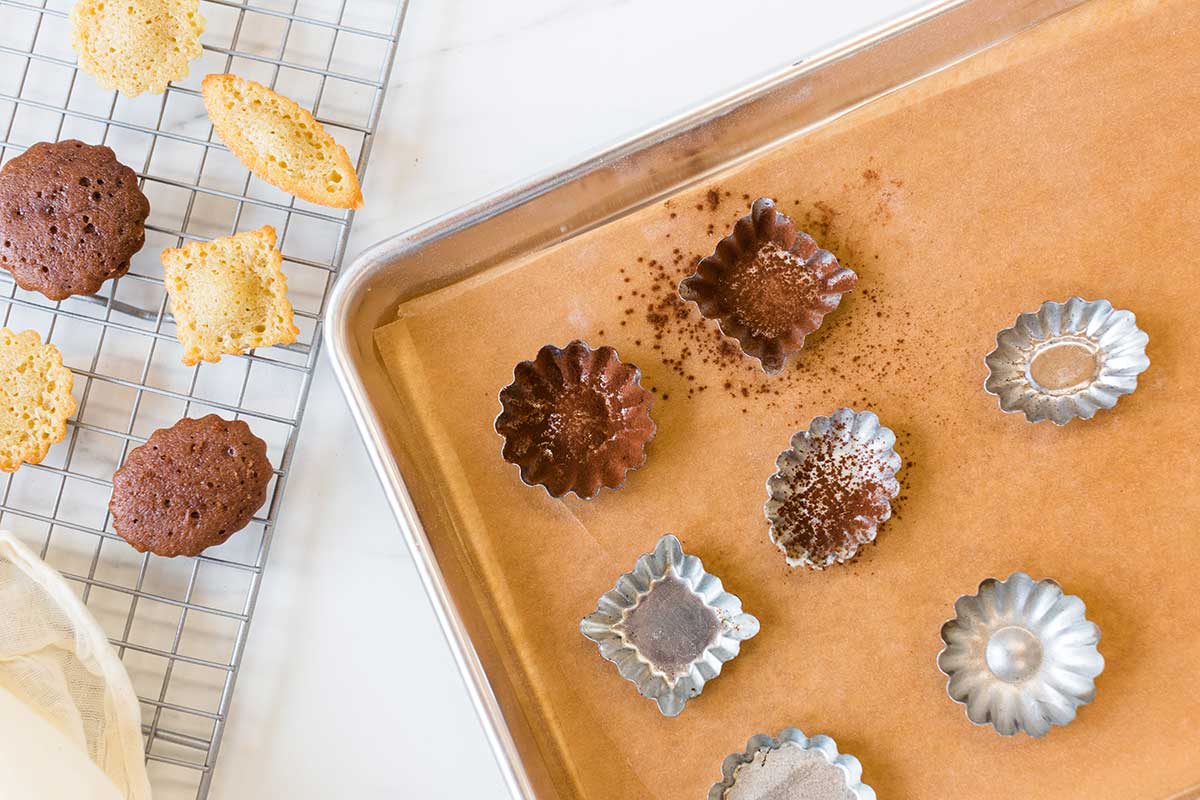
Bake the mini tart-shaped madeleines at the temperature called for in the recipe, checking for doneness about 3 to 5 minutes early (especially for dark-colored pans). Unmold the madeleines as soon as they come out of the oven and enjoy with a smile!
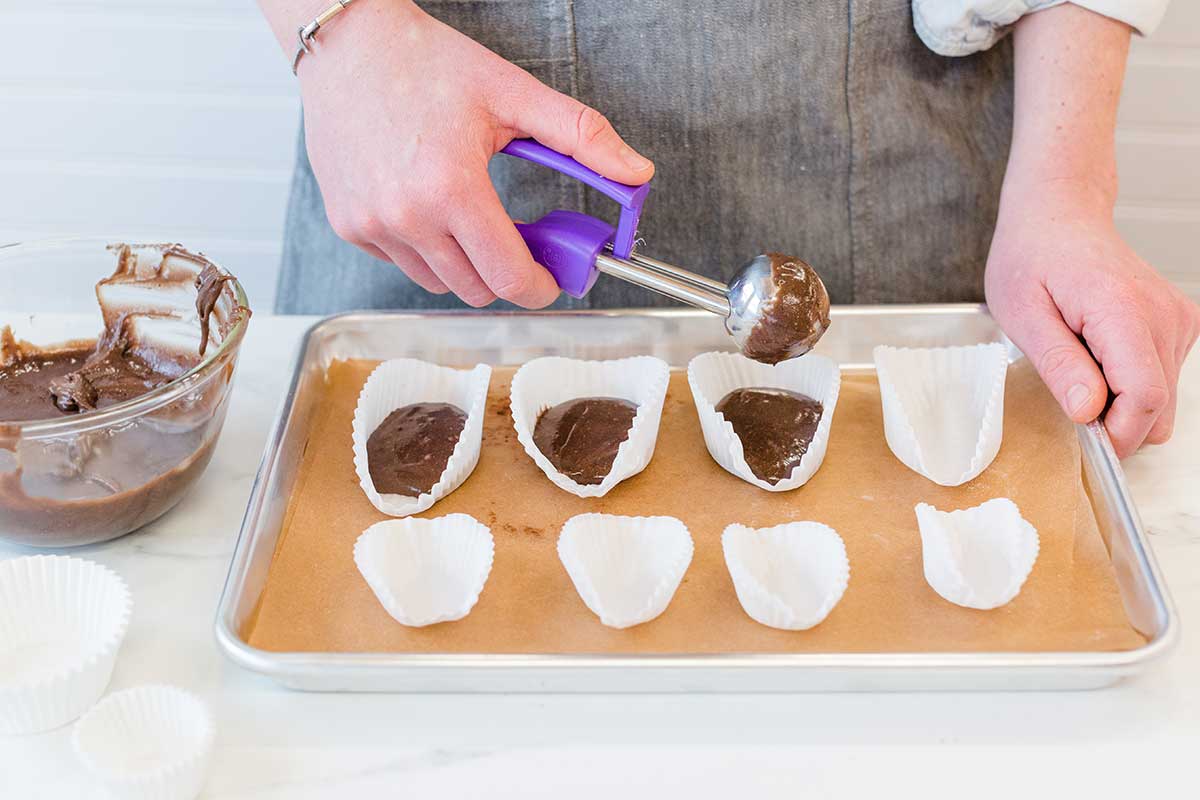
This creative approach requires only a baking sheet and cupcake papers. If the papers are quite thin and flimsy, double them up. (Choose metallic cupcake papers if those are available to you; they're quite sturdy.)
Before greasing the papers, use your fingers to open the pleats of the papers at opposite sides, turning them into a diamond shape. Place the opened papers on the baking sheet and grease lightly with non-stick spray.
If you're using standard-sized cupcake papers, portion a heaping tablespoon of dough into each one. (Our tablespoon cookie scoop is just right here.) Bake for about 2 to 3 minutes longer than the recipe calls for.
You can also go small here and use mini muffin papers instead. Portion about 1 teaspoon of batter into each opened mini muffin paper. Check for doneness about 2 minutes early.
These DIY madeleines look remarkably similar to the traditional version.
If you happen to be a scone fanatic (like me) and have a mini scone pan, you can give it another purpose and use it to make wedge-shaped madeleines. The mini scone pan holds about 2 tablespoons of batter in each well and requires an additional 5 to 8 minutes to bake through properly.
No mini scone pan? Perhaps in the depths of your cupboard you have a mini popover pan hiding somewhere. This pan is my favorite way to make madeleines (aside from the traditional method of using a seashell-shaped pan). The baked cylindrical madeleines look like mini panettones just begging to be popped into your mouth, one by one.
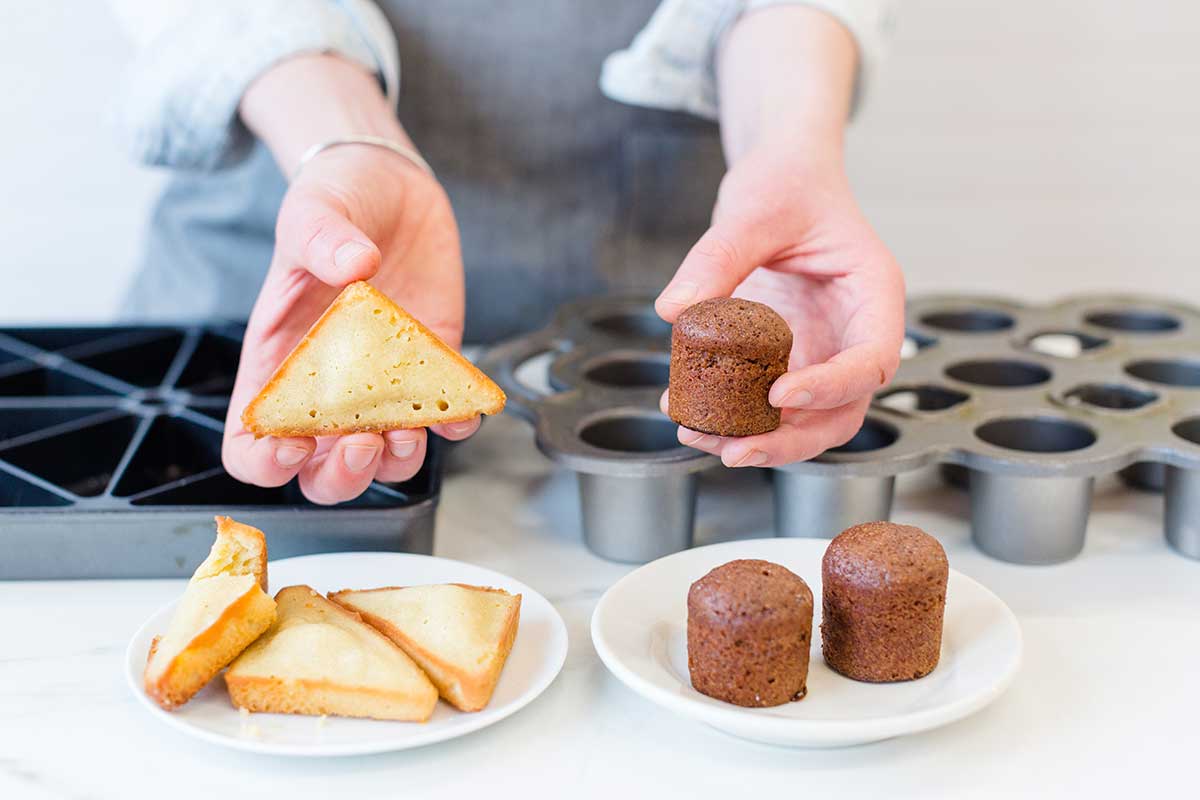
The mini popover pan holds about 1 tablespoon of batter per well and requires 3 to 4 minutes of additional time to bake through properly. Remember to look for a set, springy top and golden edges (if making vanilla madeleines). Your kitchen will smell amazing when they're done.
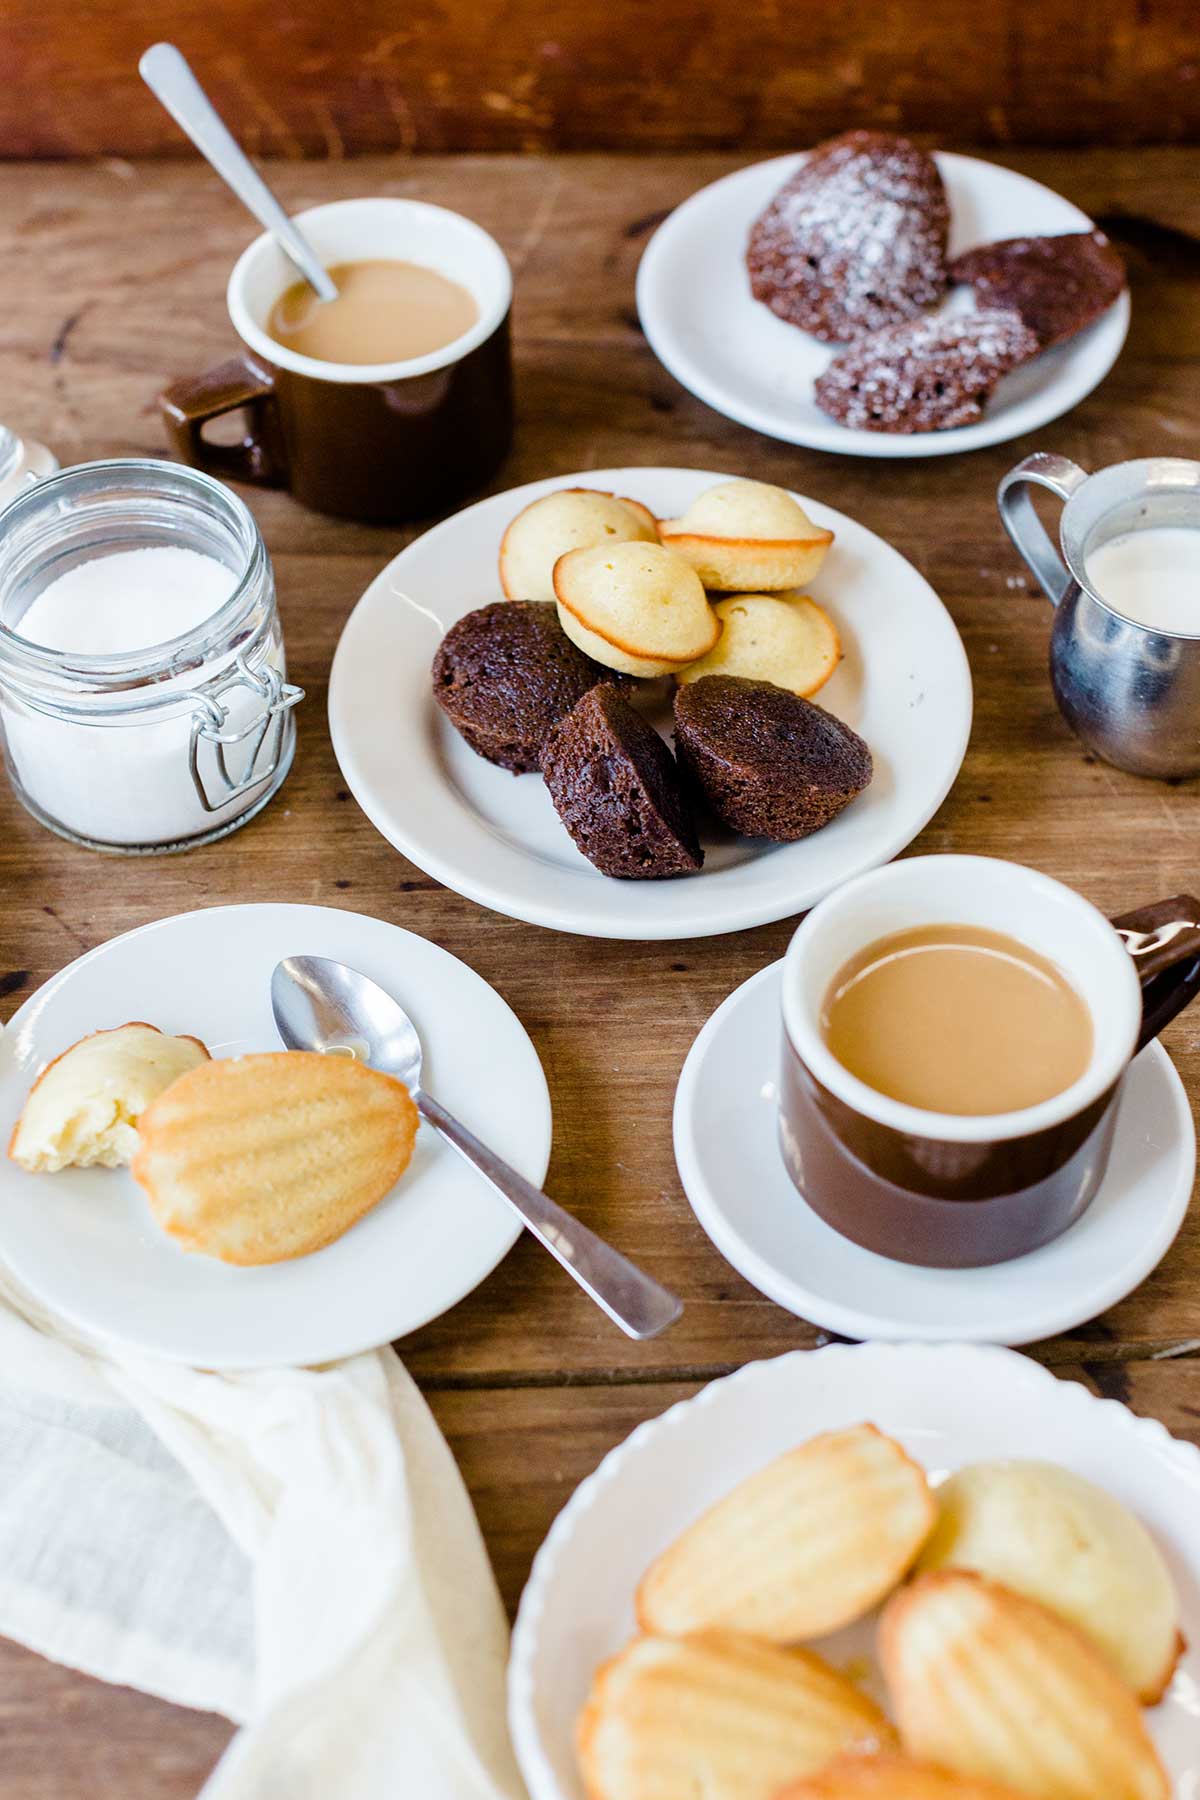
Whether you’re all about the traditional look of baked goods or you only care about flavor, madeleines hit the spot. They can be truly stunning with their seashell-shaped ridges and a gentle dusting of confectioners' sugar or cocoa powder.
If you go the DIY route, your madeleines may have a more humble appearance. But whoever takes a bite will be flooded with delight by the flavor and delicate texture — they’ll quickly realize they didn’t just eat an ordinary muffin or cupcake. No, it was something special: a homemade madeleine!
Are there other specialty pans that you'd like to find another use for? Or perhaps the opposite is true: you'd like to bake a recipe that calls for a specific pan and you're wondering what else you can use instead. Let us know in the comments, and we'll do our best to problem solve with you!
Photos by Anne Mientka