


How to make rose apple pie
A beautiful twist on a classic favorite

Date
October 13, 2020

Taking risks in the kitchen can be thrilling, especially if you’re a baker who normally sticks with the classics. Trying something new — even if it’s simply tweaking flavor or adjusting presentation — can deliver a rush of success. That sense of excitement and intrigue is usually absent when you make the same recipes, the same way, over and over again. Case in point: apple pie.
This year, it’s time to take a leap of faith and branch out from your standard double-crust apple pie. Brace yourself — we’re making a rose apple pie!
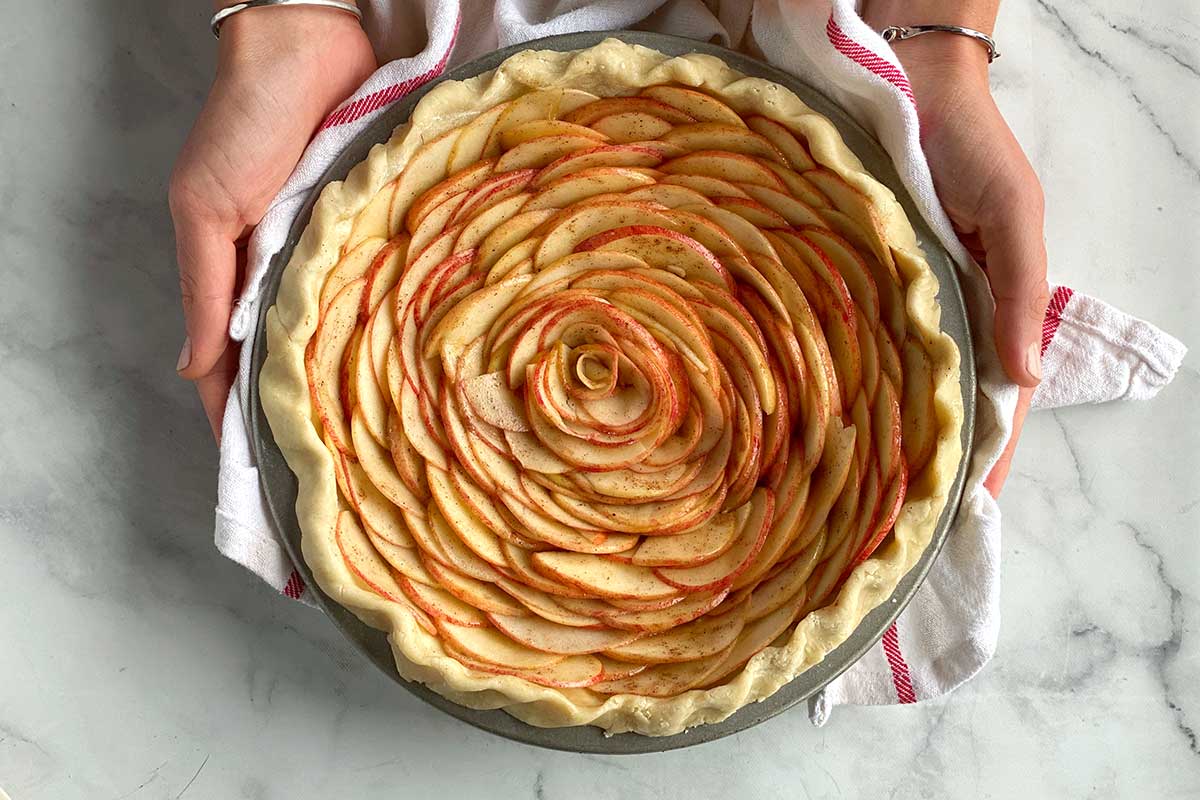
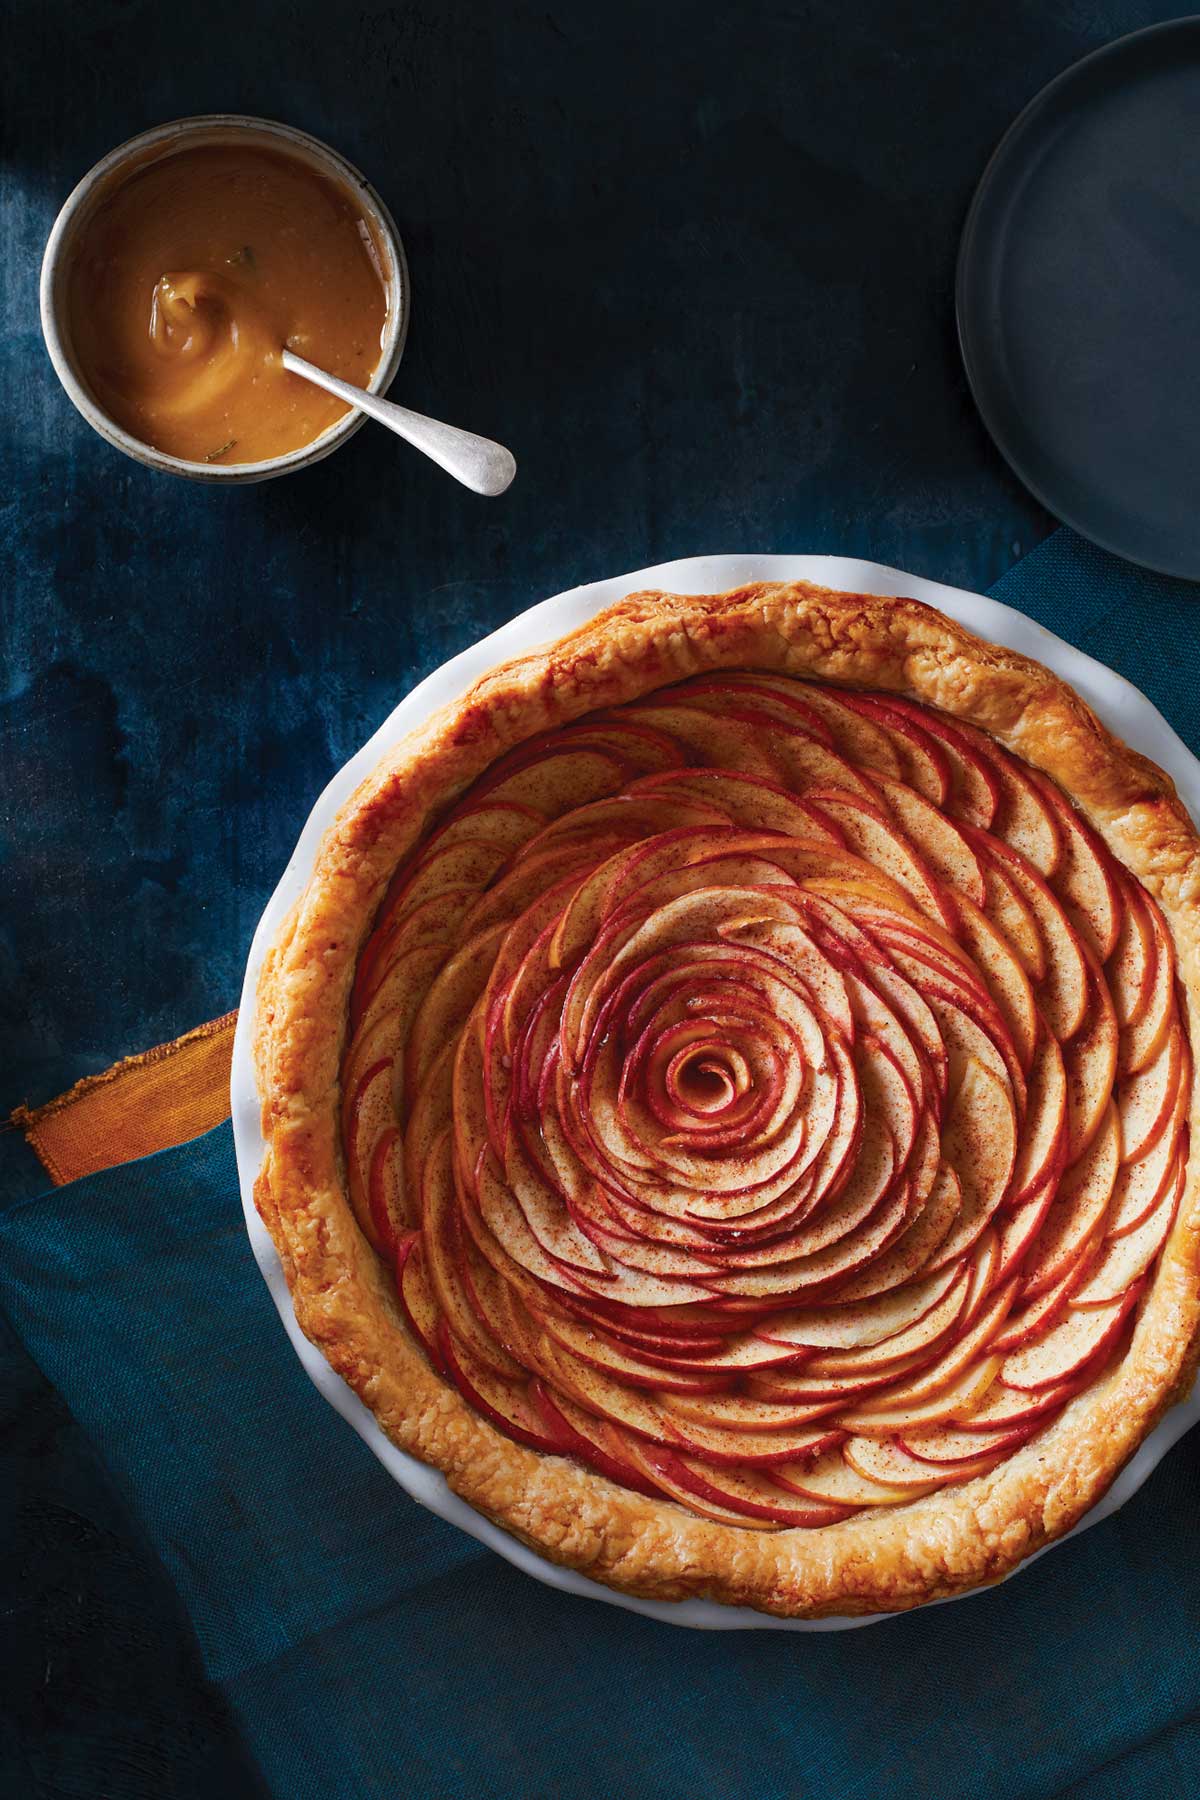
A rose apple pie contains all the deliciousness of the classic dessert while giving it a stunning rose-like presentation.
For those of you who are shaking in your aprons, terrified at the idea of deviating from your tried-and-true apple pie recipe, go ahead and relax. I’ve got good news: you can start with practically any apple pie recipe and turn it into a rose apple pie.
For best results, start with a pie recipe that uses about 4 to 5 apples — a “mile-high apple pie” will produce too much filling for this style of pie. A half batch of our Apple Pie recipe is just the right amount. (Alternatively, prepare the entire batch of filling and bake off any excess filling in a small ramekin as a baker’s snack.)
When it comes to the crust, you’ll only need a single crust for the bottom of the pan: no top crust will cover up the beautifully arranged apples.
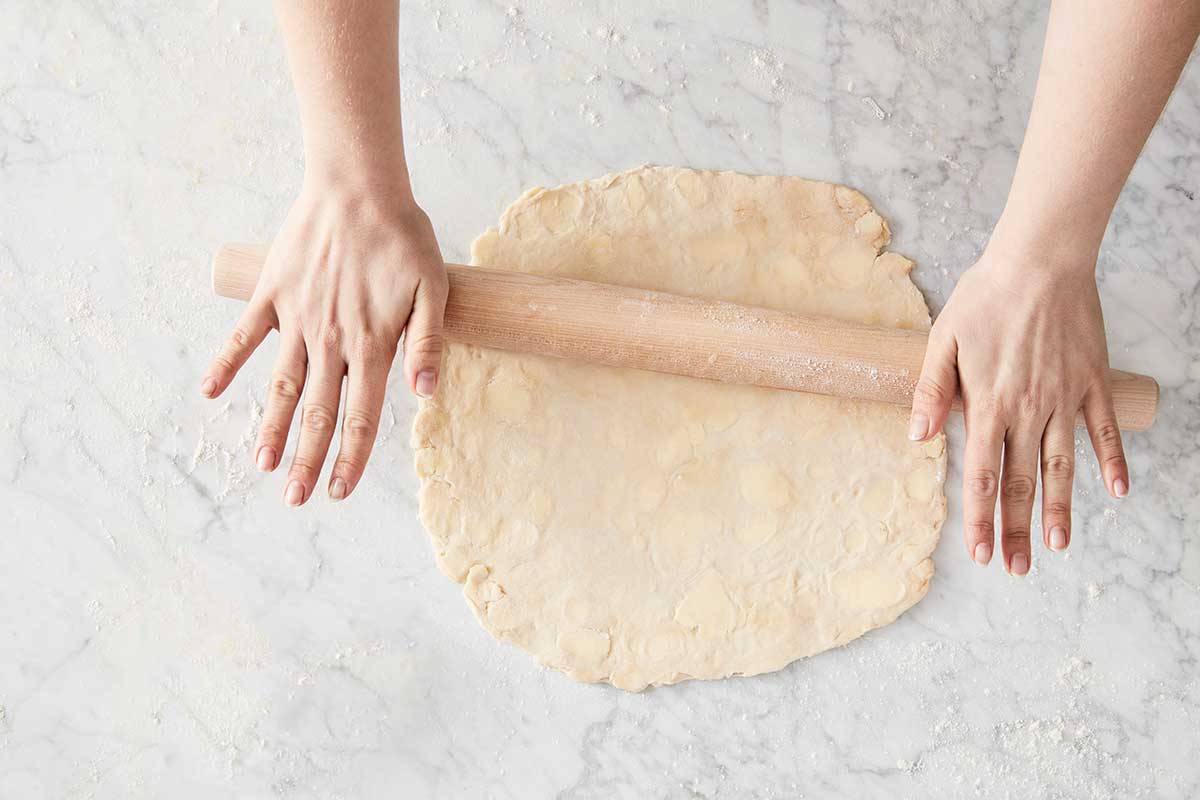
When you’re ready to make your rose apple pie, roll out the dough and place it in a 9" pie pan. (A pie pan that's about 1" to 1 1/2" deep will suffice for this style of pie.) Crimp the edges with your design of choice — you don’t want to mess with the edges once the filling is in place.
Now, on to the apples. Our test kitchen recommends starting with a variety of apples to offer a mix of flavors, colors, and textures. (See our previous blog post, The very best pie apples, for tips on selecting varieties.)
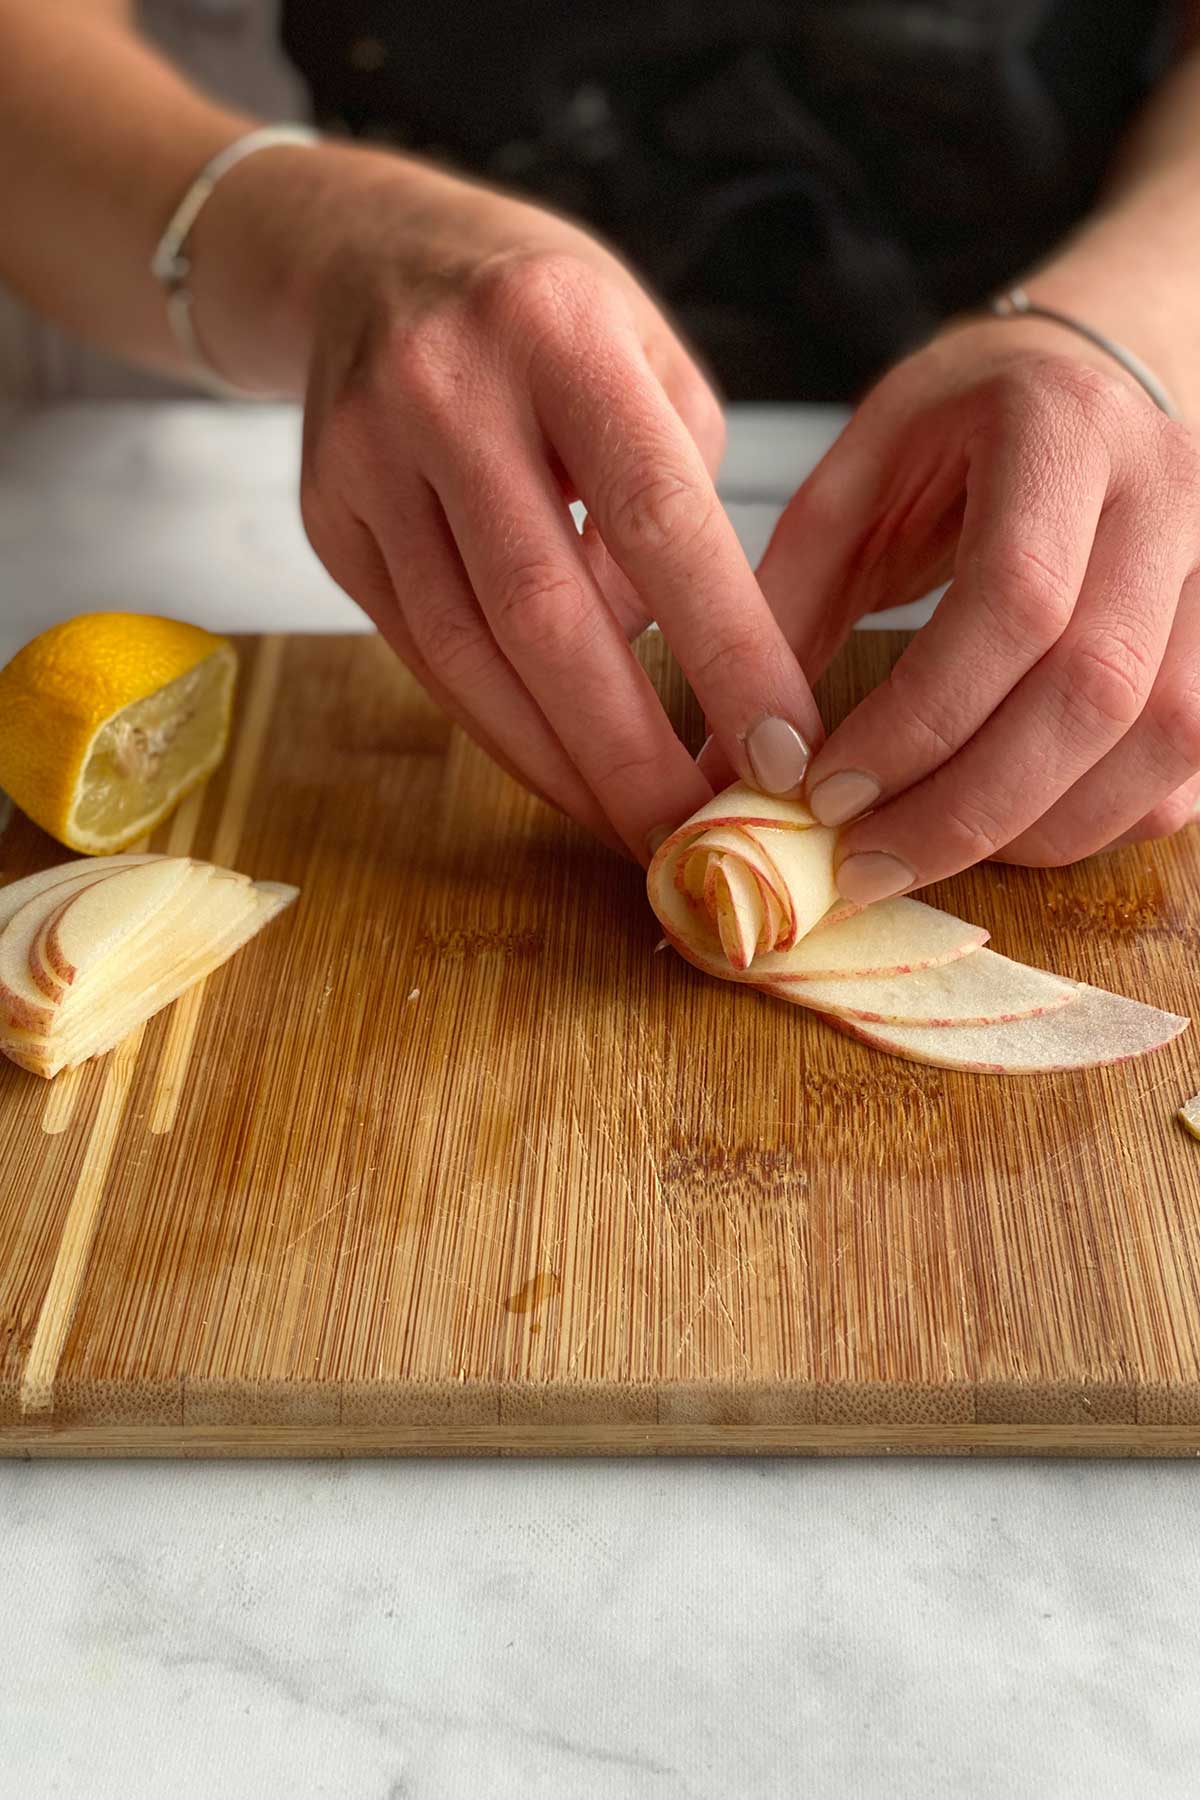
Once you have your apples, start preparing them for the rose-like center of the pie. Your goal is to slice the apples into very thin discs about 1/8" thick. If you have an apple slicer or another tool that will produce this cut for you (like a mandolin), feel free to use it.
Here, we’ll show you how to transform the apples into ribbons using only a knife.
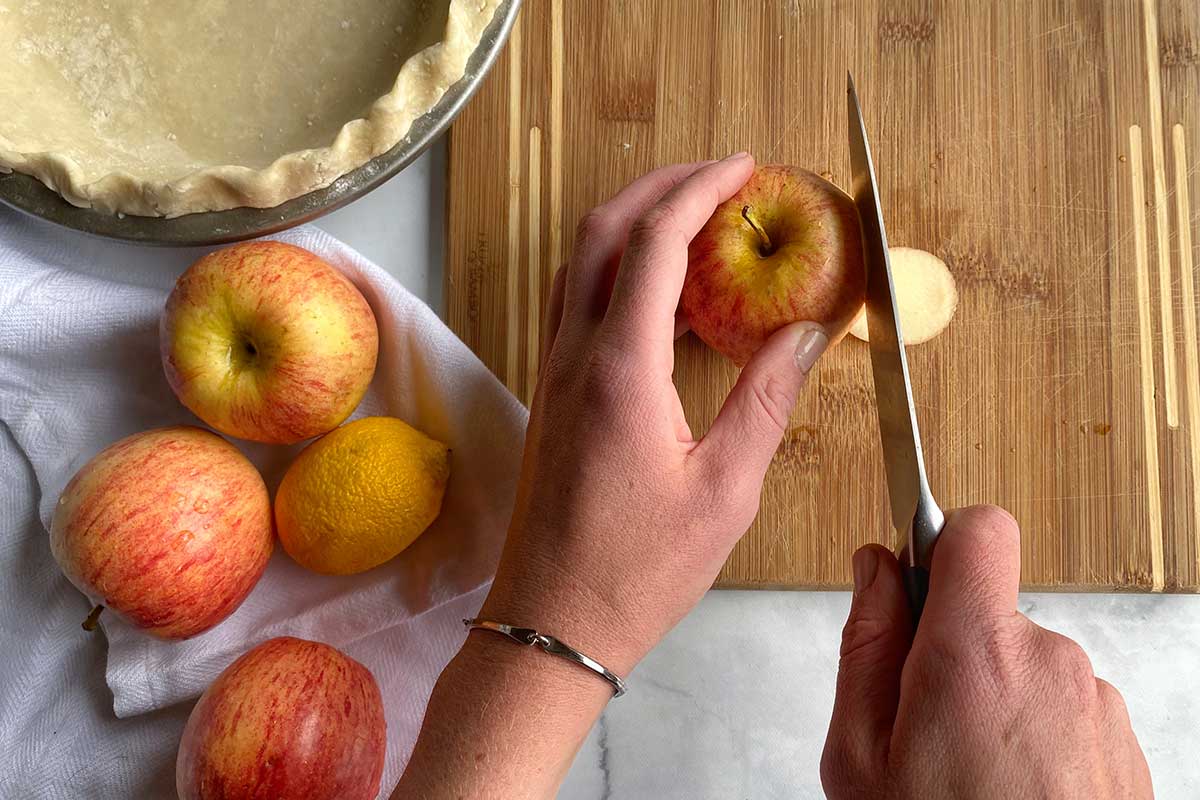
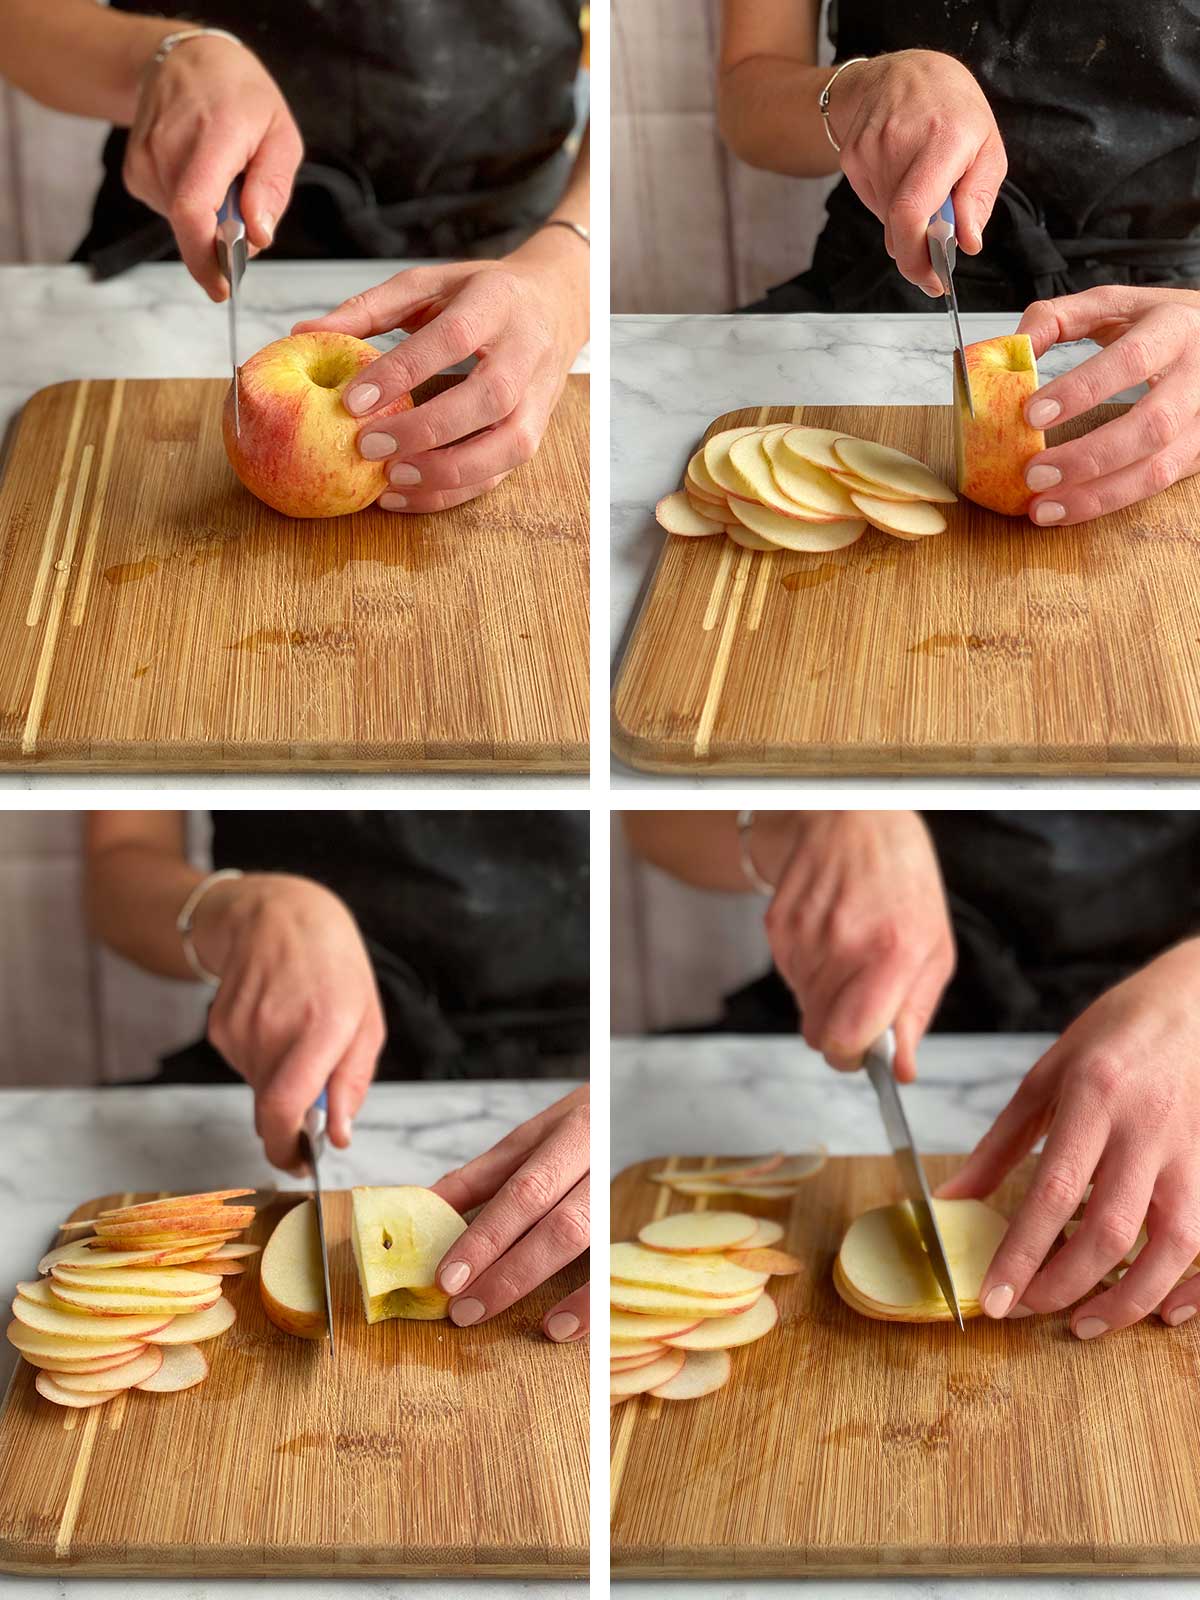
Honestly, there are a handful of ways you could successfully slice the apples, as long as you end up with lots of evenly sliced apple discs that are roughly the same height. Ideally, the semi-circles should be about 2 to 2 1/2" at their widest point.
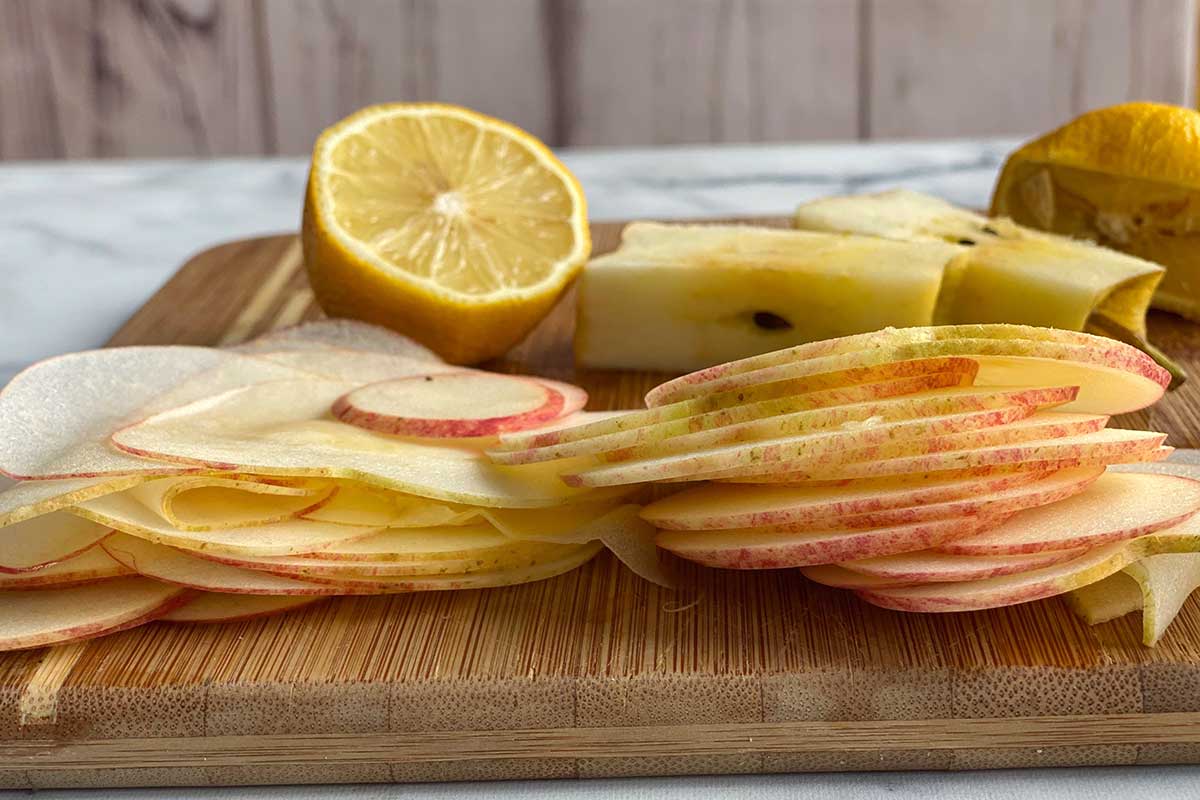
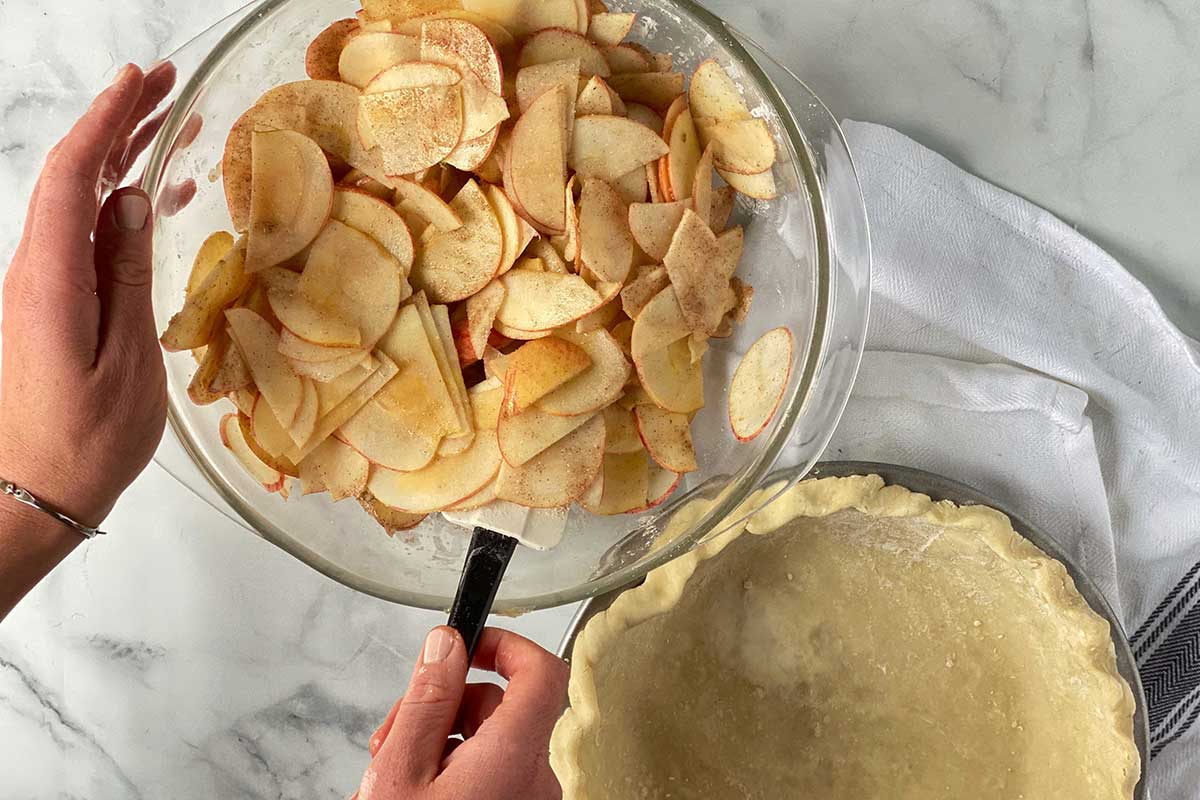
Time for the filling! Start by tossing your apples with 1 to 2 tablespoons of lemon juice. This will prevent them from oxidizing and turning brown during the next few steps (and also add a slight touch of citrus-y flavor).
While the apple discs hang out with the lemon juice, mix together the dry ingredients for the filling. Toss the apples with the mixture, separating the layers of apples as you gently stir to ensure all sides are coated.
Baker’s tip: If you want the apples to remain creamy white so there’s more contrast between the flesh and skin, go light on the cinnamon and use white sugar instead of brown sugar, if that’s what called for in your recipe. Also choose acidic apple varieties, which are slower to oxidize: Granny Smiths, Galas, and Honeycrisps are all good choices.
This is where things may get tricky. Initially you won’t see much of a rose pattern, and it can be difficult to keep the first layer of apple slices in place. Don’t give up! The result is worth the effort. Here’s how to do it:
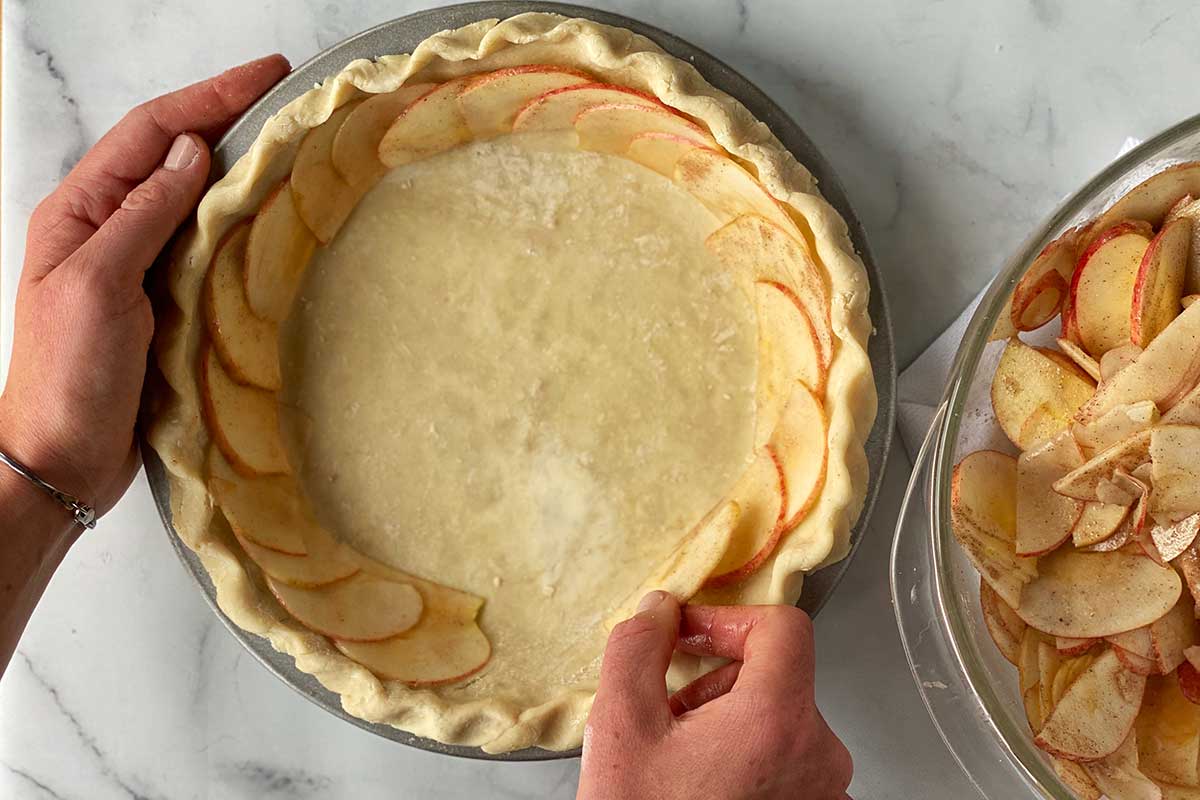

Baker’s tip: If you’re having a hard time keeping your apple discs in place, roll a piece of tin foil into a 10” to 12” log. Bend it into a curve that follows the inside edge of the pie and use it to keep the apple slices snug in place, moving it as needed as you build the layers.
It’ll become easier and more efficient to layer the apples as you get closer to the center. When there's about a 2” diameter hole left in the middle, use these steps to make a beautiful rose center.
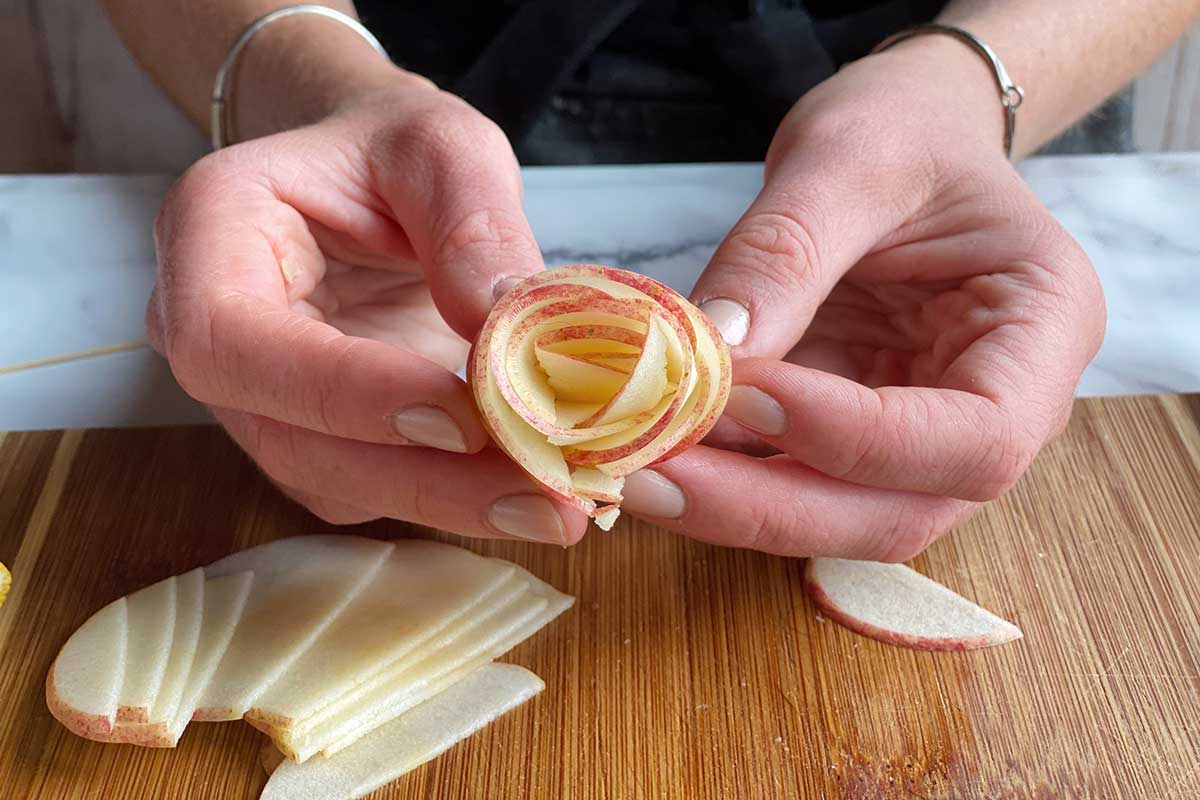
Baker’s tip: Trimming the slice at the center so that it’s slightly shorter than the rest makes the center look more rose-like and natural.
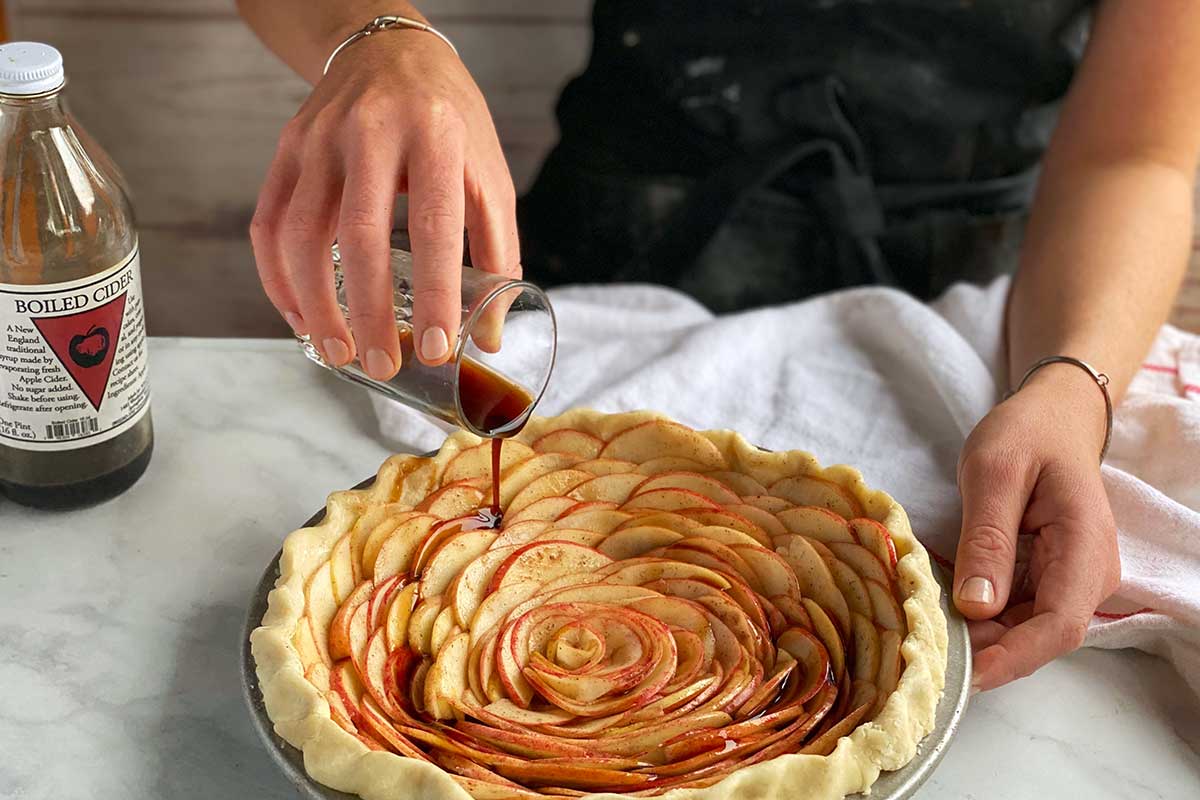
To add a rich finish to your pie, dice 1 to 2 tablespoons of cold butter into chunks and place them on top of the apples before putting the pie in the oven.
Follow the baking instructions called for in your recipe, including if it calls for starting at a higher temperature and then lowering it to finish.
The rose version of apple pie will bake more quickly than a double-crust apple pie, especially if you reduced the amount of apples called for in the filling. Expect your pie to bake about 25% faster than a traditional apple pie, since the apples are exposed directly to the heat and thinly sliced apples bake quickly.
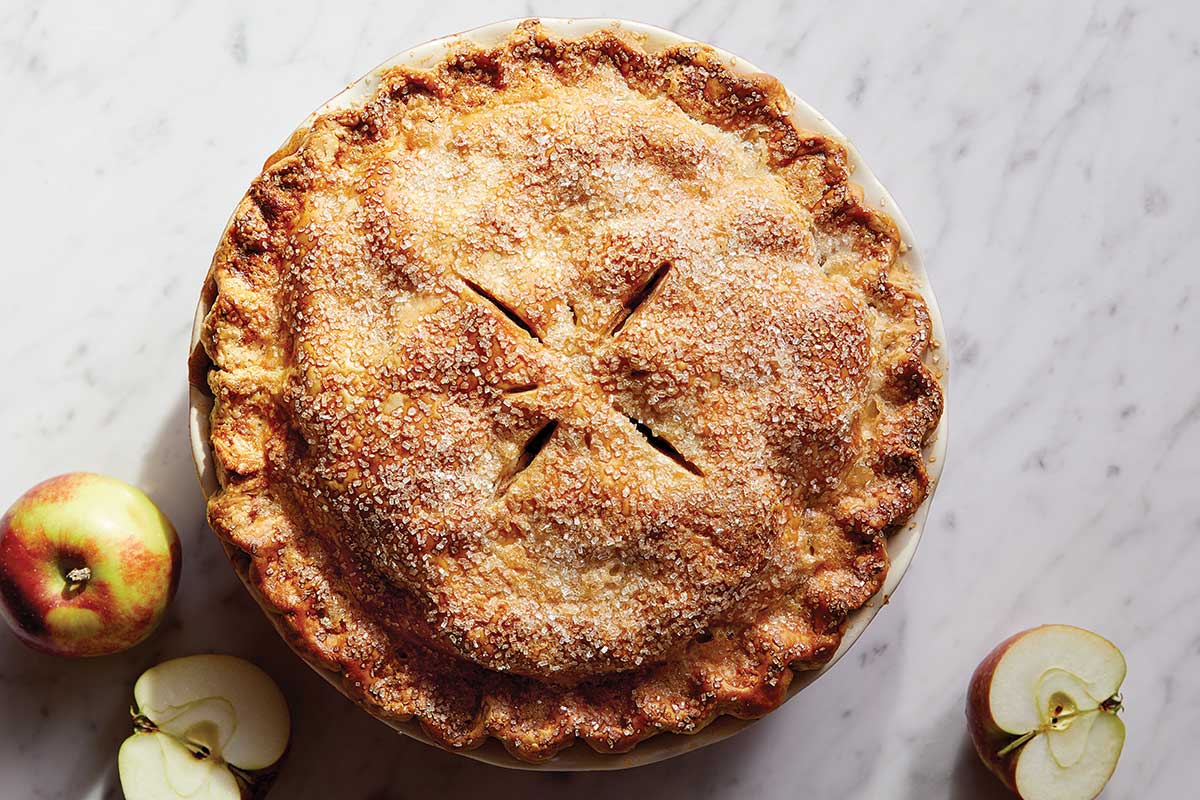
When the is pie done, the apples will be a light golden brown but should still hold their shape. Check for doneness early and often — the design you’ve worked so hard to create will become less distinct if overbaked.
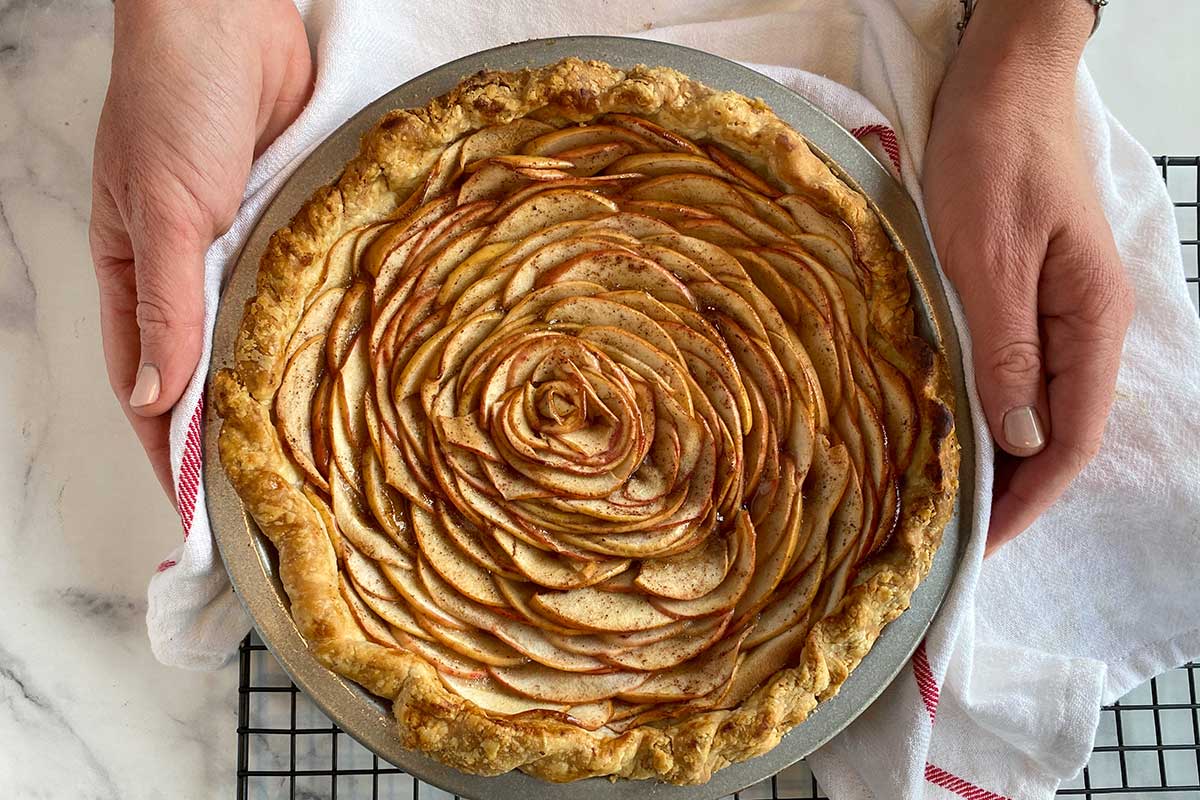
Once your pie is out of the oven, step back, relax, and check out your awesome apple pie! Place your pie somewhere it’s clearly visible and easily admired. I recommend making it the centerpiece of your table until it’s time to serve.
At the end of the baking day, pie is meant to be eaten and enjoyed with a smile.
Even if your pie doesn’t turn out exactly as you envisioned — perhaps the rose design falls in on itself or the apples soften as they bake — the pie is still going to taste exquisite. It’s made with fresh fruit that was lovingly arranged and accented with other delicious ingredients. You can’t go wrong.
Tell us about other next-level pies you’ve tried making at home. Were they flops or flying successes? Full disclosure: we’ve had our fair share of both in the King Arthur test kitchen!