


Have you heard of salt-rising bread?
Probably not, if you're neither a passionate bread baker, nor a resident of certain parts of the country – the southern and western portions of the Appalachians, western New York down into western Pennsylvania, and parts of Michigan. This traditional American bread remains popular in these regions, where it's often sold in bakeries.
But if you're living in, say, Colorado, or Connecticut? You probably never heard of salt-rising bread.
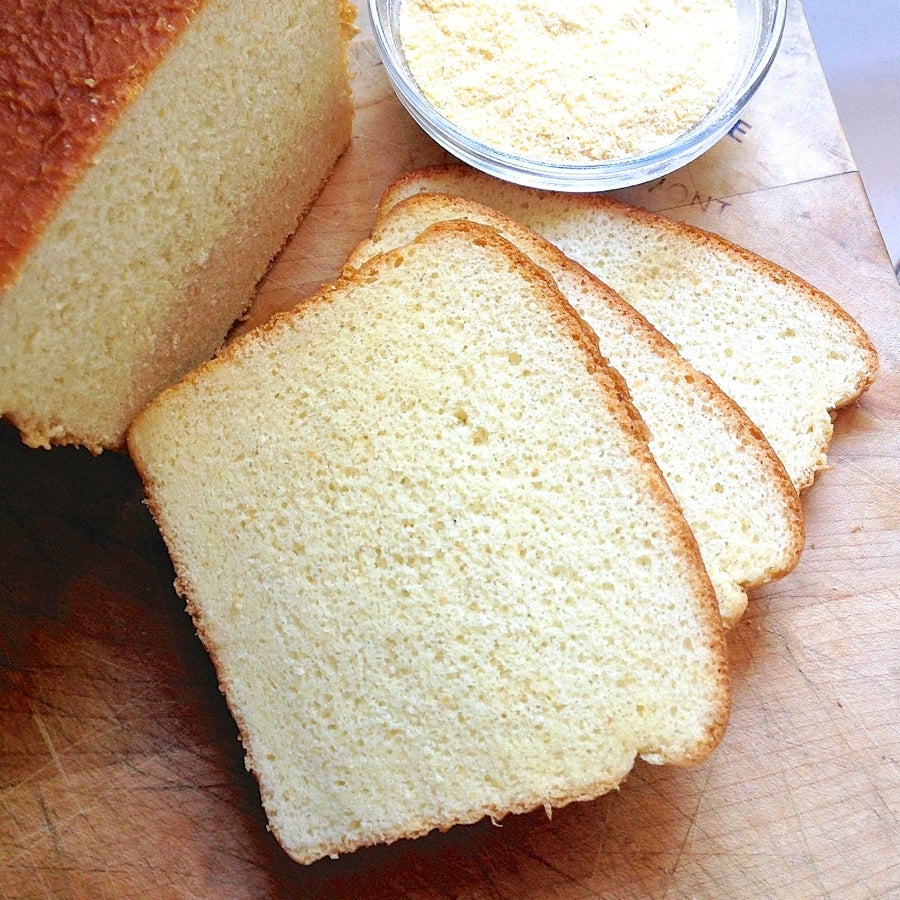
So let me describe it to you: it's a fairly dense, fairly moist, very close-grained white bread, with a distinctive "cheese-y" flavor. It makes wonderful toast. But its most salient characteristic? It's not made with yeast. And, contrary to its name, it doesn't rely on salt for rising; in fact, this bread has less salt than many standard breads.
So what's the deal?
Salt-rising bread had its American origins back in the early 1800s, when commercially produced yeast wasn't available. Housewives found that a mash of cornmeal and milk (and/or potatoes) could produce a bubbly substance that could then be used to raise bread.
The "starter" was tricky, though, needing consistent warmth to work; it's thought that perhaps "salt-rising" refers to the rock salt that pioneer women might have heated and piled around their starter, to keep it warm.
These days, those of us experimenting with salt-rising bread find ourselves with the same challenge as our forebears: how to keep the starter warm for the 12 to18-hour, two-stage process it needs to leaven bread.
Heating pad, top of the fridge, near the wood stove, over a heating grate... all of these are imperfect solutions. (I know, I've tried them.)
But now, I've found the perfect tool for not just salt-rising bread, but all kinds of yeast breads, plus sourdough starter and yogurt, too.
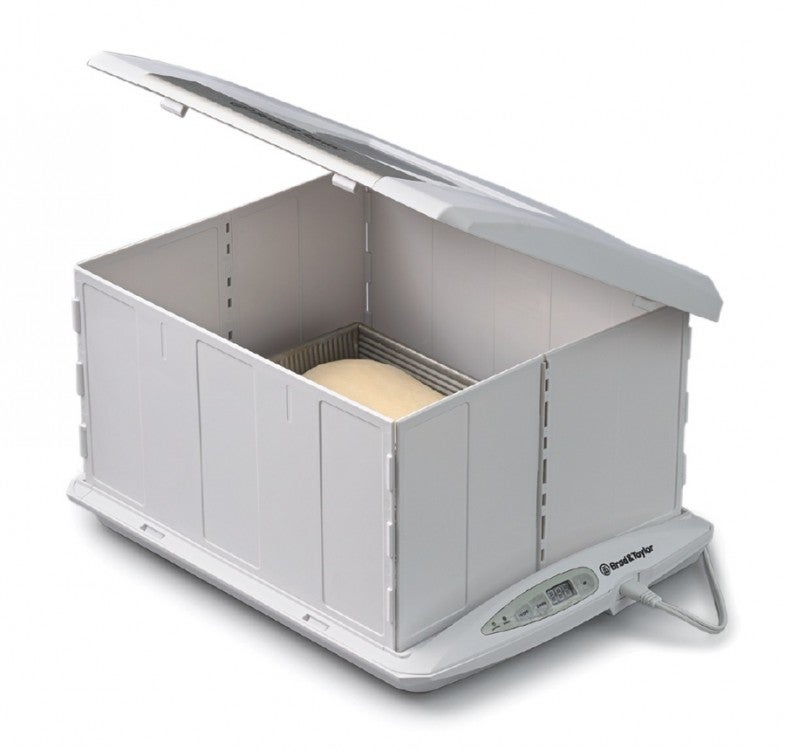
This "climate controlled" electric proofer offers temperature settings from 70°F-120°, plus a water tray for optimum humidity. If you're a baker who struggles to find a cozy place in the house for rising bread or feeding sourdough (or salt-rising starter and bread), you might consider this tool.
But don't worry; while this proofer makes the whole process a lot simpler, I've found another "hot spot" in my house; and it's hopefully one that'll work for you, too.
If you've never made salt-rising bread, please be prepared to trust me through some of the following procedures. Yes, it's very important to keep the starter warm. Yes, it's supposed to smell that way. The bread's aroma is redolent of cheese, though there's no cheese in involved; the flavor comes from the slight fermentation of the ingredients during the bread's preparation.
Speaking of fermentation, be prepared; the starter and dough will smell like... dirty socks? Old sneakers mixed with Parmesan cheese? Somewhat unpleasant, anyway, but please bear with me – it's just the enzymes and bacteria doing their jobs and giving the bread its special qualities. If you've ever made cheese or yogurt, you know exactly what I'm talking about.
OK, let's get started here, shall we? This bread is built in stages. First stage: starter #1.
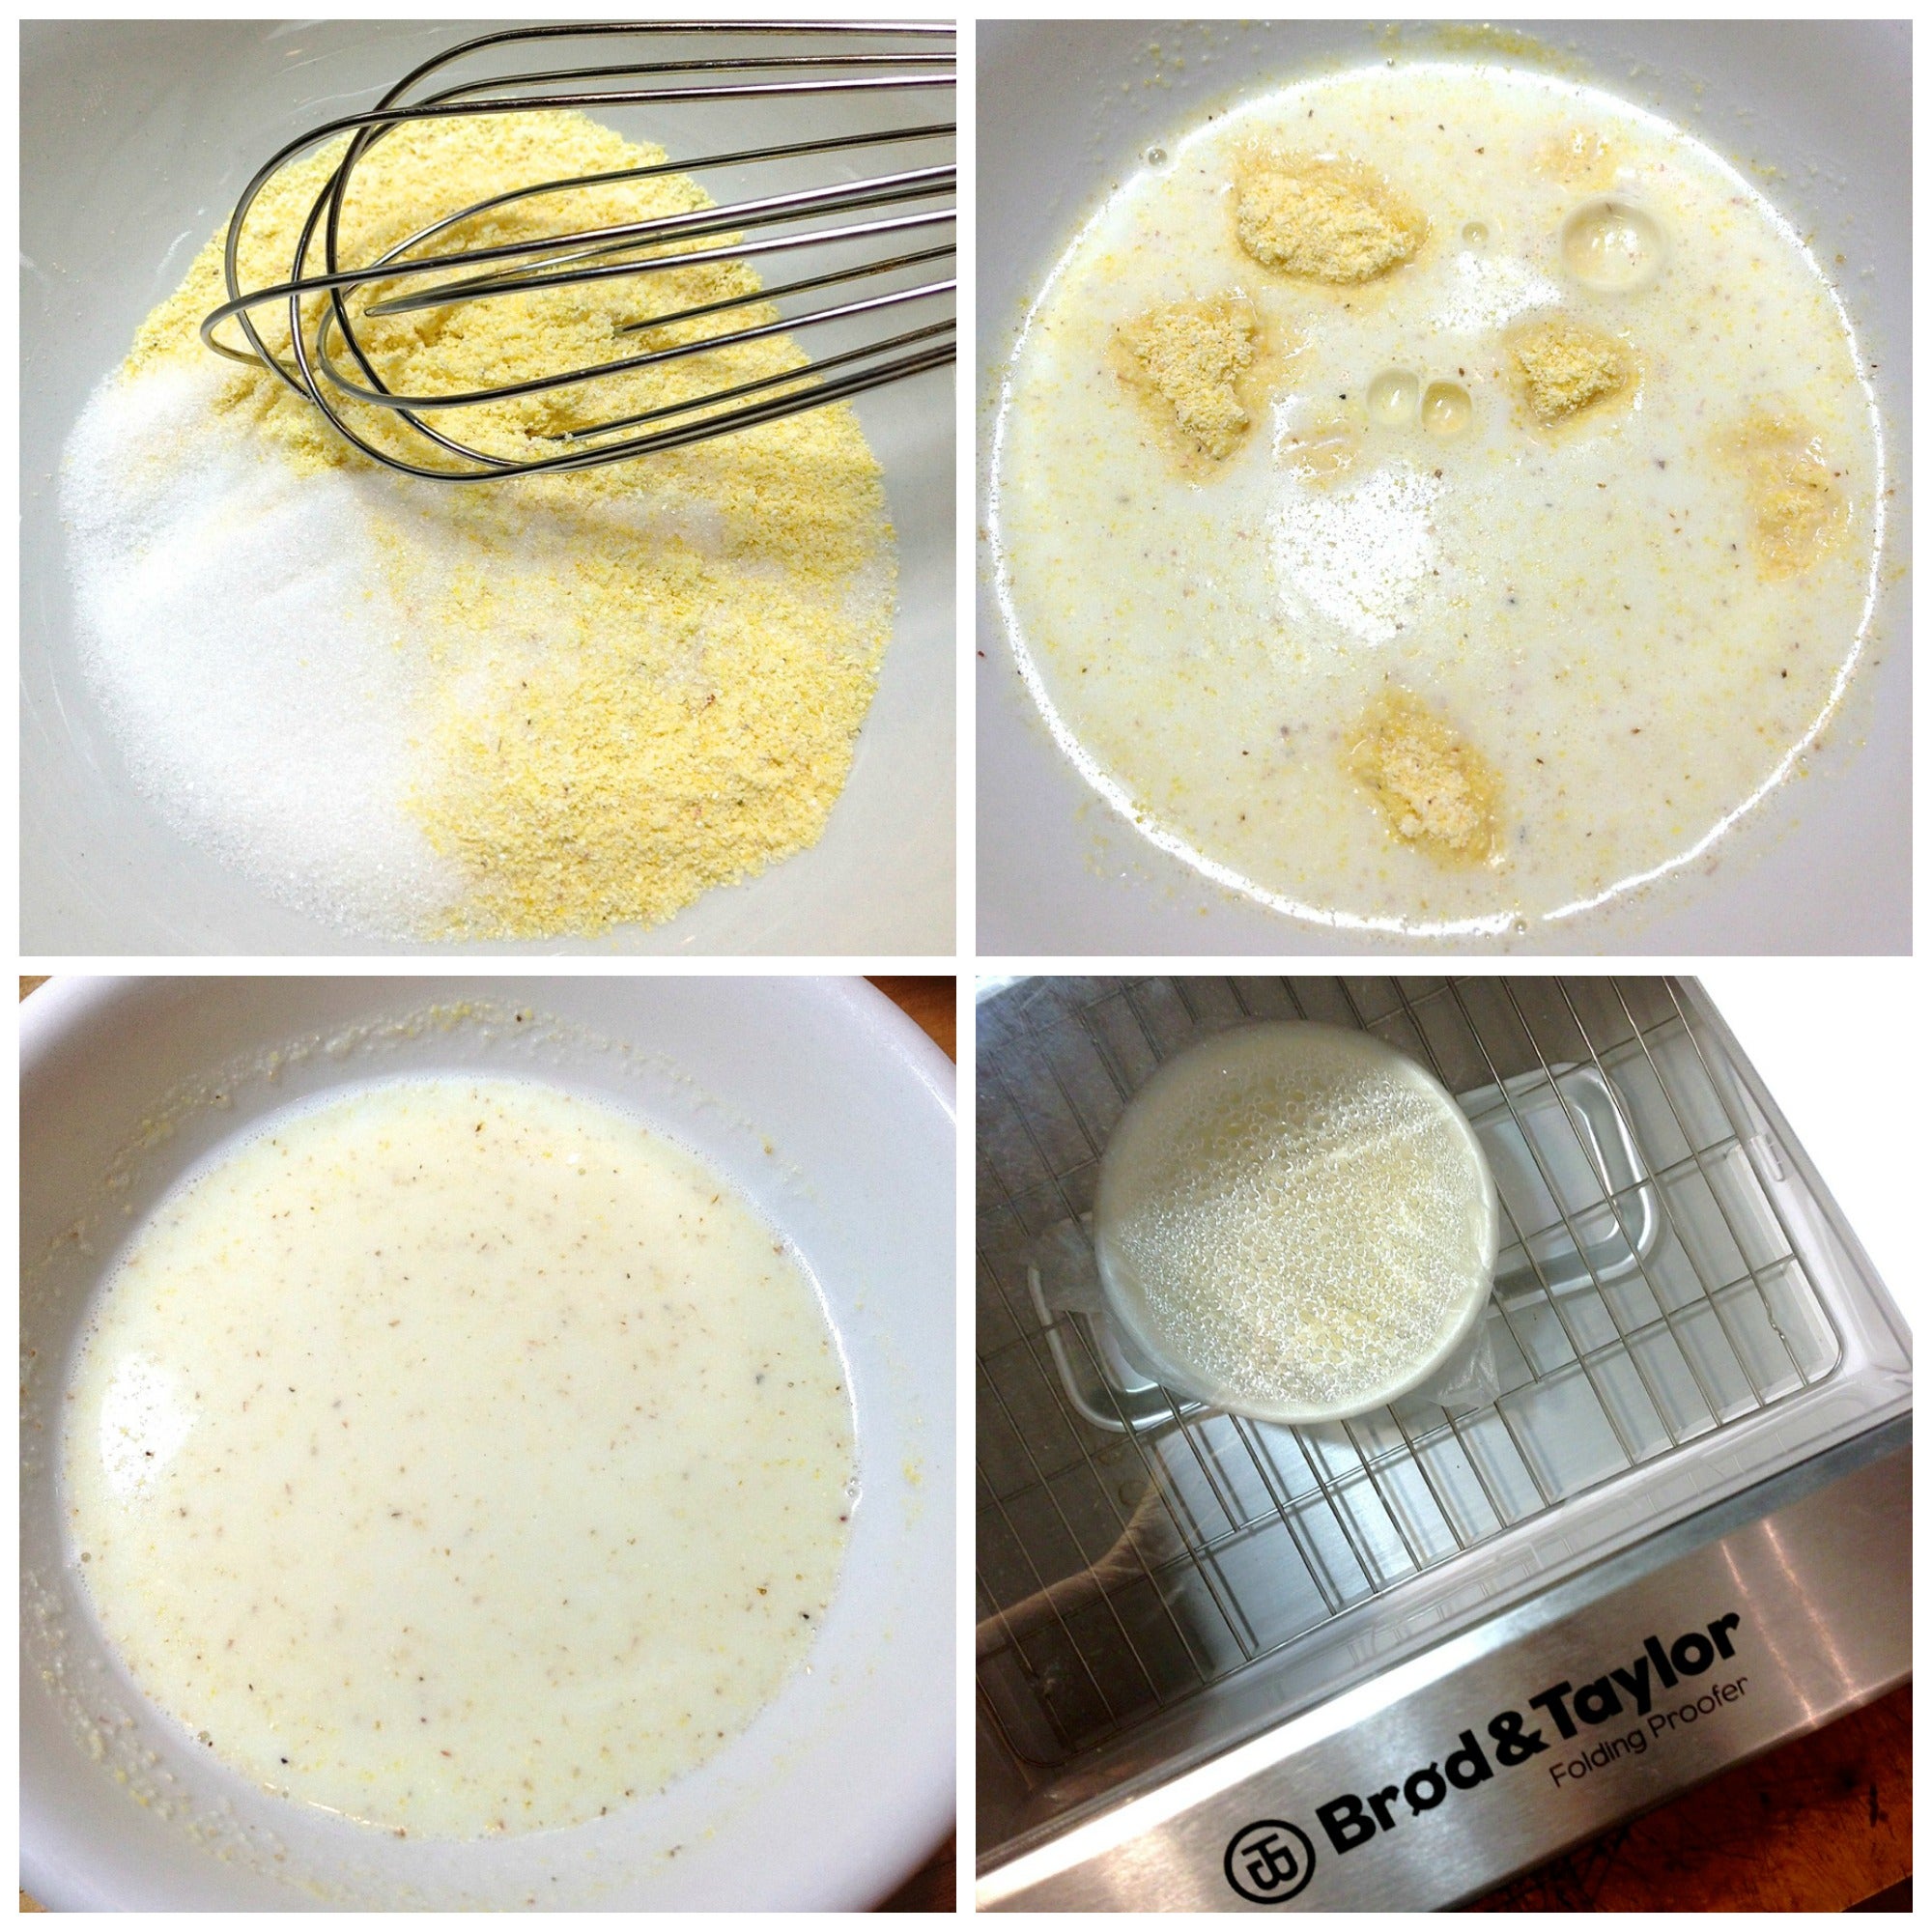
Heat 1/4 cup (57g) milk (skim, 1%, 2% or whole) until it's nearly but not quite boiling; small bubbles will form around the edge of the pan (or microwave container), and you might see a bit of steam. This is called "scalding" the milk.
Cool the milk until it's lukewarm, then whisk together the milk, 2 tablespoons (14g) cornmeal (yellow is traditional), and 1 teaspoon sugar in a small heatproof container. The container should be large enough to let the starter expand a bit.
A note on cornmeal: while you can certainly use "supermarket" cornmeal, organic is probably preferable, since it comes with additional "friendly bacteria."
Cover the container with plastic wrap, and place it somewhere warm, between 90°F and 100°F. The bread proofer mentioned above is ideal for this, since you can set the exact temperature you want.
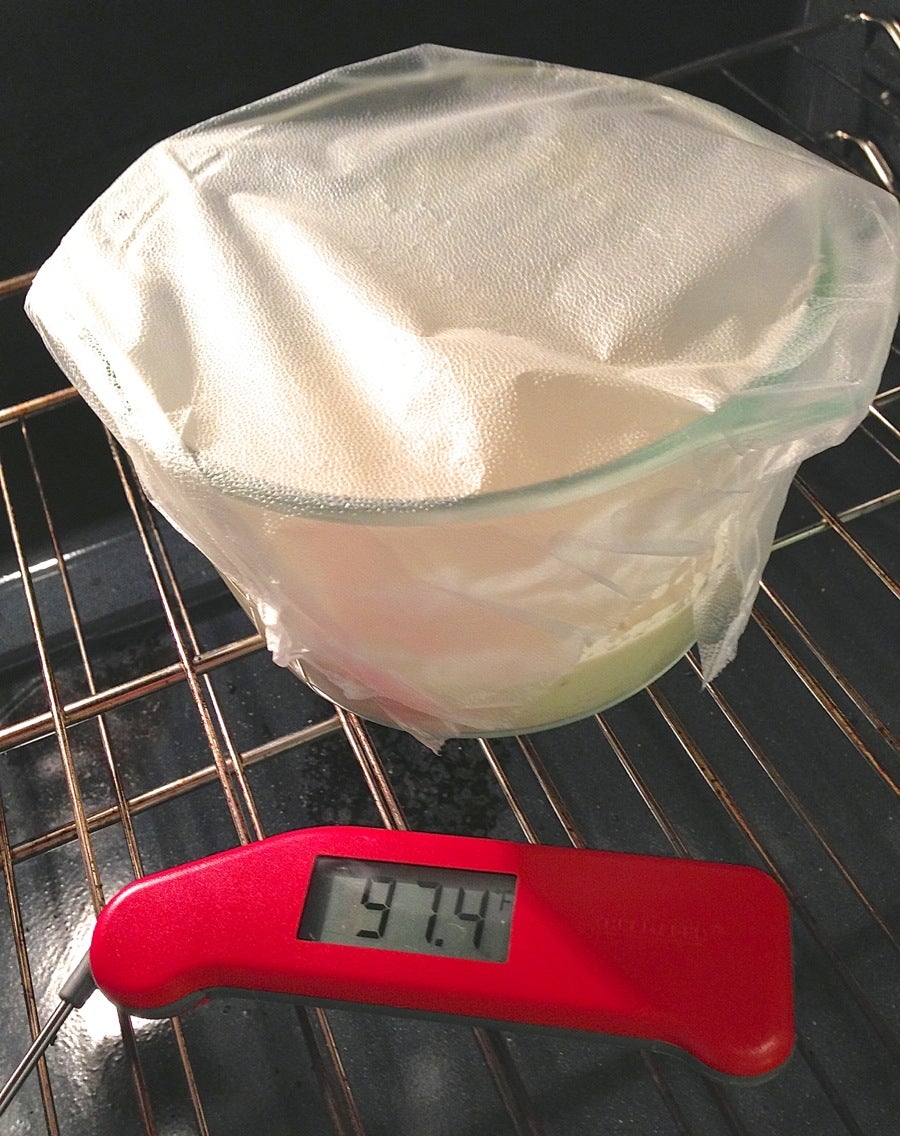
I find my turned-off electric oven, with the light turned on for about 2 hours ahead of time (and then left on throughout the starter's time in the oven) holds a temperature of 95°F to 97°F, perfect for this starter.
I tried a heating pad covered by an overturned bowl, but it didn't work. Before you even start this process, find someplace reliably warm for the starter; if you can't find someplace that'll stay warm for up to 12 hours at a time, it's best not to try this recipe.
Let the starter rest in its warm place overnight, or for 8 to 12 hours.
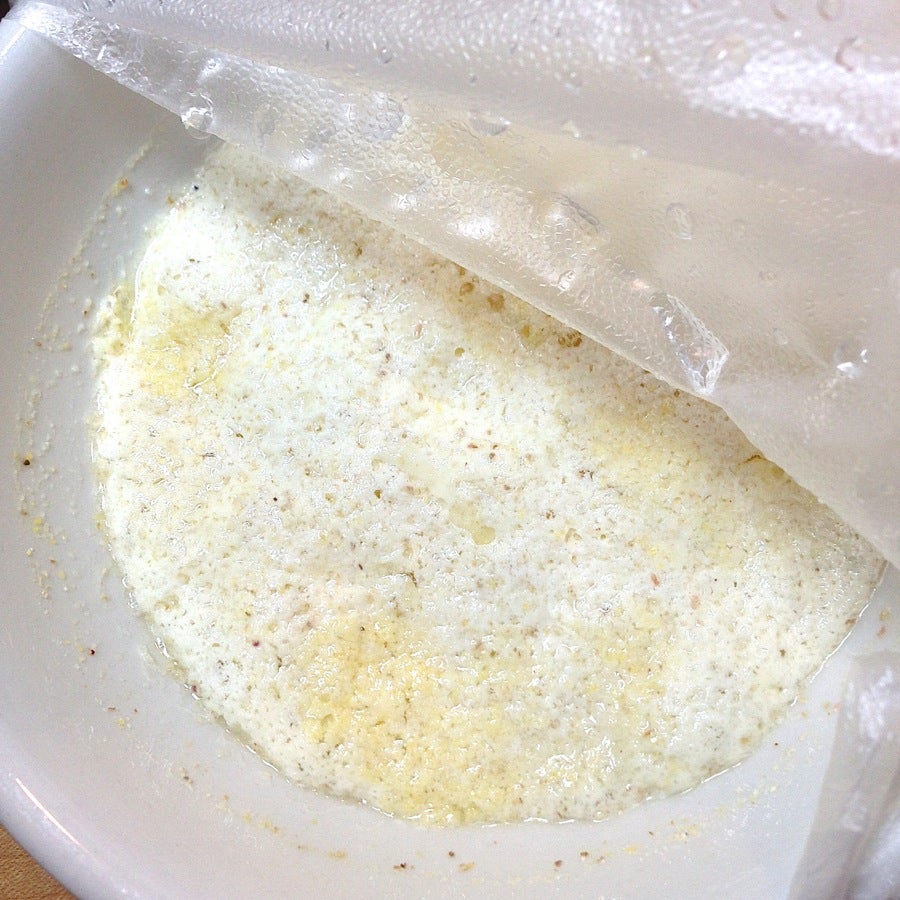
The starter won't expand much, but will develop a bubbly foam on its surface. It'll also smell a bit fermented. If it doesn't bubble at all, and doesn't smell fermented, your starter has failed; try again, using different cornmeal, or finding a warmer spot.
Next, we'll build on this first starter; let's call this starter #2.
Combine the following:
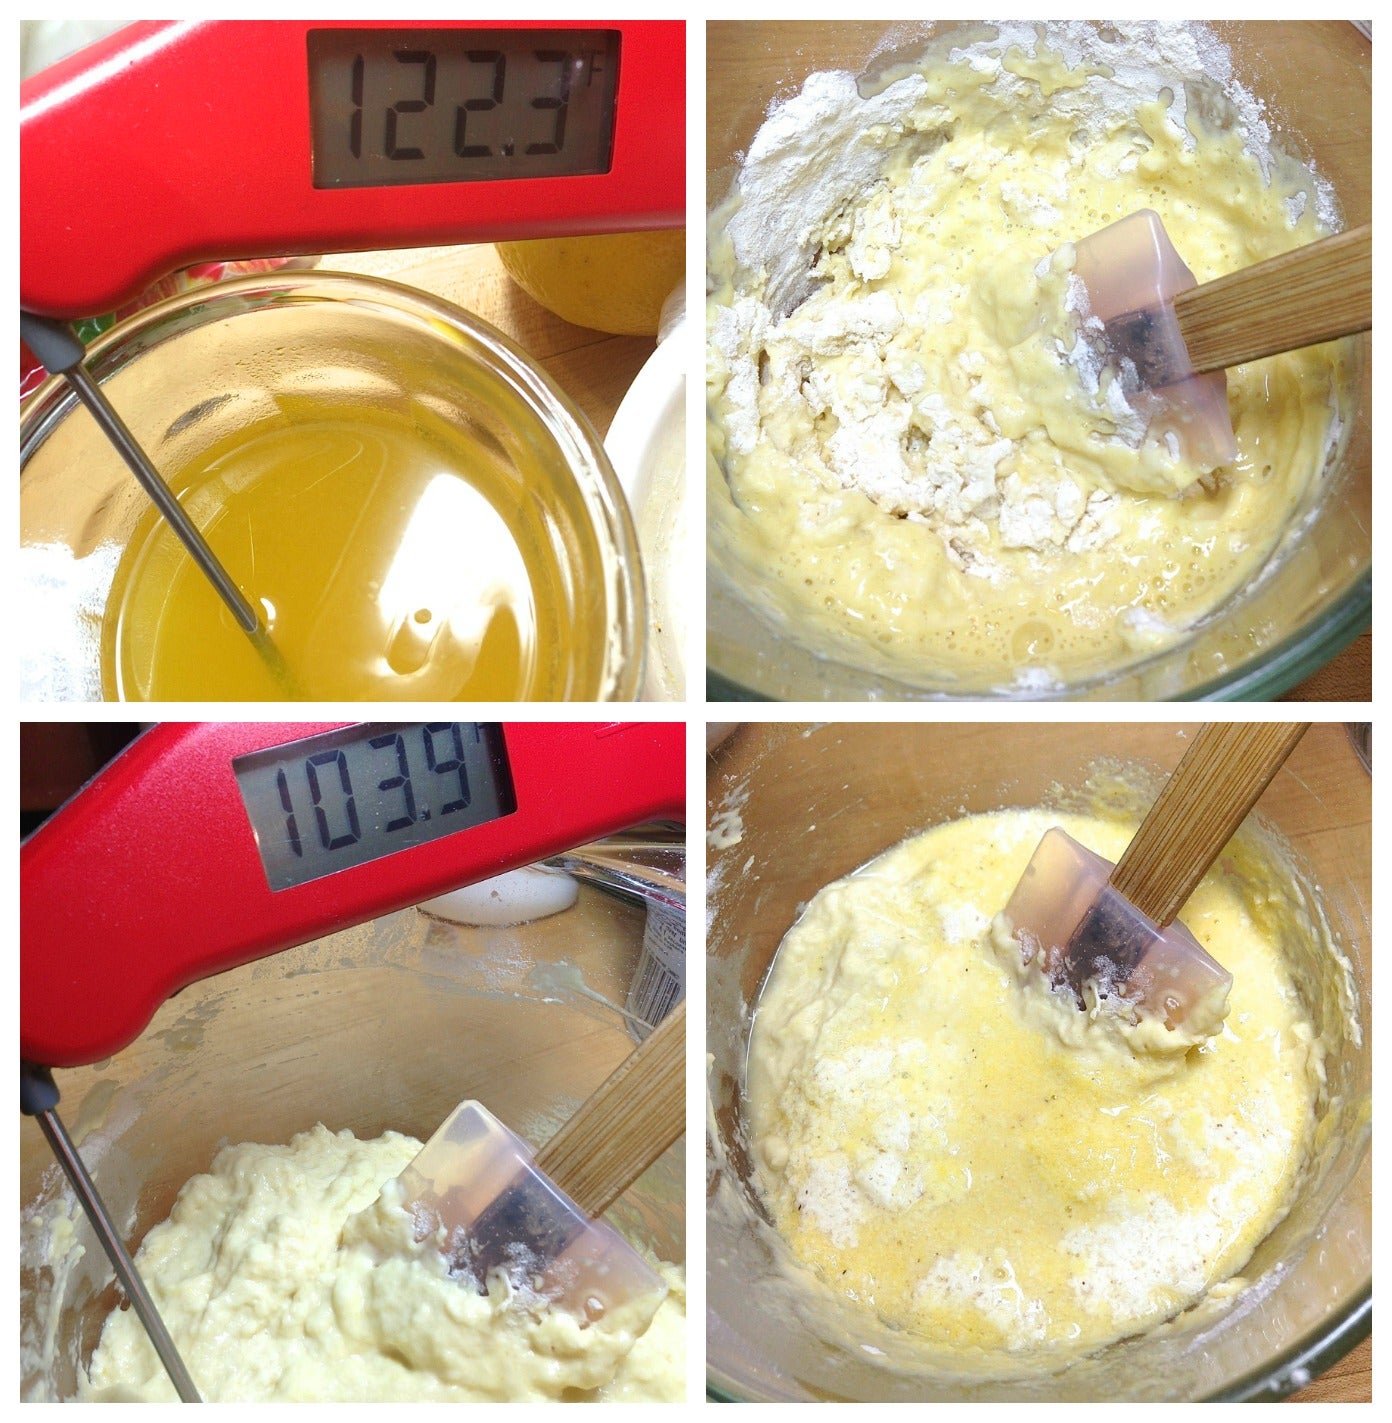
1 cup (227g) hot water (120°F to 130°F)
1/2 teaspoon salt
1/2 teaspoon baking soda
1/2 teaspoon sugar
Add 1 1/2 cups (177g) King Arthur Unbleached All-Purpose Flour, stirring until everything is thoroughly moistened.
Stir starter #1 into starter #2.
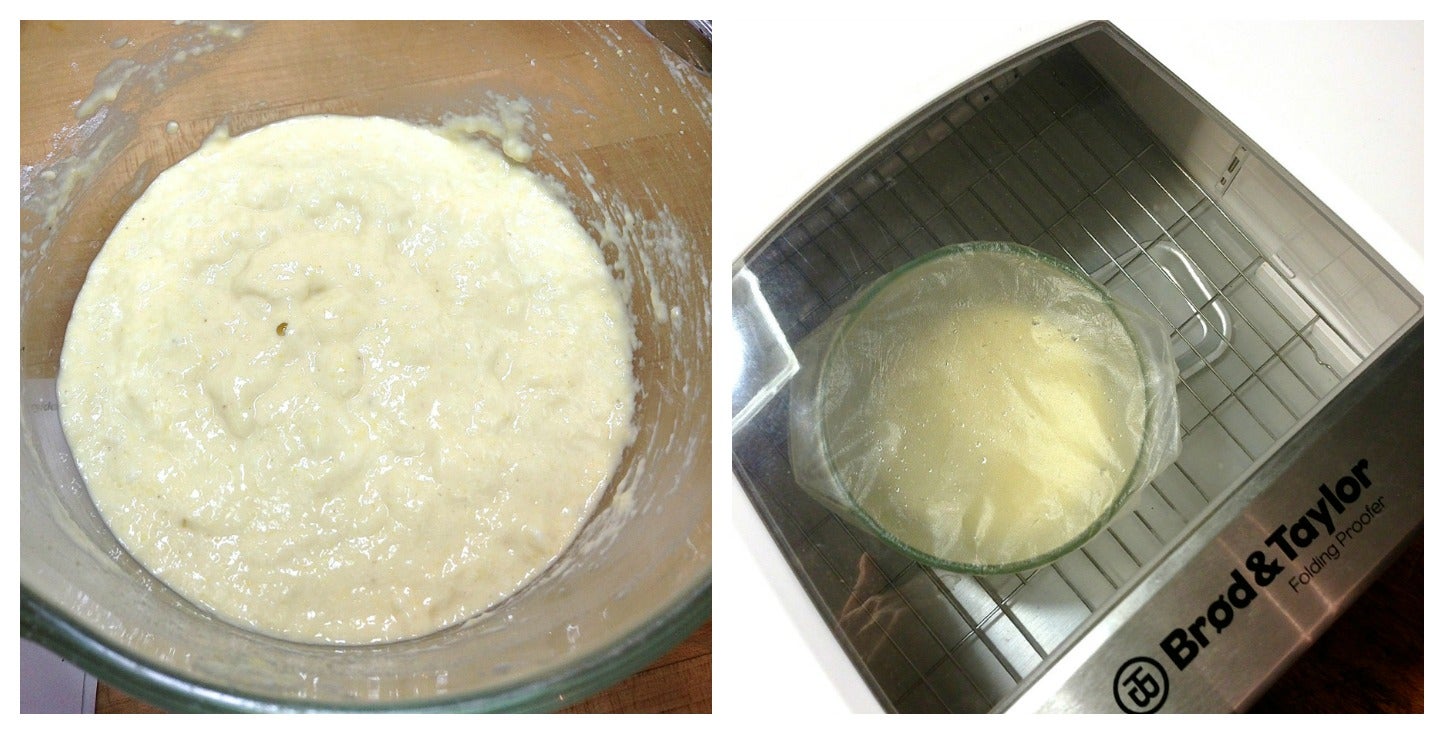
Cover the bowl with plastic wrap, and place it in the same warm spot starter #1 was in. Let it rest until very bubbly and doubled in size, 2 to 4 hours.
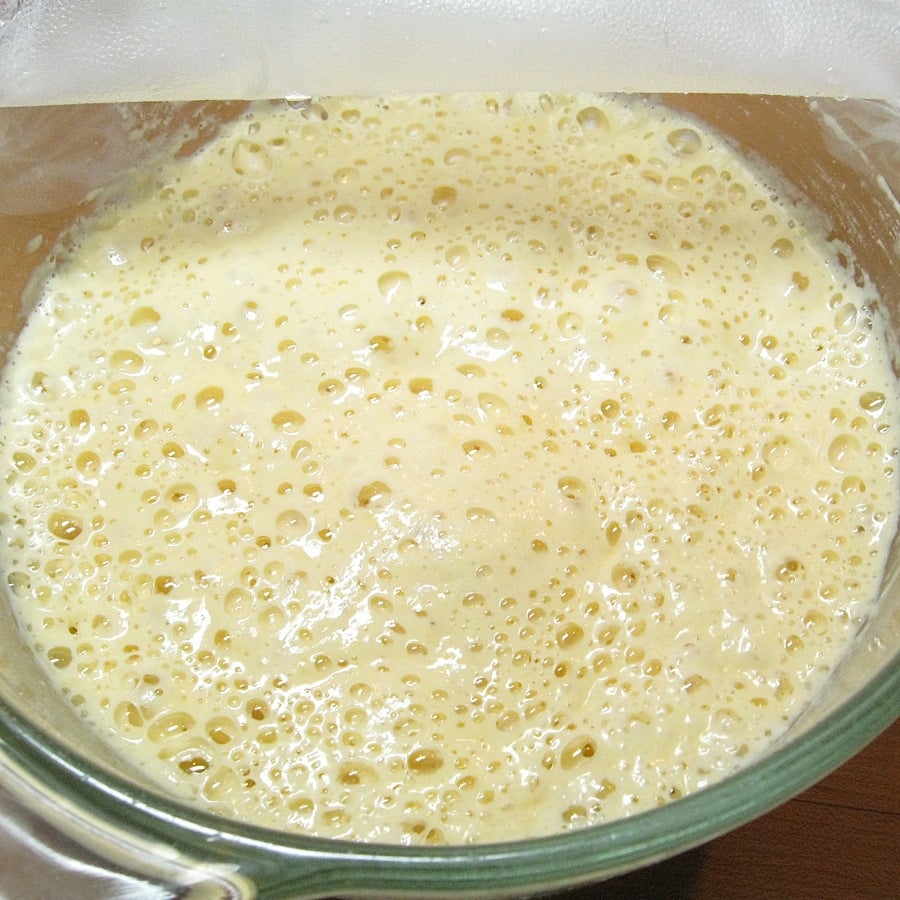
Success!
If the starter's not showing any bubbles after a couple of hours, move it somewhere warmer. If it still doesn't bubble after a couple of hours, give it up; you'll need to start over.
If the process isn't working for you, don't be too discouraged; even our pioneer forebears found this bread notoriously fickle, working perfectly one day, not so well another. Personally, I think it's all about finding a spot that's reliably warm, between 90°F and 100°F.
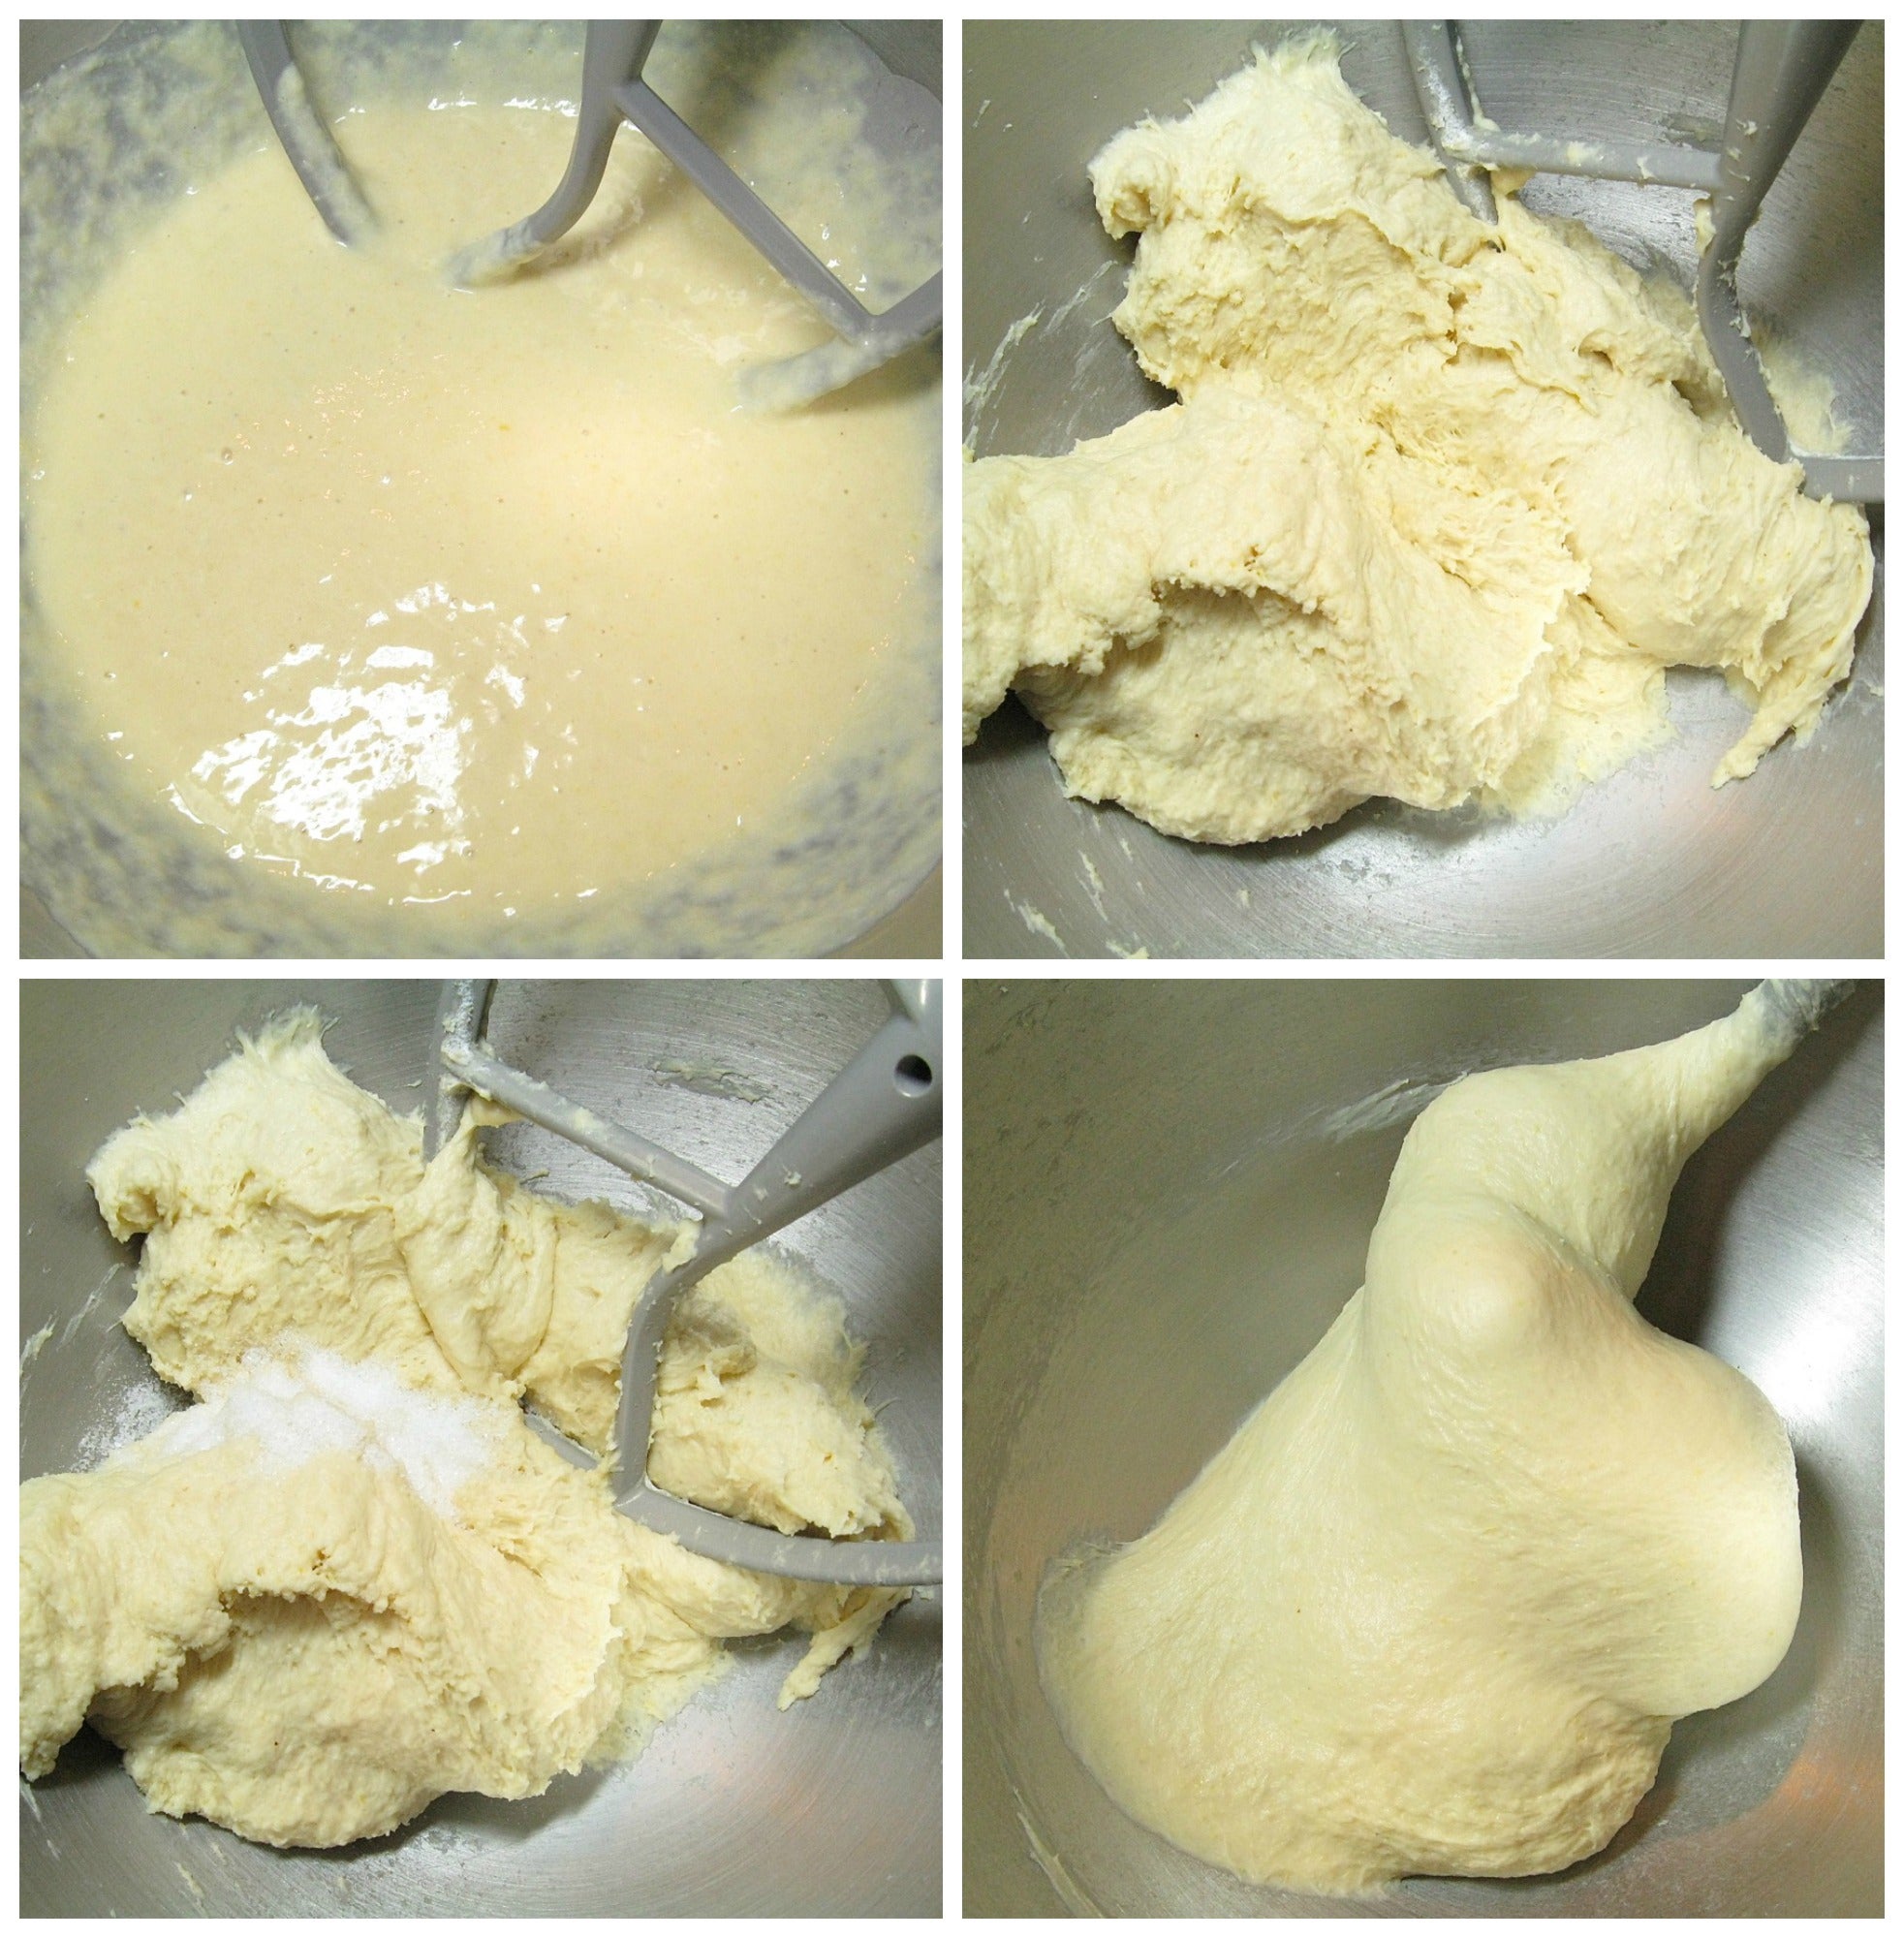
Transfer your bubbly starter to a larger bowl, or the bowl of a stand mixer (or your bread machine bucket).
Add the following:
4 tablespoons (57g) soft butter
1/2 teaspoon salt
2 1/4 to 2 1/2 cups (269g to 298g) King Arthur Unbleached All-Purpose Flour
Start with the smaller amount of flour. In the depths of summer, when your kitchen is hot and humid, you may need to use more. But usually you'll only need about 2 1/4 cups to make a dough that's cohesive and elastic yet still a bit sticky, as pictured above.
Hey, what's with the salt being added after the dough was already partially kneaded, you ask? Simple; I forgot to add it when I added the butter and flour. Good lesson: when you forget an ingredient in yeast bread dough (including the yeast), simply knead it in when you remember.
In fact, sometimes you forget the yeast and only realize it when your dough doesn't rise. Go ahead and knead the yeast into that unresponsive lump of dough, and give it an hour or so; it should be fine.
OK, back to business. Knead everything until smooth; this took 7 minutes at medium speed in my stand mixer. The dough will be soft, and fairly elastic/stretchy.

Shape the dough into a log, and place it in a lightly greased 8 1/2" x 4 1/2" loaf pan.
Cover the pan, and place it back in its warm spot. Let the loaf rise until it's crowned about 1/2" to 3/4" over the rim of the pan, which could take up to 4 hours or so.
This won't form the typical large, domed top; it will rise straight up, with just a slight dome.
Towards the end of the rising time, preheat the oven to 350°F.
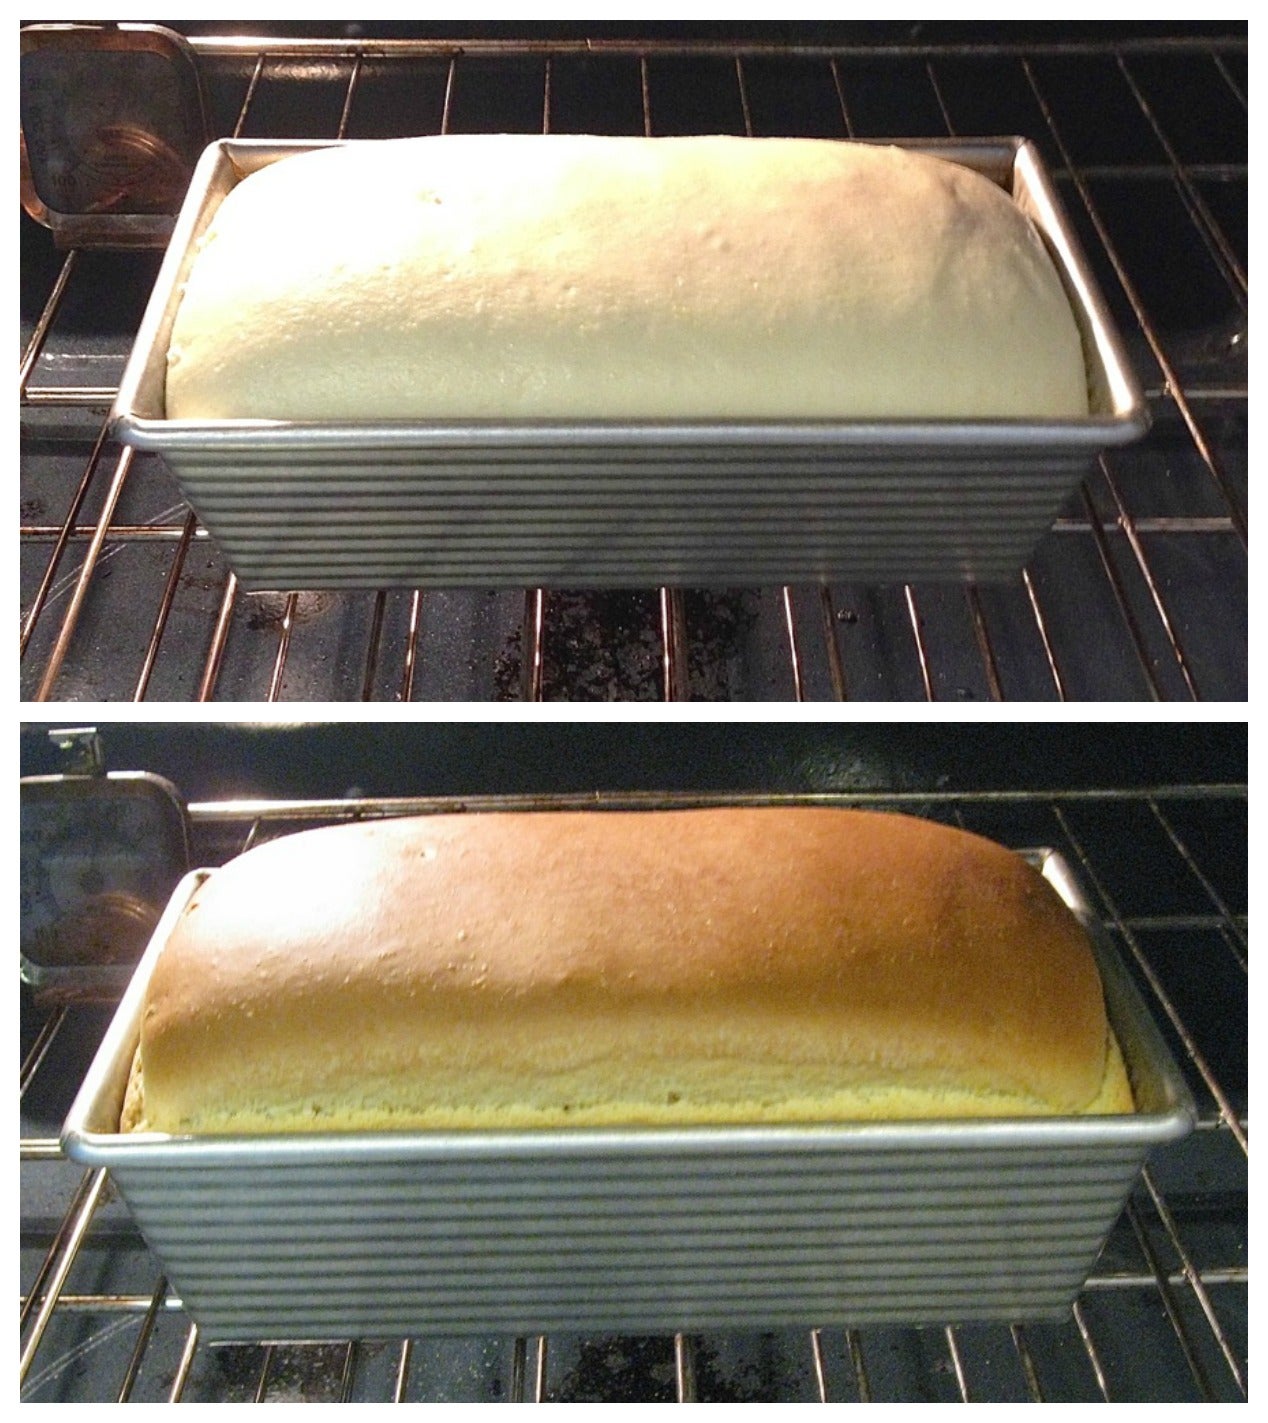
Bake the bread for 35 to 40 minutes, until it's nicely browned. Again, it won't rise much; that's OK.
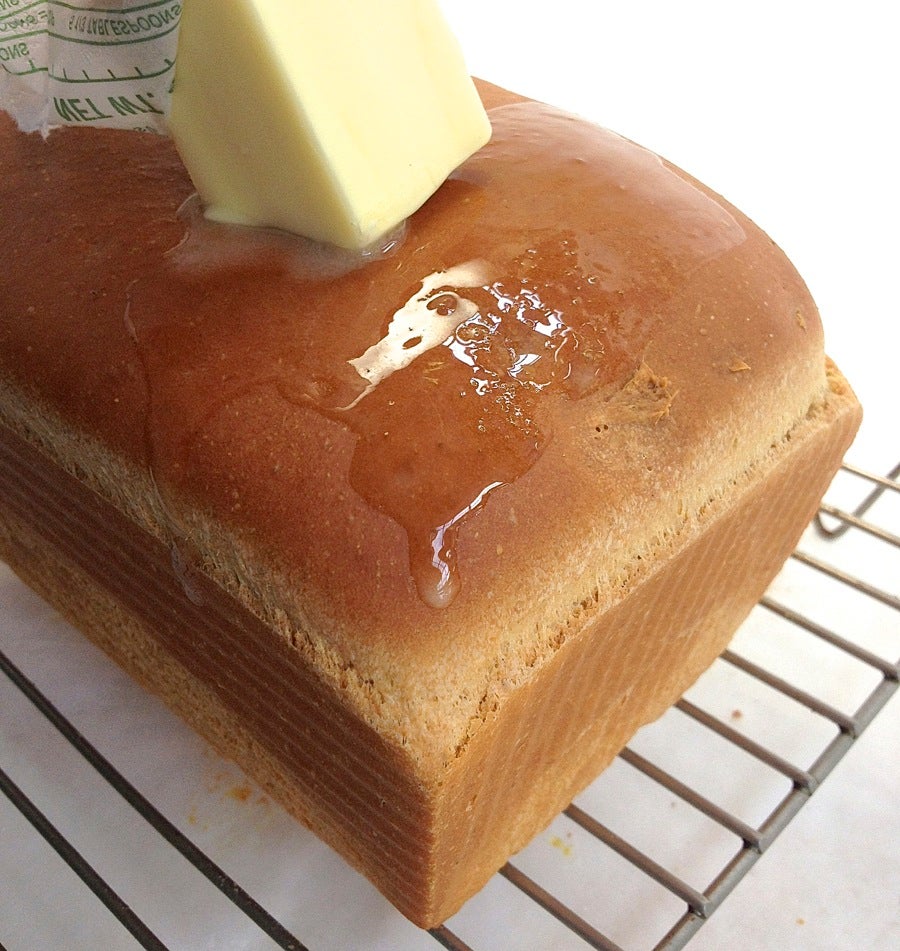
Remove the bread from the oven; if you have a digital thermometer, it should read about 190°F to 200°F at its center. Wait a couple of minutes, then turn it out of the pan onto a rack to cool.
Run a stick of butter over the bread's surface, if you like; this will add flavor, and a lovely golden sheen.
Here comes the hard part: DO NOT slice the bread until it's completely cool! You'll make the loaf gummy if you do. And after all you've been through to get to this point, you surely don't want impatience to get the better of you now.
Once it's cool – enjoy! Toast it. Use it for sandwiches. Make grilled cheese. This bread keeps quite well at room temperature for 5 to 7 days; if there's any left over after that, it's best to wrap it tightly and stow it in the freezer.
Salt-rising bread can be quite a journey; but the end result is well worth it, in my book. Partly because I feel good keeping alive a very old tradition; and partly because, hey, who doesn't like cheese-y bread?
Please read, bake, and review our recipe for Classic American Salt-Rising Bread.
