

When the turkey needs baking and the yams need glazing and the cranberries need saucing and the potatoes need scalloping and the giblets need gravy-ing—to say nothing of the in-laws needing fresh towels—and and and…
…the last thing you need to do is worry about making homemade pie crust, right?
But wait. Stop right there, your hand on the freezer door, a guilty gleam in your eye as you prepare to unbury that ready-made frozen boxed supermarket pie crust from behind the bag of brussels sprouts. Caught, red-handed! You were going to sneak it into your best pie pan, add your secret apple filling, and…
What? Bake a gorgeous homemade pie in a crust whose ingredients include the words “propionate” and “sorbate” and “Yellow 5”? Perish the thought! Not when you can MAKE YOUR OWN CRUST—yes, you—fill it with that over-the-top fresh apple filling, and bake
THE BEST PIE EVER. Really.
Have you had trouble in the past with crusts that crack? Pastry dough that shrinks and shrivels into a heap in the bottom of the pan? A beautiful rolled crust that disintegrates into a floury disaster as soon as you try to lift it off the counter?
Then try this crust. It strikes a lovely balance between texture and ease of handling. Yes, it’s tender and flaky. But you can still lift it in one piece off the counter and put it into the pan, then edge it around till it’s perfectly centered, maybe lifting it again… all without it crumbling under your gentle touch.
Trust me; you’ll never miss the Doughboy. Or Mrs. Smith, either.
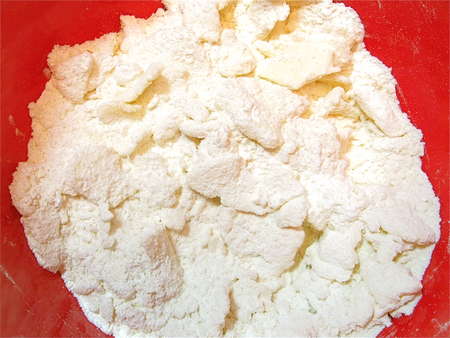
Here's where my favorite pie crust starts: with King Arthur Unbleached All-Purpose Flour.
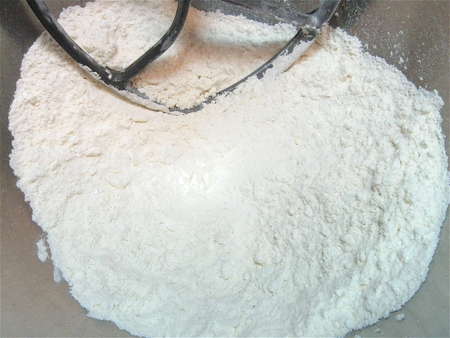
First, mix 2 1/2 cups (297g) King Arthur Unbleached All-Purpose Flour or 2 1/2 cups (283g) Pastry Flour Blend with 1 1/4 teaspoons salt. Next, mix in 1/4 cup (46g) vegetable shortening until the shortening is very well combined; you should see no substantial lumps.
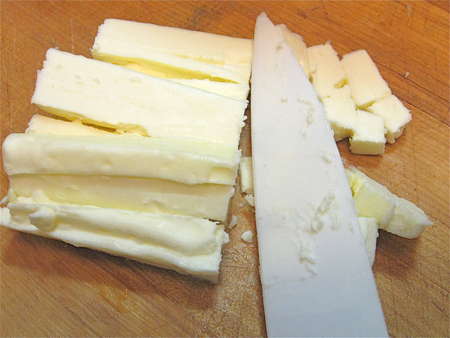
Cut 10 tablespoons (142g) cold butter into cubes...
...and work it into the flour with your fingers, or a pastry fork, a pastry blender... whatever your preferred method.
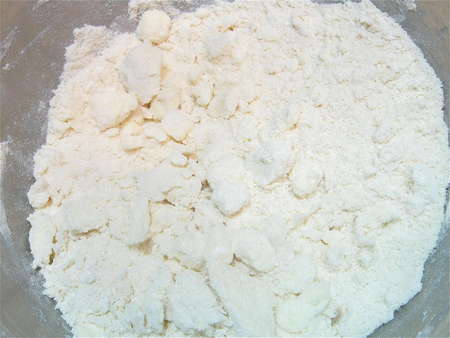
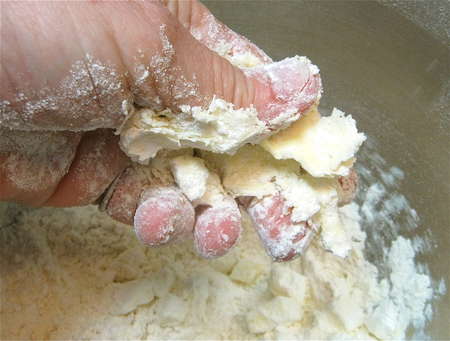
The goal is a mixture of flour and chunky, flattened butter.
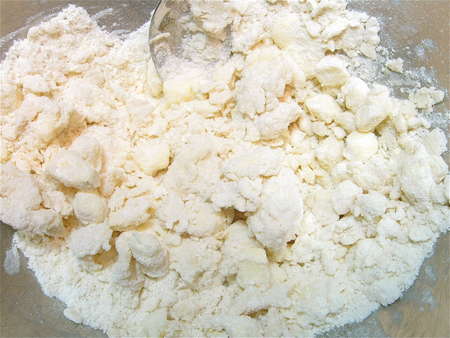
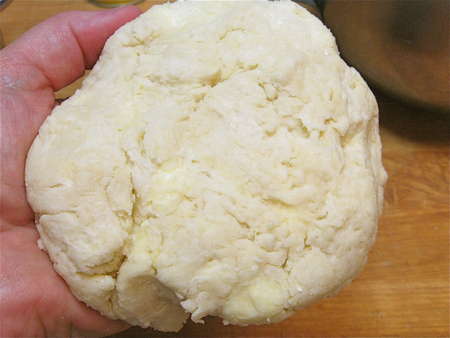
Add about 1/4 cup ice water. Stir/toss to combine.
Add up to an additional 1/3 cup ice water (perhaps a bit more, if the weather is very dry) a tablespoon at a time, until the mixture becomes cohesive, and you can squeeze it together.
Like this.
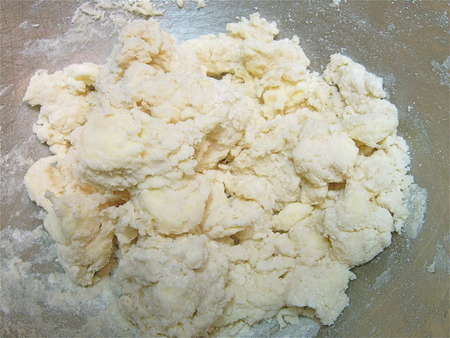
If you're making a double-crust pie, divide the dough in half. Squeeze each half into a rough disk...
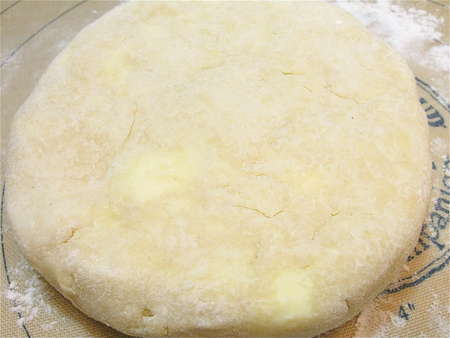
...then gently flatten and smooth with your fingers.
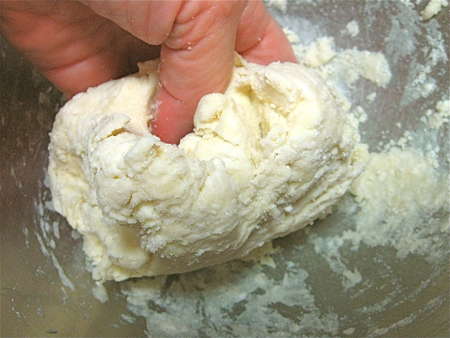
Roll the edge of the disk along a floured surface to smooth it out; this helps prevent ragged edges as you roll. Wrap the dough in plastic wrap, and refrigerate for 30 minutes, or overnight.
Now don't get confused: I'm taking a side trip here. This is another way to make pie dough. I'm going to take you to the point where you refrigerate the dough.

If you feel up to a couple of extra steps, this is MY favorite method for making pie dough. First, mix the dry ingredients and shortening. Dump 1/2 cup or so of the mixture onto a rolling mat or other work surface. Take the butter, and cut it lengthwise into long chunks. Coat it with the flour mixture.
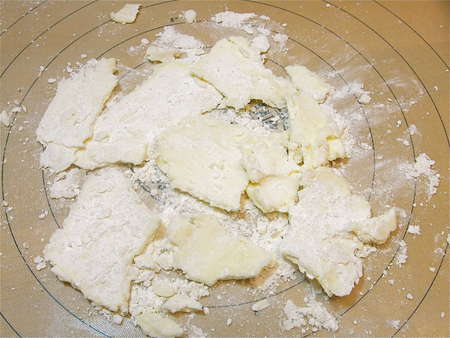
Use a rolling pin to roughly flatten the butter chunks. Be sure to keep the pin well-floured as you roll.
Toss the flattened butter chunks with the remaining flour mixture. Add the liquid to make a cohesive dough, as directed in the previous method.
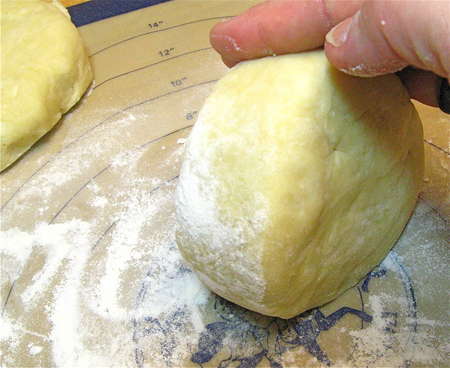
Roll the dough into a rough rectangle.
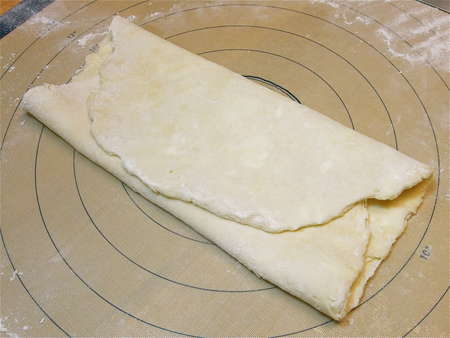
Fold it like a letter. This is going to create layers, which in turn promotes flakiness.
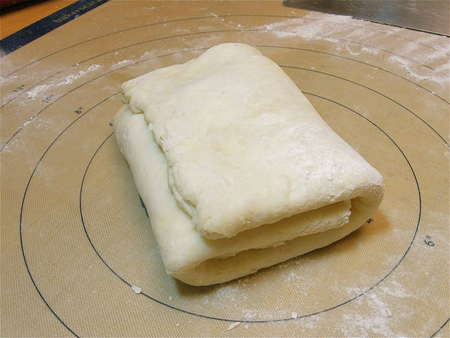
Turn the dough 90° and fold it like a letter again. Wrap and refrigerate. And how does this rectangle turn into a round crust? When you're ready to roll, simply work your pin so it becomes round. Not a problem.
And, for you true pie crust aficionados, check out our very own Susan Reid's favorite method to prepare pie crust.
So, whichever method you've chosen to make pie dough, it's now in the fridge. Back to the action.
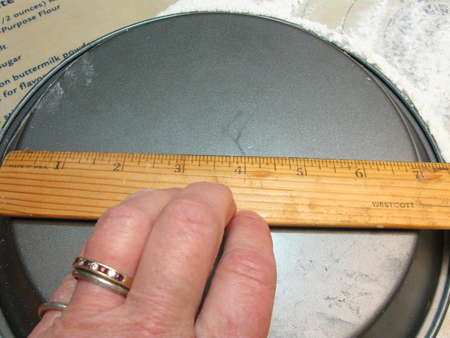
While the dough is chilling, determine the desired diameter of your bottom crust. First, measure the bottom diameter of the pan: 7”.
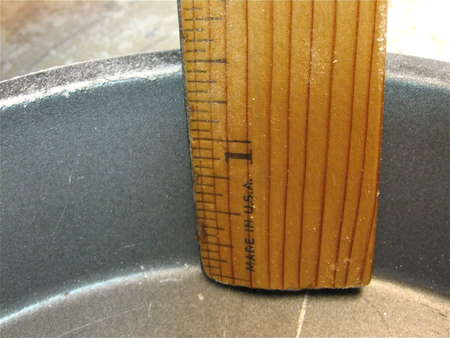
Then lay your ruler flush against the inside edge, and measure that. This won't be the vertical distance from top to bottom of the pan; it'll be the actual length of the pan from bottom to top, which is more slanted than vertical. In this case, 1 1/2”. Since the bottom diameter of my 9” pie pan is 7”, and each side is 1 1/2”, I'm going to add those all together and come up with 10”. This would bring the pie crust right to the edge of the pan, but I want extra, in order to have some overhang. So I'll add 1” on each side, giving me a total of 12”. This is how wide I'll roll my bottom crust.
Attention: this sounds more involved than it is. All you're doing is measuring the actual inside diameter of your pie pan, then adding 2”. Take a cloth tape measure and do it that way if you prefer.

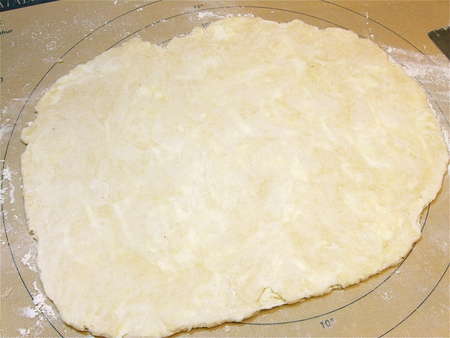
Take your chilled dough out of the fridge. If it's been chilling longer than 30 minutes, you may need to let it soften up a bit at room temperature, maybe 15 minutes or so; it should still feel cold, but also be soft enough to roll pretty easily. Put the dough on a well-floured surface, and roll from the center towards the outside edges. If you roll back and forth, it confuses and toughens the gluten in the flour, making the crust hard rather than tender.
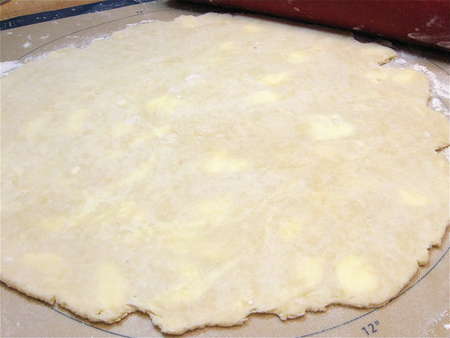
Here's the crust rolled to just about 12”. Notice the big, flattened chunks of butter. This is a good thing! The butter effectively separates layers of the pastry. When you bake the pie, those layers set in the oven's heat before the butter melts; the butter eventually melts, and the layers stay separated. These are the ”flakes” in flaky pie crust.
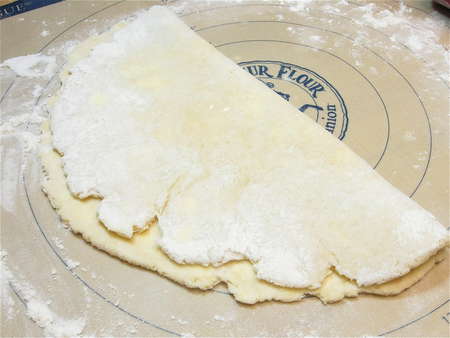
To move it into the pie pan, fold it in half...
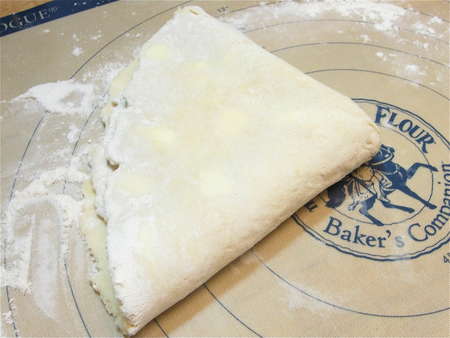
...then in half again.

Place it in the pan with the corner right in the center, then unfold it and gently press it into the pan.
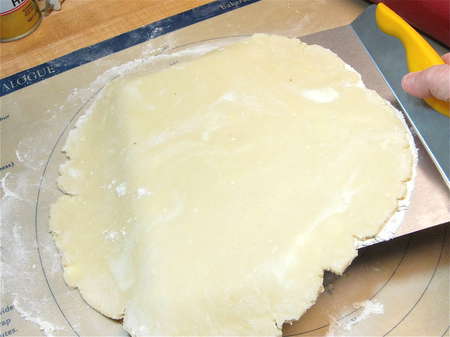
Or never mind all that and simply pick the crust up with a giant spatula, and set it into the pan. This is my preferred method.
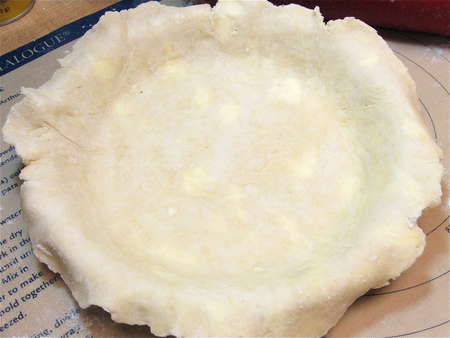
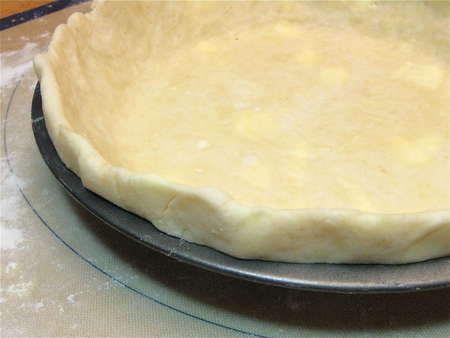
Notice the overhang.
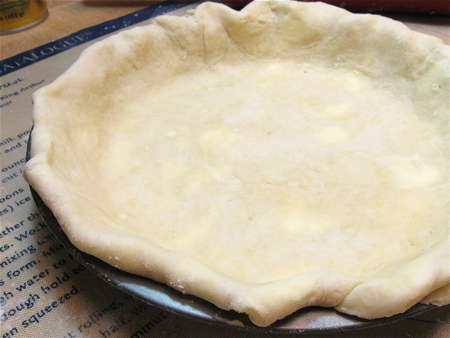
This is how to make a single-crust pie. Fold the overhang under...
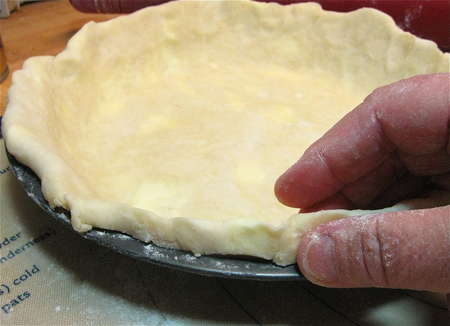
...and gently squeeze it together.
You'll end up with a nice, tall “wall” of crust.
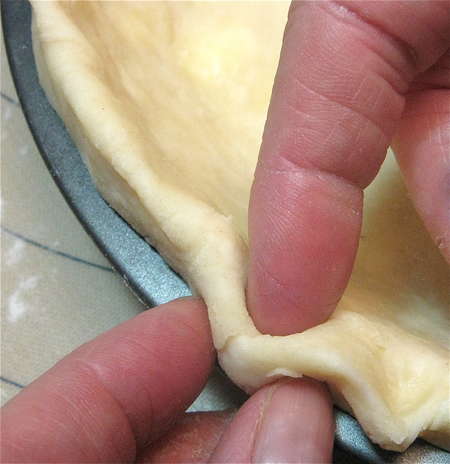
Crimp it using your fingers...
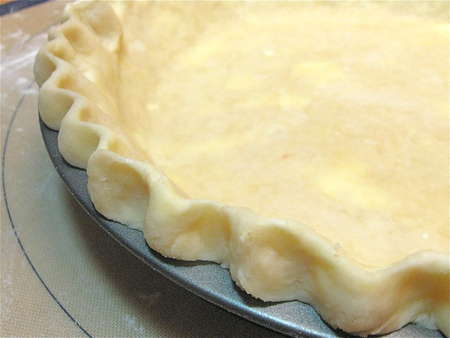
...to make a crimp that looks like this. Very pretty, and good for pumpkin pies and others with liquid filling. It's nice to have this tall barrier to keep the liquid from sloshing out as you move pie from counter to oven.
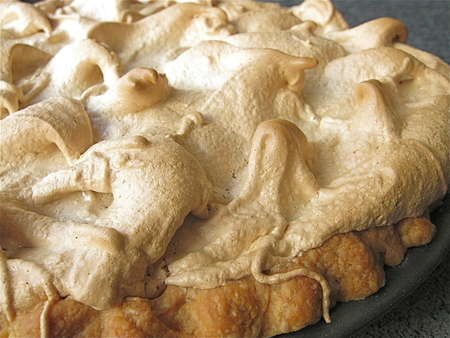
And here's that single crust, crimped, filled, topped with espresso meringue (oh yeah!), and baked. Stay tuned for my recipe for café au lait chess pie, coming soon to a blog near you.
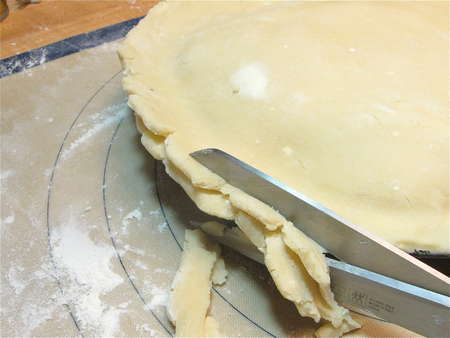
Making a double-crust pie? Measure the outside top diameter of your pie pan, and roll the top crust to that width. Fill the pie, and lay the crust over the filling. Use a pair of scissors to trim the excess to within 1/2” of the edge of the pan.
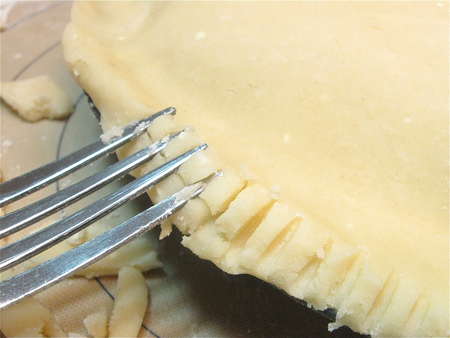
Press the bottom and top crusts together to seal, then crimp with a fork. When the fork starts to stick, simply dip it in flour.
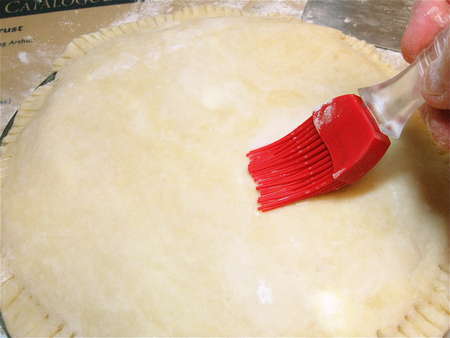
For the nicest top crust, brush with milk...
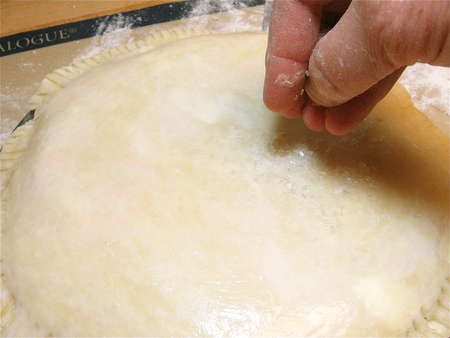
...and sprinkle with coarse white (sparkling) sugar.

Cut slashes in the top; this will allow the steam to escape, which helps the crust and filling stay close together, rather than the crust doming up and the filling sinking down, leaving a big empty space between top crust and filling.
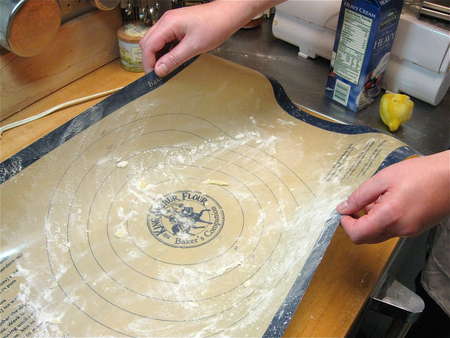
Here it comes, a shameless plug for our silicone rolling mat. Aside from the fact that it keeps everything from sticking, here's why I like it: When you're done, you just pick it up...
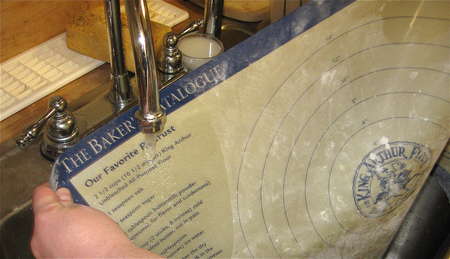
...and rinse it with warm water. I hang mine over the handle of the dishwasher to dry, then fold it in quarters and stash it in the cupboard, on top of my pans.
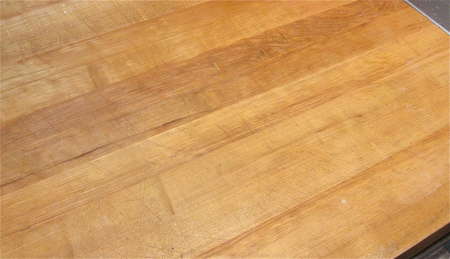
And here's the counter where I made my pie dough and rolled my crust. NO CLEANUP NEEDED. No scraping dough, no gummy sponge, nonono... Love it.
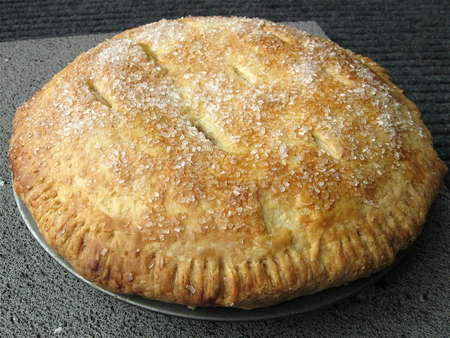
And the finished pie: gorgeous, huh? If you're wondering what's inside, it's frozen peaches and dried apricots. Wintertime Peach Pie—again, coming soon to a blog near you.
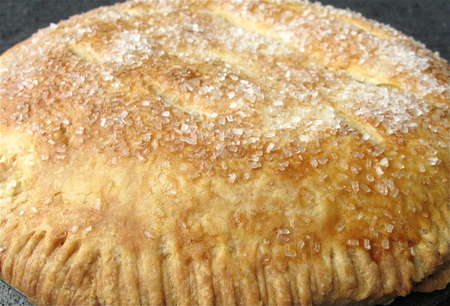
See how nice the coarse sugar looks?
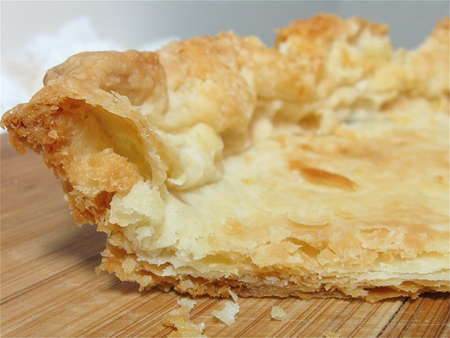
And look at that flaky crust! That wasn't hard, right? No need to buy one of those frozen supermarket crusts, right, Halley?
Read, rate, and review (please!) our recipe for Classic Double Pie Crust.