


How to preshape sourdough
When you preshape sourdough, you set the stage for successful shaping.

In the typical life cycle of baking bread, there’s a point where your dough must be transformed into its final shape. But right before that, there's an often overlooked yet equally important step: you need to preshape sourdough bread dough.
Preshaping is precisely what it sounds like; it sets the stage for successful final shaping — and there are many approaches a baker can take. Some people like to preshape sourdough by pulling the dough together tightly and letting it rest with the seam facing up. Others preshape by gently gathering the dough and letting it rest seam-side-down for a uniformly smooth surface on top.
Ultimately, the preshape approach is up to the baker. Let's walk through several considerations that can influence how you preshape your sourdough.
Most sourdough recipes call for enough dough to make multiple loaves, but it can be challenging to divide up a large mass into perfectly sized pieces on the first try. Typically I'm left with lumps of different shapes and sizes — not to mention the small scraps I slice off the larger mounds and stick onto the smaller ones.
To facilitate the final shaping of these unruly forms, I perform a preshape step to bring some measure of uniformity to the pieces. This way, when we begin final shaping of our dough, we’re starting from a consistent and orderly structure.
Preshaping also gives us an extra chance to add strength to our dough. If your divided dough feels a little loose or slack, you can give it a slightly tighter preshape. This simple act can add much-needed strength and structure to a dough that might otherwise prove tricky to shape.
Further, if the dough is especially weak, possibly from undermixing or overhydration, you can perform a second preshape step to bring more structure to the dough before shaping. This ensures your dough will rise high and make it less likely to collapse or spread.
While preshaping is not strictly mandatory, it does provide an opportunity to check in with your dough, to assess its strength and fermentation activity. It sets the stage for a more streamlined shaping step.
I prefer to take a very gentle approach to preshaping sourdough, and my method differs from the one used by King Arthur Flour's Baking School, and on their Complete Guide to Sourdough Baking. As is the case with many steps in baking, there's no one right way to do something; it depends on your preference and what you're comfortable with.
I've refined this preshaping method through my own testing and find it effectively organizes and strengthens the dough without being too aggressive. However, it's important to make the call in the moment: Is the dough a little on the weak side? If so, preshape it with more strength and order. Conversely, if the dough is plenty strong, a really light hand will suffice.
In addition, think about how soon after preshaping you want to do your final shaping. If the interval between preshape and shape is short, then preshape gently. If it's longer, preshape more assertively.
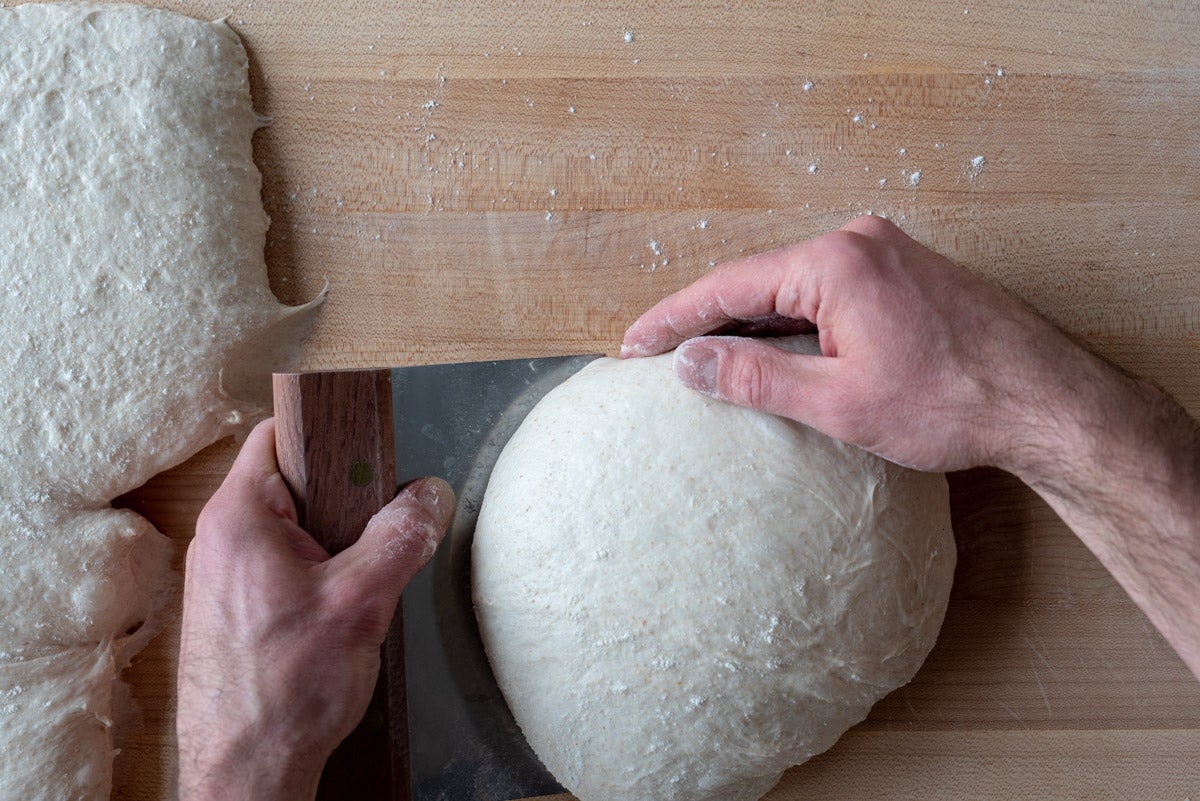
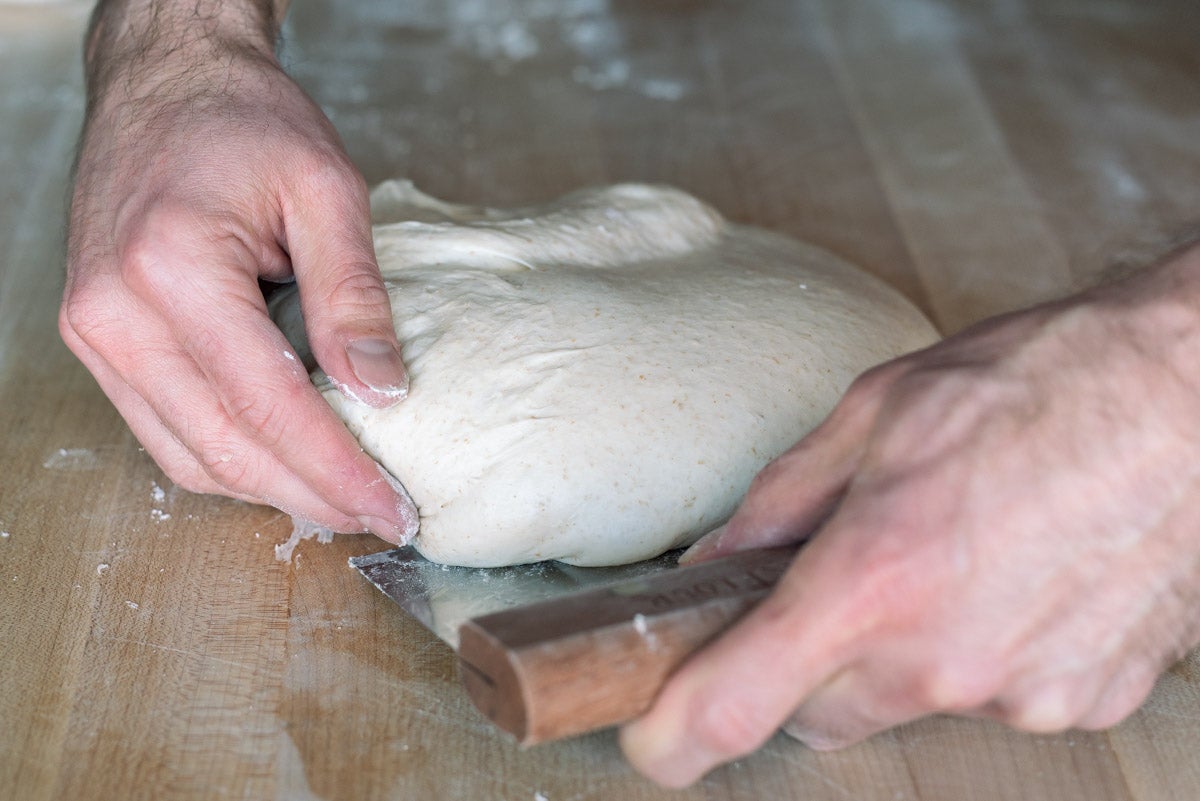
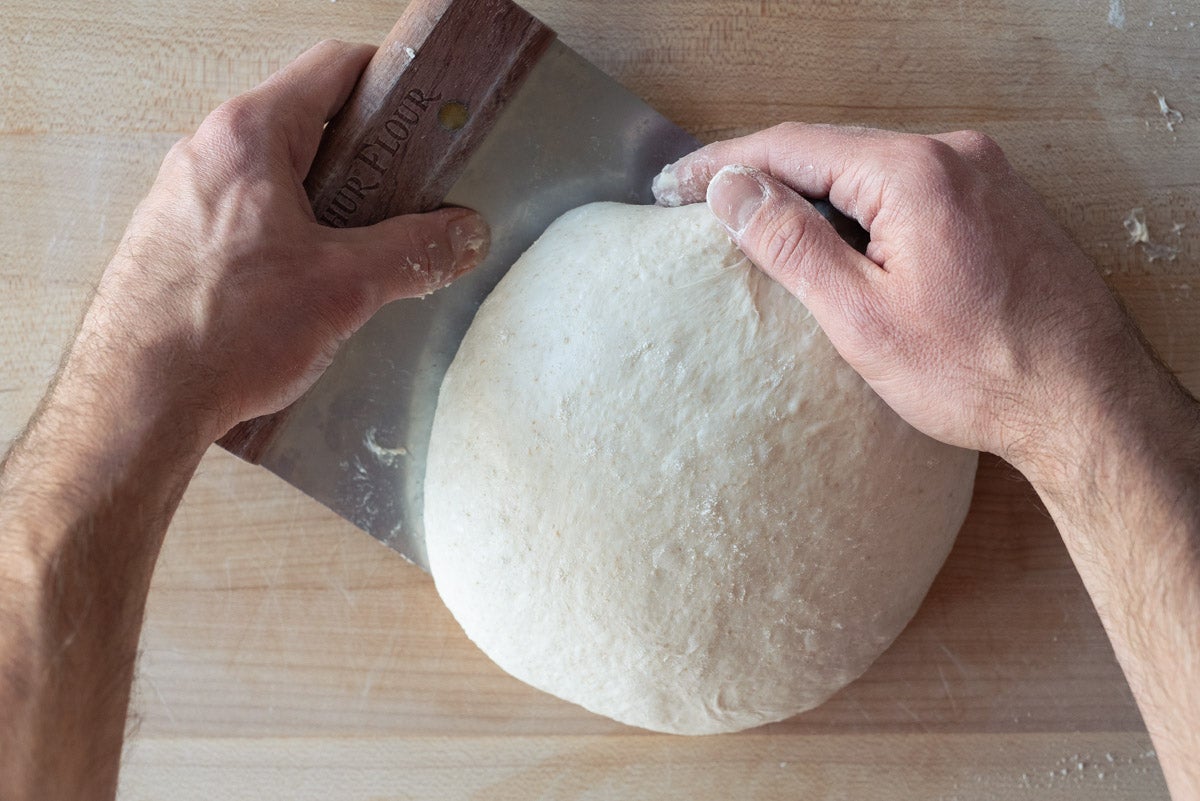
In performing a preshape, I rely heavily on my bench knife and lightly floured hands. The bench knife pushes the dough toward my bare hand which is used to guide and tuck the dough under.
I prefer to keep a shallow angle between the bench knife and the work surface, as seen above. The higher the angle, the more tension and strength you’ll add to the dough. I find a shallow angle allows me to push and pull the dough a little more without over-tightening.
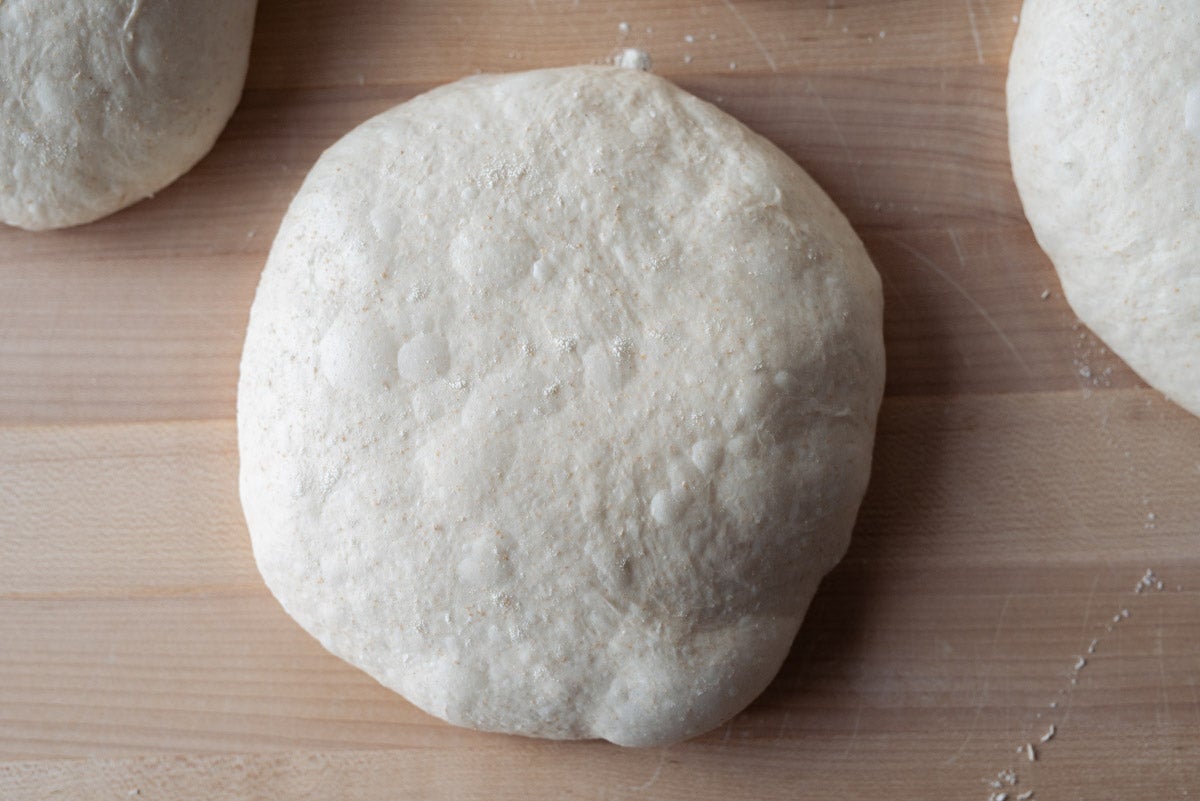
The goal for preshaping is to take each piece and form it into a loosely round shape with just enough tension on the outside. The round should hold its shape on the work surface but not be preshaped so tight that the "skin" on the outside begins to tear. Stop preshaping when you notice the top is smooth without creases and is relatively uniform all around -- if you're too aggressive with preshaping you'll end up with a denser loaf of bread.
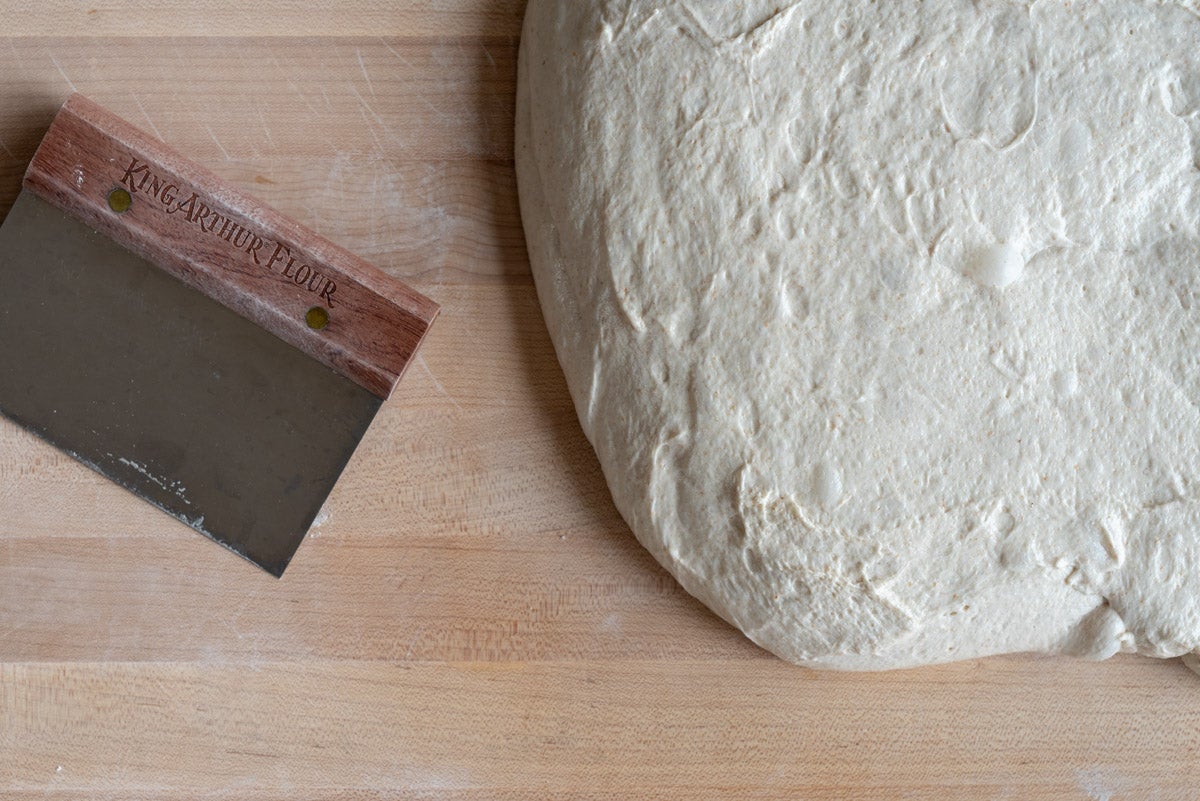
Turn your dough out onto a lightly floured work surface. Then, dust the top of the dough with flour and divide it into pieces scaled to your desired dough weight.
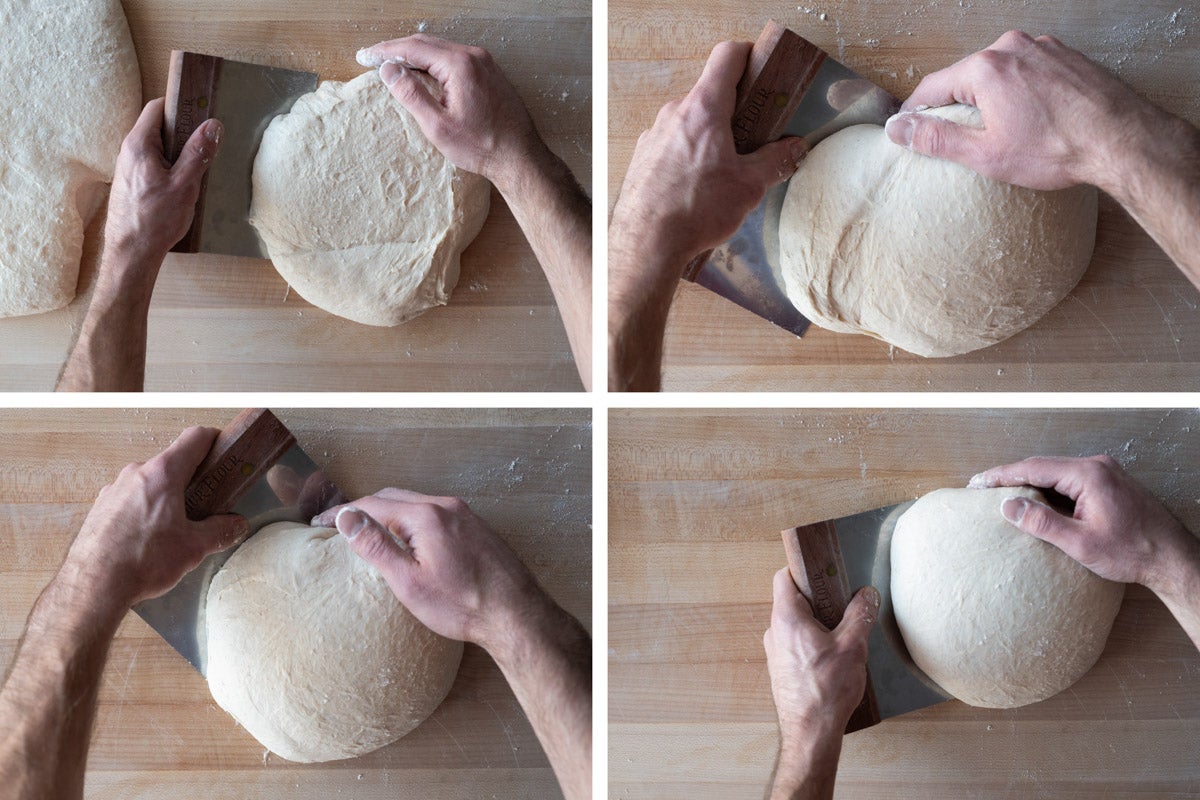
Push the blade against the dough, and as you push, turn it slightly down across your work surface. Both of your hands work in unison: your empty hand tucks the dough under as you push the blade into the dough. The motion is quick and gentle; I then remove my blade and hand from the dough as soon as it comes to rest on the work surface.

Repeat this motion with your blade and hand over and over, gently rotating the dough each time. You’ll notice with each pass that the dough tightens more as it snags the dry work surface and you scoot it along. This tightening will be visible on the outside of the dough as its skin stretches slightly and becomes taut.
Continue with these motions until the dough is in a loose, round shape. There should be no visible seams or bulging sides. If there are, continue to gently round the dough and smooth the surface. The key is to find that balance between just enough tension and not enough.
After you've preshaped all of your dough pieces, let them rest on the bench before shaping.
If you were to shape your dough immediately after preshaping, it would be too tight and it could tear. When you give your dough time to rest, in what's called the "bench rest," you give it time to relax and spread. This returns extensibility to the uniform pieces, allowing us to manipulate them into their final shape.
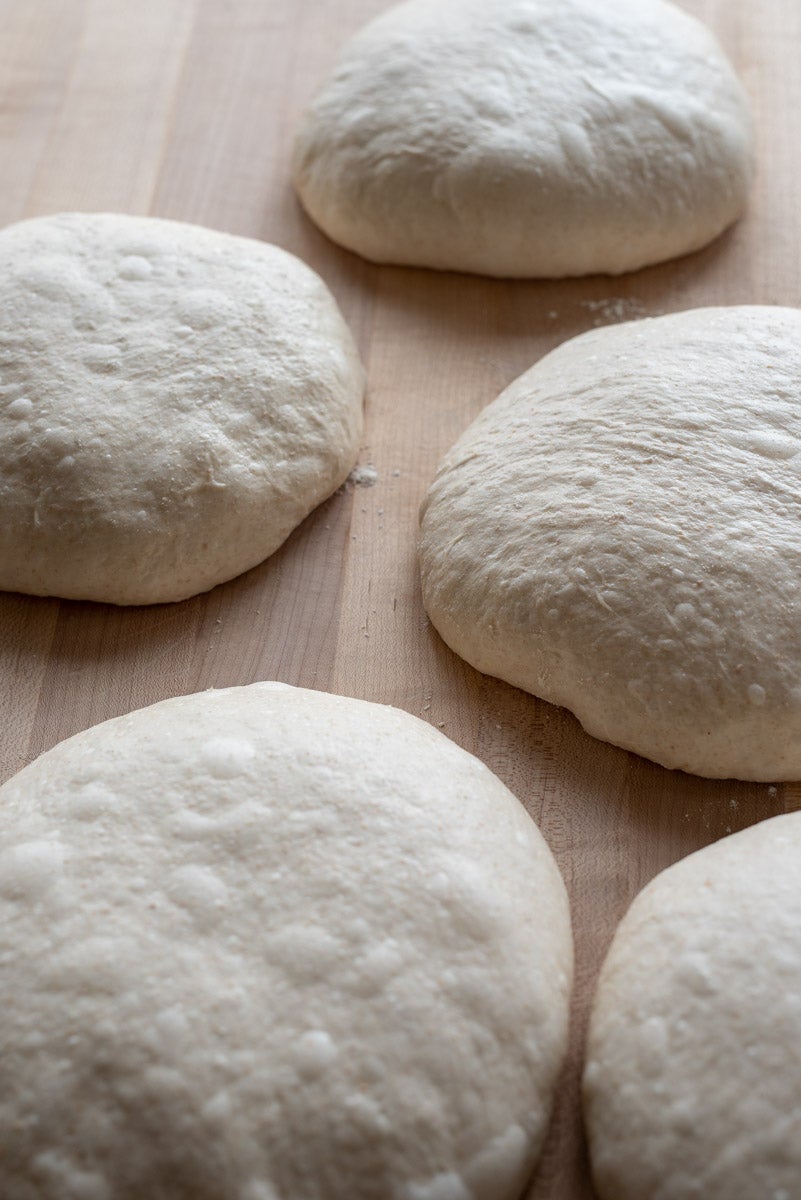
Generally, a bench rest can range from 10 to 45 minutes. The length depends on how firm and how tightly you’ve preshaped your dough. The tighter the preshape, the longer the bench rest before it relaxes sufficiently.
If you find your dough quickly spreads, cut the bench rest short. Then, either perform a second preshape step or proceed with final shaping straightaway.
Conversely, if your dough resists shaping, consider giving it more time to rest and relax.
As with most aspects of baking, preshaping takes practice and careful attention. If you watch carefully, we can see how each movement imparts order to pieces that were once shaggy bits. This paves the way for a more successful shaping and increased baking consistency.
What's the best way to work on your preshape? Find a bulletproof bread recipe, double the ingredients, and get practicing. There's no substitute for building up the confidence and intuition that comes with repeated training.
Head over to the King Arthur sourdough guide for a deeper look at each step of baking, including a video of an alternate preshaping approach.