This is the best way to keep your bread's bottom from getting too dark
My go-to way to prevent a burned bottom crust.

Date
July 30, 2025

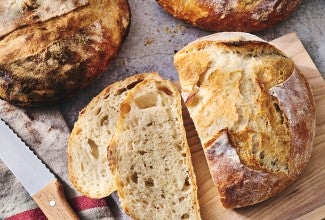
If a perfectly baked loaf of crusty artisan bread is your goal, then a Dutch oven can yield excellent results. These heavy-duty lidded bakers give your bread incredible oven spring, a reliable “ear,” and a crackly, blistered crust.
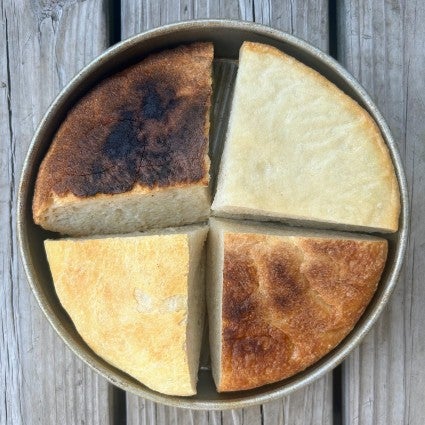
But there’s one downside: Unless you’re careful, baking bread in a Dutch oven can result in a super-dark (even totally burned) bottom crust. Since the bottom of the bread is in direct contact with the hot Dutch oven, it bakes much more quickly than the interior. By the time the center of the loaf is fully baked, the bottom crust may very well be black or overdone. How can you avoid this?
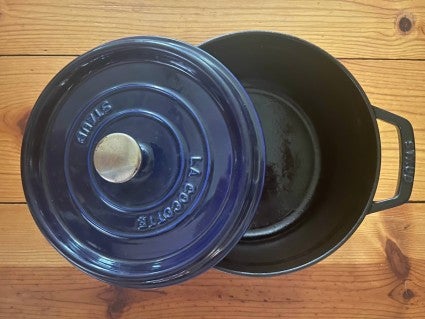
Does your Dutch oven have a very dark or black interior? If so, its inner surface becomes super-hot as it heats, hotter than a pot with a light-colored interior. A dark surface conducts heat quickly and more thoroughly than a lighter one; thus, the bottom of your bread is more apt to burn before its interior is thoroughly baked. (For more on pan materials and conductivity, see Glass or metal or stoneware — which is the “right” pan?)
Are you heating your (empty) Dutch oven by placing it into your preheating oven? Many recipes call for this step, since slipping your risen loaf into a preheated, searing-hot Dutch oven will shock yeast into quick action, causing the loaf to rise vigorously. This bold oven spring is just what you want. However, because of the super-hot pot, the loaf’s bottom will also brown very quickly — in many cases, too quickly.
Where are you positioning your Dutch oven? The lower you place your pot in the oven (closer to the heating element), the hotter it will become, and the hotter it will stay throughout the bake. This can lead to an uneven bake, with an underdone interior and burned bottom.
Does it take a long time for your loaf to bake? Some dense breads, particularly whole-grain ones, can take longer to bake all the way through. By the time the interior is done (which is a temperature of at least 204°F at the center of the loaf), the bottom may be burned.
There are a couple of proven ways to bake bread with a perfect crust and interior.
Choose a Dutch oven with a light rather than dark interior. This solution is practical if you’re acquiring your first Dutch oven; or if you have a dark-interior Dutch oven but are willing to invest in a second one with a light interior. If you plan on using a Dutch oven with a dark interior or are still getting too-dark results with a light-colored Dutch oven, read on.
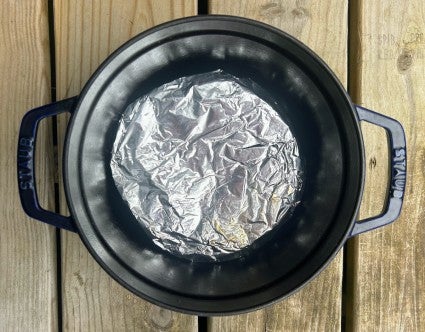
Insulate your loaf from the Dutch oven’s bottom. Use aluminum foil to make an insulating barrier between your loaf’s bottom crust and the heated pot. This step lowers the temperature at which the bottom crust bakes, while still retaining the temperature of the pot’s interior as a whole. Same oven spring, lighter bottom crust: Win-win!
Here’s how it’s done:
Take a long sheet of aluminum foil and flatten/shape it into a disk the diameter of the bottom of your Dutch oven. The exact length of the foil will depend on the size of your Dutch oven; for purposes of comparison, you’ll need about 30" of 12"-wide foil for a Dutch oven with a bottom diameter of 7". Place the foil, which should now be about 1/4" thick, in the bottom of the Dutch oven, smoothing it as flat as possible.
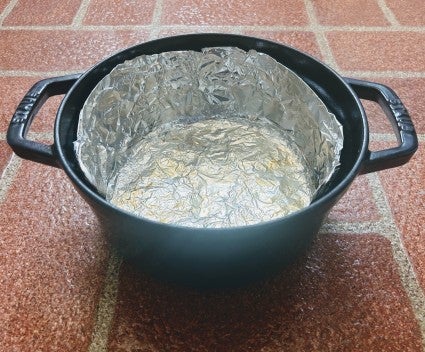
Then press a single sheet of foil about 3" up the insides of the pan. This second layer of foil will keep your loaf from charring around the edge.
Preheat your Dutch oven with the foil lining. Bake your bread as directed in the recipe, greasing the foil just before adding the dough to the pot. The foil will transmit the perfect amount of heat for a loaf with great oven spring and a bottom crust that’s golden brown, not burned.
Want a bottom crust that’s deeper brown, though still not at all charred? Flatten the aluminum foil to 1/8" thick; a rolling pin is a handy tool here.
Other, less successful options: I tested several other insulating methods, though they all proved less successful:

My tests were made using a Staub black-enameled cast-iron Dutch oven and our recipe for No-Knead Crusty White Bread. Your own Dutch oven and recipe may produce slightly different results. But I feel confident that the best path to a perfectly baked loaf in any dark-interior Dutch oven is a substantial layer of aluminum foil at the bottom, and a thin layer around the sides.
It's not just your bread’s bottom you need to consider — the top crust should shine, too! For everything you need to know, see 7 tips for the very best bread crust.
Cover photo by Rick Holbrook.