


Alison May is an independent consultant working with companies, large and small, in helping develop sustainable and socially responsible enterprises. She's been honored as one of the 100 most influential business women in the San Francisco Bay area, where she lives and works. Alison is also a member of King Arthur Flour's board of directors. San Francisco is a great bread town, and King Arthur Flour makes wonderful flours for bread; so it's not surprising Alison has become an enthusiastic bread baker. Follow along with her as she shares her favorite artisan loaf.
I was chosen to join the board of directors of King Arthur Flour in 2008 because I had a background in finance, socially responsible companies, and knowledge of employee-owned companies.
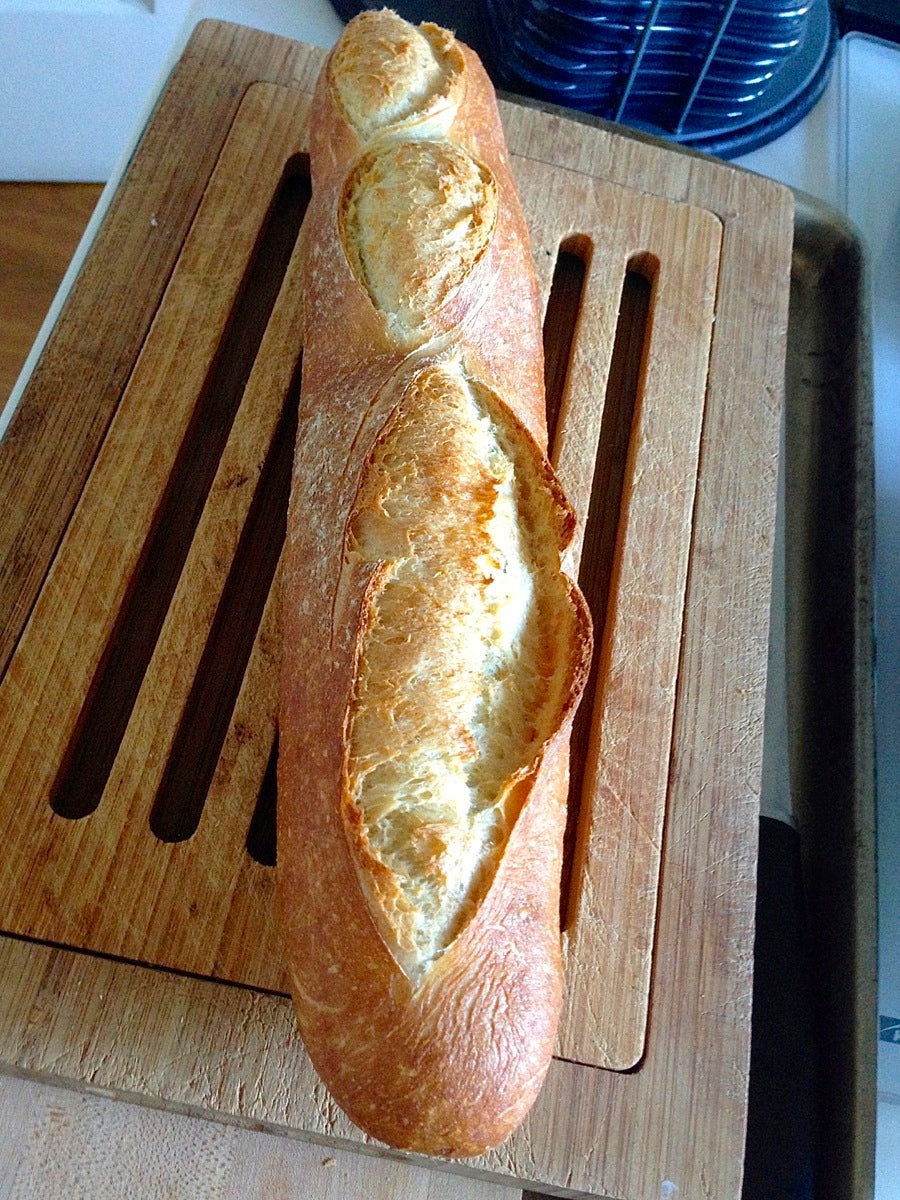
I love to cook, but at that time didn't bake; and figured, “How hard could it be”? So I started with something I thought would be easy: baguettes.
Ha! Little did I know that baguettes are considered the most difficult bread to bake, and “the art of artisan breads.”
For the first six months, I baked three baguettes every day, generally wondering why anyone would go to all of the trouble. It took a lot of time and effort, and my baguettes just never seemed to come out very light, airy, or tasty.
I was frustrated because I couldn't pinpoint a specific problem. I read many books, tried many techniques, and still failed. But I was determined to be a baker.
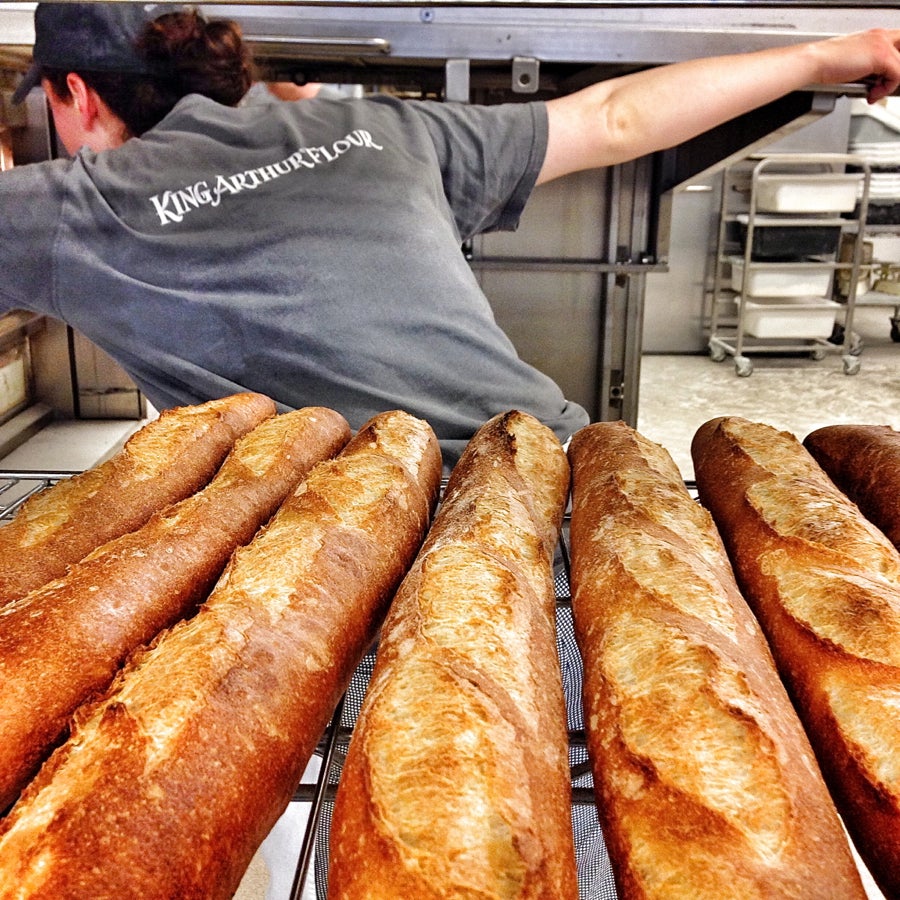
I would take my baguettes to the King Arthur Flour board meetings, and ask the wonderful bakers at King Arthur to critique them – and this was no small effort, since I had to bake the baguettes in the wee hours of the morning in San Francisco, travel 8 to 9 hours to Norwich, Vermont, and get up to work with the bakers at 5 a.m. the next morning.

Master baker Jeffrey Hamelman, King Arthur's bakery director, advised me that when you take the baguettes out of the oven, “The bread will sing." That had never happened for me, until one day, almost absent-mindedly going through the process, I took the baguettes out of the oven, put them on the bread rack, leaned over to smell the wonderful aroma, and heard it – the bread was actually singing!
In that moment, I was engulfed by the sound, color, warmth, and intoxicating fragrance of freshly baked bread, and for an instant, I was transported back in time to the beginning of civilization, where women baked bread in communal ovens and shared their stories. It was a deep connection and I was hooked.
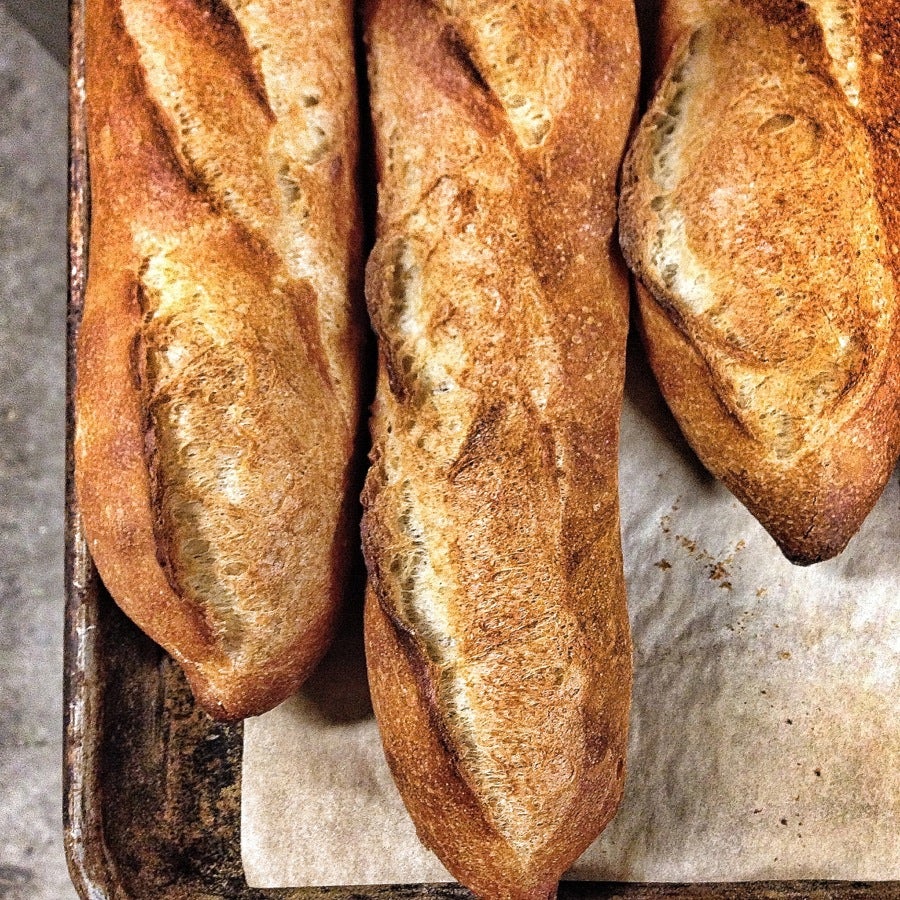
Since that moment, I joyfully bake baguettes every day, and they're simply delicious. I share them with friends, family, and neighbors. I take baguettes to everyone I know or meet, and give them to the shopkeepers in my San Francisco neighborhood. It's always the best gift, and it seems to create that same, ancient connection that I had made.
People will immediately share stories of their childhood as bread evokes memories of family, comfort, and innocence. Invariably, when I give someone a baguette, the first words out of their mouths are, “My mother used to…” And they then go on to talk about growing up in the Middle East, or France, or Argentina, or Ohio.
My mission is to show home bakers and wannabe home bakers that they can bake fabulous artisan bread at home, and that this bread will be better than 95% of the bread they buy in bakeries. People come to my home to learn and teach new “baking tricks," and wrapped within that soothing aroma of freshly baked bread, we make new friends, eat, drink, and share our own stories.
I call the following loaf “Traveling Crusty Artisan Bread,” because it can be made almost anywhere without special equipment.
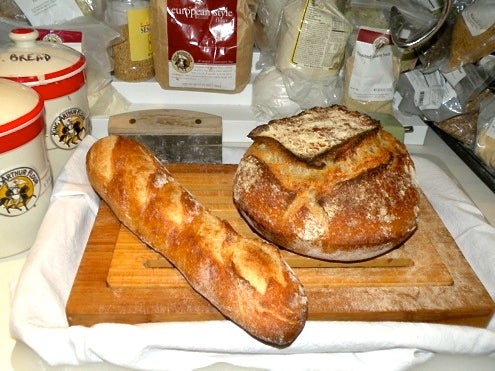
Although great baguettes can be made from this recipe, they do require some extra gadgets and “tricks,” and are more challenging. The Traveling Crusty Artisan Bread is the next best thing, as it’s delicious and requires only tools you’re likely to find in most kitchens.
What could be nicer than going to someone’s home and baking fabulous artisan bread? If you’re a house guest, they‘ll probably ask you to stay a couple of extra days. Homemade bread is the best gift: It smells great, tastes great, and makes people happy.
Crusty artisan bread has only four ingredients: flour, water, yeast, and salt. It’s important to use high-quality ingredients if you want high-quality bread, so make sure you use only the best flour (King Arthur, of course).
You‘ll want flour that isn’t bleached or bromated. Bleaching masks the fact that the product uses an inferior part of the wheat berry, and bromates are used to speed up the natural maturing period of the flour. Excellent bread is like excellent wine; you can’t hurry either of them.

The flour should have a protein content of 11.7% to 12.7%; the higher the protein content the higher the gluten. King Arthur Unbleached All-Purpose Flour checks in at 11.7%; King Arthur Bread Flour, at 12.7%. Bagel flour, (King Arthur High-Gluten Flour, for example), will have a protein content of 14%; cake flour, 7% to 10%.
I find it works equally well if you use all-purpose or bread flour. I tend to use all-purpose flour because it’s easily available, and yields a softer dough and bread with larger, more numerous holes; but either works.
I sometimes substitute ¼ cup whole wheat flour for all-purpose flour when making the overnight starter. It gives the bread excellent flavor and nice color. Until you get the hang of it, you don’t want to substitute too much whole wheat in making artisan bread because it contains the entire wheat berry, including the bran (or outer shell), whose “shards” tend to puncture the little bubbles created by the flour, yeast, and water doing their magic. Whole wheat flour tends to make a denser bread.

If you’re not going to make and maintain your own natural leaven (e.g., sourdough starter, which is easy and worth it, but time consuming), the quality of store-bought yeast is very important. I highly recommend SAF Red instant, which comes vacuum-sealed in a 16-ounce package. You’ll only use a little each time you make this bread, but you can keep the rest for months in a sealed canister in your freezer. Those little packets you find in the supermarket can be iffy as far as freshness and vigor, but will do if nothing else is available.
Different salts vary in strength. The key is to choose one you like and stick to it, altering the amount of salt you use based on your personal taste. King Arthur sells an excellent bread salt I like to use.
Water is important, and acidity (pH levels) can affect the bread’s rising (fermentation process). But work with what you have, and adjust with practice over time. Some people use bottled water to control the pH consistency.
I advocate baking all the time, using too much of something, too little, screwing up, hitting home runs, and just getting a feel for the dough so you’ll know what it needs. You’re working with a living culture, and when you get into the entire “bread experience,” it’s easy to sense there’s a rich relationship with the dough and bread. If you bake bread frequently, your kitchen will be full of wild yeast and your bread will develop its own personal signature.
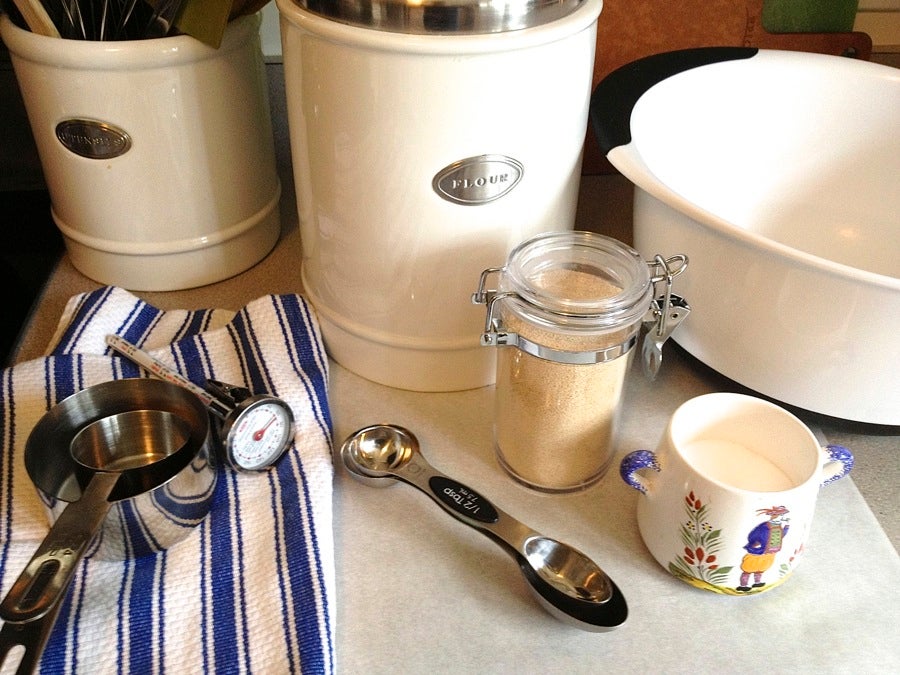
Some useful (but not mandatory) pieces of equipment are a timer; a scale; an apron, and a baker’s bench knife, which is a 6” long rectangle of stainless steel with a handle across the top used to divide dough into pieces or to scrape dried dough from your countertop (a.k.a. “bench”).
You can find absolutely everything you need related to baking at www.kingarthurflour.com, including equipment, ingredients, recipes, and a great help line. No other flour purveyor has more rigorous standards or more consistently performing flours than King Arthur.

The company’s been around for 224 years, is 100% employee owned, is a Benefit Corporation (B Corp), and is genuinely committed to bringing the joy of baking to everyone.
Bakers also work with metric weights, not cups and teaspoons. But not everyone has access to a scale, especially when traveling; so I’m using cups and teaspoons for this recipe. As a reference:
1 cup flour = approx. 121g, 4 1/4 ounces
1 cup water = approx. 227g, 8 ounces
1 teaspoon salt = approx. 7g
So let’s get going.
Make the starter the night before by mixing together with your fingers:
1 cup (4 ¼ ounces) King Arthur Unbleached All-Purpose Flour (or ¾ cup all-purpose flour + ¼ cup whole wheat flour)
3/4 cup (6 ounces) room-temperature water
1 pinch yeast
Cover and let sit at room temperature overnight.
If you need to speed this up, let it sit in the oven with the oven light on for about 6 to 7 hours, and it should be ready to use.
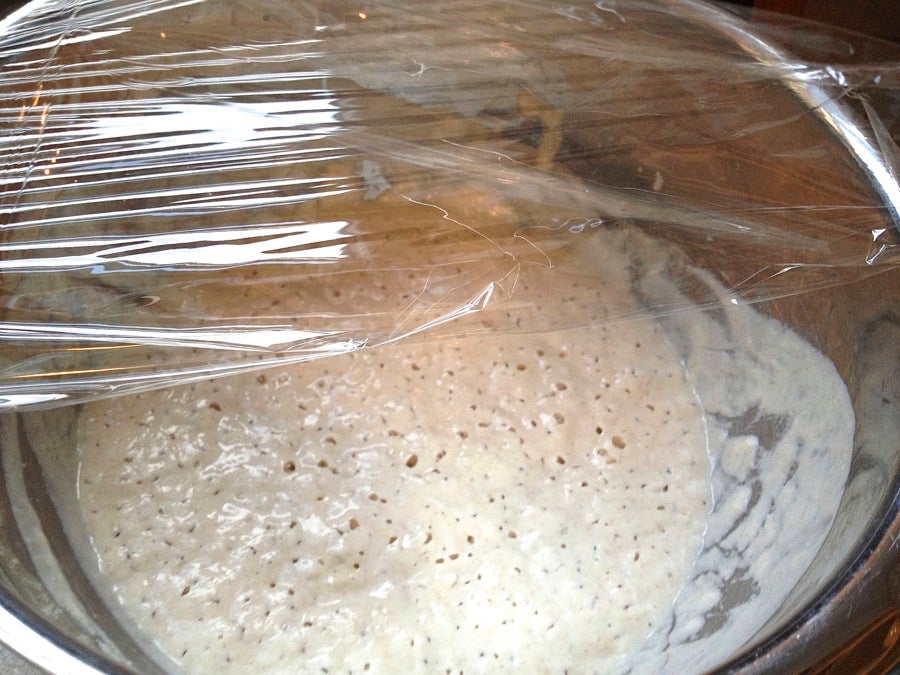
After it sits, it will contain many little bubbles and will have increased in size by about 25%. The slower overnight fermentation at room temperature will create a more complex flavor in your bread.
The next day – baking day – add:
For 2 medium loaves
all of the starter
1 3/4 cups (14 ounces) lukewarm water
4 1/2 cups (19 ounces) King Arthur Unbleached All-Purpose Flour or King Arthur Unbleached Bread Flour
2 ½ teaspoons salt (approx.)
1 1/2 teaspoons instant yeast
For 2 large loaves
all of the starter
2 1/2 cups less 1 tablespoon (19 1/2 ounces) lukewarm water
6 cups (25 1/2 ounces) King Arthur Unbleached All-Purpose Flour or King Arthur Unbleached Bread Flour
1 tablespoon salt (approx.)
2 teaspoons instant yeast
It’s important to combine the ingredients in order, as follows:
Add the starter to the warm water (about 80°F to 85°F) and mix it with your fingers until the two are thoroughly combined.
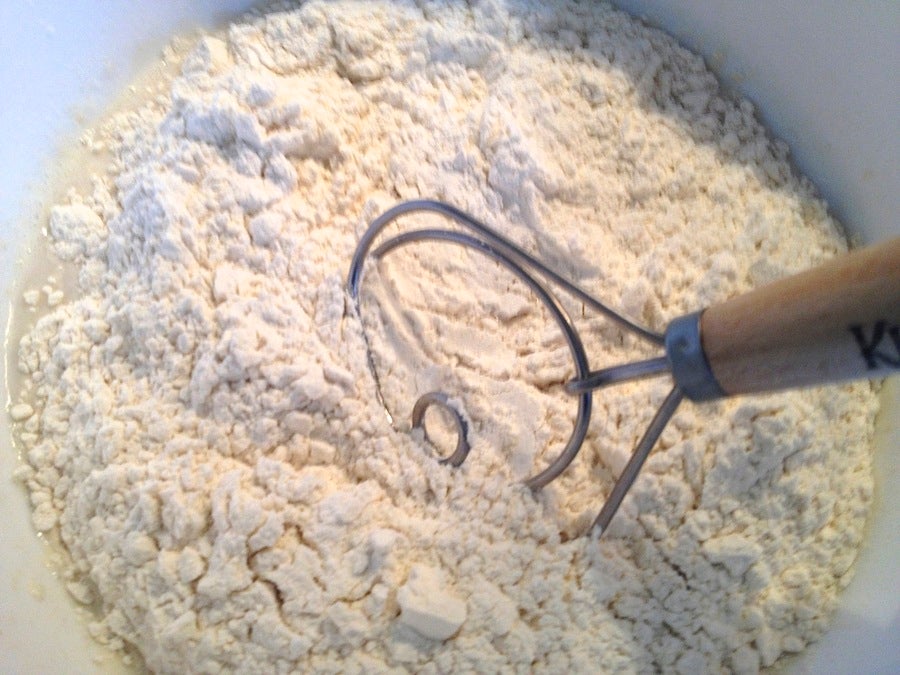
Add the flour and incorporate so that all of the flour is moist, mixing with your fingers or a dough whisk. Do not add the salt or yeast at this stage.
Let the shaggy dough rest, covered, for 15 to 30 minutes so the flour hydrates. This is key to great bread, and is called “autolyse.”
After the rest period, add the salt and yeast and incorporate well, kneading with your hands until you don’t feel anything grainy from the salt or yeast. This takes about 2 minutes.
Now you’re ready to make the bread.
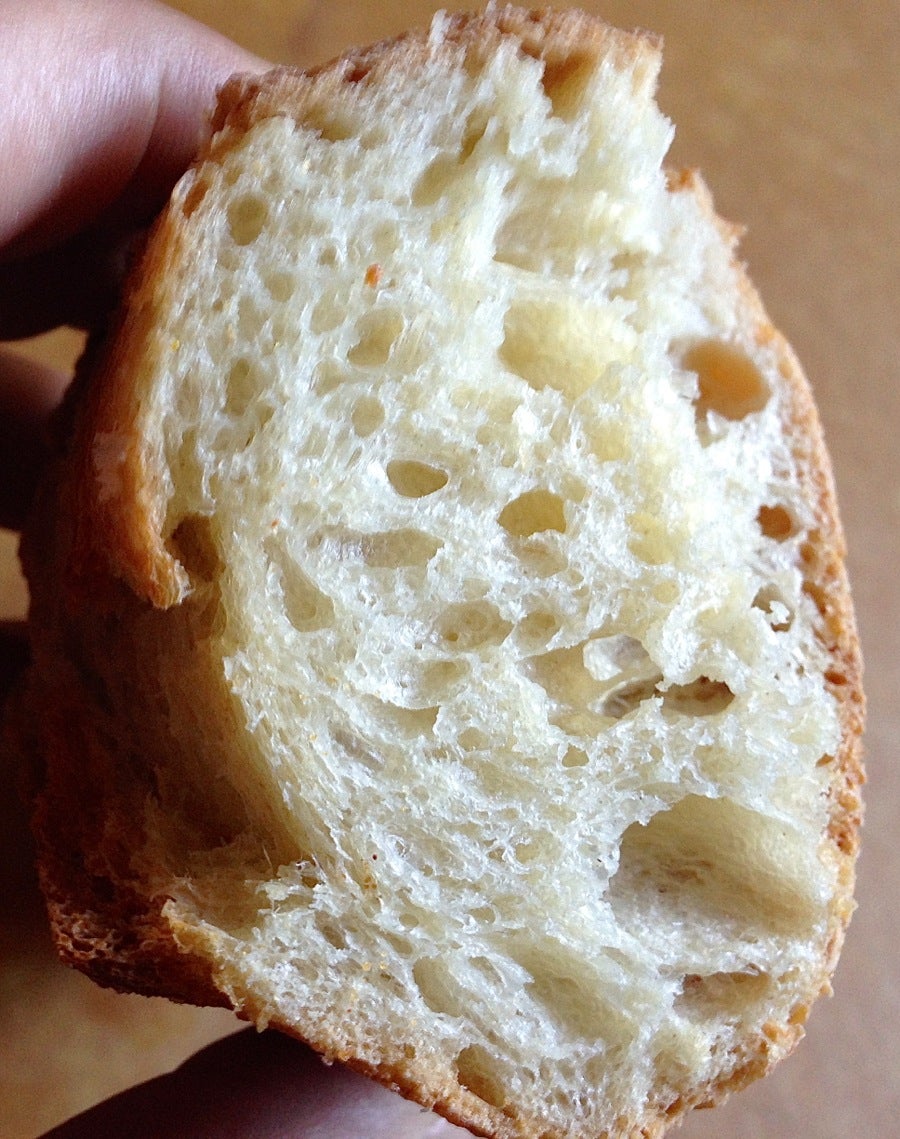
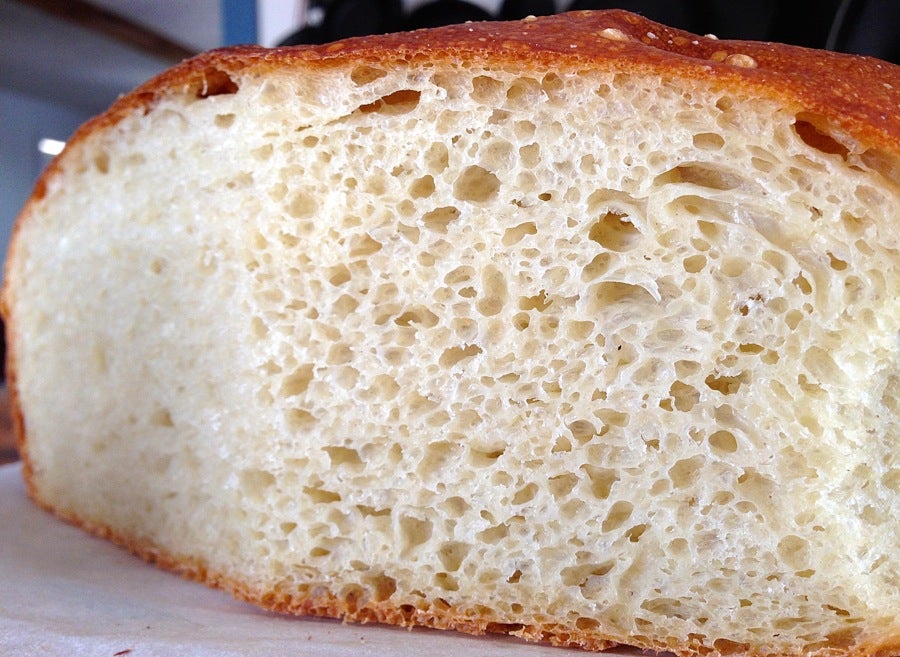
For the next 2 hours, you’ll work the bread by doing a “stretch and fold” every ½ hour. You never “knead” the bread in the traditional sense; you simply run your hand under the faucet to get it wet, then scoop your hand under the dough, and pull the dough up and over itself about 4 to 5 times. You never pound the dough; try to handle it rather gently. This process helps create nice big holes in the bread.
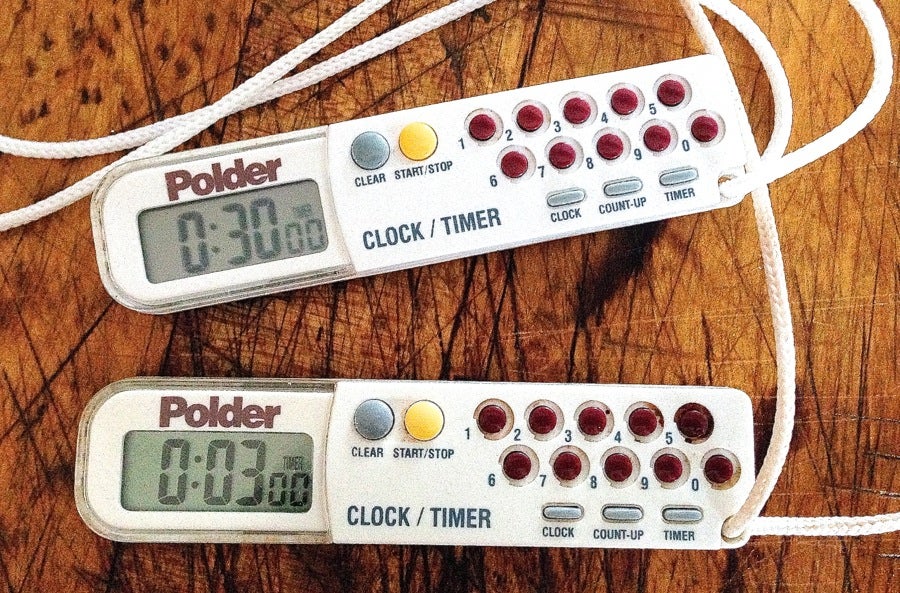
A good timer is useful here. I use two timers: one set to remind me to do the “turn” every 30 minutes, and the other set for 2 hours so I don’t have to keep track of how many “turns” I’ve done. I wear them around my neck because I get distracted.
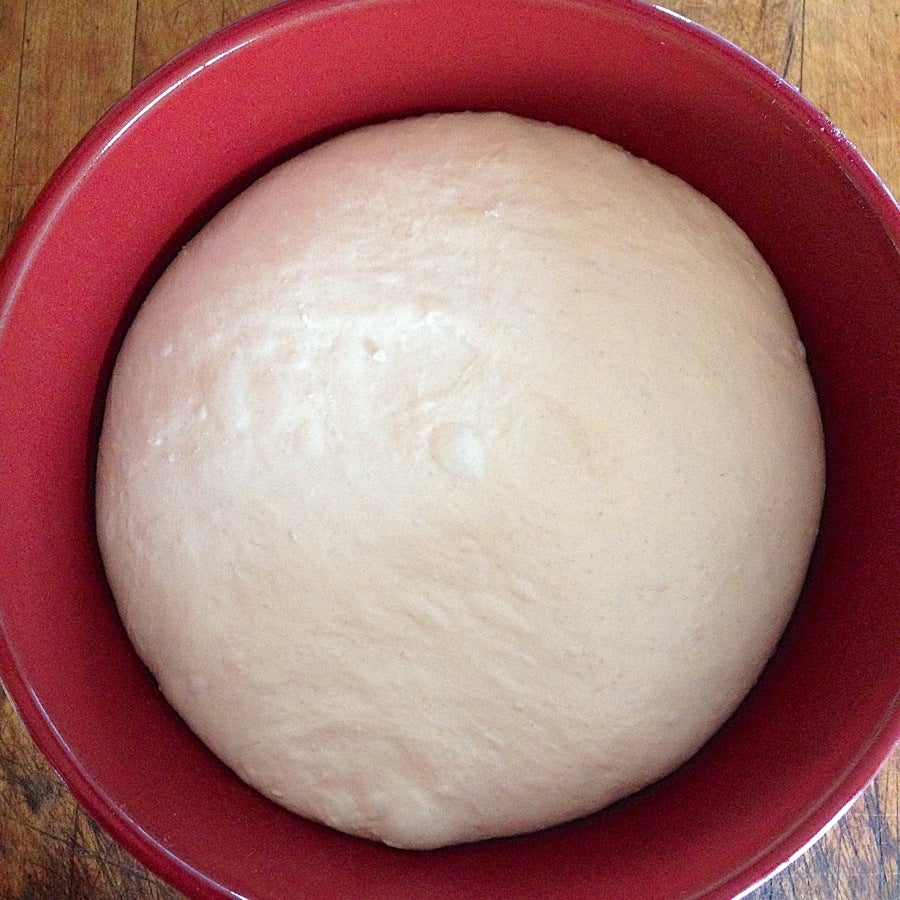
During the 2 hours, your dough will increase in size about 20% to 25%. Keep the container covered, at room temperature, in between the stretch-and-fold processes.
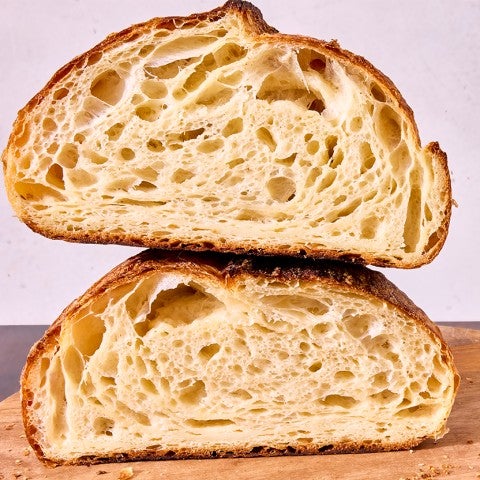
Your dough with be very wet and sticky when you start the process, and it’s tempting to add flour at the early stage; but it will become a bit firmer during the stretch-and-fold period. What you’re going for is the highest level of hydration (wetness) while still keeping the dough workable. The dough in this recipe is about 85% hydration (weight of the water divided by weight of the flour), which is very sticky indeed.
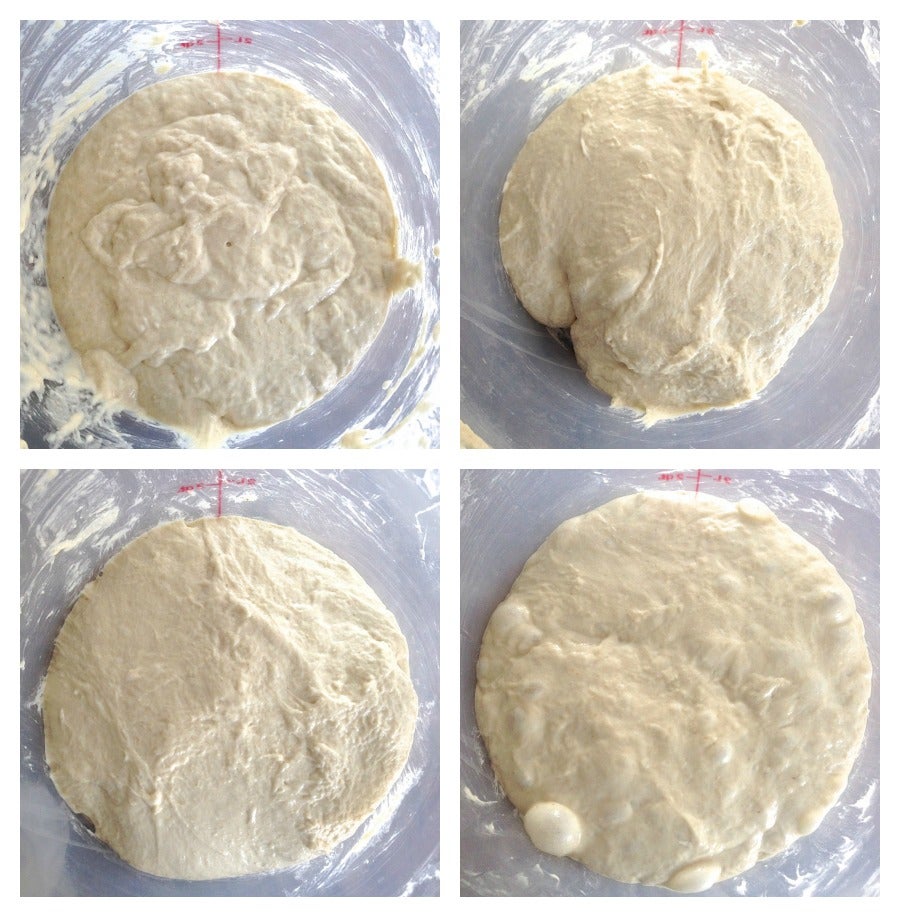
While any container works during this phase, a glass or clear plastic container is preferable as it allows you to see the dough as it ferments and begins to develop little bubbles and holes.
After 2 hours of stretching and folding, turn your container upside down onto a cutting board (or “bench”) and let the dough fall naturally onto the bench. This is the dough’s “final stretch”. Do not put flour on the cutting board before you let it fall; the dough should stick slightly to the cutting board.
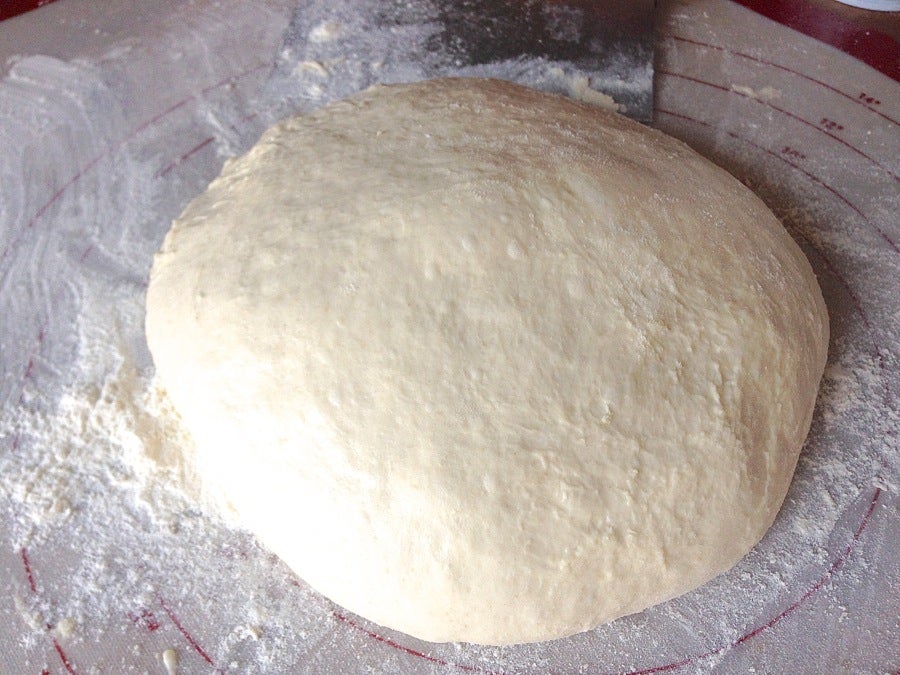
Ed note: My dough must have been stickier than Alison's; I found the work surface needed a generous coating of flour to turn the dough from an unworkable sticky mass to something that was still extremely sticky, but could be handled.
The following directions may or may not be possible for you to follow as written. If you've used bread flour instead of all-purpose, your dough will be a bit easier to work with, and you can probably round it up as Alison explains. If you've used all-purpose flour, and your dough is very sticky, keep your hands and the work surface well-floured, and round the loaves into smooth balls as best you can.

Lightly flour the top of the dough and cut it into two sections, cutting with a bench knife or sharp knife. Only flour the top of the dough – not the bottom.* From now on, the outside – the side you lightly flour – will eventually be your crust. You want the inside to stay as moist as possible, and have minimal contact with additional flour.
*Ed. note: As mentioned above, you may find the dough is so sticky that it's necessary to flour the surface on which you're working; just try to keep the added flour to a minimum.
With each loaf, and using the bench knife or something similar, flip the dough over so that the floured side is now on the bottom. Flatten lightly and pull the side nearest you up and over towards the middle. Pull the left side then the right side up and over towards the middle.
Finally, pull the side farthest from you up and over towards you so that the dough now looks like an envelope. Then fold in half, away from you, with the floured side on the outside, and roll the dough into a ball by cupping from underneath with your hands and pushing it away from you, cupping from underneath again, and then rolling back towards you. It should stick slightly to bench and create some tension and something almost like a membrane. Your goal is to create a smooth ball with its seam on the bottom.
Try to work the dough as little as possible, taking just 3 to 5 motions to make a tight ball. This is tricky to learn, but it gets easier with practice. The balls should feel and look (but not smell) like a baby’s behind. Let the dough rest for 15 minutes.
After 15 minutes, repeat the process again. Pat the balls down gently, then flour the tops lightly, flip them over so the floured side is on the bottom, make the envelope by pulling the sides and stretching towards the middle. But now, pat into the shape you like. I suggest that for the first attempts, you roll into balls and make two round loaves.
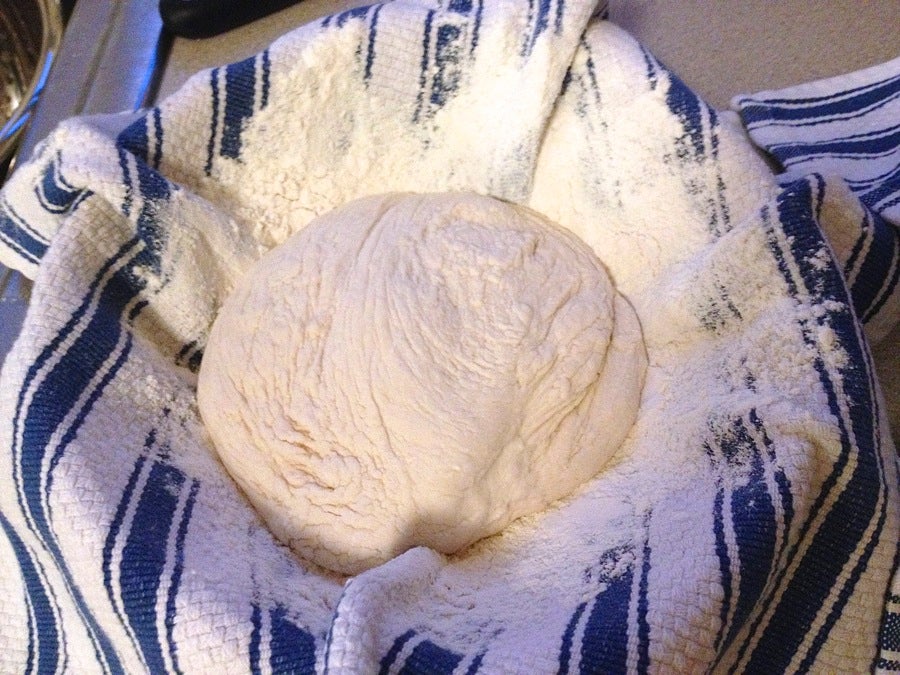
Put each loaf into a basket or bowl, seam side up, in which you’ve put a light towel sprinkled with enough flour so the dough won’t stick. Some people use oil to coat the bowl, but flour will give you a rustic-looking crust. Cover the bowl with a towel, and let the loaves sit for 1½ hours at room temperature, until they've risen noticeably.
One of the most important things required for a good, crusty crust is a homemade “steam oven.” This is hard to do for baguettes; but for round loaves, you can replicate a steam oven by creating a large, tall Dutch oven made of two cast iron skillets (or any oven-safe metal or ceramic skillet/pot) that fit on top of each other.
The skillet on the bottom will contain the bread; and the larger, deeper skillet, placed upside-down atop the shallower pan, will be the cover. The pans need to fit on top of each other so that moisture won’t escape. This captured moisture replicates a steam oven.
You can use any covered pot or pan that goes in the oven for this phase. I do find, however, that the more contained the bread is in your skillet or pot, i.e, the more it fits the size of the loaf, the higher your bread will rise. If the dough sprawls too much in a large skillet, the bread will tend to expand sideways as well as upward. But don’t worry; either way your bread will be puffy, light, full of big holes, and delicious.
Thirty minutes before you’re ready to bake, preheat the oven to 500°F with both skillets in the oven – you want them to be very hot. You’ll bake one loaf at a time, so put the second shaped loaf into the refrigerator at the same time you preheat the oven. You can then bake it after you finish the first loaf, or the next day.
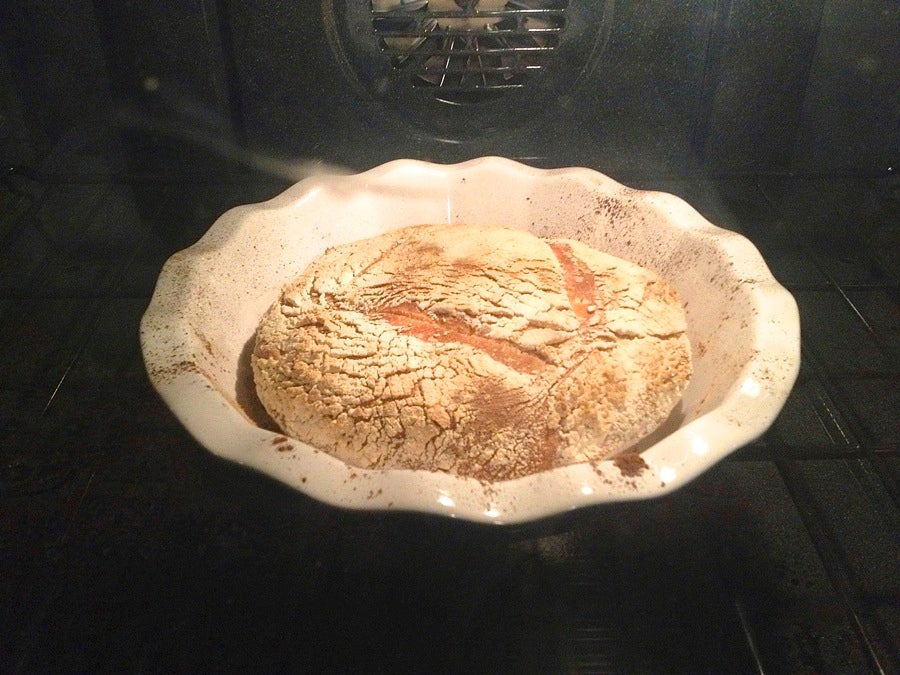
Ed. note: I'm using an Emile Henry crock here – I found that the smaller of Alison's two recipes, shaped as one loaf (rather than being divided into two loaves) is a nice fit for this crock. Here's my risen loaf, ready to go into the oven. When using this crock, it's not preheated, as Alison directs; instead, the shaped loaf is put into the cold crock to rise and then bake.
If you let the second loaf sit in the fridge, covered, overnight, it will develop a deeper and more complex flavor. You can bake it in the morning and have fresh bread for breakfast without having to get up at 2 a.m. to make the dough from scratch. Simply remove the loaf from the refrigerator and let it sit unrefrigerated for 30 minutes while the skillets are heating up. The loaf doesn’t need to be at room temperature and works just fine if you take it directly from the refrigerator and put it into the very hot skillet and cover immediately.
When the oven is hot, take the shallow skillet out (careful – it will be very hot).
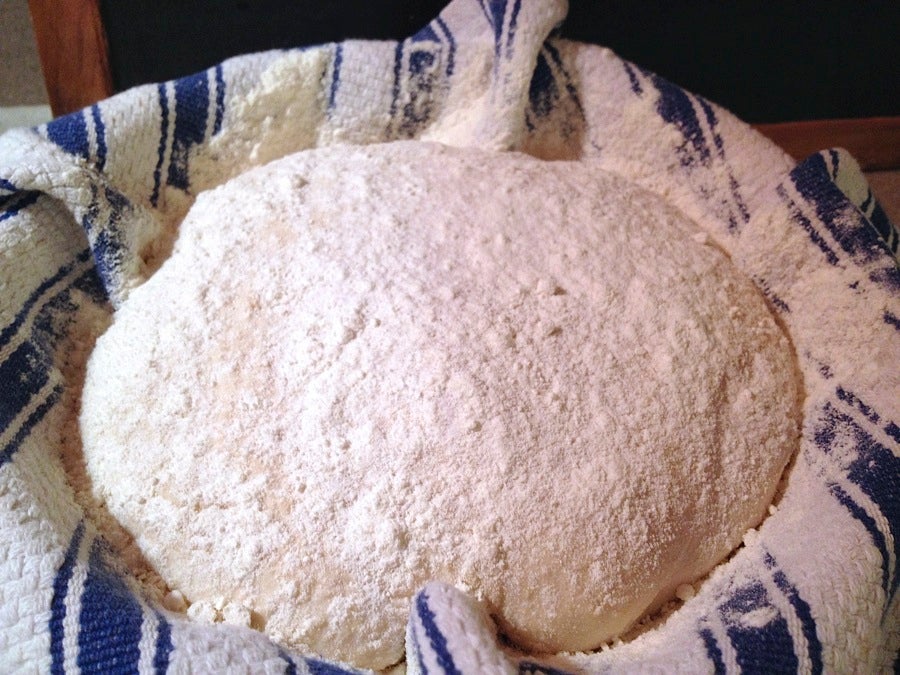
Sprinkle the top of the loaf with flour so it won’t stick, and gently flip it upside down (seam side down) from its bowl into the very hot skillet; try to center it, though it’s difficult.
Quickly score the top of the loaf with a lame, razor, box cutter, or very sharp knife into a pattern you like, making four to five decisive deep slits. You can make a tic-tac-toe pattern, or anything else you desire. I like to make a square with four slits. These slits will allow the bread to “pop open,” giving it room to rise.
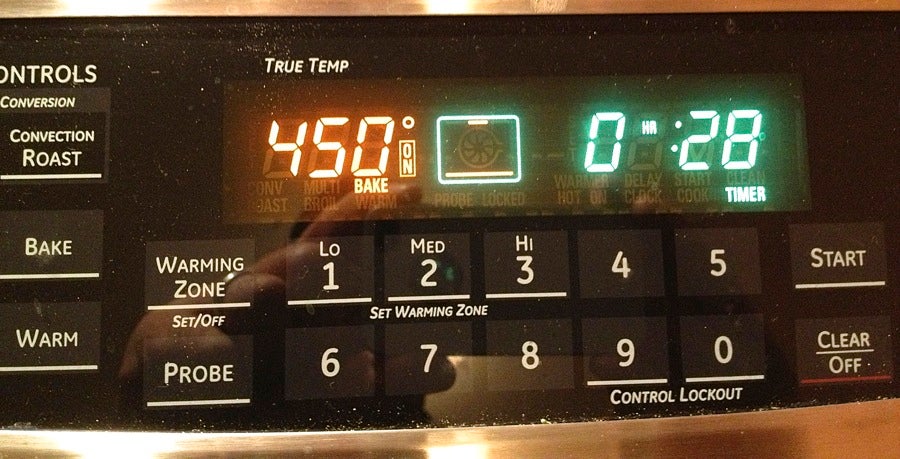
Immediately after scoring your bread (making the slits), put the skillet with the bread into the oven and cover it with the upside down deeper skillet or heated top, to seal moisture inside. Reduce the oven temperature to 450°F, and bake the bread, covered, for 15 minutes.
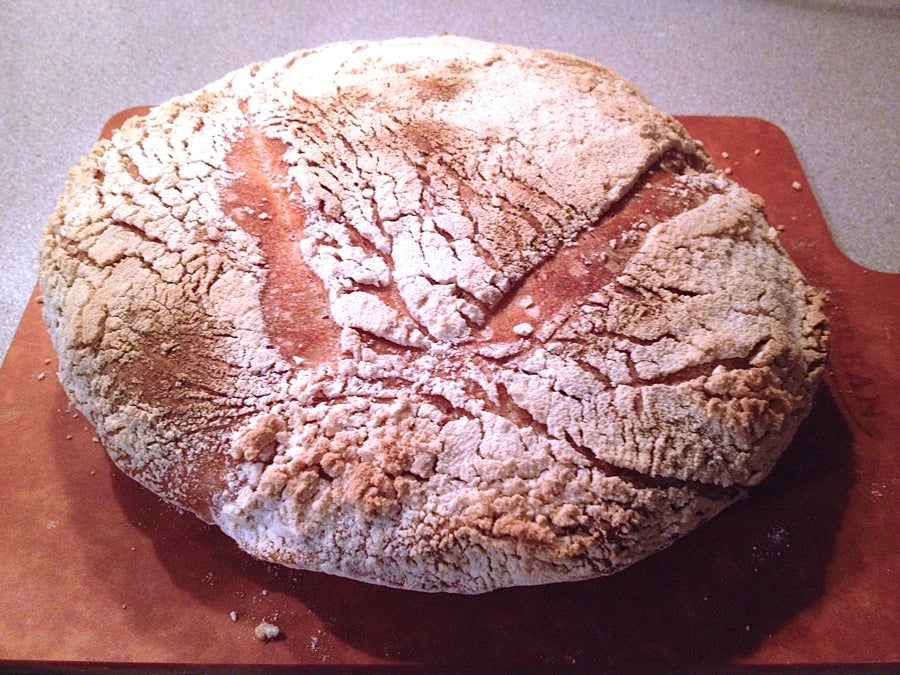
After 15 minutes, take the top skillet off and let the bread bake, uncovered, for another 15 to 20 minutes, until it’s a deep golden brown. Your bread should have popped open and grown in size. The larger loaf will take a bit longer than the medium loaf, so keep an eye on them for the last 5 minutes.
I like bread with a very dark and “crusty” crust, so after it’s baked, I generally let it sit in the oven, temperature turned off, oven door cracked open, for another 7 minutes before I remove it. This helps create a drier, crunchy crust. For crunchiest crust, remove the bread from the pan and set it on the oven rack prior to this final 7 minutes in the turned-off oven.
Remove your beautiful bread from the oven and let it sit on a bread board or cooling rack to cool.
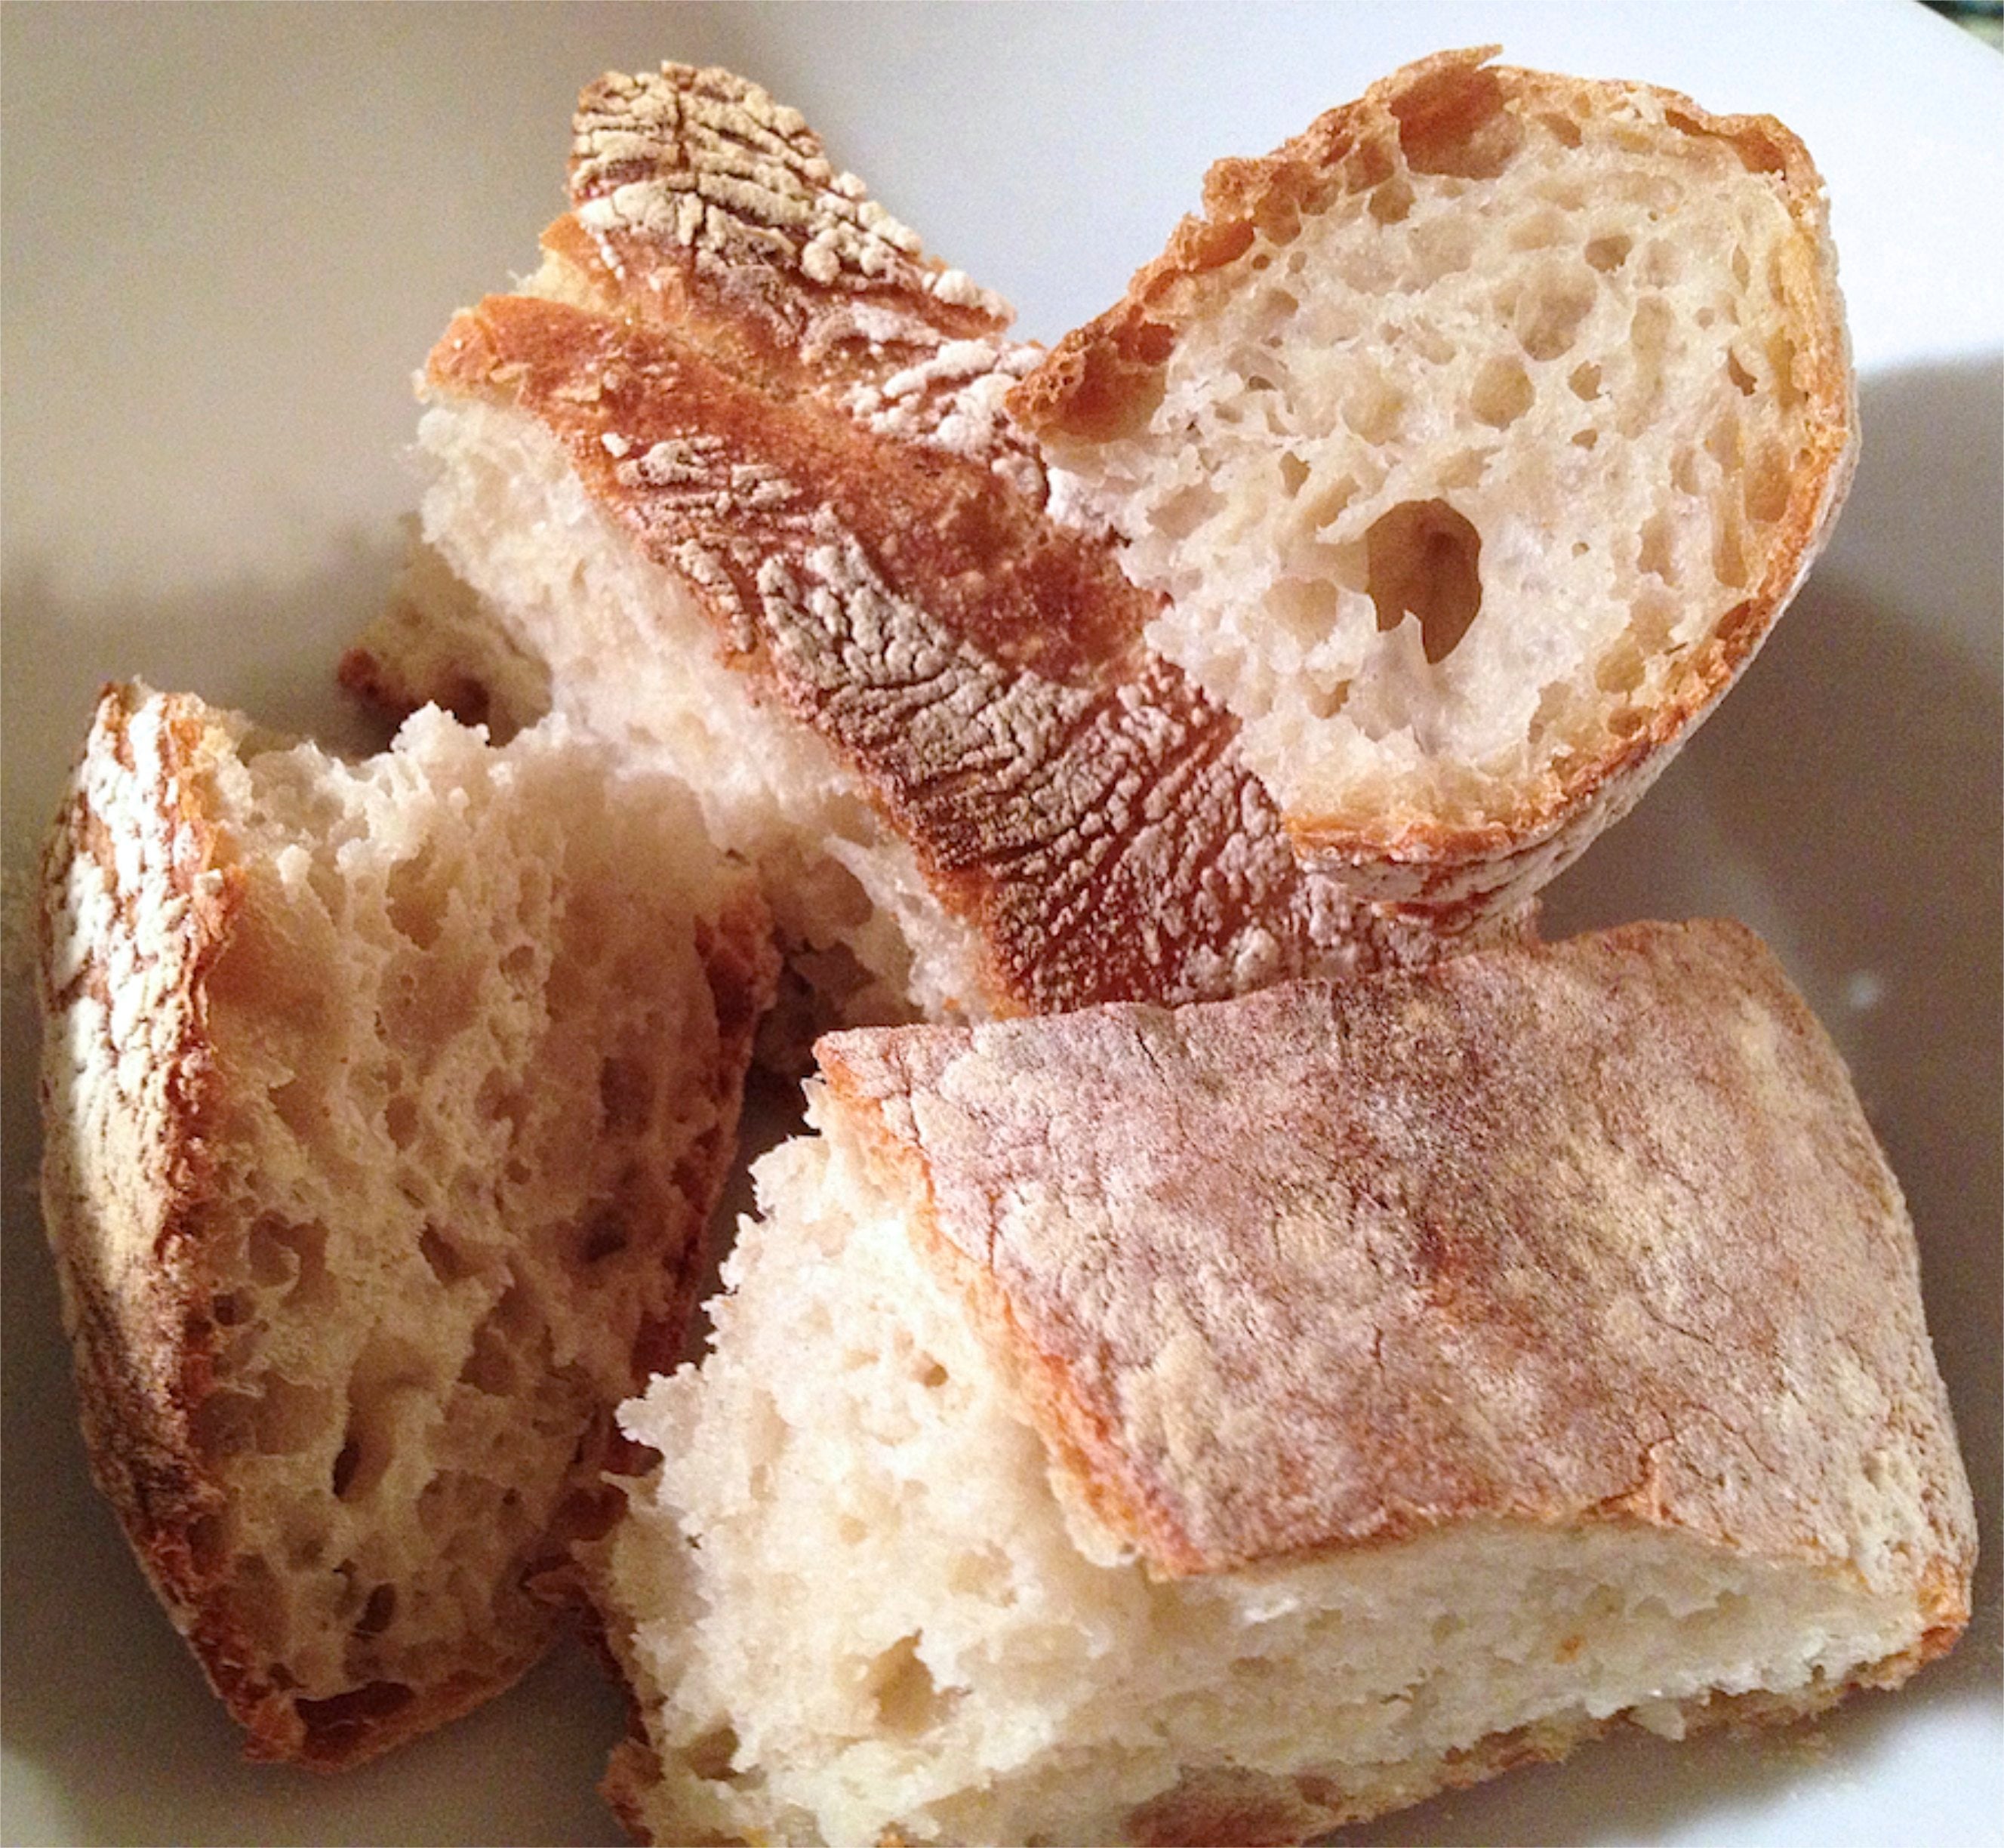
It’s tempting (and delicious) to eat a piece immediately, so go ahead if you must; but I find the bread’s even better after it sits 15 to 20 minutes, as it settles and the full flavor emerges. I find that artisan bread, especially the crust, reaches its peak about 30 minutes after it’s removed from the oven.
Although the whole process is quite long (about 6 hours, not including making the starter the night before), each stage is very short. Instead of being a slave to the process, I’ve learned that if something comes up, I can stop at any stage and simply cover the dough/loaves, put them into the refrigerator, and resume where I left off by removing the dough/loaves from the refrigerator and letting them sit for 30 minutes while I preheat the oven. It’s not always desirable, but it gives your schedule some flexibility and your bread will still be delicious.
One other trick about bread – no matter what you do, baking bread is messy, so WEAR WHITE!
If you get the “bread bug,” you might want to read more about it. As I said before, the ingredients are simple, but making great artisan bread involves many subtle processes, each of which is important and makes a huge difference in the quality of your bread.
There are millions of books on the subject of bread and baking, but I’ve found the following four books to be the most useful, and have listed them in order of complexity and detail, with the simplest first:
The King Arthur Flour Baker’s Companion: A wonderful book to get you started, chock full of information on baking, flours, and many great recipes. You can learn to make many different types of bread as well as pies, pastries, brioche, etc.
Baking Artisan Bread, 10 Expert Formulas For Baking Better Breads at Home, by Ciril Hitz: I like this book because it includes pictures depicting what the bread or dough should look like at different stages. There are pictures of “too little,” “too much,” “just right,” plus recipes for baguettes, ciabatta, pizza dough, bagel dough, and challah, among others, all of which I’ve made with good results.
Bread: A Baker’s Book of Techniques and Recipes by Jeffrey Hamelman: Jeffrey is the director of King Arthur Flour’s bakery in Vermont. This is the book to read once you want to get serious. It’s a textbook for bread bakers and used in most baking institutes. It’s well written, and provides great information on everything from recipes, history, and techniques, to how to stand so your back won’t hurt when baking. Jeffrey is one of the most famous bakers in the world. I call him the “J.S. Bach of Baking.”
Tartine Bread by Chad Robertson: Tartine is the most famous bread bakery in San Francisco, and Chad is obsessed with baking the perfect bread – his famous Tartine Country Loaf. I’ve borrowed many of his techniques, and refer to him as the “Chopin of Bread Baking,” as this book is a romance between Chad and bread. The Country Loaf recipe is 26 pages long! It’s a bit hard to follow unless you know the basics, but definitely worth it.
Ed. note: The photos for this blog were taken by three different bakers at three different times, as we each made loaves following this formula. Thus, don't be confused by different backdrops, different looks to the dough, etc. The recipe can produce varied results, depending on whether or not you use bread flour, and how accurate you are with your measurements. Enjoy this post for what it is – a visual recap of the bread-baking process – rather than a precise guide to making a specific recipe.