How to make bagels in the Ooni
A baker's tips for live-fired success.
Date
September 5, 2022

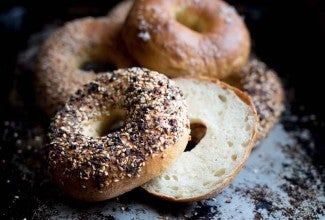
I’ve wanted to make bagels in my Ooni pizza oven since the day I got it. Crisp, fire-kissed rounds, tugging at my teeth with a whiff of wood smoke and a smear of cream cheese; that’s a baker’s dream. But I was afraid. This month, I finally decided to give it a shot. And then, a dozen more shots, perfecting the method until I was pulling beautiful bagels from the oven, rather than the charred rounds I made at the start of my experimenting. In short, I burned bagels so you don’t have to, and now I’m here to show you the way.
But first, a warning. If you’re looking for something with a little risk, and a big potential reward, this is the challenge for you. But the learning curve is no joke: At the start, you will burn some bagels. I did, too. But my step-by-step method will help you unlock Ooni Bagel: Level Expert in no time.
Before we get to the step-by-step, a few specific tips (don’t skip this).
If you’ve made pizza or flatbreads, roasted meat, or seared fish or vegetables in an Ooni, you know it’s all about the heat: too much and you produce charcoal, too little and “hot” becomes “not.” The key is to find the right temperature zone. Let’s talk heat.
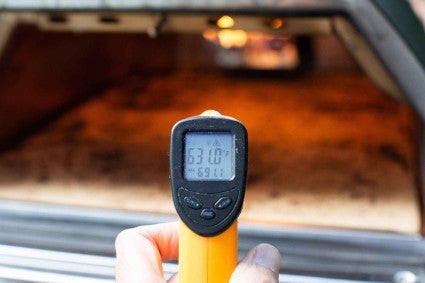
How hot for bagels? After burning more than I’d like to admit, I’ve found a sweet starting spot where the stone is around 600°F and the side wall temperature is around 800°F. (Use an infrared thermometer to measure.) (Heads up: At King Arthur, we only recommend the products that we, as bakers, truly love. When you buy through external links on our site, we may earn an affiliate commission.)
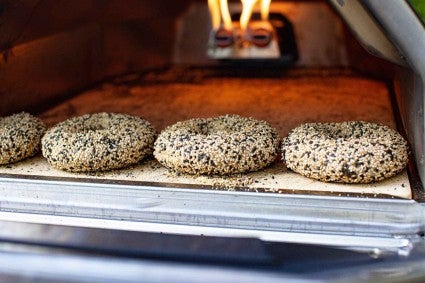
Once you’ve hit the desired temperature, immediately turn the gas to its lowest setting just before loading; for the wood- or pellet-fired models, let the flames fall to a low level, with just enough coals to keep a small fire going (use small sticks, adding bits at a time).
Baking with the receding heat gives the oven spring that we want initially, while the cooling oven supports the longer bake time required for maximum crispness and color. What I learned in testing was that I burned bagels when I didn't let the heat fall, though ultimately it's a balance. Not enough heat and they don't rise well or achieve the burnished crust of my dreams. So, start hot, then let the temperature fall.
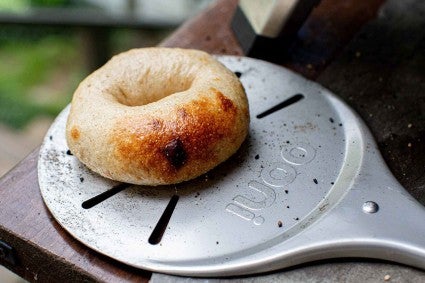
For your best bake, rotate. With a strong heat source in the back of the oven (or back and side, as with the Koda 16”), it’s easy for one side of the bagel to become Florida tan while another is as pasty as my winter self. Turning the bagels as you would a pizza (remove with a peel, rotate with tongs) helps to ensure mahogany all over. No tan lines!
And don’t stop there: In addition to turning, sometimes I flip. Flipping bagels while they bake (literally turning them over like pancakes) is a practice used by the pros: At Russ and Daughters, they use bagel boards, baking on one side and then flipping to ensure a crisp crust. At Montreal’s St. Viateur, they leave the bagels on the baking peel for the first portion of baking, then flip and finish. If my heat is a little high, or if I see a bagel that is well-baked except for the bottom side, I use a pair of tongs to flip. So: Rotate, then flip if necessary.
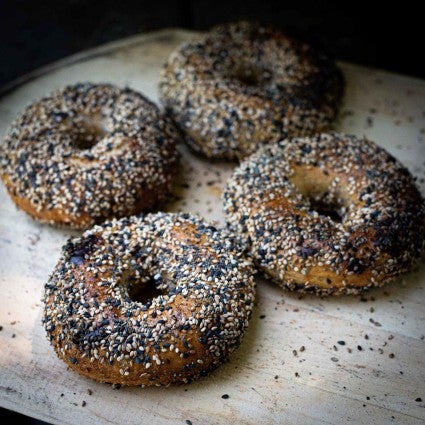
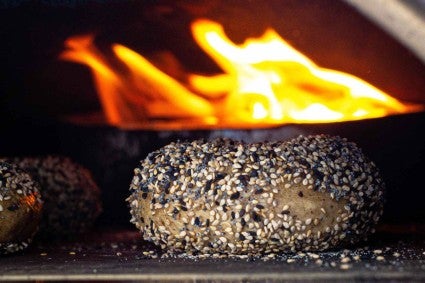
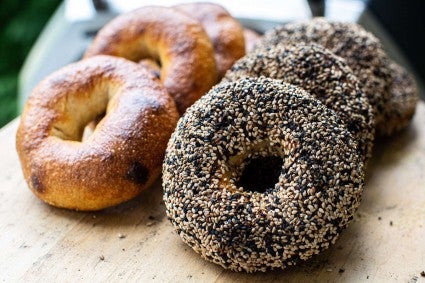
Sure, I’ll eat a plain bagel. But only after all the seeded ones are gone. Good news for me and all the other seed lovers: Seeds not only make bagels taste better, but they also make baking in the Ooni easier.
As mentioned above, you need to rotate the bagels early in the bake to avoid burning. But because you’re moving them before the crust of the bagel has fully formed, the bagels may stick to the stone baking surface.
Adding seeds, however, prevents sticking. After boiling, drain the bagel briefly then dip into seeds, turning once to fully coat. I’m an *everything* person so I use our Everything Bagel Topping, but just sesame seeds or poppy can work too. (Fully coating is the move here, as the seeds cover the sticky spots of dough. And don’t worry, rotating and flipping will keep them from burning.) When the seeded bagels slide onto the stone, they don’t stick. If you’re really set on plain bagels, though, here are two additional tricks to ensure your bagels won’t stick.
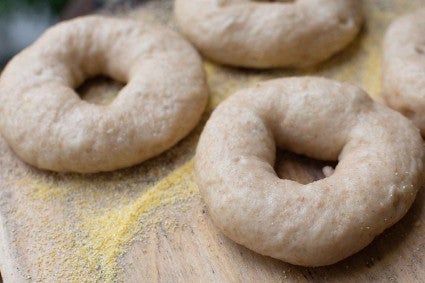
First, use semolina or coarse cornmeal. After boiling, briefly set the bagels on a kitchen towel to remove some of the excess moisture, then place on a peel that’s generously sprinkled with coarse cornmeal or semolina. As with pizza, the ground grain will act as ball bearings, helping the bagel to float on the peel and oven stone so it can easily be loaded and then rotated and flipped.
The second tip is to use parchment. Cut a piece of high-quality, heat-tested, half-sheet parchment in half crosswise (to make a rectangle roughly 8 1/4” by 12 1/4”). Place four to five bagels on it after boiling, then load the bagels — still on the parchment — into the oven using a baker's peel. At the 4-minute mark, rotate the sheet of parchment and bake for another 2 minutes, until the parchment begins to brown. Slide the bagels off the parchment and continue baking them for the remainder of time — about 4 to 6 minutes — directly on the stone. (If you don’t remove them from the parchment, it will blacken and burn.)
One note: Our parchment paper is rated for higher heat than many other brands. While the initial temperature of the oven is higher than the paper's rating, the short baking time and the removal of the paper after only a few minutes have proven successful in testing.
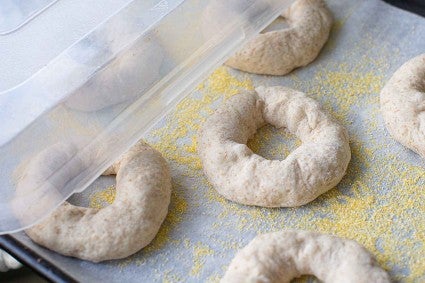
After forming your bagels, refrigerate the shaped pieces before boiling. Why? Chilling slows down the rate of rise, giving you time to get tools together, sufficiently preheat your oven, and bring the boiling liquid up to a good roll. Furthermore, chilling the shaped pieces firms them slightly, which makes for easier handling. Well-covered, the bagels can hold in the refrigerator for 1 to 2 hours or even overnight.
Here’s my method. Try it, then adapt for your Ooni model and desired bake.
Maybe it's obvious, but in case I haven't said it explicitly or with enough volume: I love this oven. If you're new to the game, I wrote another piece with broad tips and tricks for getting started; be sure to check that out. If you're a seasoned user, stay tuned for more content, more crispiness, more crunch, more fire, and more fun.
Cover photo by Martin Philip.