Crispy Cheesy Pan Pizza
Our 2020 Recipe of the Year has become a household classic, with its crispy golden edges, gooey layer of cheese, and thick yet delicate crust. Martin's here to show you through the "tricks" of this unique recipe: a nearly no-knead method to create airy pockets in the crust; overnight refrigerated rest to develop maximum flavor; baking in a cast iron pan for that audibly crispy crust; and finally, the unique layering of cheese beneath the sauce to avoid sogginess. See why Crispy Cheesy Pan Pizza is such a sensation for homemade pizza night, year after year!
- Something like that is kind of like why people keep eating pizza, you know? If pizza wasn't that good, it wouldn't be the most popular food in the world.
Hey, Bakers, it's Martin. I'm here in the studio today and I'm making our Crispy Cheesy Pan Pizza. This is a perennial favorite, we haven't done it recently, let's make it. Recipe link is right below in the description.
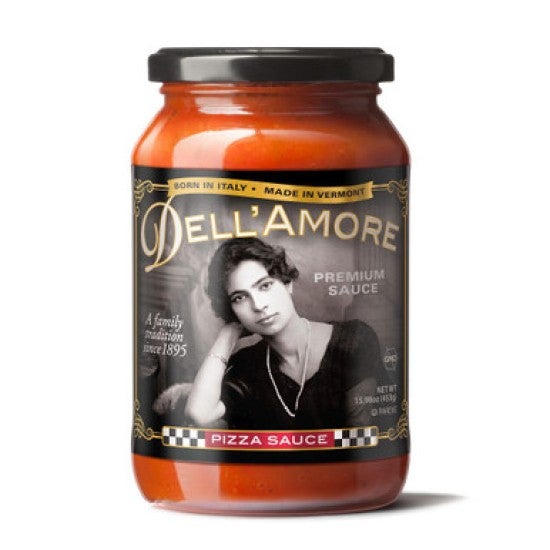
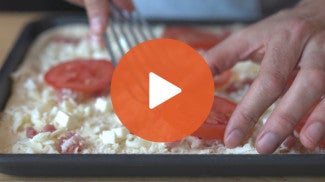
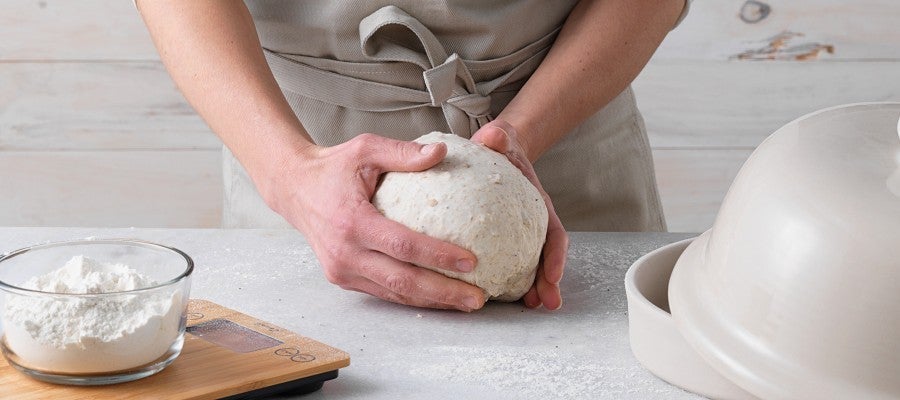
Okay, so let's do the mix for our Crispy Cheesy Pan Pizza. I've got my two quart container. I'm gonna put it directly onto the scale. I'll make sure that I'm tared, zero it out. And then I'm gonna add two cups, or 240 grams of all-purpose flour. If all you have is bread flour at your house, use bread flour, don't even sweat it, it's gonna be fine. I like all-purpose for making quite a few different types of breads because it does bring a little bit more tenderness, and sometimes I want that. Sometimes I need a little tenderness. And then I've got half a teaspoon of instant yeast. Sometimes with those very small amounts I switch to teaspoons because volumetric at those low, low numbers where the scale sort of struggles with accuracy, volumetric can be a little bit better. But by and large, larger numbers, scale, perfect tool. Three quarter teaspoon of salt, 170 grams of lukewarm water. And about a tablespoon of olive oil. And that's it, and then we'll give it a mix with our wooden spoon. The ratios of this dough, if we sort of look at it in terms of like, what might this dough resemble that we've baked before? And what I'll tell you is that it's very similar to a focaccia dough. A little bit of oil, flour, salt, yeast, pretty straightforward. And it's a soft dough, pretty sticky, and it's not even that smooth yet. If I look in there, it's not that smooth yet. But we're gonna come back, and we're gonna fold this four times in the course of 20 minutes. 20 minutes, four folds. We're just gonna go in and give it a little bit of strength. We'll be back in five minutes for our first fold. All right, so ding ding, five minutes. And, you know, don't be too uptight about the five minutes. If it's 10 minutes, if it's 15 minutes, remember, you're in charge of the dough. If it goes a little bit longer, it's not gonna hurt anything, okay? So don't be too sort of stressed out by that rigidity. With a wet hand, I'm gonna go into the container and I'm just gonna give it a bowl fold. Working my way around, stretching and pressing from the outside to the center. So this is really a matter of just sort of tensioning the dough. And at this point, I'm also just checking to see, have I done a good and thorough job at the initial mix of making sure that the ingredients are well distributed? In this case, I feel like I did sort of a mediocre job. I can feel a little bit of sort of areas where it's not quite homogenous. And so, maybe I spend an extra second just sort of folding and pressing. It's still a bowl fold, but I'm almost like kneading in the container just a little bit, just to sort of smooth it out and make sure that my ingredients are well distributed. Put a lid on it, come back in five minutes. You can set a timer with your heart if you want, and not worry about it. Come back when you have a second, that's okay too. Fold number two. So the dough already looks like it's really smoothing out. It looks beautiful. I bet that I could even pull a window pane. And that is the value of time in bread making. Good basic flour, right? All-purpose, beautiful. Plenty of strength to make bread. And we're what, 10 minutes into bulk? And it'll already window pane, that's the magic of gluten. So I'm gonna give it a couple folds. I'm gonna go into the bowl, grab on the outside, stretch up, press to the center. I know the recipe only says four. But if you feel like, as I did with the first fold, that it can use a little bit more, or you feel like it's not quite as smooth as we want it to be yet. This is your dough, you make those choices, it's okay, it's not gonna hurt it. Come back in five minutes, we'll do our third fold. Okay, fold number three. And the dough is looking like it's definitely strengthening. If I get my hand in there, I even feel a little bit of activity, honestly, even in those few minutes. It feels great. Starting with the outside, stretching it up. And look at this, beautifully sort of elastic. That's exactly what we want. Dough's behaving very well. Make your way around the outside, stretching and pressing into the middle. Put the lid on, we'll come back in five minutes for the fourth and final fold. Okay, fourth and final fold. See what we got going on here. Boy, the dough feels nice. It's just a nice dough to handle. At this point, it's absolutely smoothed out, it's luxurious. And that's it, that's the last touch until it's time to shape it. So get your lid on there. We're gonna leave it at room temperature for 40 minutes. Could be a little bit longer, it's okay. The idea here is that after the folds, you sort of let the dough start to recover to sort of rise a little bit more fully. And then we're gonna put it into the fridge for a minimum of 12 hours, but up to 72 hours. So, a few days. Okay? So happy nappy, we'll see you on the other side. Okay, let's get our dough into the pan. We have a dough that's been in the fridge for a minimum of 12 hours, but up to several days. In that sort of fridge period, it's developing flavor. It's also making your life easier, believe it or not. I've got some olive oil and I'm using a cast iron. I really like the cast iron aspect of this recipe. I feel like a lot of people are putting Detroit-style pizzas into cast iron these days. The black color is not dissimilar to the Lloyd Pans, which are also black anodized. It's a great color for baking. Black is actually helpful in terms of like the thermodynamics of the pan itself. Maybe we just take a peek at the dough and see what we think before I dump it into the pan. Looks beautifully fermented. Good fermentation around the sides. If you look, lots of small bubbles. That tells me that the dough rose well in the container. So let's get some olive oil into the pan. This is a tablespoon and a half of olive oil. Is that a lot? Yes, it is a lot. But the olive oil is gonna contribute a couple things. One is the crispness, sort of first and foremost, it's gonna give us this crispness. I'm using my hands just to sort of bring it up the sides a little bit because this dough is gonna move some. Make sure you've got good coverage there. And then you can just dump the dough into the pan. And then once it's into the pan, you're gonna invert it once just so that you've got a nice sort of oil-covered side on top as well. So then gently, but also acting like I'm in charge of this dough, I'm gonna press it out to fill the pan. And if the dough has fermented well and sort of relaxed in the process, this shouldn't be something that's challenging to do. The should sort of play ball with you. And if it's still being a little bit of a problem child, you can give it another 15 minutes. But I really don't think that if you've done the other aspects of the recipe well, if it's fermented well and so forth, I don't think you're gonna have an issue there. We're gonna cover it, we're gonna leave it to rise at room temperature for about three hours. And that seems like a long time, right? In terms of like a bread dough and its final rise. But what we're looking for here is a nice full rise, which will give us this sort of open interior that we're looking for, which will contribute to crispness and tenderness and all of those delicious aspects. Towards the end of proof, make sure that you're preheating your oven to 450 degrees. And that your ingredients and toppings are ready to go. And we'll be making pizza in no time. Okay, pizza time. It's been about three hours. I had this dough rising in a nice comfortable spot with a lid on it to protect it from drying. It looks jiggly to me. I see some bubbles kicking around. I'm not waiting any longer, let's get this into the oven. So I'm gonna start with my cheese here. I've got some low moisture mozzarella. It's six ounces, about 170 grams, and it's just grated. I'm gonna put about three quarters of that quantity onto the pizza. Then I'll add a small amount of sauce, and then I'll use the remainder of the cheese just to sort of garnish it. One of the things that I really like is the way that cheese sort of crisps along that edge. I might even recommend that you add a thin amount of cheese around the perimeter first, and then you can sort of fill in some on the top. So the idea here is that the cheese goes on first and then you create this layer between dough and cheese and then the wet sauce. It helps to support the crispiness a little bit. Now we're gonna go with some sauce. It's not a heavy quantity of sauce, it's only about a half cup, 113 grams and you can use any sauce that you want. You could use a canned pizza sauce, no shame in that. If you have a nice tomatoey pasta sauce kicking around your house and you wanna use up some of that, that's fine. So I just went in with the dollops of the sauce. It doesn't look like much. But as it sort of bakes, the sauce will find its way into the nooks and crannies. And I think you'll be happy with that amount. I'll go back with that small amount that I had remaining of cheese. Okay, so we're gonna get this in. I'm gonna put it in the lower third of the oven, 18 to 20 minutes, 450 degrees. At some point during that process, sort of towards the end, I'm gonna take an offset and I'm just gonna peek underneath and make sure it's browning well. If I feel like I want some more color on top, I'm gonna pop it up to the upper third of the oven and I'll give it a little bit more time just to make sure that those toppings are as beautiful and sort of colorful as I want them to be. So enough talking, let's get this into the oven. It looks great, I gave it a second to cool. I ran an offset spatula around that edge just to make sure that it's gonna come out in one fell swoop. If you feel like you're going to try and get this out of the pan and it's not releasing easily, it probably needs a couple more minutes in the oven. Don't be afraid to sort of use your heavier hand in terms of the quantity of bake. We want this to be cheesy, yes, but also crispy. And the way that you get it crispy is by using that oven as much as possible. So don't be shy about the bake on this, okay? I'm gonna go ahead and get it out of the pan. And it should come out in one fell swoop no problem. Beautiful, beautiful characteristics. I mean, the recipe is called Crispy Cheesy Pan Pizza and... Yeah, it's crispy. If you had any doubts, you can now be free of those doubts because it's definitely crispy. Let's look at the underside and see how we did there. It's crispy, golden brown, beautiful. Really, really nice. Let's garnish with a little bit of Parm, just a little bit. I mean, is it for flavor? Yes, but it's also just that it's beautiful. And a little bit of chili flakes. You know, don't skip garnishing. It's the mint on the pillowcase of baking. It's that thing, it's that extra little piece that says, "Hey, I care about you, I care what I'm doing. This is how I can make it as beautiful as possible just for you." I'm gonna take it off the cooling rack, get it onto a cutting board, let me find a knife. And we'll cut a piece. Crispy Cheesy Pan Pizza, this was our 2020 Recipe of the Year. And I'll tell you what, it hasn't aged a day. It is still gorgeous, crispy, cheesy, compelling to eat. A beautiful pillowy dough with a feathery texture. I recommend you make it. I appreciate you joining us. We'll see you in the next video. This is Martin, Tucker, and Ryan, and everybody else in the studio today saying, happy baking.

Video Credits
Shop this video


Related Videos


Your bread fell flat. Your cookies crumbled. Who do you turn to?