How to make a sky-high cake without the oven
Crêpe cake to the rescue.

Date
July 14, 2021

Imagine a cake that’s a dozen layers high but doesn’t require turning on the oven. A cake that’s filled with pastry cream but doesn’t require any fussy piping. A cake that’s Instagram-worthy but easy enough to make in under an hour. That cake exists! Behold, the crêpe cake.
Crêpes occasionally make an appearance at dessert time. They might get a dusting of confectioners' sugar and a squeeze of lemon juice, or perhaps a smear of chocolate-hazelnut spread. These dishes are undeniably delicious, but they’re just the beginning of what crêpes can do.
Let’s turn these delicate, French-style pancakes into a towering, decadent cake. As promised, it won’t require the oven and takes practically no time at all, especially if the filling is made in advance.
To make a crêpe cake, you need two basic components: crêpes and filling.
Mix and match your favorite recipes and create an entirely new cake creation, or follow our recipe for Chocolate Crêpe Cake for a fantastic final product.
If you’re going the “choose your own adventure” route, aim to make about 18 to 20 medium (8”) crêpes and a scant 3 cups of filling. This will ensure your cake is tall and generously filled.
Do yourself a favor and start thinking about the filling before making the crêpes. Consider the flavor profile you’re going for — fruity? Vanilla-infused? Chocolatey? Nutty? Will the filling complement the crêpes or provide contrast?
Anything that’s thick, spreadable, and delicious can act as a filling: frosting, lemon curd, jam, or my personal favorite: pastry cream.
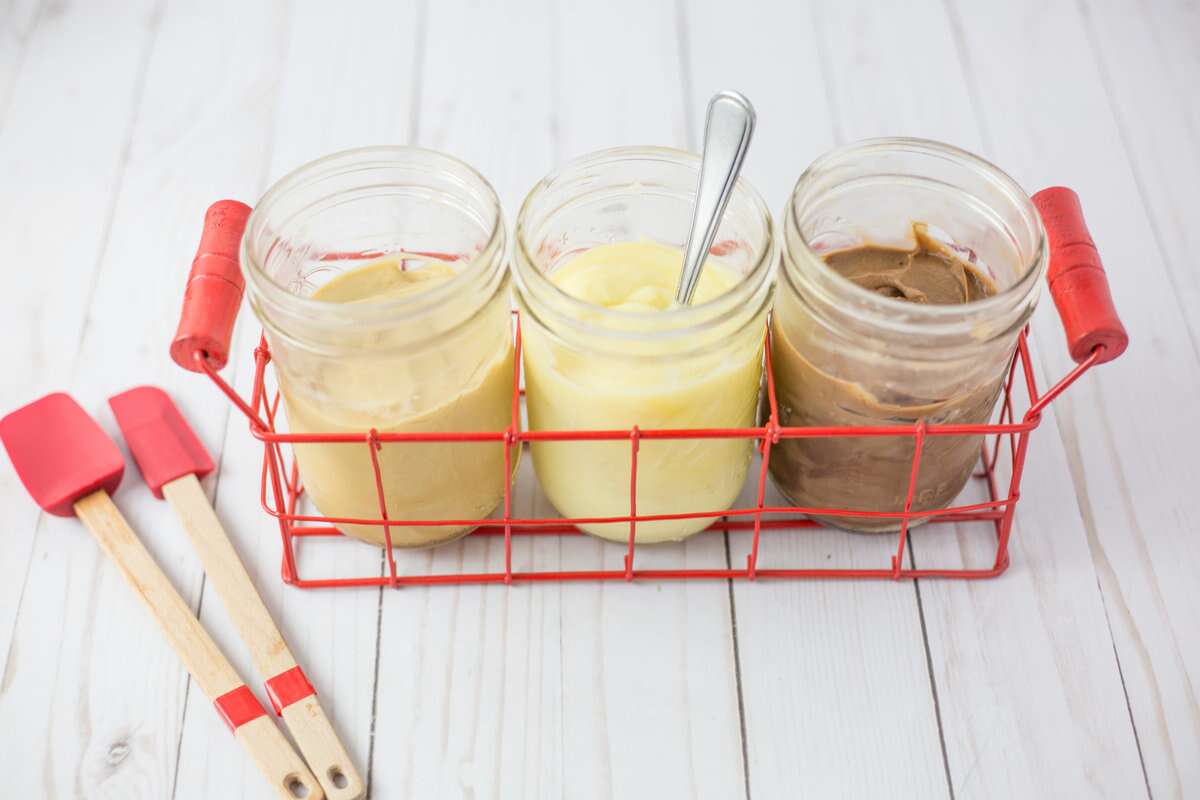
If you’re going the pastry cream route, you have flavor options. Use one of the variations (butterscotch, citrus, pistachio, and more!) outlined in the baker's tips at the bottom of our Pastry Cream recipe. Or make the vanilla version outlined in the recipe and then once it's chilled, fold in a flavorful addition like fruit purée, liqueur, or in my case, chocolate-hazelnut spread.
Regardless of your flavoring approach, make a slightly thicker version of pastry cream to give your crêpe cake body and stability. Here’s how:
If using our Pastry Cream recipe, increase the amount of cornstarch to 1/3 cup (39g) and omit the 1 cup (227g) of optional whipped cream.
If you’re looking for a shortcut, use our Quick-and-Easy Pastry Cream Mix and increase the amount of mix to 1 3/4 cups (198g) for a stiffer final consistency.
Whichever route you go, prepare the filling and allow it to chill for about an hour to fully set before you start making the crêpes.
While you most certainly can make a batch of plain crêpes, you’re not limited to this basic approach. Jazz them up by adding your favorite extract, citrus zest (grated rind), or cocoa powder (because let’s be honest: nothing says dessert decadence like chocolate).
To make a batch of chocolate crêpes, here’s what you’ll need:
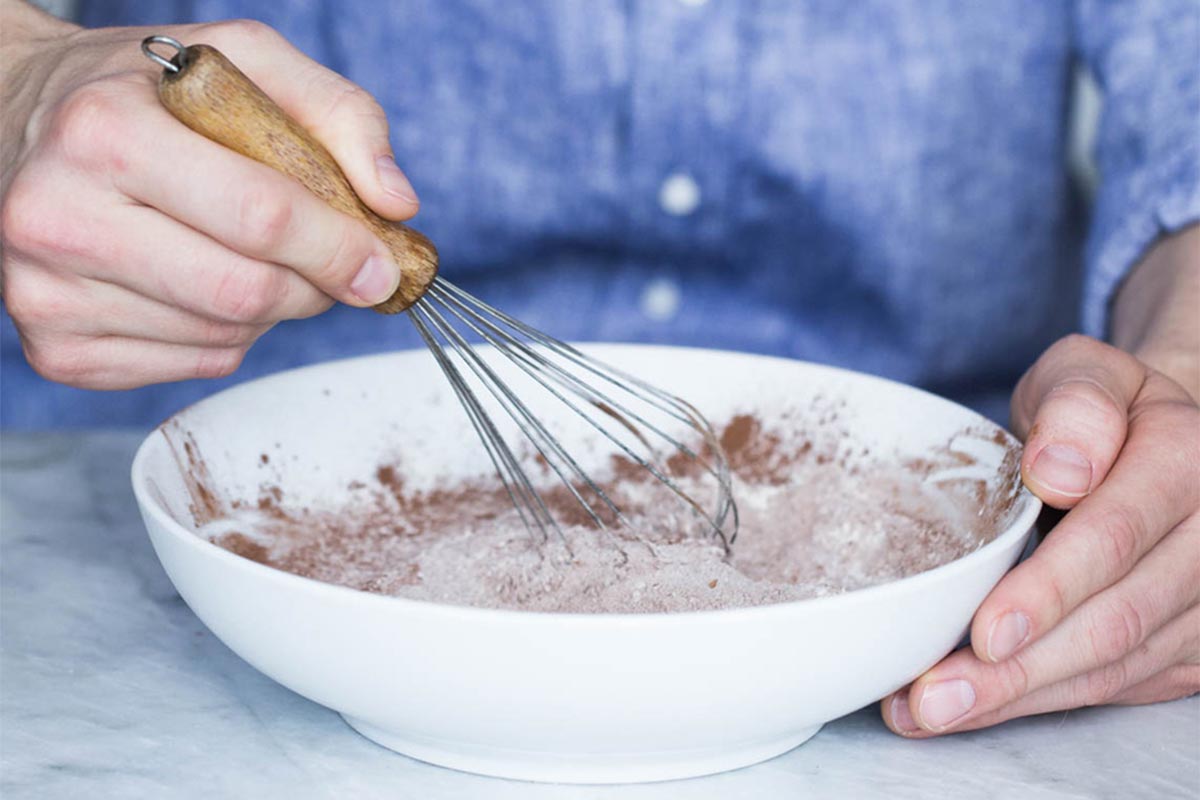
1 3/4 cups (210g) King Arthur Unbleached All-Purpose Flour*
1/2 teaspoon salt
1/4 cup (21g) unsweetened cocoa, Dutch-process or natural
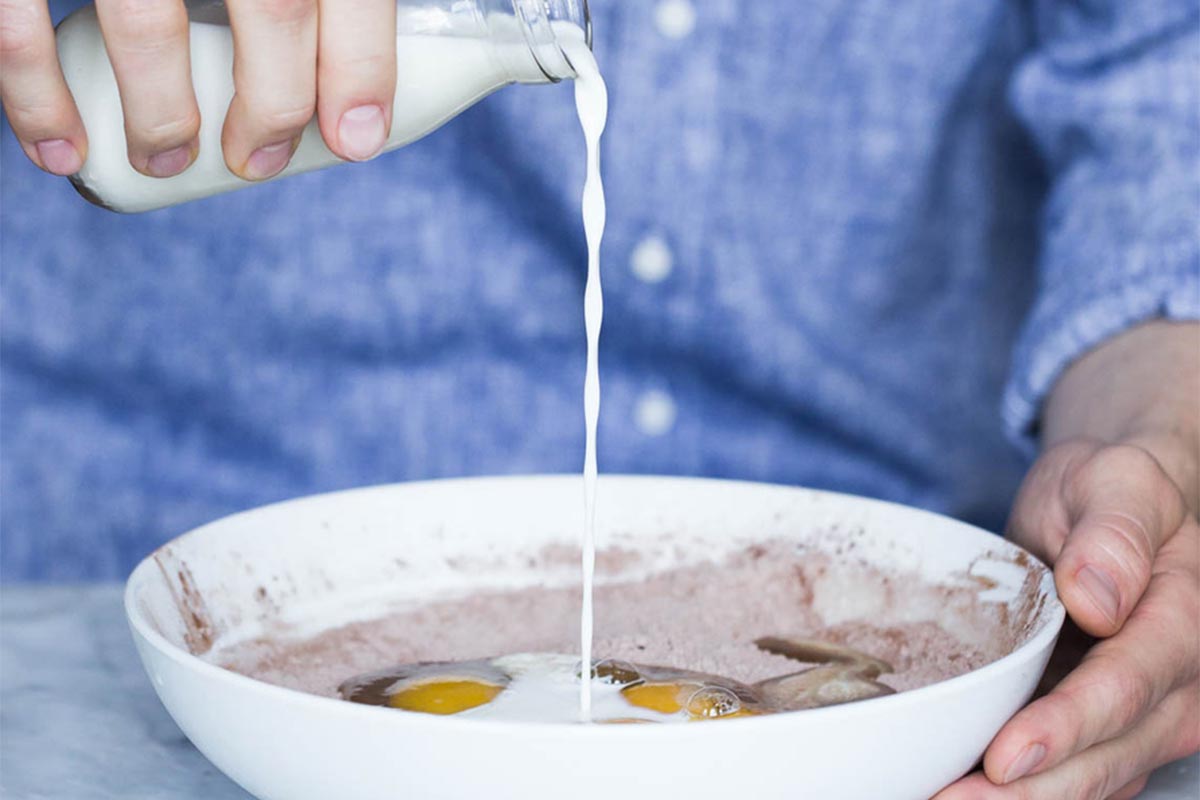
4 large eggs, at room temperature
1 1/2 cups (340g) milk, at room temperature
8 tablespoons (113g) unsalted butter, melted
*To make a gluten-free version, substitute an equal amount of Gluten-Free Measure for Measure Flour and make sure all your other ingredients are gluten-free, if needed.
Mix together the flour, salt, and cocoa powder. Both Dutch-process and natural cocoa powder will work in this recipe; Dutch-process will yield a more pure, bittersweet chocolate flavor.
Next, whisk in the eggs, milk, and melted butter. Starting with room temperature eggs and milk makes incorporating the wet ingredients into the dry easier.
Continue to whisk the batter until smooth. You don’t have to worry about overmixing here because of the high hydration (it’s a wet batter), and it’ll rest before being cooked.
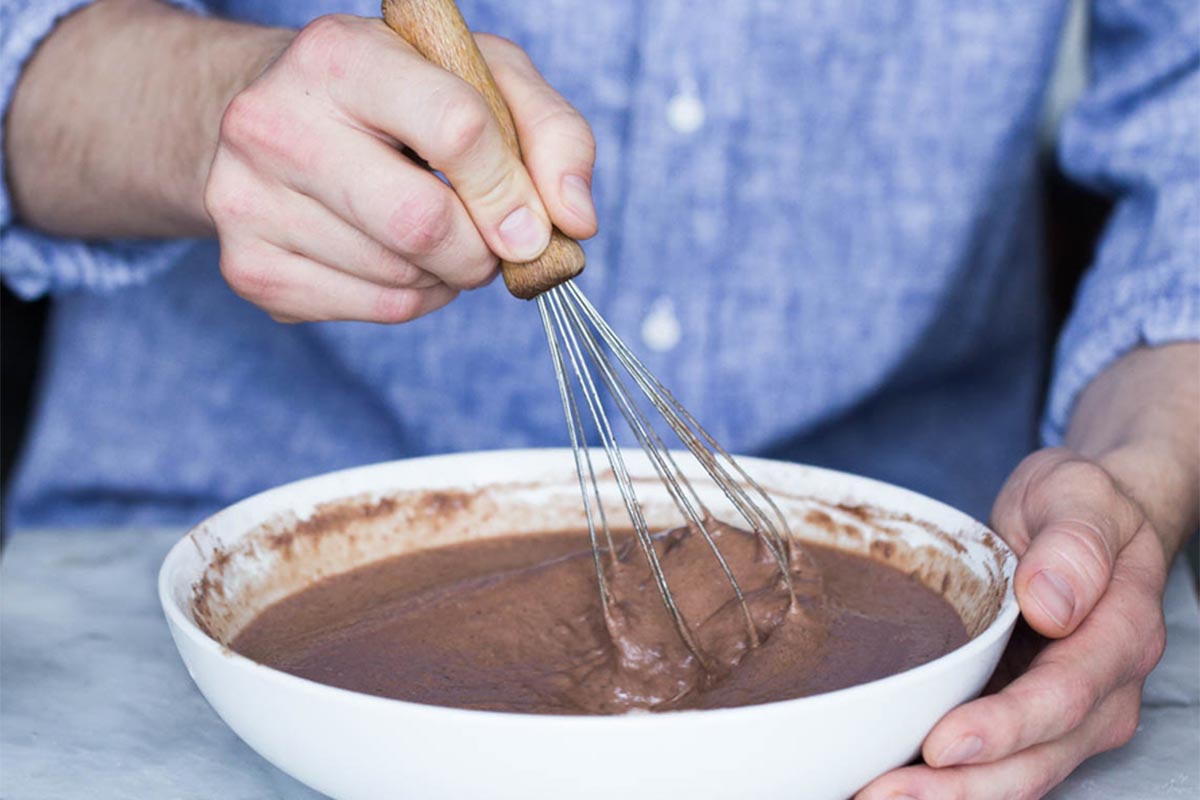
Pour the batter through a strainer into a clean bowl to remove any lumps, then set it aside to rest at room temperature for 30 minutes. This brief pause allows the batter to thicken slightly and gives the gluten a chance to relax, yielding more tender crêpes.
If you have a crêpe pan, now's the time to pull it out. If you don’t have one, that’s fine too. Use any 8” to 10” nonstick skillet.
Toward the end of the rest period, heat the crêpe pan according to the manufacturer's directions. If using a skillet, preheat it over medium-low for a few minutes. Melt a small pat of butter in the pan and swirl it to get even coverage.
Cook a test crêpe or two by spooning about 1/4 cup of batter into the pan and swirling it until you have an even 8” circle. If the batter is too thick to work with add a bit of milk, a tablespoon at a time, until it’s pourable. (It should be thinner than traditional pancake batter.)
If the crêpes start setting before you’re able to spread the batter evenly, turn down the heat slightly.
Once you have the right batter consistency and pan temperature, cook the rest of the crêpes. Allow the cooked crêpes to cool on a rack until you’ve used all the batter. (You can stack them once cool.)
While the crêpes are cooling, add any finishing touches to your filling, if needed.
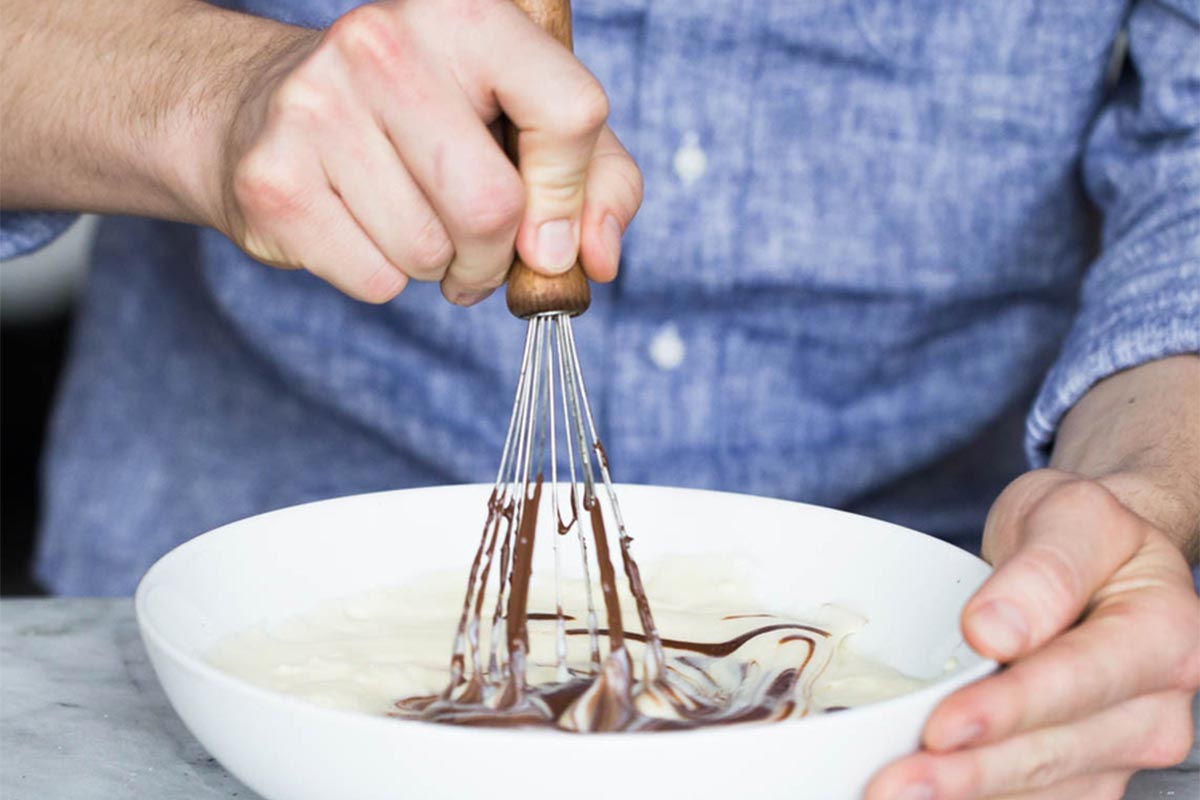
If you haven’t already flavored your pastry cream, now's the time to add ingredients like jam, nut butter, or chocolate-hazelnut spread. Trust me, this is going to send your crêpe cake over the top with flavor.
Start with 2 cups (510g) of pastry cream and about 3/4 cup of your flavor addition of choice (jam, spread, etc.). Warm the ingredient you’re adding in the microwave for about 20 seconds until it’s soft and almost pourable. Add it to the chilled pastry cream.
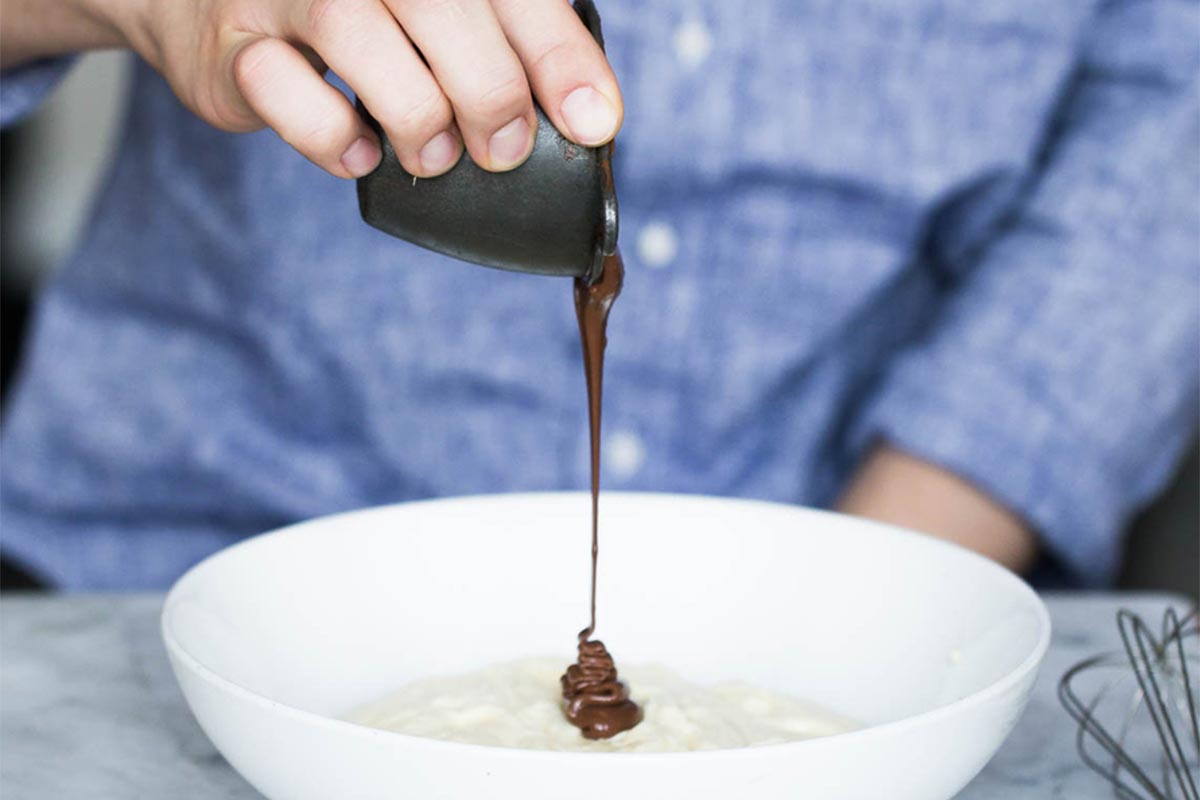
Whisk the pastry cream mixture until it’s smooth and lump-free.
Now that your two main components are prepared, it’s time to start building your crêpe cake!
To assemble your crêpe cake, start by stacking three crêpes on a serving plate. Beginning with three crêpes that aren’t separated by filling creates a solid base for your cake that will hold up when sliced.
Next, spread about 2 tablespoons of filling evenly over the top of the crêpe, leaving about 1/2" around the edge bare. (An offset spatula is an excellent tool for this job.) Gently place another crêpe on top of the filling.
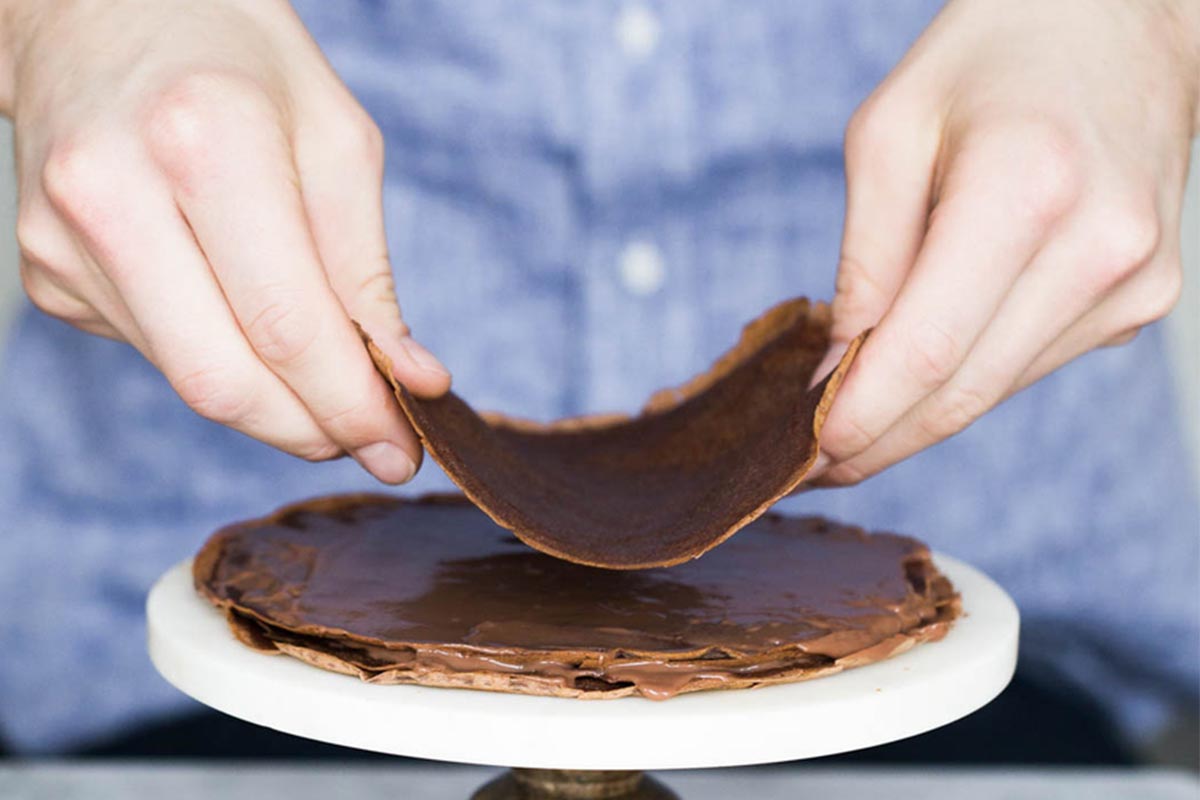
Continue to layer a single crêpe and 2 tablespoons of filling until you're nearly out of crêpes. Depending on the number of crêpes you have and the thickness of your filling, occasionally layer two or three crêpes at a time instead of a single one for added stability.
End with a layer of three crêpes on top, then wrap the whole cake tightly in plastic or your favorite reusable wrap. Gently press down on the top of the cake to help the filling even out and spread almost to the edges. If the filling starts to ooze out between the layers, use a clean spatula or a bowl scraper to remove any excess, or smooth it along the sides as if decorating a naked cake.
Chill the cake in the fridge for at least an hour or up to overnight. While it’s difficult to wait to dive into your beautiful crêpe cake, it’s worth it. While the cake chills, the crêpes absorb some of the moisture from the pastry cream and become more cake-like in texture. The filling becomes firmer and the cake sets, making it easier to slice and eat.
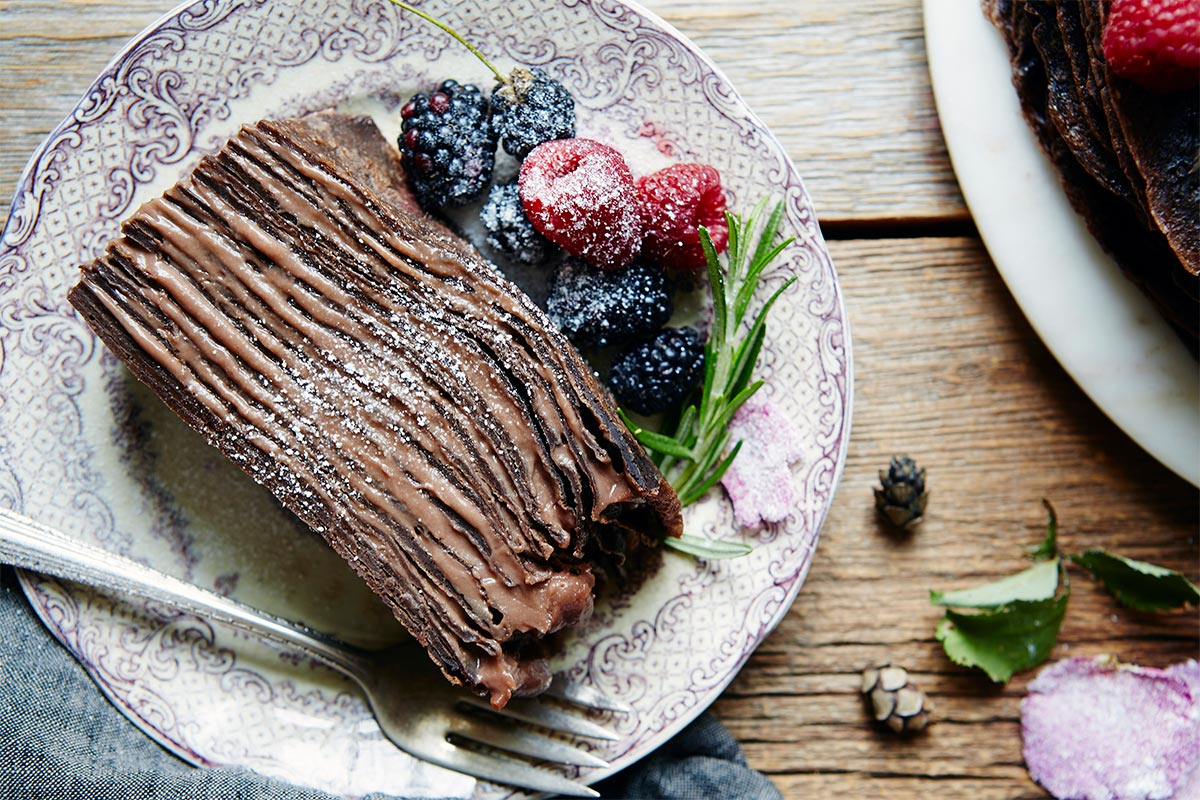
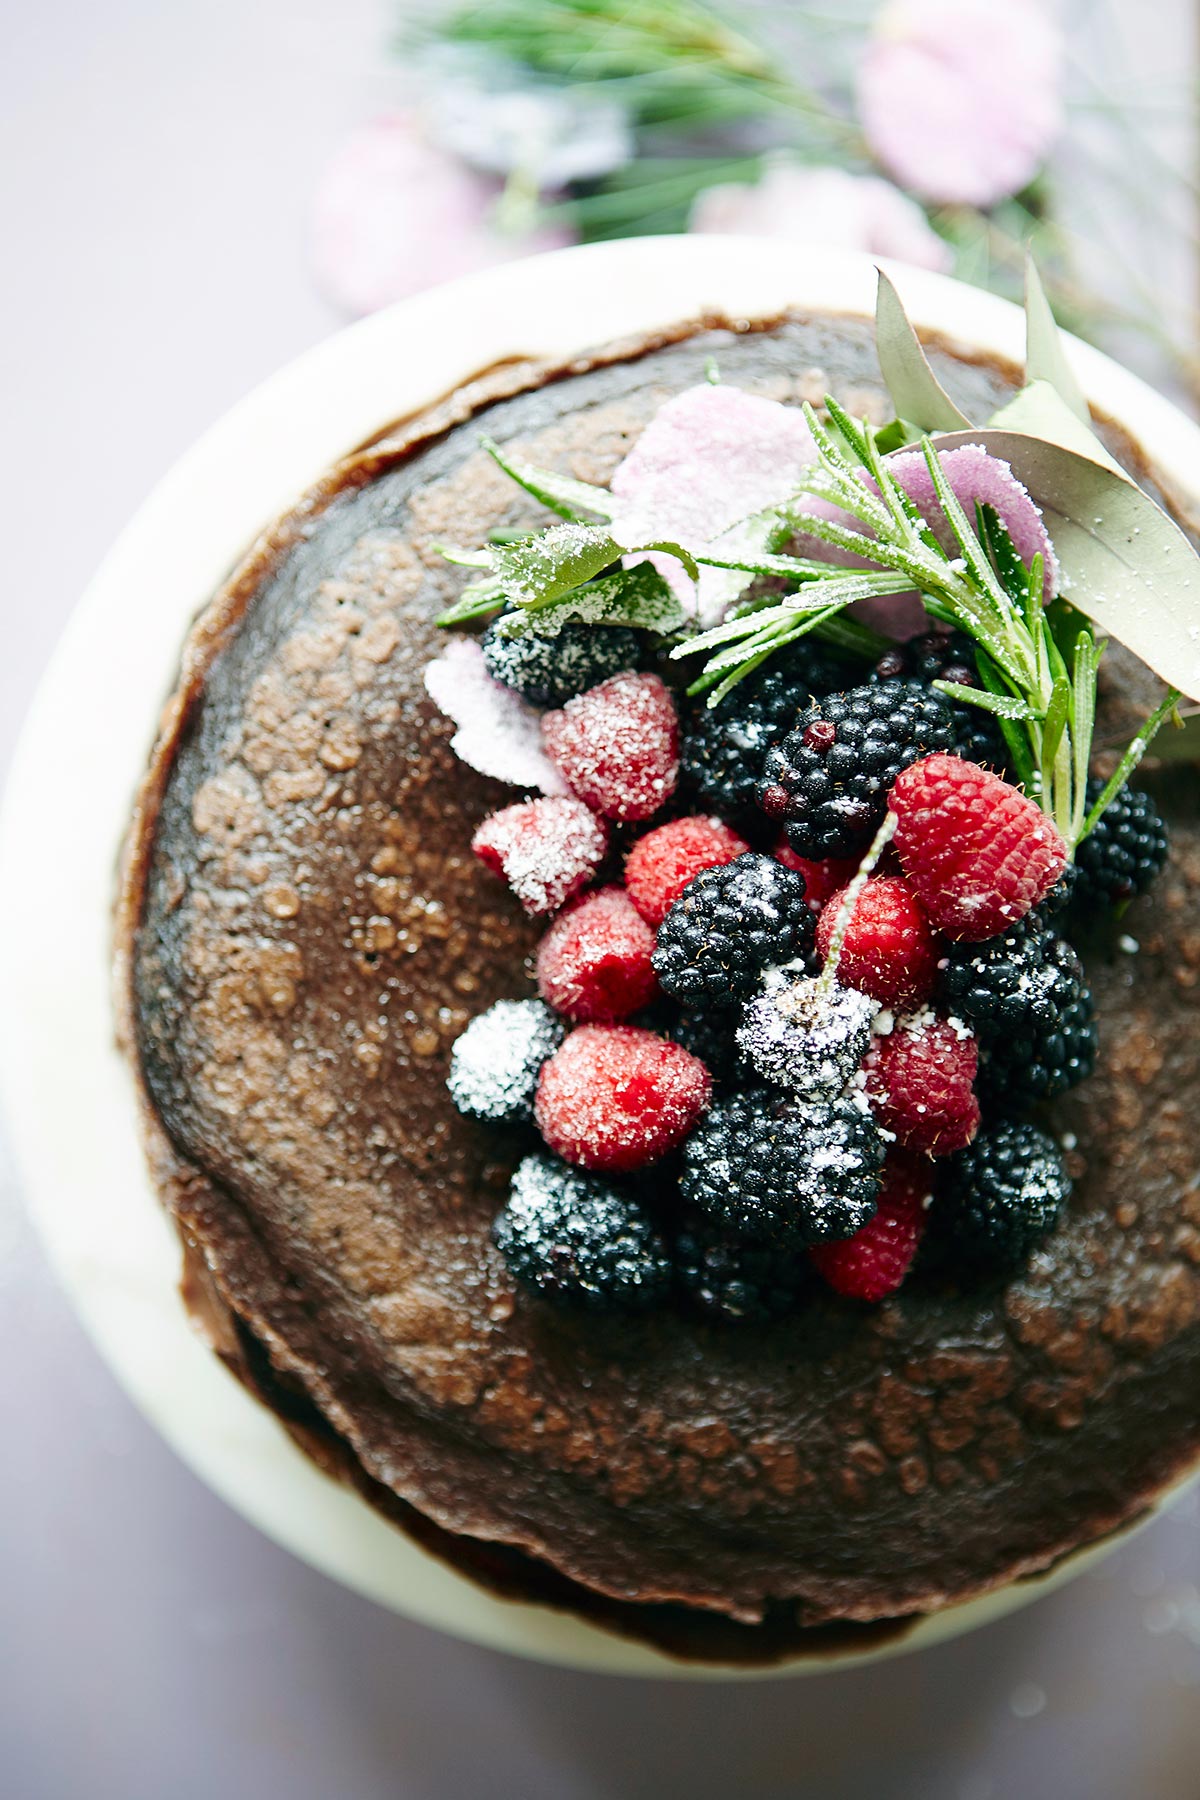
Before serving, remove the cake from the fridge and garnish it, if you like. A simple dusting of confectioners' sugar and a pile of berries always looks fresh and elegant.
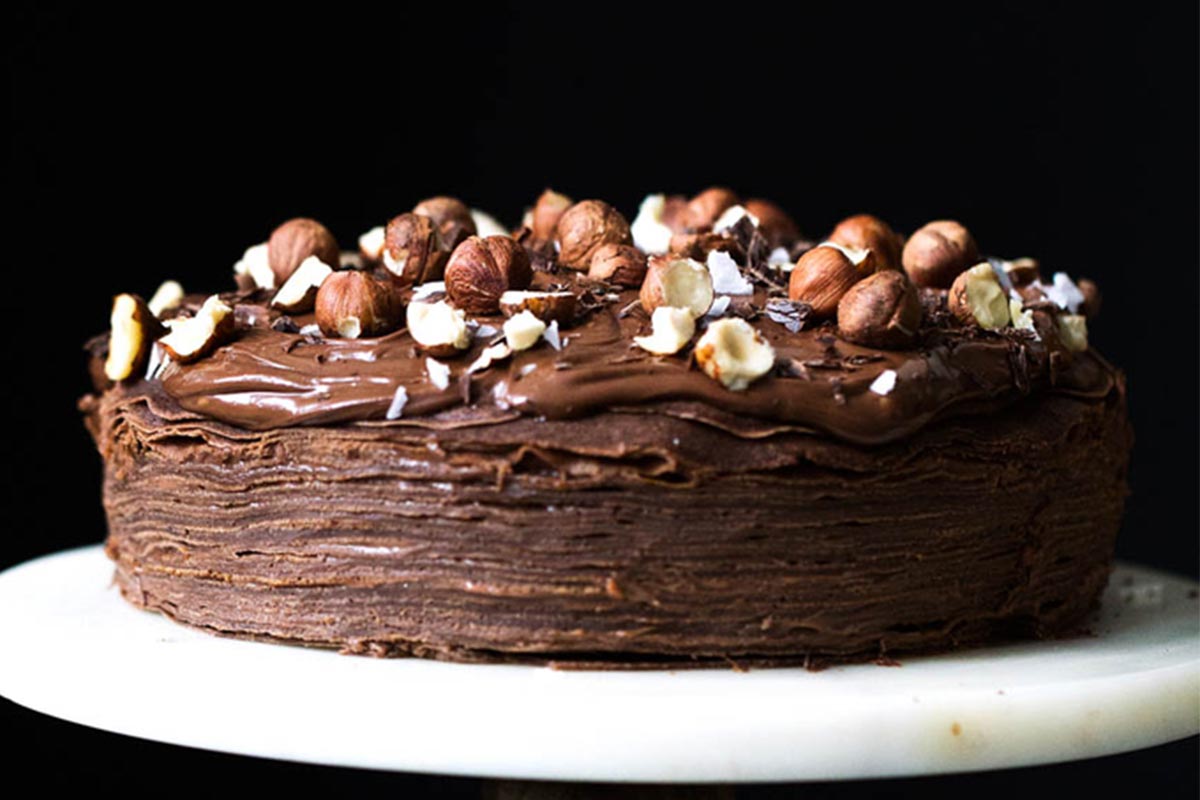
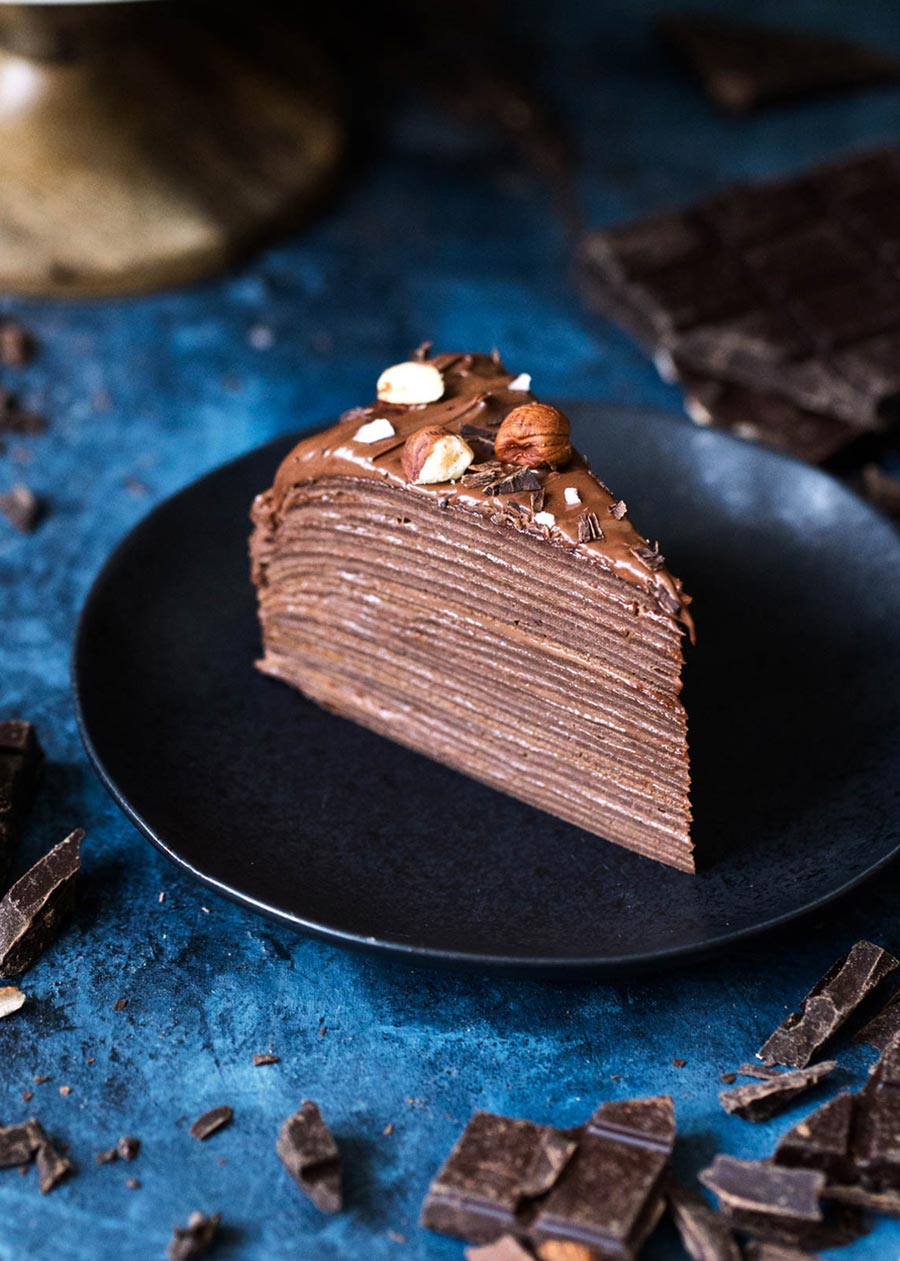
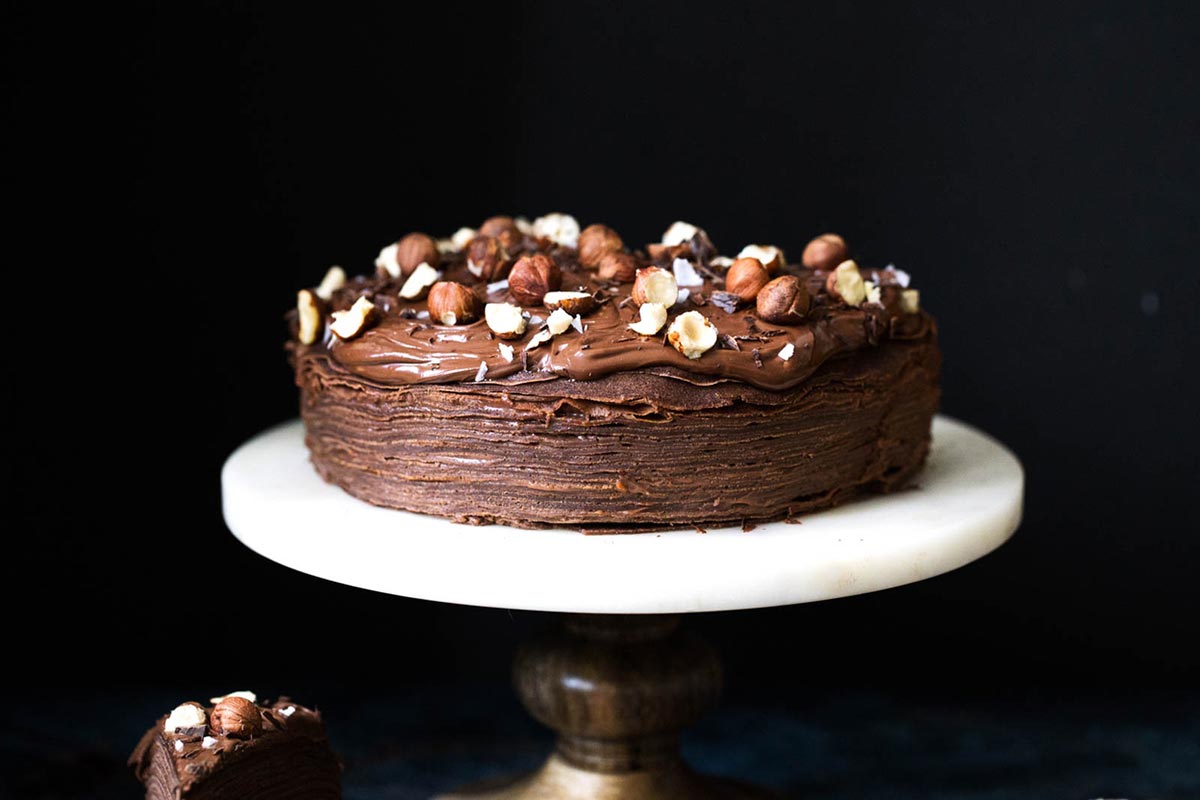
Or for an extra touch of decadence, pour some hot fudge sauce or chocolate ganache over the top. A sprinkle of toasted nuts will add flavor and texture to your cake.
All that’s left to do is cut the cake into slices and serve with a smile!
Looking for other impressive desserts to make without an oven? See our collection of No-Bake Recipes for 16 more treats that are ideal for hot weather baking, or when you just don’t feel like turning on the oven!
Cover photo by Erica Allen; all other photos from Broma Bakery unless otherwise noted.