How to make a lattice pie crust
For pies that look as good as they taste.

Date
July 1, 2021


You know how you're not supposed to judge a book by its cover? The same could probably be said of pie: No matter how unassuming in appearance it may be, there could still be a delightfully flavorful filling tucked inside.
Except, bold book covers are still the ones that draw the eye, just like a stunning pie will immediately elicit intrigue and admiration. Maybe we should think of things the opposite way: Don't you want a pie crust that looks just as good as the inside tastes?
When it comes to decorative pie crusts, no design is more classic than a lattice. Offering a suggestive peek at the enticing fruit filling underneath, it's a simple way to gussy up any pie presentation.
Here’s how to pull it off.
Just about any pie crust recipe can be used to make a lattice. Use your go-to recipe, or choose one of our reliable recipes like Classic Double Pie Crust or All-Butter Pie Crust. For particularly intricate designs (like this quilted pie crust), Rustic Milk Pie Dough is a good choice because it's extremely easy to work with.
It can also be helpful to increase the recipe to 1.5x the original batch so you’re working with extra dough. That way, you’ll have a few backup strips in case some are accidentally cut too wide or narrow, and they’ll also be long enough that you can easily trim any ragged ends for a neater appearance.
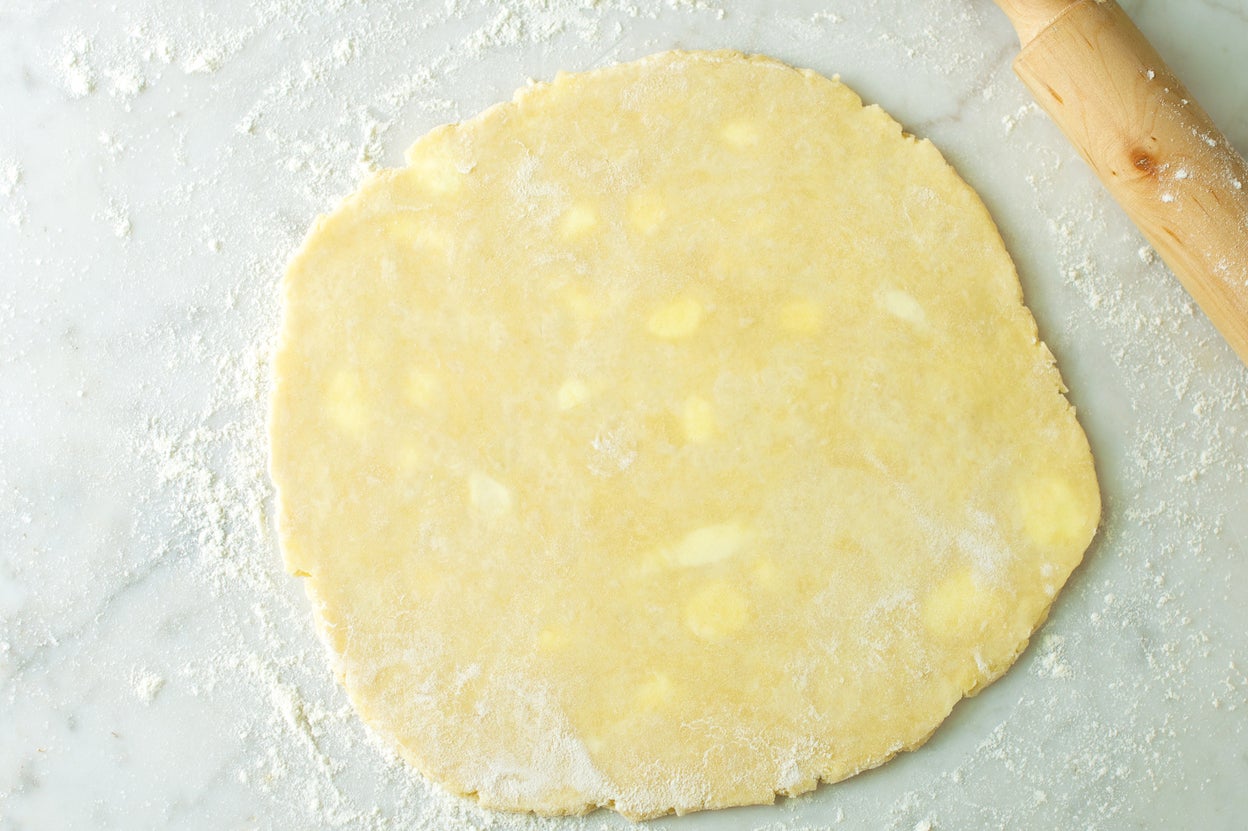
Once you’ve lined your pie plate with the bottom crust and added your filling, roll out the top crust you’ll use to make your lattice. Make sure your dough is very cold before you start rolling and weaving.
As with all pie crust, you’re going for a relatively even circle. About 12" wide is a good size for a standard 9" pie.

Trim any ragged edges, then use a pizza wheel, knife, or pastry wheel to cut the crust into even strips. You can make them as narrow or wide as you’d like (1/2" to 1" is a good range), but try to make the width of the strips as equal as you can for a traditional design. A ruler is helpful to be precise, though eyeballing works fine as well. If you want to ensure consistent sizing, this easy-to-use pie crust cutter creates 3/4" strips for a lattice-top pie.
For a nice decorative touch, use a pastry wheel with fluted edges to cut your dough.
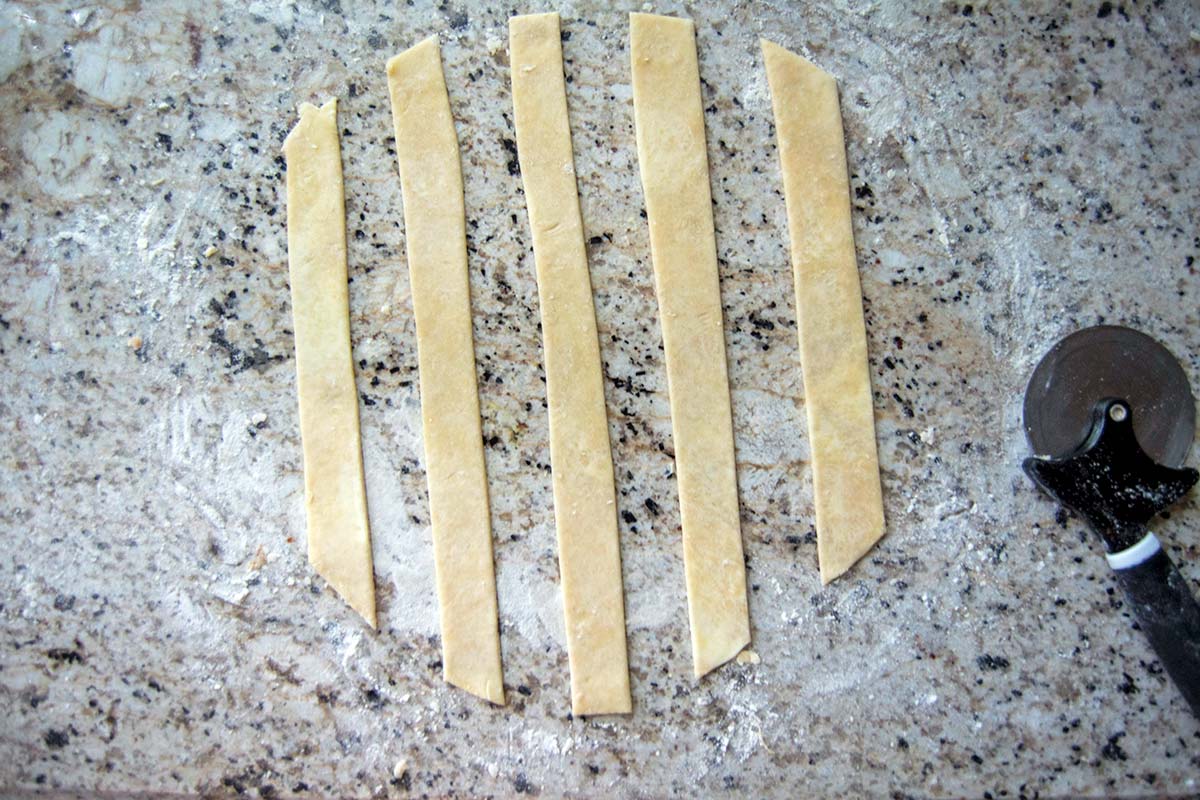
Carefully remove every other strip of dough and set aside. These will be the horizontal strips of your lattice.
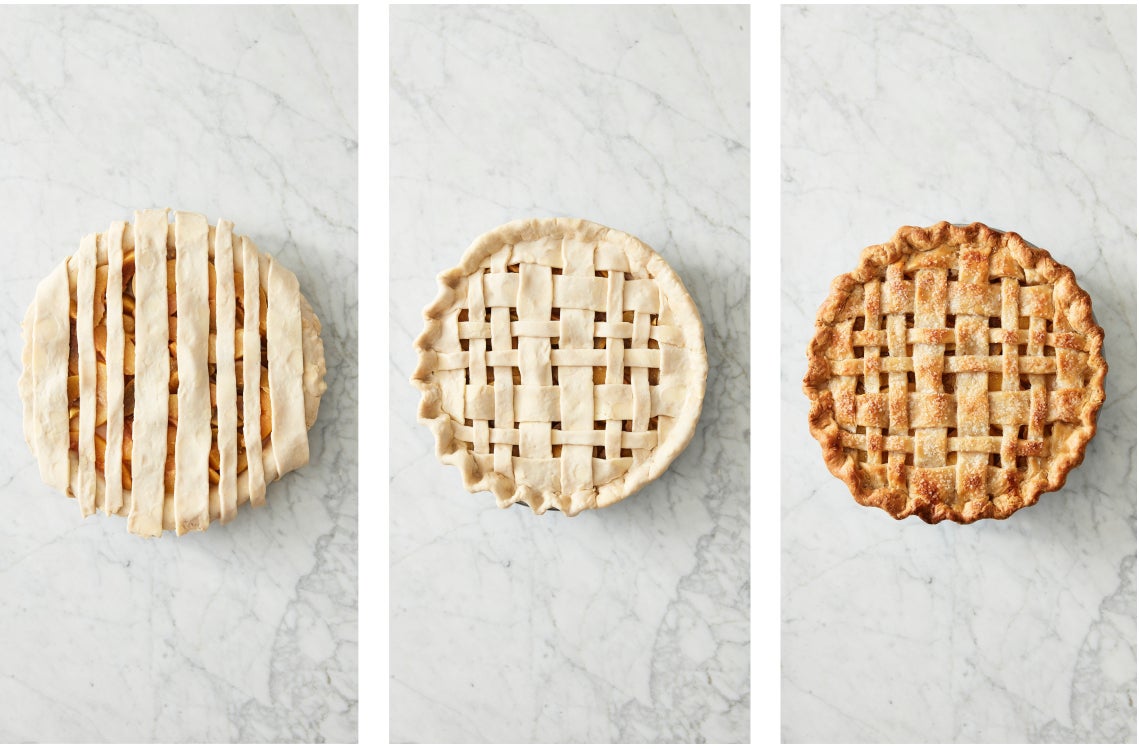
Start weaving
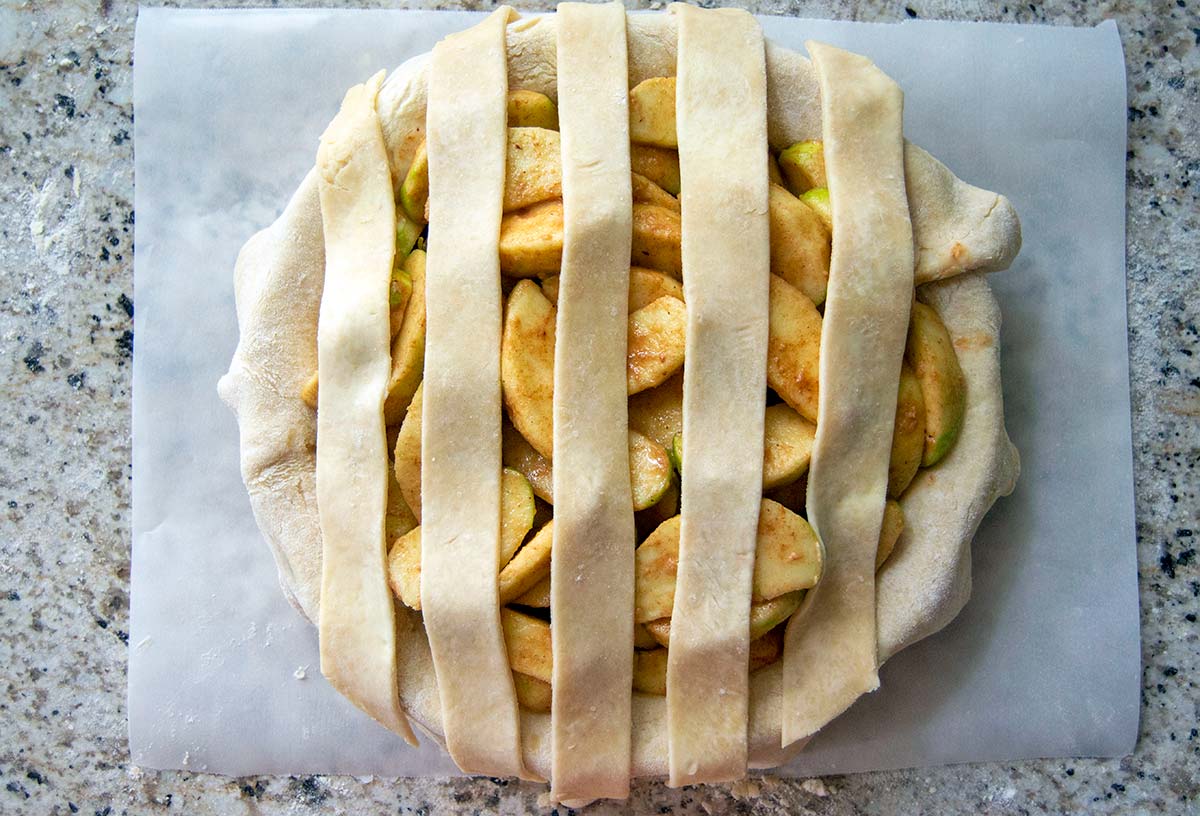
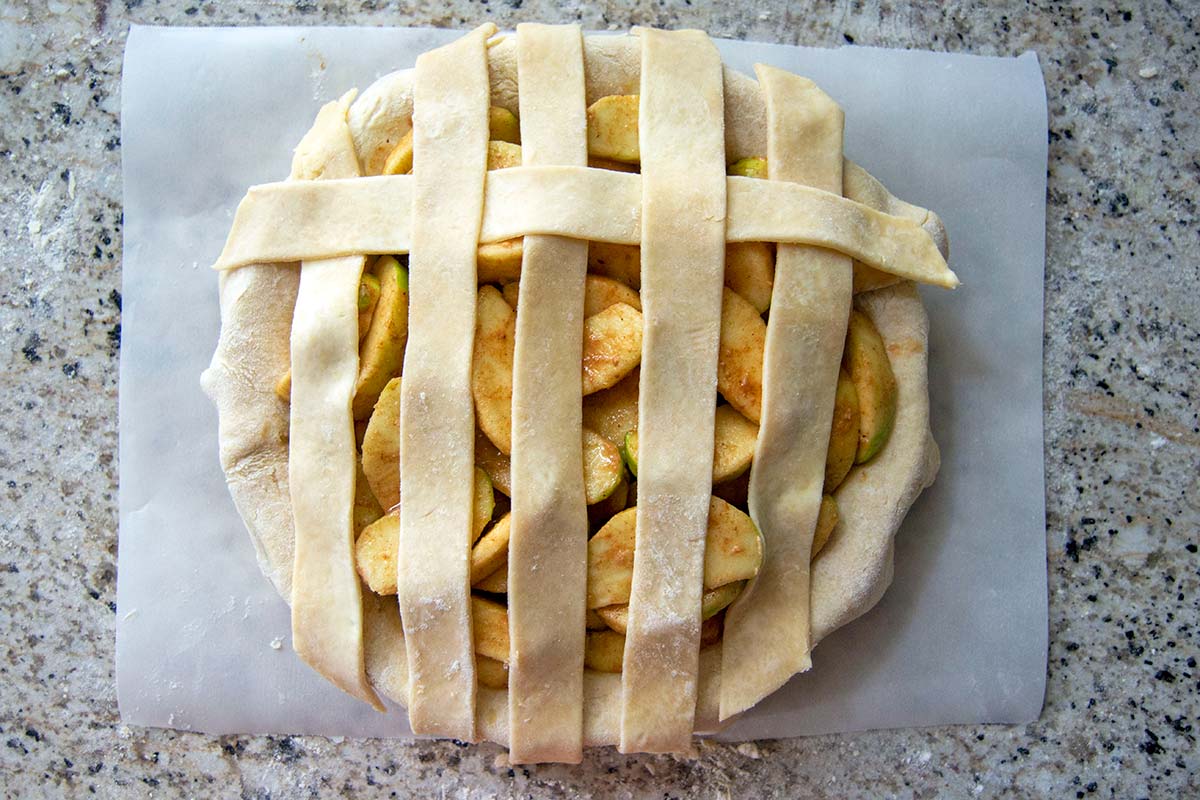
Lay the vertical strips across the top of your pie, with an equal amount of space between them.
Peel back every other vertical strip, then lay one of the horizontal strips across the width of the pie, snuggled up close to the folded-back strips.
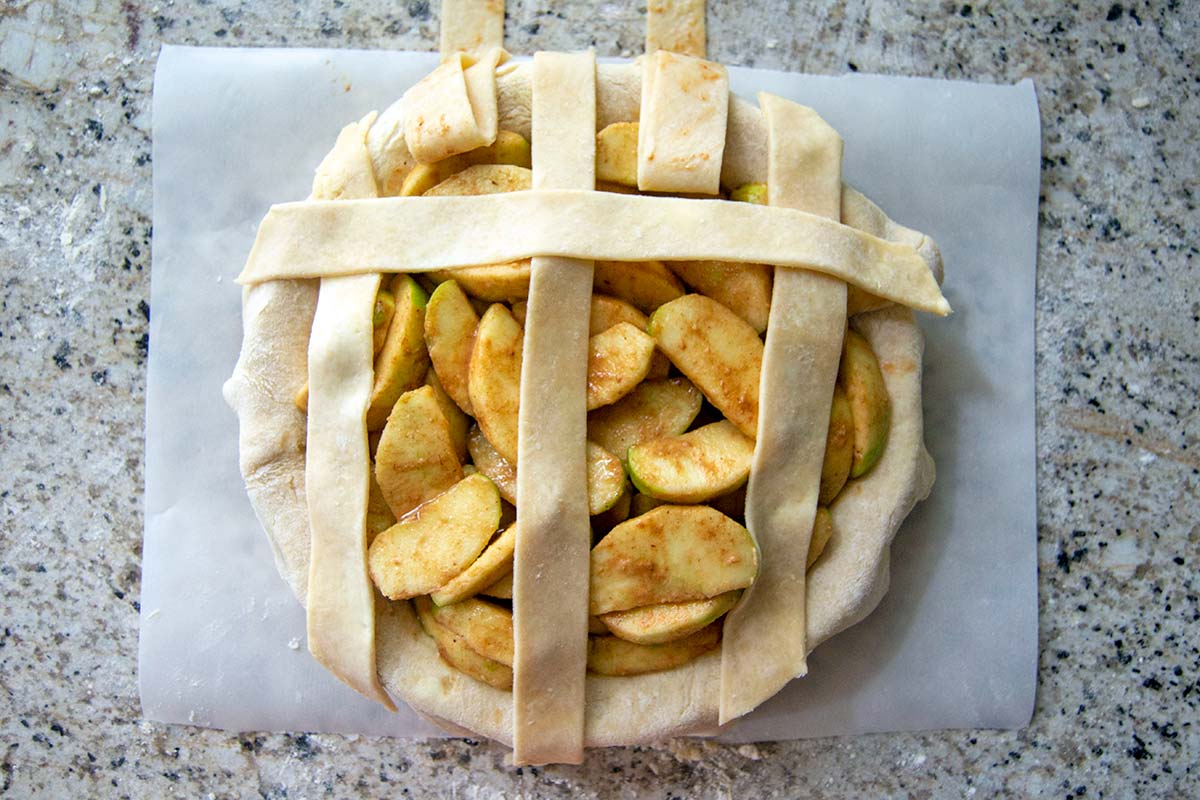
Unfold the vertical strips so they lie flat against the pie.
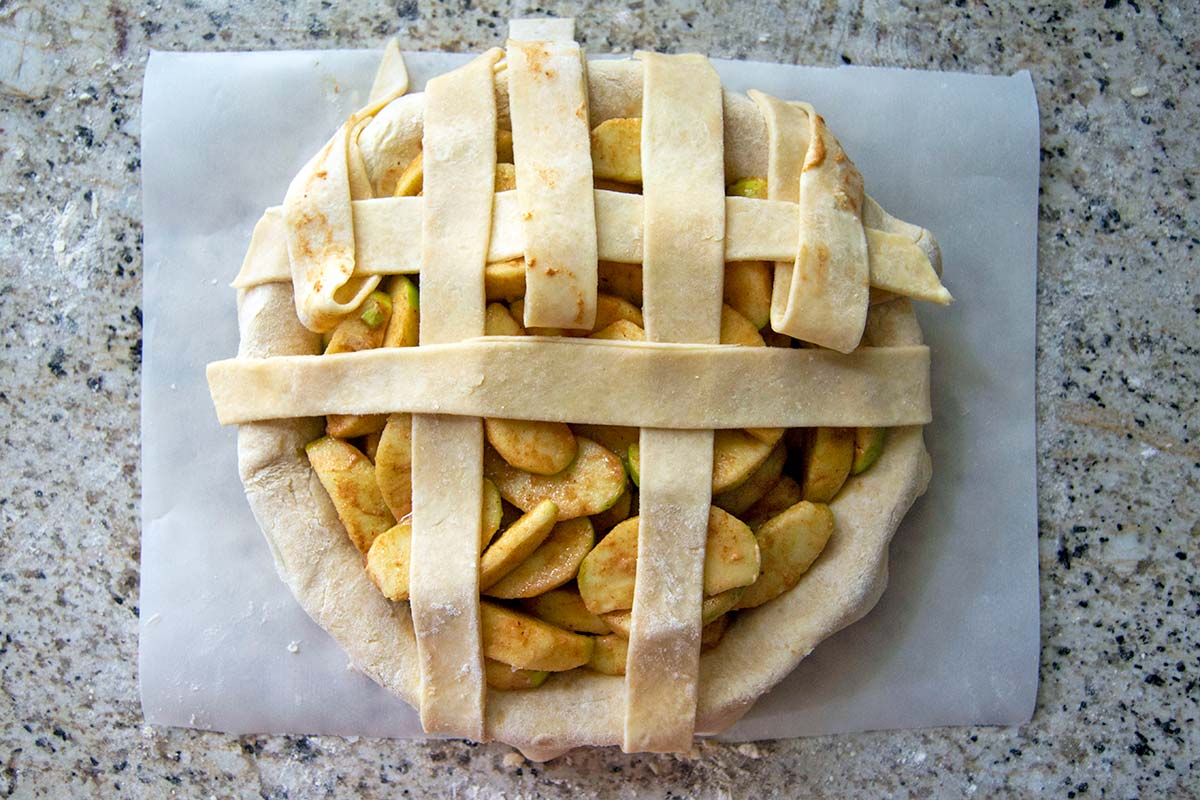
Next, peel back every other vertical strip, starting with the strips you didn’t unfold before. Lay a horizontal strip across the width of the pie, spaced an even distance from the first horizontal strip.
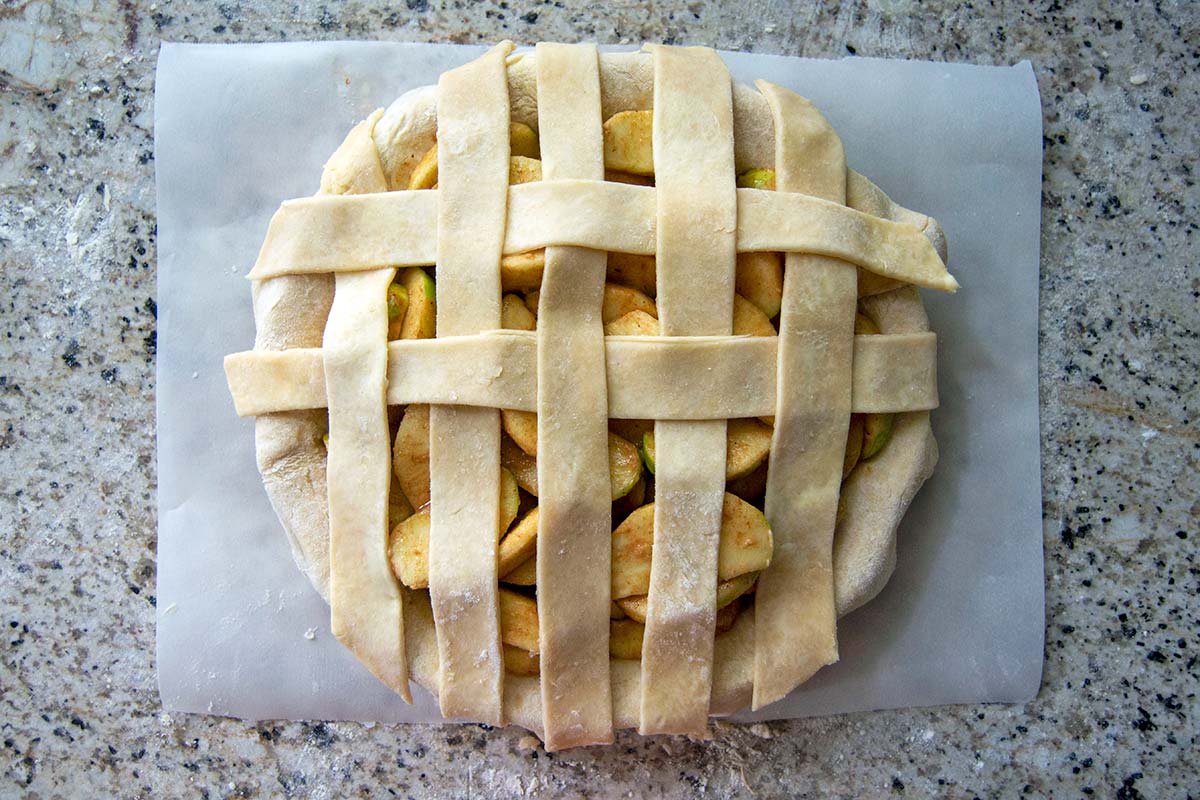
Unfold the vertical strips so they all lie flat against the pie.
Repeat these steps, folding back every other vertical strip and laying a horizontal strip across the width of the dough, until you've covered the entirety of the pie.
This technique is easier to grasp when you see it in action, so watch how it’s done in this video:
As you work, you may find your pie dough growing warm and greasy, making it difficult to handle. If that happens, simply stick the pie and unused pie strips in the fridge for 5 to 10 minutes to cool down, then resume weaving.
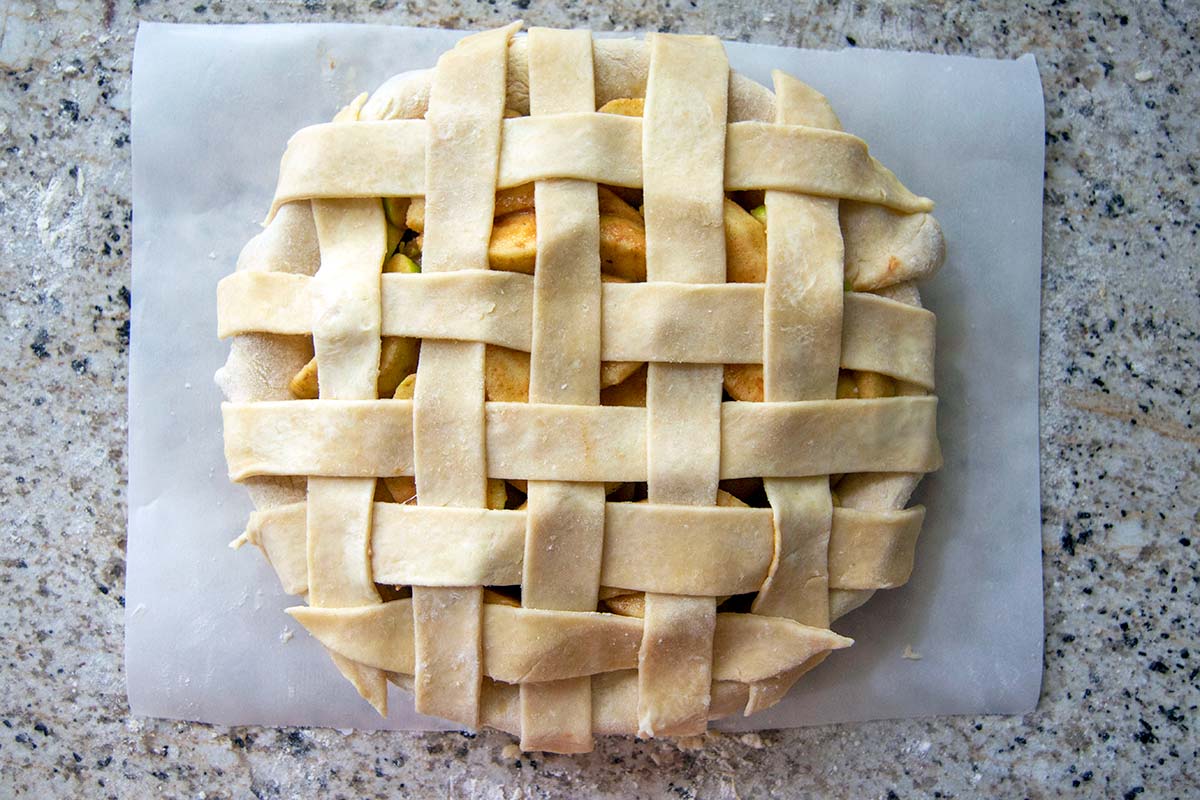
Once all your strips are in place, you might need to wiggle and move them a bit so that you have even spacing between them. This can be tricky, so be as gentle as possible!
There are many ways you can switch up your lattice to make the design your own. One of the simplest is to ditch the evenly sized strips and cut your dough into a variety of widths, alternating between narrow and wide. This creates a unique pattern you can weave in many different ways.
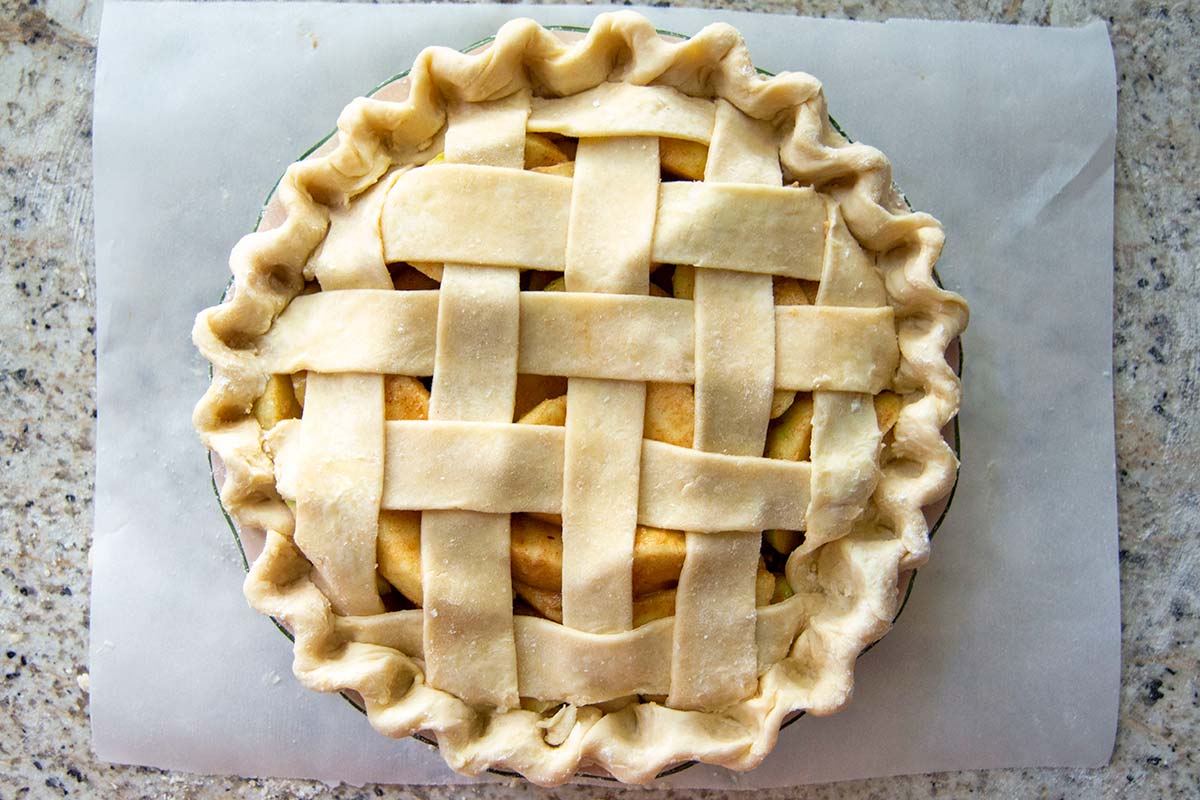
Trim the excess dough from the sides, then use your fingers to crimp the edges of the pie. Brush with egg wash and sprinkle with sparkling sugar for a little extra glitz, if desired.
If you're looking for the final baked version of the pie above, it was sadly burned to a crisp in a tragic oven broiling accident. (We have plenty of baking mishaps at King Arthur too!) But here's another lattice-topped apple pie to inspire you ...
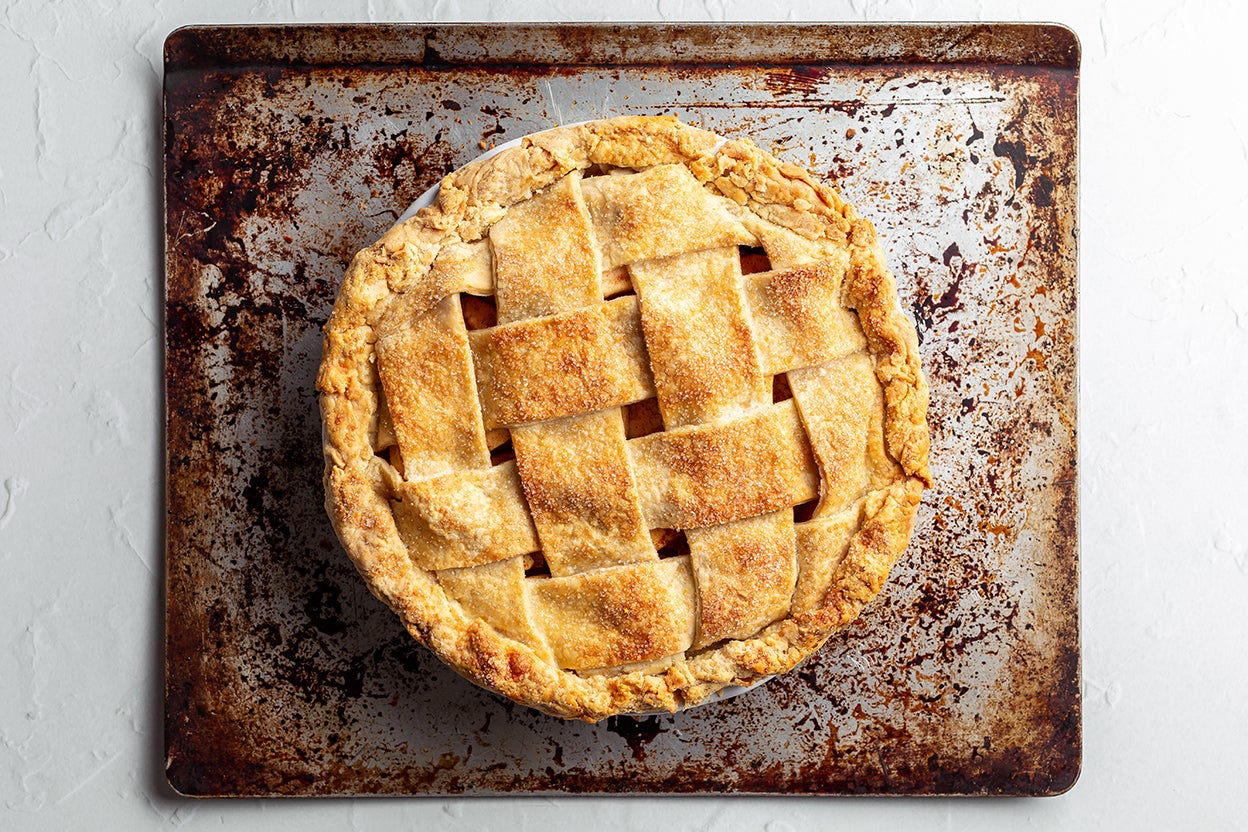
One thing to keep in mind is that the fruit filling of your pie will likely bubble up through the open gaps during baking, which can stain your crust. Your pie may not wind up totally spotless in the end, but that slightly imperfect appearance is part of the beauty of baking, particularly in rustic fruit desserts. Embrace it!
Ready to explore even more intricate crusts? See additional pie designs in our posts How to weave a quilted pie crust and Decorative pie crust tips.
Cover photo by Kristin Teig