![]() Our Artisan Bread series explores the world of professional-level bread baking and brings you more resources and guidance around how to hone your skills at true hand-crafted bread. You'll find tools, inspiration, and confidence to experiment and master what is perhaps the simplest, and the most complex, of baking genres: artisan bread.
Our Artisan Bread series explores the world of professional-level bread baking and brings you more resources and guidance around how to hone your skills at true hand-crafted bread. You'll find tools, inspiration, and confidence to experiment and master what is perhaps the simplest, and the most complex, of baking genres: artisan bread.
* * *
As a baking instructor and food editor, I’ve taught baguette workshops for years — and I know they're one of the most challenging loaves to master, since they require an extremely precise technique and a steady hand. I’ve been making baguettes for much of my adult life, and even I don’t feel like I’m done perfecting my craft yet. But this isn't a reason to shy away from trying. On the contrary, there is no bread more satisfying to triumph over, since a perfect baguette is a thing of the utmost beauty, inside and out. And in any case, the less-than-perfect loaves you create on the path to baguette excellence will be delicious just the same.
Given how challenging the baguette is to perfect, it’s all the more important to have the right set of tools and techniques on hand when you bake. Unlike simpler breads like sandwich loaves or even rustic boules, you can’t just “wing it“ with baguettes and expect to get something you’d be proud to serve your French grand-mère, real or imagined. The good news is that with the right recipe, proper equipment, and a good understanding of baguette methodology, you’ll already be most of the way there.

First, we should establish what we mean when we picture — and taste, and even hear — our platonic ideal of a baguette. On the outside, it should have a crust that is an intense, ruddy brown (“bien cuit,” as the French would say, meaning well-cooked), and so delicate and crisp that it shatters audibly into millions of tiny shards when cut or torn into. The ears (“grignes,” or grins) should have a pronounced flap along one edge, and display gradations of color: pale white beneath the cut, tan at the opposite side, and dark brown along the ridgeline of the flap. If there are multiple cuts, they should be evenly and symmetrically distributed along the length of the loaf, and the silhouette of the loaf should have a pronounced “bean pod” shape.
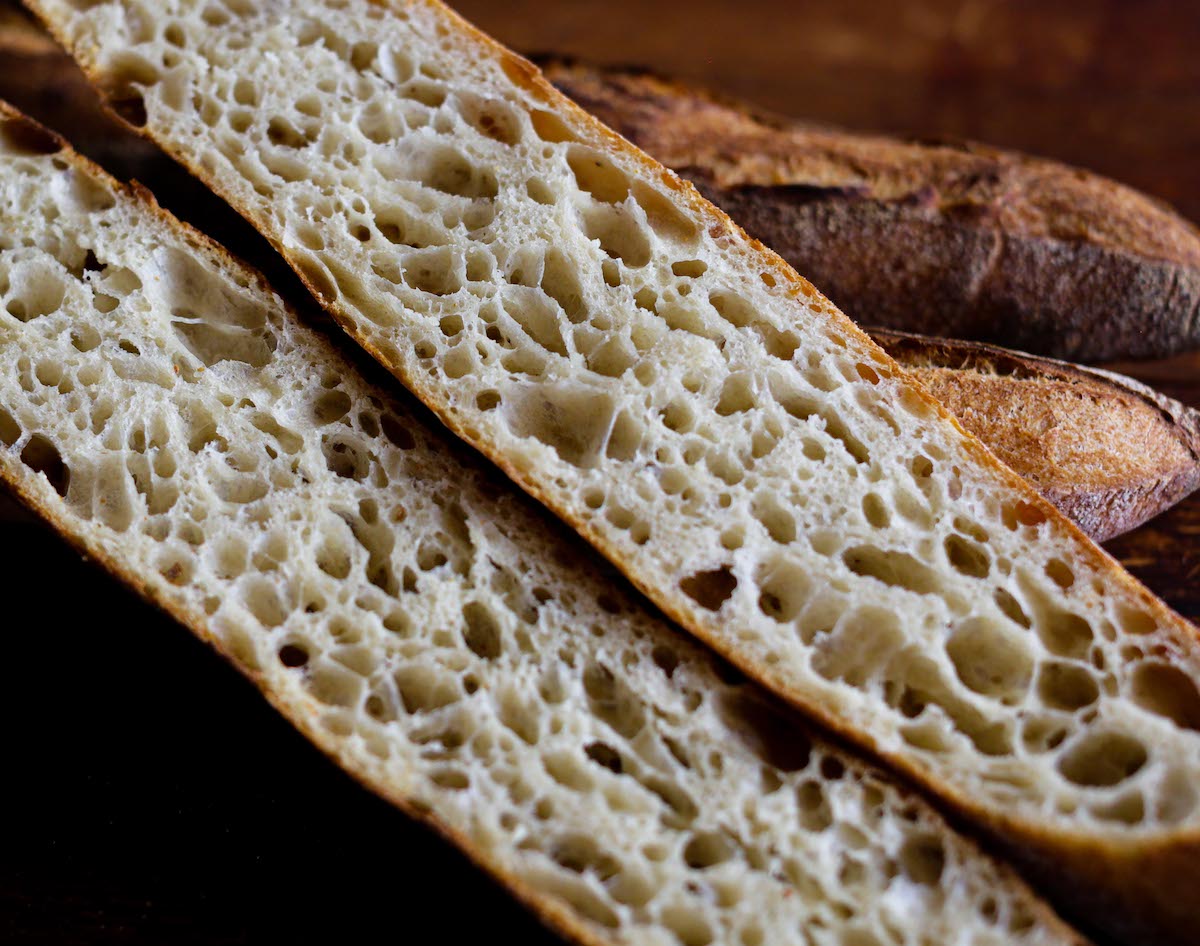
On the inside, the crumb should be tender and moist, with a mixture of irregular holes (called alveoli) of varying sizes, and have the sweet flavor of wheat, along with the subtle tang of fermentation. (Unlike many other breads, where the acidity produced during fermentation stands front and center, the acidity in a baguette should instead enhance the underlying flavor of the flour.)
Aesthetics matter greatly in a baguette, but none of these requirements are merely cosmetic — they're signposts of success.
The more “bien cuit” the crust, the deeper the flavor, since color is a sign of caramelization. Well-opened slashes ensure the interior crumb has expanded fully. And finally, an irregular crumb makes for a light but not overly hole-y inside.
Finally, while all baguettes are fleeting, ephemeral things — by which I mean they should be enjoyed as soon as possible after baking — the best ones should have some longevity to them. Or, to put it another way, if your baguette is rock hard within a few hours of coming out of the oven, then it’s time to find a new recipe.
This brings us to the number one requirement for a great baguette: a great recipe. You need a recipe that calls for a long, gentle fermentation because the acids produced during fermentation not only give the baguette complexity of flavor but also help to slow down staling. While baguettes made with 100% white flour can be wonderful, it’s sometimes nice to include a portion of whole-grain flour for a more pronounced wheatiness. (French bread flours tend to have more of the wheat berry in them than American ones, so even breads without whole-grain flour will have more of that wheat flavor.)
I recommend starting out with one of the following three recipes:
Once you have a solid recipe, you’ll next want to acquire the right set of specialized tools. While you can make an approximation of a baguette without them, having the proper set of tools — none of which requires a great investment — will take you far along the road to baguette perfection.
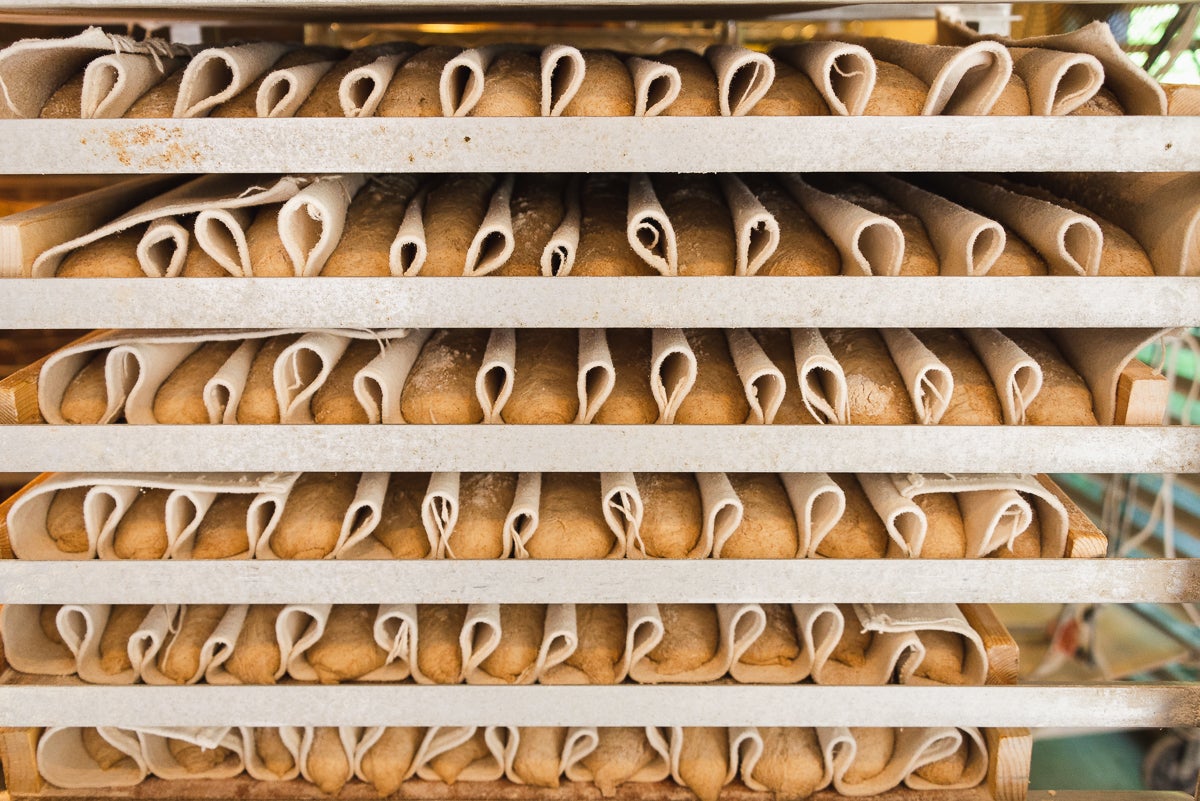
The first tool you’ll need is a couche. This thick, raw linen cloth gently cradles the shaped loaves — seam-side up and side-by-side — as they proof, so they expand symmetrically rather than slump. Meanwhile, the textured, breathable fabric helps keep the exterior of the dough from sticking or softening, ensuring a smooth, crisp crust. (In a pinch, 100% cotton flour sack towels will suffice, though they lack the stiffness of a couche.)
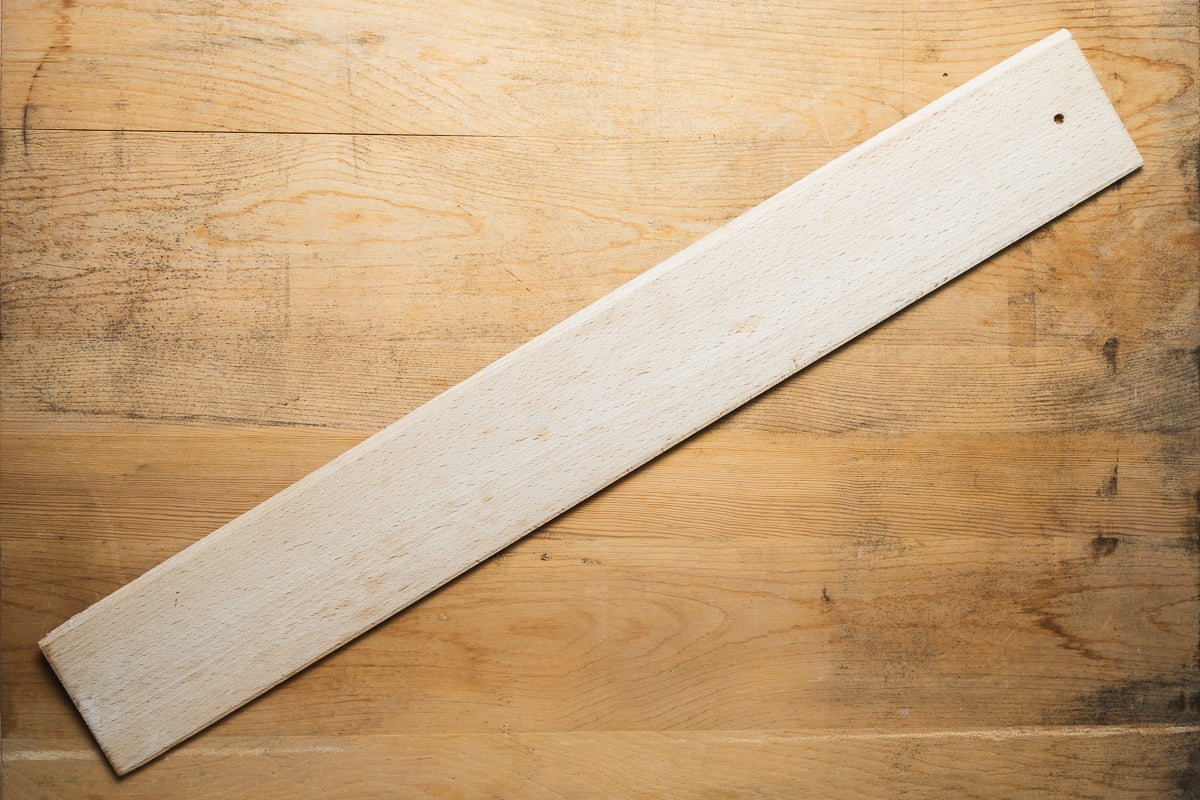
Next, you’ll need a transfer peel to move your baguettes. This is a long, stiff wooden board with a beveled edge that you slide beneath the dough to invert it right side up. You then lift up the couche gently, using it to flip the loaf over onto the transfer peel (thus explaining the tool’s nickname, the “flipper board”).
From there, with a flick of the wrist, you flip the loaf one last time onto a pizza peel, right side up again. (It sounds complicated, but it’s easy to get the hang of, and despite all the flipping to and fro it’s actually the gentlest way to move the somewhat fragile dough.)
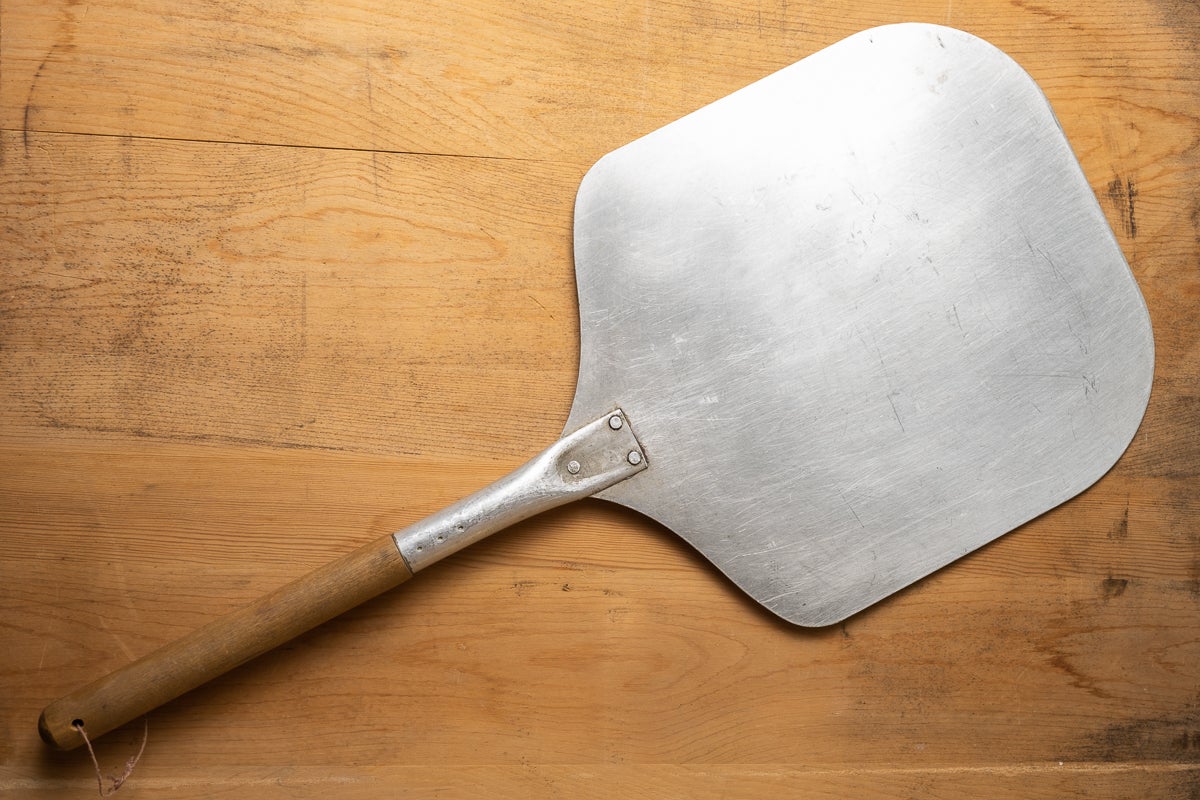
To load the baguettes into the oven you’ll need a wide pizza peel or a rimless cookie sheet, along with sheets of parchment to set them on. (A baking sheet flipped upside-down will work, too.) Using parchment not only allows the baguettes to slip easily off the peel: It also lets you load two or three baguettes into the oven at a time while keeping them evenly spaced. (In a pinch, you could flour the peel liberally and load them in one at a time, but your best bet is to use parchment.)
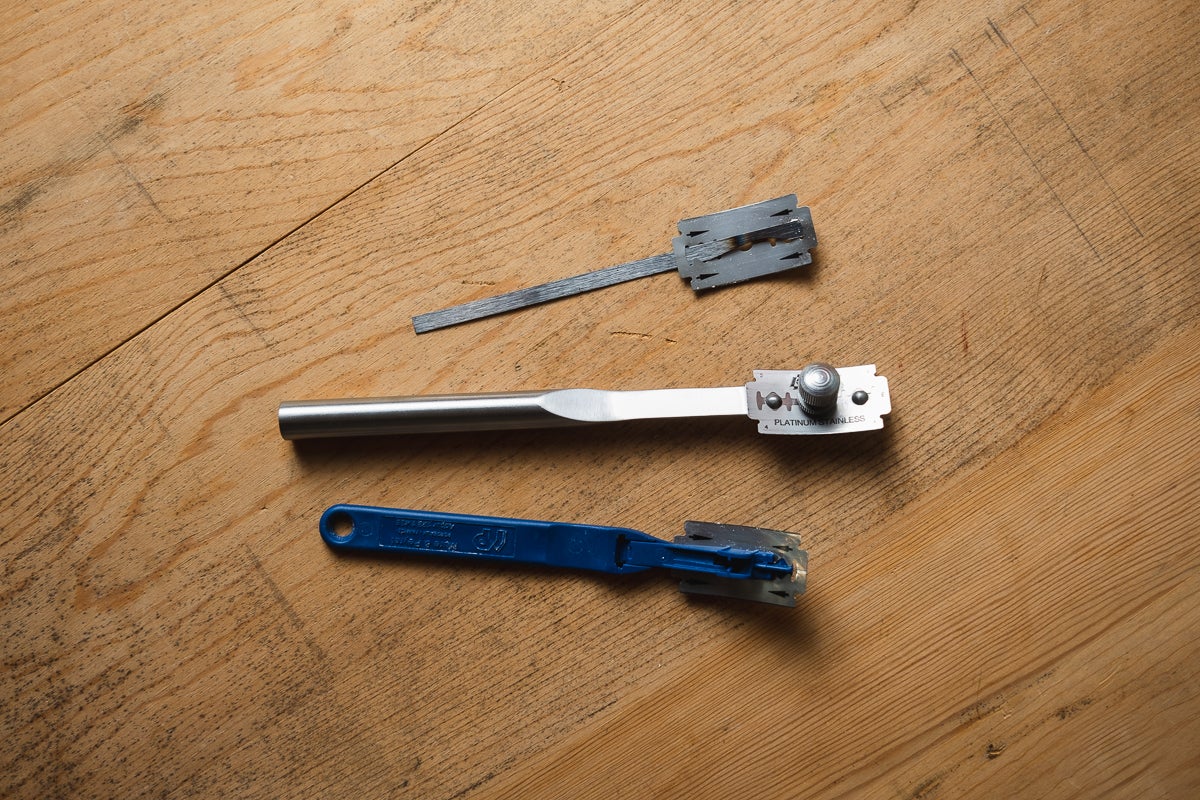
Next you’ll need a lame: the traditional tool for scoring breads. While a lame is essential for scoring many styles of breads, baguettes in particular demand the precise, swift cuts that only a razor-sharp lame can produce. You’ll want one with a curved blade, since that helps properly angle the blade in order to produce a deep, asymmetrical ear once the loaf is baked. (The curve helps get the blade under the skin of the dough to create a flap that peels back as the loaf expands.) I recommend keeping an ample supply of extra double-edged razor blades on hand to use in your lame, since they wear out quickly.

Finally, you’ll need a baking stone to bake the baguettes on. Setting them on a preheated stone pumps heat quickly into the center of the loaves so that they spring up quickly and evenly. (A preheated sheet pan can work in the absence of a stone. I don’t recommend baking baguettes on a baking steel, however, since it’s too conductive and the breads are likely to burn.)
By far the two most challenging aspects of baguette-making are shaping and scoring. These two techniques contribute to the final shape of the loaf and the internal structure of its crumb. And when it's finally time to bake, you'll need to properly steam your bread in the oven for ultimate success. Keep in mind: Although steam comes last in the process, it is not an afterthought. It's so crucial here that, in our opinion, it rises to the level of a tool and you should wield it as such.
Even more than with other breads, turning an amorphous blob of dough into a long, uniform baguette with an open, irregular crumb requires a gradual and gentle approach. Doing so with brute force will push gas out of the dough, collapsing the crumb. Moreover, manhandling the dough will leave the loaf misshapen, because the dough will inevitably turn elastic and fight back.
Instead, you need to coax it into shape over a series of incremental steps. It begins with the preshaping step, in which you gently roll the mass of dough into a short, symmetrical log. Then, after a 15- to 30-minute rest, you fold the dough in half lengthwise over itself several times; with each fold, the dough naturally elongates. Finally, you gently roll the dough under your palms to bring it to its final length.
I’ve already mentioned that the key to achieving a baguette with pronounced ears and asymmetrical cuts is to score it at a deep, oblique angle to create a flap in the dough. More than anything this requires practice, since the correct wrist position will feel awkward the first few (or more likely, few hundred) times you try it.
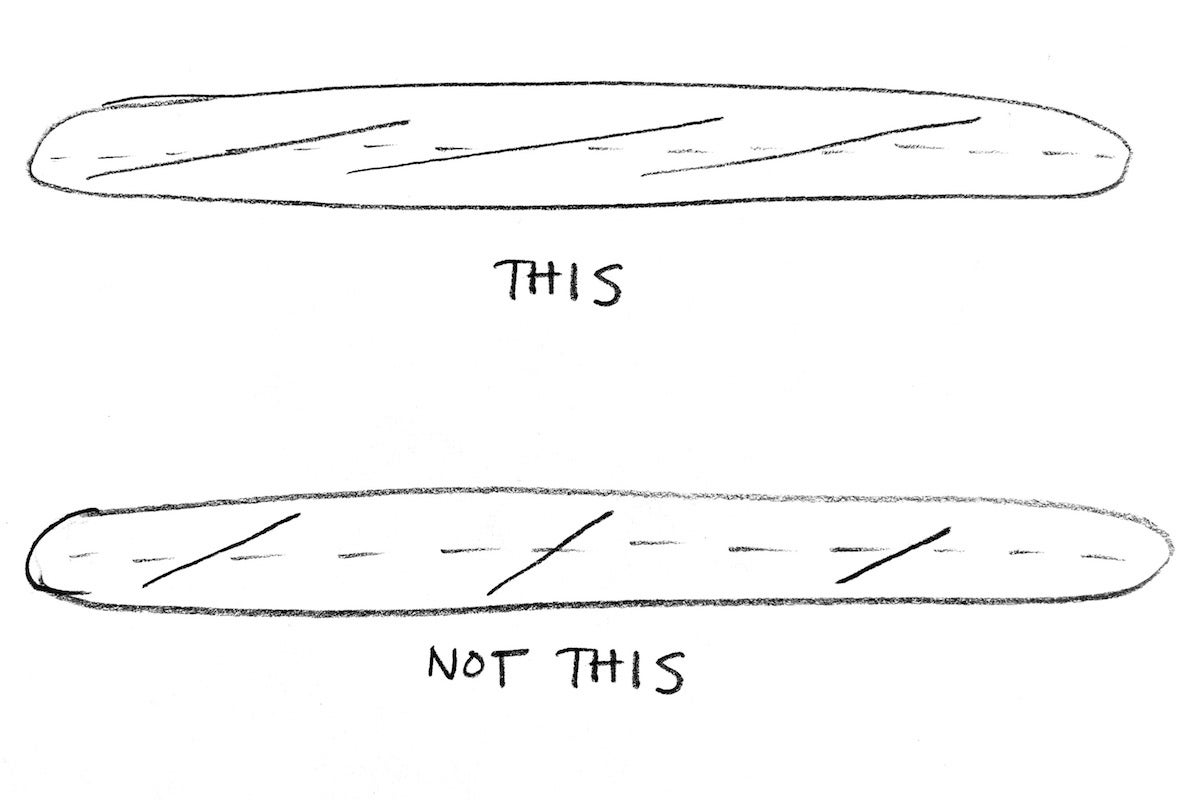
Additionally, you’ll want to make sure the cuts run parallel (or nearly parallel) to the centerline of the baguette. The simplest way to achieve this is to limit yourself to one single cut from end to end; this will yield a perfectly cylindrical loaf. To achieve the classic “bean pod” baguette silhouette, you need to create a series of overlapping cuts that are angled just slightly off the centerline. This is yet another place where (lots of) practice makes perfect, as the natural tendency is to make the cuts at more of an angle than called for, and not to overlap them.
The final area on which success or failure hinges is in the bake itself. Even the largest of baguettes is no more than a few inches in diameter, so they bake in a flash — needing 20 to 30 minutes, tops. Achieving an open crumb and a crisp, delicate crust requires steam … and lots of it.
Surrounding a loaf with steam at the start of baking does three important things. One, it holds off the formation of the crust, allowing the loaf to expand maximally and keeping the crust from getting overly thick. Two, it transfers heat efficiently to the loaf, so that it increases in temperature rapidly and evenly. And three, it gelatinizes the starches on the exterior of the dough, making the finished crust shiny, delicate, and crisp.
An important step here is venting. Once the loaf has expanded fully, the steam is then vented so that the crust can dry out and caramelize.
Professional bread ovens have steam injectors and are sealed to retain steam. Your home oven obviously lacks a steam injector, and it’s vented, so you’ll need other strategies to keep your baguettes steamy. One way to do so (as Martin demonstrates here) is to preheat a pan filled with lava rocks on the bottom of your oven. (Lava rocks can be found at most home improvement stores in the grilling section. If you don’t have them, a preheated cast-iron skillet works acceptably in a pinch.) Once you load the baguettes onto the baking stone, you carefully pour a half cup or so of water over the stones and quickly close the oven door to capture the steam that's generated.
This method works best in minimally-vented electric ovens. In gas ovens, which vent fully by design, the lava rock trick is a no-go. In that case, another approach is to create an ersatz “Dutch oven” by placing an upturned disposable turkey roasting pan over the loaves as soon as they're loaded onto the stone. Like a Dutch oven, the roasting pan traps the moisture released by the baguettes as they heat up, surrounding them with steam.
Last but not least, baguette success requires three additional things that are neither tool nor technique: practice, patience, and perseverance. Unless you work in a bakery making bread day in, day out, mastery will likely take years to achieve, and you’re bound to make a lot of less-than-beautiful baguettes along the way. It’s important to embrace these imperfect loaves as stepping stones toward success. If you keep at it, you’re bound to get there sooner or later, especially with the right set of tools and techniques in hand.
For more tips and guidance, find the rest of our Artisan Bread Series here. Now go forth and bake your way to beautiful baguettes!