![]() Our Artisan Bread series explores the world of professional-level bread baking and brings you more resources and guidance around how to hone your skills at true hand-crafted bread. You'll find tools, inspiration, and confidence to experiment and master what is perhaps the simplest, and the most complex, of baking genres: artisan bread.
Our Artisan Bread series explores the world of professional-level bread baking and brings you more resources and guidance around how to hone your skills at true hand-crafted bread. You'll find tools, inspiration, and confidence to experiment and master what is perhaps the simplest, and the most complex, of baking genres: artisan bread.
* * *
Homemade pizza often disappoints compared to restaurant pizza, though that doesn’t have to be the case. It’s possible to pull restaurant-caliber pies from a humble home oven, but you need to tailor your approach to the setting. Some of the common pitfalls on the road to great pizza are the same whether you're baking in a blazing wood-fired oven or a home oven, while others are oven-specific. But none are impossible to overcome!
First we need to define what we mean by "great" pizza. For starters, we’ll be limiting this discussion to round, thin-crust styles baked directly on a surface like a baking stone. (Thicker pan pizzas such as Sicilian or Detroit-style are generally more forgiving than freeform pizzas for a number of reasons, starting with the fact that they aren’t usually baked at temperatures beyond what most home ovens can achieve.)
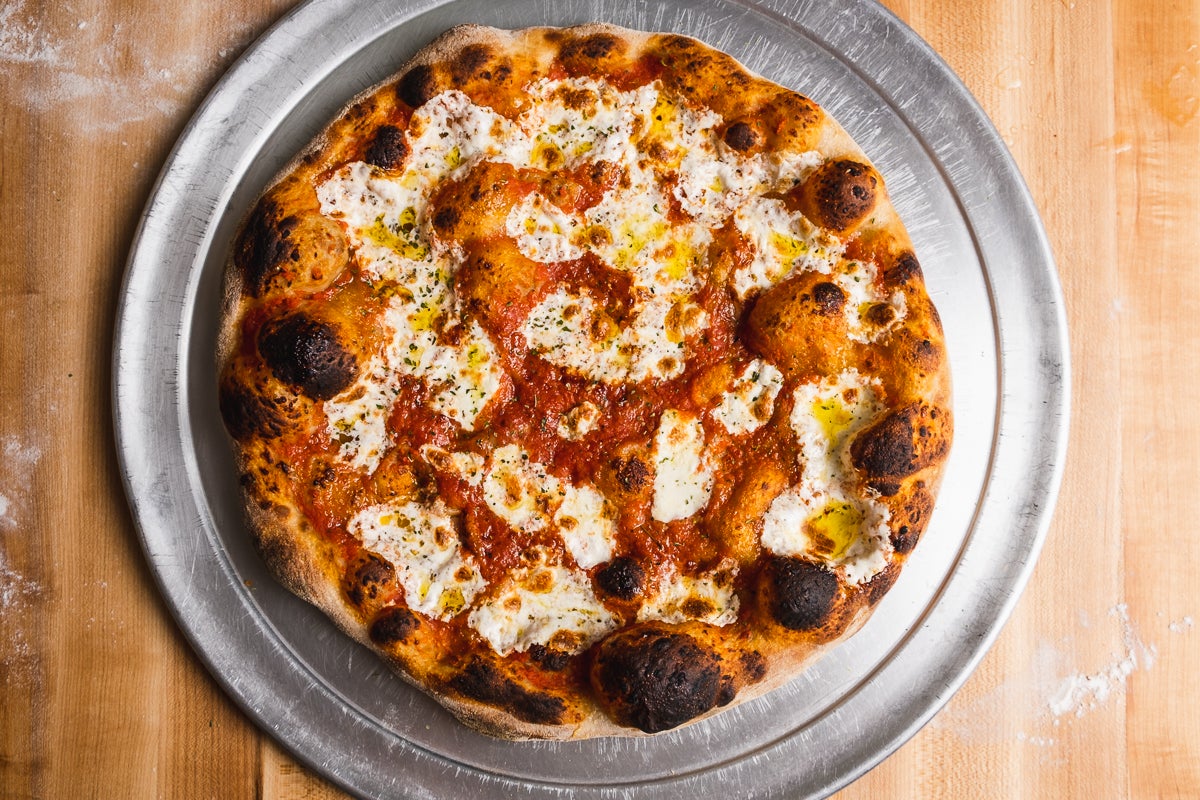
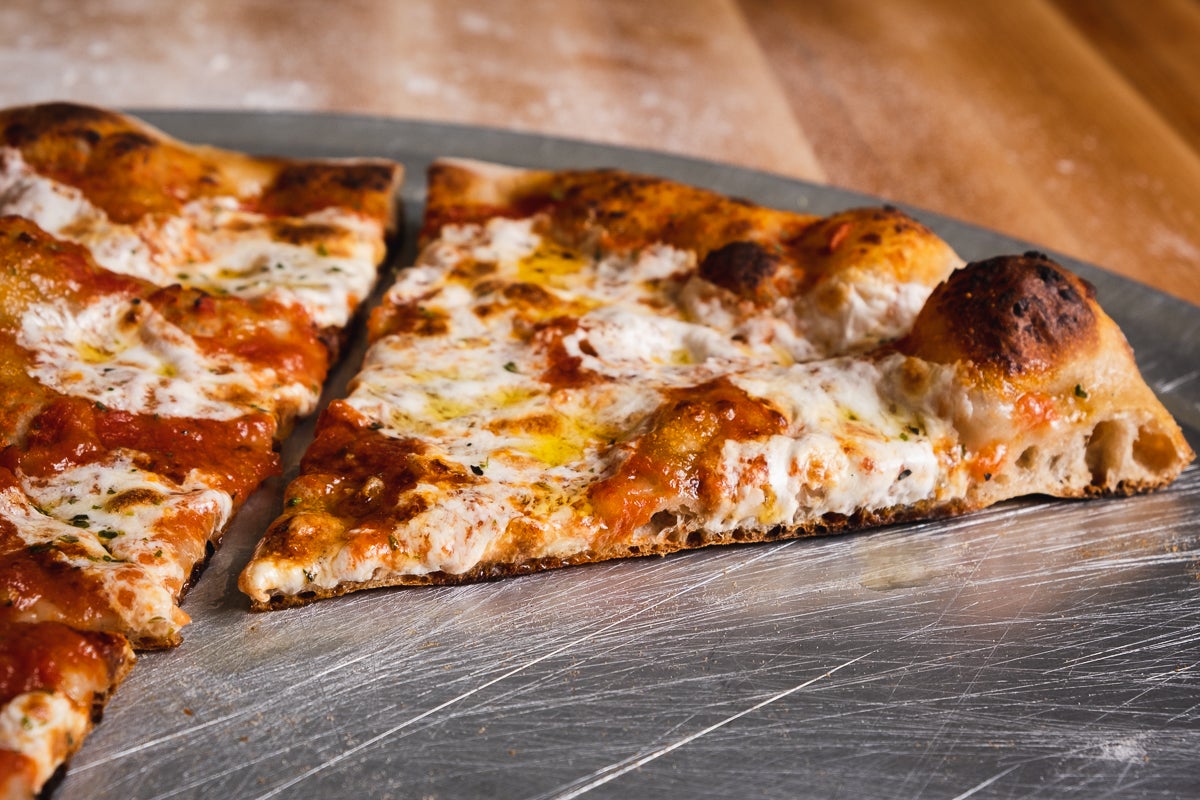
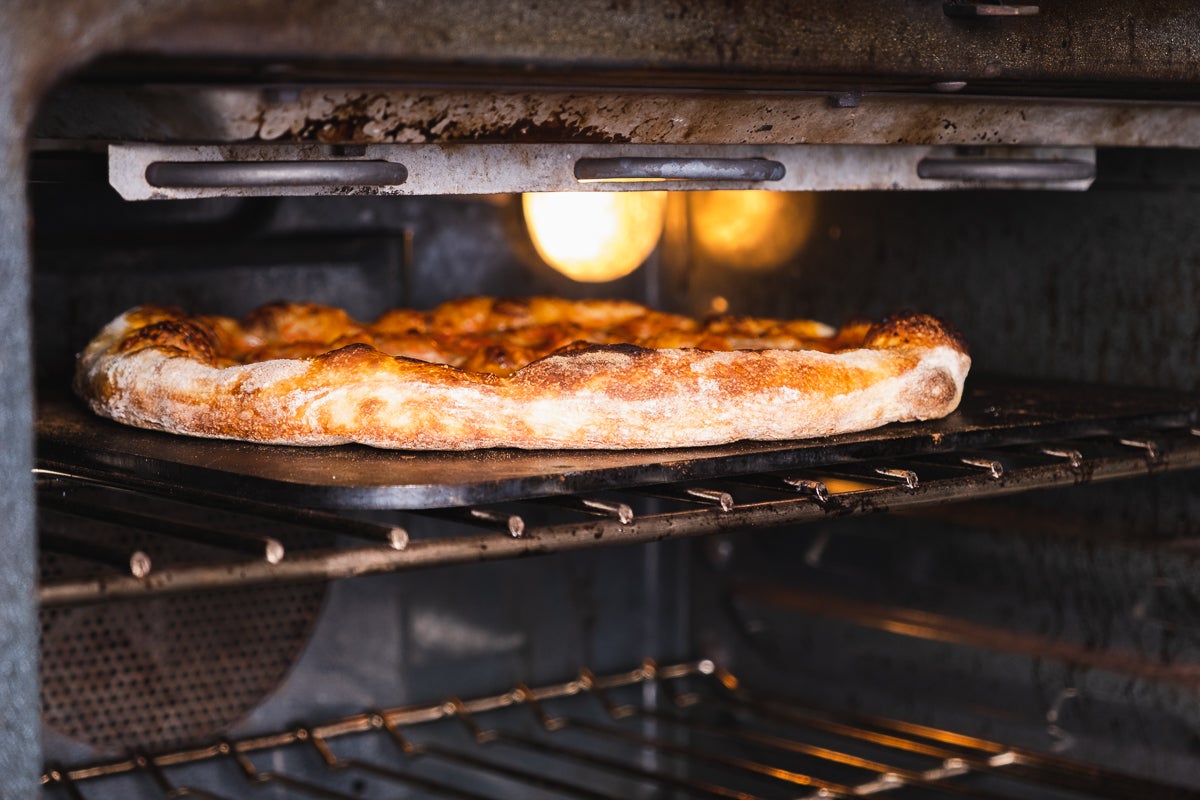
The most important hallmarks of a great thin-crust pizza are a crisp-tender, well-browned crust (both on the underside and the raised rim), and a moist-tender interior crumb. (Obviously flavor is important too, but the shortcomings of a less-than-flavorful crust can be made up for with great toppings, while those of a less-than-perfect texture are insurmountable.) There are two key crust elements to zoom in on here: tenderness and contrast.
Both the crust and the crumb should be tender rather than tough; this is true whether we're talking about a chewy, New York-style slice or a more tender "artisanal" pie. (Chewy and tough are related but not identical concepts: Chewiness in pizza generally relates to how much gluten a pizza dough contains, while toughness has more to do with how that gluten has been treated along the way.)
There also needs to be contrast between inside and outside: The crust should be crisp and well-baked, while the interior crumb should be moist and even a touch underbaked within.
Most of the secrets to making great pizza (at home or otherwise) revolve around attaining one or both of these goals. Getting a tender crust involves knowing how to treat the dough once it has been mixed, which is something that anyone with the proper skillset can pull off.
And achieving pizza crust contrast usually means baking it as quickly as possible, since the faster a pizza crust browns, the less chance of over-baking the interior crumb. This is where blazing hot professional pizza ovens have a distinct advantage over humble home ranges, which rarely top 550˚F. But there are ways to overcome the limitations of a home oven.
Behind every great pizza is a great dough recipe. Pizza doughs contain just a few ingredients: flour, water, salt, and (usually) oil, along with yeast and/or a sourdough culture.
Your choice of flour has a major effect on the texture of a pizza crust, but you can achieve a tender pie using a wide variety of different flours.
Higher gluten flours are best for things like New York-style pizzas, which should have an underlying chewiness, while lower-protein flours give pizza crusts a more tender texture. Oil adds even more tenderness, since it lubricates the gluten networks, making them more flexible.
The amount of water in a dough has a big influence on the texture of the resulting crust. Generally speaking, more water yields a more tender result, since water tenderizes gluten.
But there's a limit to how much water a dough can handle, particularly when baking in a home oven. That’s because in order for the outside of the crust to brown and crisp up, the water in it first needs to be driven off. In a super hot oven, this isn’t a problem, but at the maximum temperatures a home oven can achieve, a wet dough usually translates to a long bake time and, as a result, an overbaked interior crumb. For best results, the hydration of a dough needs to be tailored to the temperature at which the pizza will be baked.
How a dough is fermented has a strong influence on how the pizza crust turns out.
Fermentation does two primary things: It creates gases in the dough, opening up the crumb to make it light and airy, and it develops flavor. In my experience many of the best pizza doughs are fermented — partially or entirely — at cold temperatures (i.e., in the fridge). Doing so stretches out fermentation, which allows more complex flavor to develop in the dough. It also reduces carbon dioxide production. Less carbon dioxide means smaller alveoli (holes in the crumb structure), which is particularly helpful for creating a thin-crust pizza with an even, flat profile from edge to edge as opposed to a puffy, uneven one.
Finally — and perhaps most importantly for those in pursuit of the perfect pizza — a long, cool fermentation period increases the extensibility of the dough, making it easier to stretch (and less likely to fight back and toughen up).
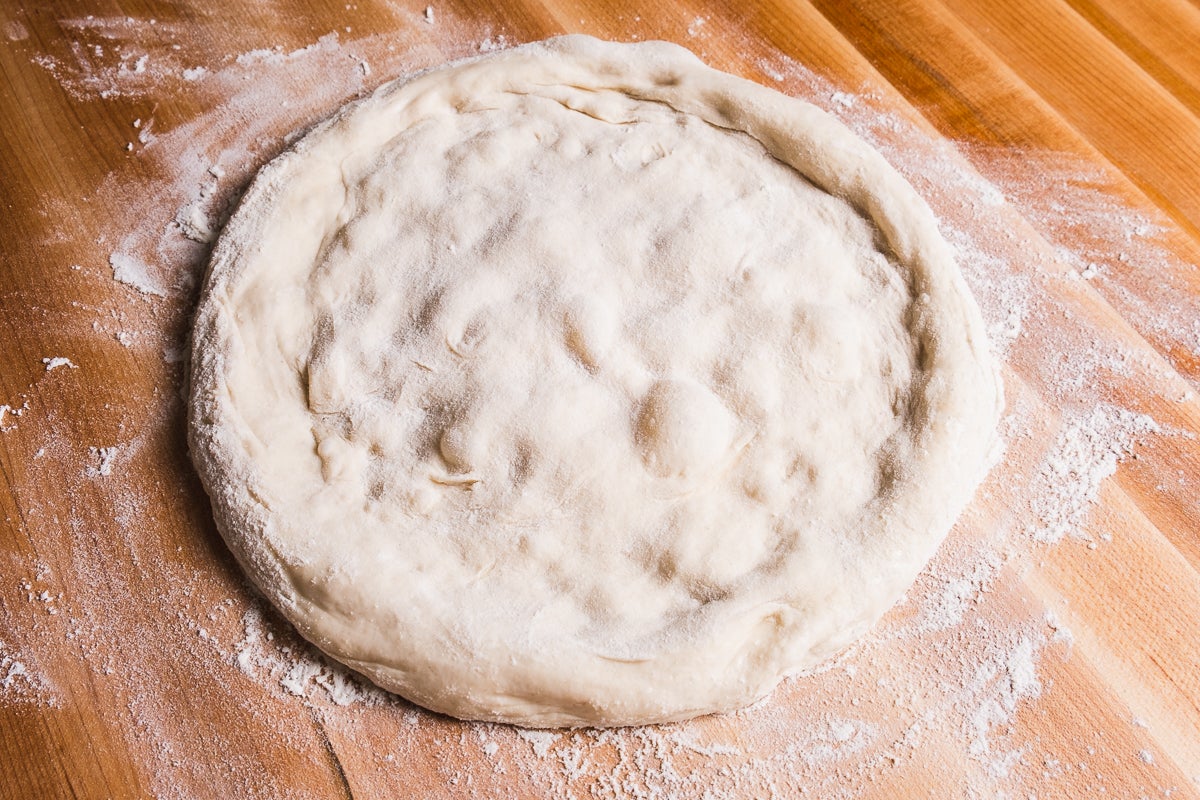
Once that extensibility is achieved, you need to make the most of it. Even the most relaxed pizza dough will tighten up if manhandled, so it’s important to treat the dough with care once it’s fully mixed, or you risk it toughening up once baked. For that reason, I prefer to shape my dough into individual balls before fermentation begins, rather than dividing after bulk fermentation (the initial rise). That way they relax as they proof, and stay that way right up to the bake.
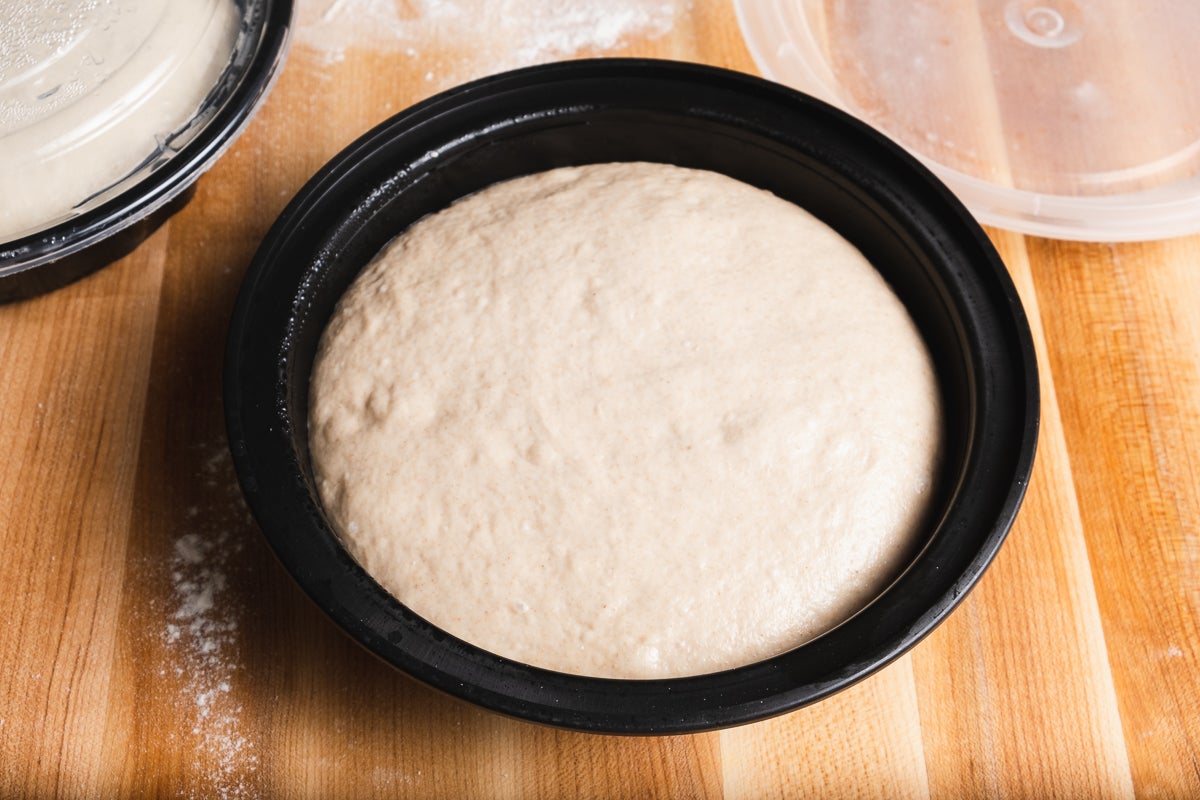
Similarly, I like to proof my dough balls in individual containers, which makes it easy to move them around without needing to lay hands on the dough prematurely. (Stackable and lightweight round plastic takeout containers are perfect for this.) Once it comes time to bake, the container can be gently flipped over to release the ball of dough onto a floured counter to be stretched. At that point it’s up to you to nudge the dough to its final dimensions gently, which isn't hard to do with a little practice.
Finally, we get to the moment of truth: the bake. As I've said, hotter is generally better when it comes to pizza, in order to encourage that ideal contrast between a moist interior and crisp exterior. Since home ovens generally don’t go higher than 550˚F, after cranking the oven knobs all the way up we need to come up with other strategies to speed up the bake.
The first way to maximize heat output is to bake the pizza on a surface with a lot of thermal mass, like a baking stone. The stone absorbs the oven’s heat and then pumps it into the underside of the pie, where it’s needed most to bake the crust quickly.
Better yet is a baking steel: a slab of metal that works like a stone but has the additional benefit of being more conductive, so that the heat moves more quickly into the pie. (Upgrading from a stone to a steel can reduce baking times by one-third or more!)
Whether you use a stone or a steel, you want to preheat the baking surface for at least an hour if using a stone, and at least 30 minutes for a steel.
Of course, pizza has a top and a bottom, and it’s important to make sure it bakes evenly from above as well, or the pie is likely to overcook while waiting for the cheese and the rim to brown. To maximize the heat that reaches the top of the pizza, place the stone or steel as high in the oven as possible, so that it will be exposed to reflected heat bouncing off the roof of the oven. (You still want to leave room to get the pizza in and out of the oven easily, so whether you put it on the first or second shelf depends upon the dimensions of your particular oven.)
Finally, there are some "experimental" approaches to consider trying. You can flip on your broiler, either to help saturate the baking surface with heat before loading the pizza into the oven, or to apply more heat to the top of the pie as it bakes. Or you can do both. If you use the broiler once the pizza is loaded, keep a careful watch over the pie to avoid burning it.
Using the convection setting on your oven can speed up the bake time of your pizza as well, but how evenly it does so depends on your oven. (I tend to use it on mine, but I have to also rotate the pie so that it browns evenly.)
Finally, don’t let all my advice intimidate you into thinking that making great pizza at home is hard to do and not worth attempting. Above all, pizza should be fun, both to make and to eat. There might be a lot to consider when looking to up your home pizza game, but none of the individual elements are all that difficult to implement. The more of these ideas and approaches you start to apply to your pies, the better your pizza will be.
For more artisan bread tips, find the rest of our Artisan Bread Series here.