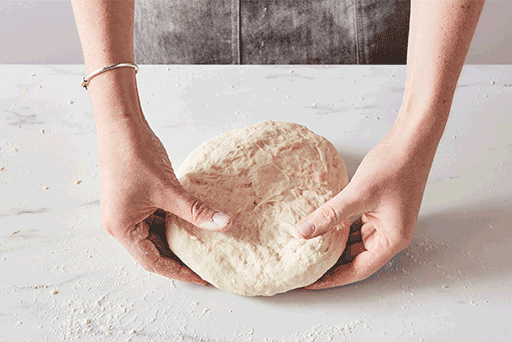
Hide images

Instructions

Prevent your screen from going dark as you follow along.
  1. Weigh your flour; or measure it by gently spooning it into a cup, then sweeping off any excess. Mix all of the ingredients in the order listed, and mix and knead — by hand, or using a stand mixer — to make a smooth dough. It won't be particularly soft nor stiff; it should be smooth and feel bouncy and elastic under your hands.

    A baker kneading dough by hand on a countertop and gently poking it to see that it has become bouncy.
  2. Place the dough in a lightly greased bowl, or large (8-cup) measuring cup. Cover it, and let it rise for 60 to 90 minutes, till it's become quite puffy, though not necessarily doubled in size.

  3. Gently deflate the dough, and shape it into a fat 9" log. Place it in a lightly greased 9" x 5" or 10" x 5" loaf pan.

  4. Cover the pan, and let the dough rise for 60 to 90 minutes, till it's crowned 1" to 1 1/2" over the rim of the pan. Towards the end of the rising time, preheat the oven to 350°F.

  5. Bake the bread for 20 minutes. Tent it lightly with aluminum foil, and bake for an additional 15 to 20 minutes, till it's golden brown. An instant-read thermometer inserted into the center will read 195°F to 200°F.

  6. Remove the bread from the oven, and turn it out onto a rack to cool. When completely cool, wrap in plastic, and store at room temperature.

Tips from our Bakers

  • If you're short on yeast and want to reduce the amount you use in this recipe, here's how: Cut the yeast from 2 1/4 teaspoons to 1 teaspoon. For its first rise, cover the bowl and place the dough in a warmer than usual environment, about 85°F to 88°F or so. Let the dough rise until it doubles in size, about 2 hours. Shape the dough, put it in the pan, and let it rise in its warm environment for another hour, or until it's noticeably puffy. Bake as directed. Alternatively, you can let the reduced-yeast dough rise at normal room temperature (65°F to 70°F); it will take about 3 hours for its first rise, and another 3 hours once it's shaped and in the pan. For more information see our blog post, How to bake bread using less yeast.

  • Want to make this bread using a bread machine? See our Walter Sands' Favorite Bread Machine Bread.

  • We call for a fairly wide range of water here due to two variables: how bakers measure their flour, and climate/season. Flour is drier and will absorb more liquid in winter, and/or in a dry climate; in summer or in a humid climate, it's moister and will absorb less. So generally speaking, you'll use more liquid in your bread in winter, less in summer. In addition, some bakers measure their flour by dipping the cup into the bag or canister, tapping the flour to pack it down, and leveling it off. The way we measure flour here at King Arthur is to stir/aerate the flour, sprinkle it gently into the measuring cup, and level it off. If you're of the scoop/tap/level school, which measures a "heavier" cup of flour, you'll need to use more liquid. At any rate, for this recipe, start with a smaller amount of water and move up, if necessary; it's easier to add water than to take it out! Your goal is a dough that starts out a bit sticky, but as you knead becomes soft (but not sticky) and smooth, not "gnarly."

  • This signature white sandwich loaf is an updated version of King Arthur's popular Walter Sands Basic White Bread, And who was Walter Sands? The Sands family became associated with King Arthur in 1820, 30 years after the company's founding. Walter headed up the company from 1943 to 1968, when his son, Frank, took over as president. Frank led an effort that made King Arthur a national brand by the turn of the 21st century; eventually he and his wife, Brinna, sold the company to us, the employee-owners. to this day, Frank and Brinna remain the inspiration behind King Arthur's long-time quest: to serve our community, do the right thing, and provide Americans with the best flour in the world.