A bountiful blueberry scone recipe
A delicious way to showcase fresh berries

Date
August 5, 2019

The summer isn’t complete without a trip to a local blueberry farm. I pick pounds of ripe, juicy berries. I’m always sure to have enough to eat straight from the pint and enough to bake with. I make blueberry pies, and of course muffins too. But one of the easiest, most elegant ways to use your fresh berries? Our Lemon Blueberry Scones recipe.
This one-bowl recipe comes together quickly. You can go from dreaming about warm blueberry scones to actually splitting one in half and slathering it with butter in a half-hour, flat.

We’ll teach you how to make this crave-worthy, perfectly sweet blueberry scone recipe so you can show off the jewels of summer: fresh blueberries. Let’s get started.

If you can’t pick your own berries, be sure to carefully select your berries at a farmers market or grocery store. While I love eating giant blueberries, medium to small-sized berries are best for baking.
Why? Don’t the big berries pack big flavor?
Large berries may be sweet if they’re fully ripe, but they also contain the most water. For baking, smaller berries allow for a more even distribution of fruit and a less soggy texture.
Look for berries that are smaller than a dime, if possible. And remember, this recipe truly shines with fresh (rather than frozen) berries.
You can use frozen blueberries in a pinch, but as my fellow blogger Annabelle writes in her post, Fresh vs. frozen fruit in baking, “If a recipe specifically calls for fresh fruit, it’s safe to say that’s the ideal way to go — especially if the word ‘fresh’ is in the recipe’s title.”
You can try substituting frozen blueberries in our other blueberry scone recipe; follow the tips we outline in our post, The secret to baking with frozen blueberries.
Before you dive into the Lemon Blueberry Scones recipe, choose your flour mindfully: King Arthur Unbleached All-Purpose or Pastry Flour. Decide based on the texture you’re looking for in your final scone.

If you want to make scones with a traditional consistency somewhere between cake and biscuits, choose all-purpose flour.
If you’re looking to make scones that are more tender and delicate, choose Pastry Flour. Its low protein content (8% compared to all-purpose at 11.7%) ensures your blueberry scones will practically melt in your mouth. Those made with all-purpose flour will still be scrumptious, just a bit more hearty.
Once you’ve acquired your blueberries and selected your flour, gather your ingredients. You’ll need:

If you’re planning to bake the scones right after you prepare the dough, preheat the oven to 375°F. (This way the oven will be nice and hot when your scones are ready.) You can also leave the oven off and prepare the dough to be baked later, for a fast make-ahead treat.
To make the dough, begin by measuring your flour. The best way to do this is with a scale. If you don’t have a scale, consider treating yourself to this essential kitchen item. It’s one tool that can truly change your baking for the better — incorrectly measured flour is one of the most common baking pitfalls.
If you measure your flour by volume, be sure to fluff up the flour then gently spoon it into your measuring cup. Use a knife or another straight edge to swipe off any excess.
Put your perfectly-measured flour into a large mixing bowl. Add the salt, sugar, and baking powder and whisk well.
Now it’s time to work in the butter. Be sure to use cold butter (from the fridge, not frozen). If you wonder what kind of butter you should be using, we’ve got just the article for you: Butter for baking.
Cut the butter into pieces; I usually start with 1/2” cubes. Then use your fingers to flatten the butter into leaf-like shards. You can also use a pastry blender for this step, rocking the tool back and forth to combine the butter with the dry ingredients.
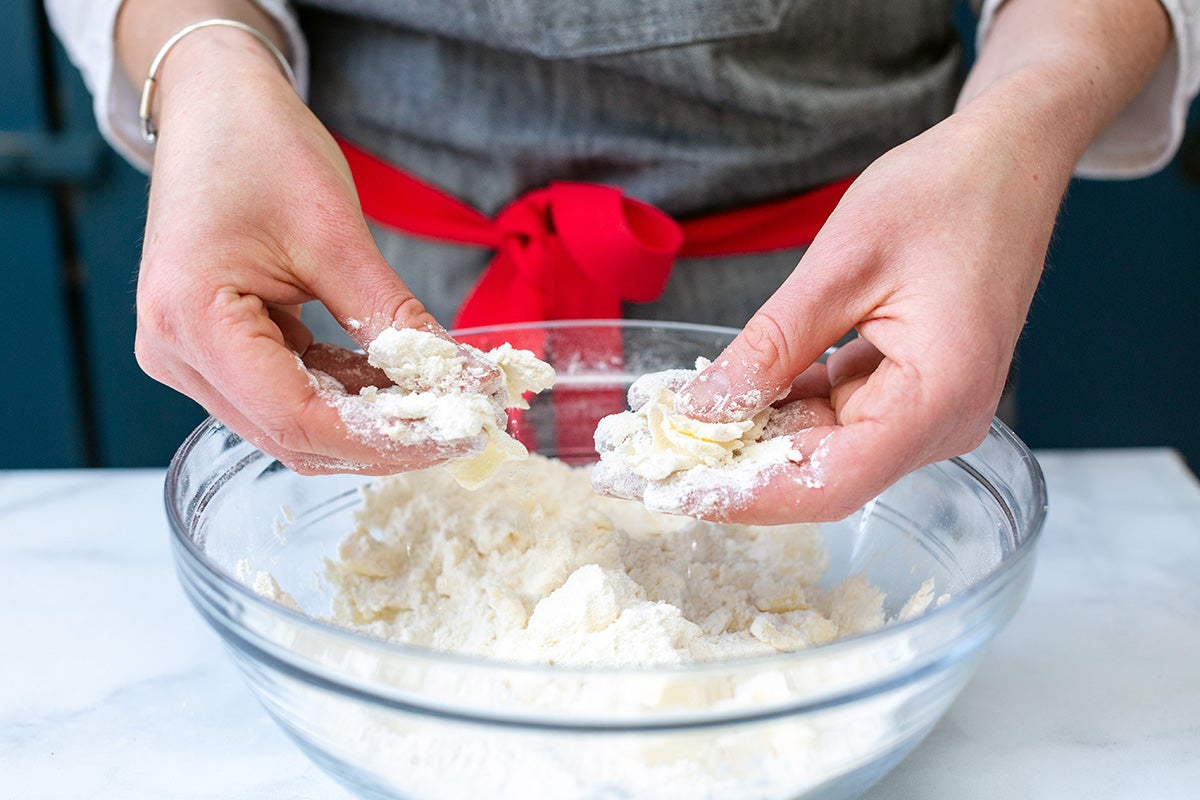
Stop mixing once the butter is in small, pea-sized chunks. This will give your Lemon Blueberry Scones little pockets of buttery deliciousness.
Leaving the butter in small chunks also creates that classic craggy scone look and feel.

In a large measuring cup, mix together the eggs, yogurt, vanilla extract, and lemon zest (or oil).
What kind of yogurt should you use? We like plain whole milk yogurt for baking, though you can use low-fat or even Greek yogurt too. If you use flavored yogurt, expect the scones to be slightly sweeter and have a touch of the yogurt's flavor.
Use a fork or a whisk to break up the egg and homogenize the mixture.

Add the wet ingredients to the dry ingredients.
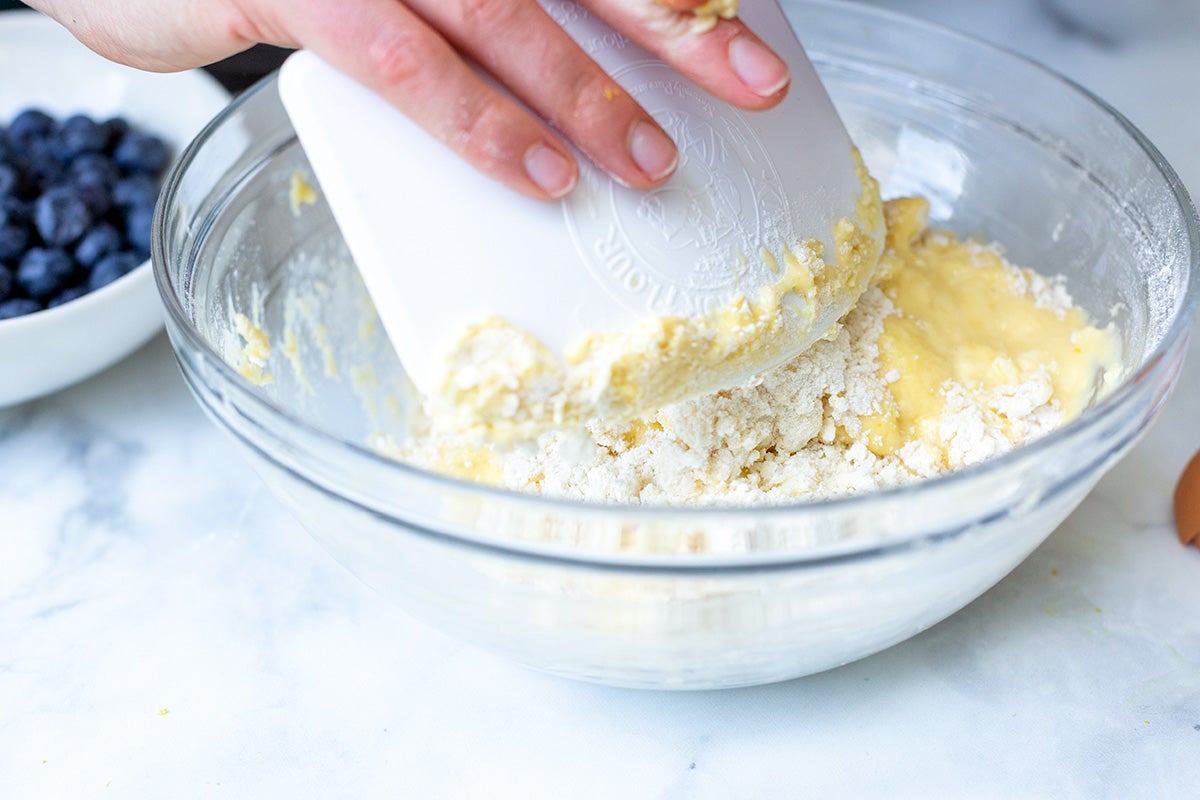
Stir the dough gently until all the ingredients are combined.
At this stage, the dough should be the consistency of wet drop-cookie dough. (Think sticky chocolate chip cookie dough.) If there’s still quite a bit of powdery flour at the bottom of the bowl, drizzle in a few teaspoons of additional milk. Give the dough a few more folds, incorporating the freshly hydrated flour into the rest of the dough.
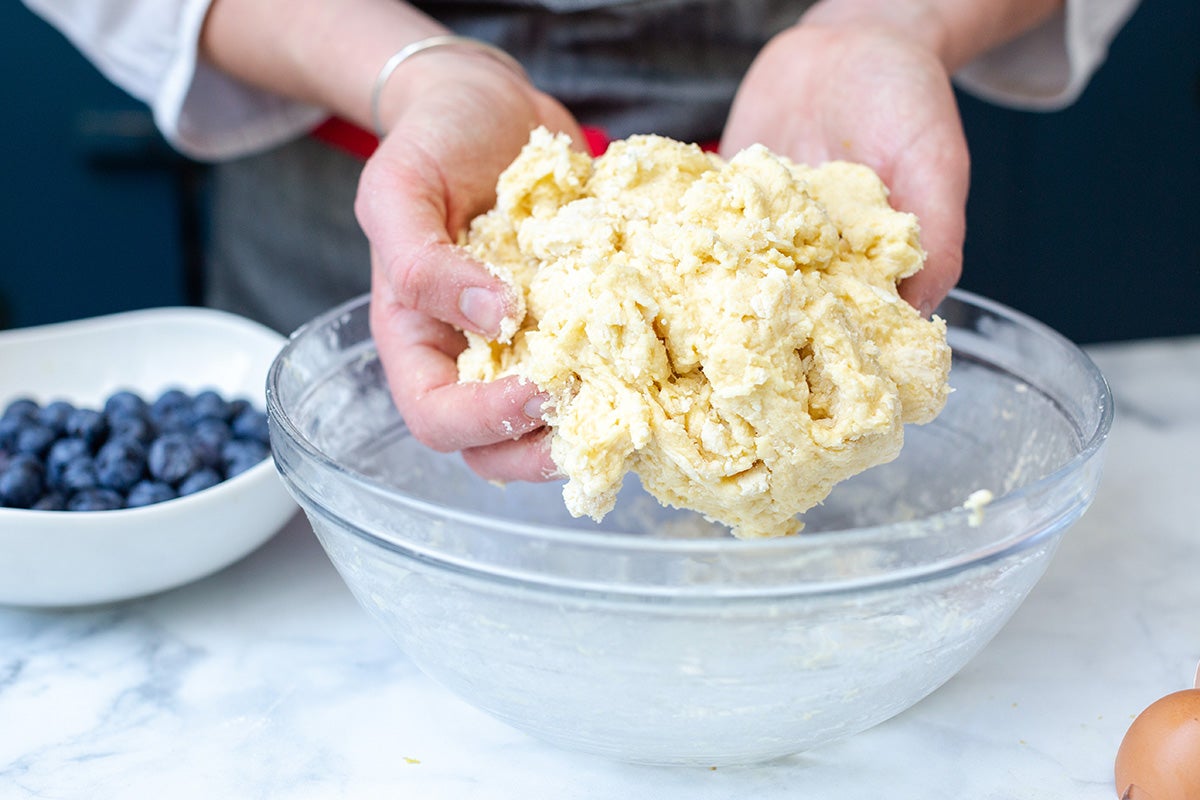
In the humid months of summer, you might find that the dough is quite wet and difficult to handle. You can add an extra tablespoon of flour to the dough to bring it to the right consistency.
Alternately, cover the sticky dough with plastic or your favorite reusable wrap and let it rest in the fridge for half an hour. This will make the dough easier to handle once it's absorbed some of the liquid.
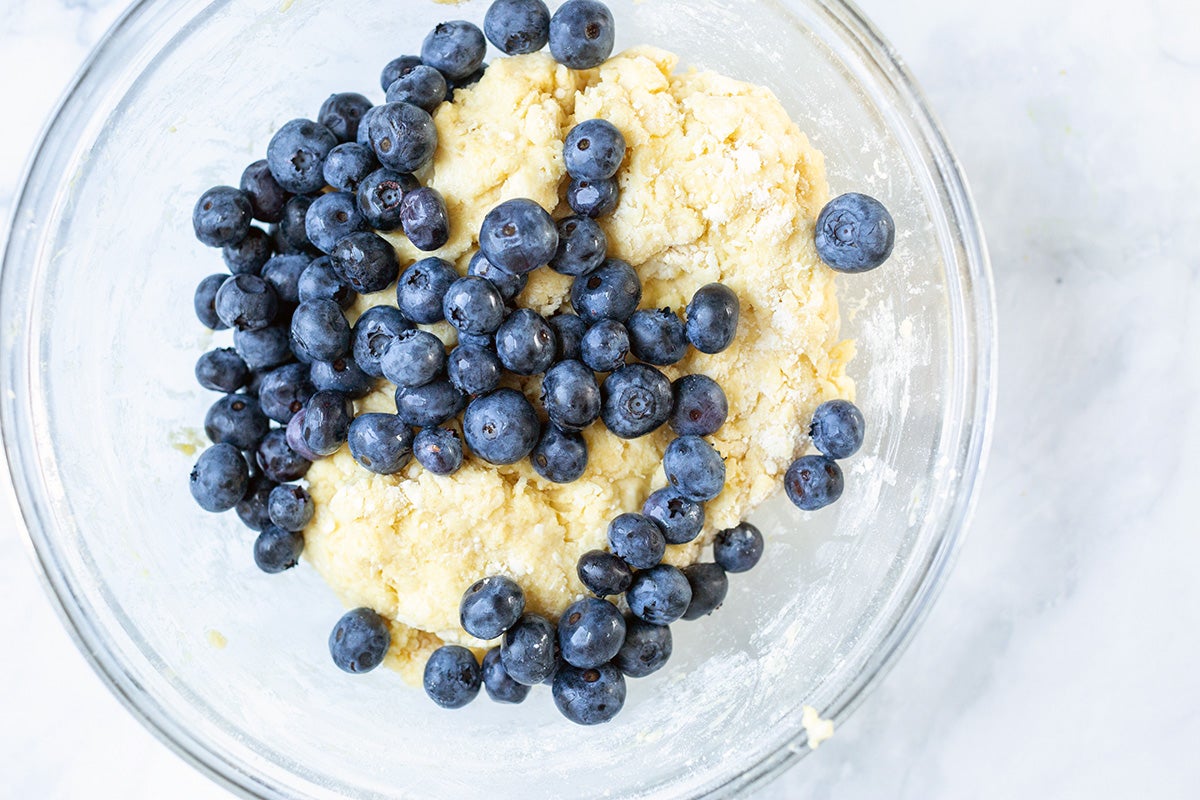
Once the dough has just the right consistency, stir in the blueberries. Use gentle folding motions to avoid breaking the berries.
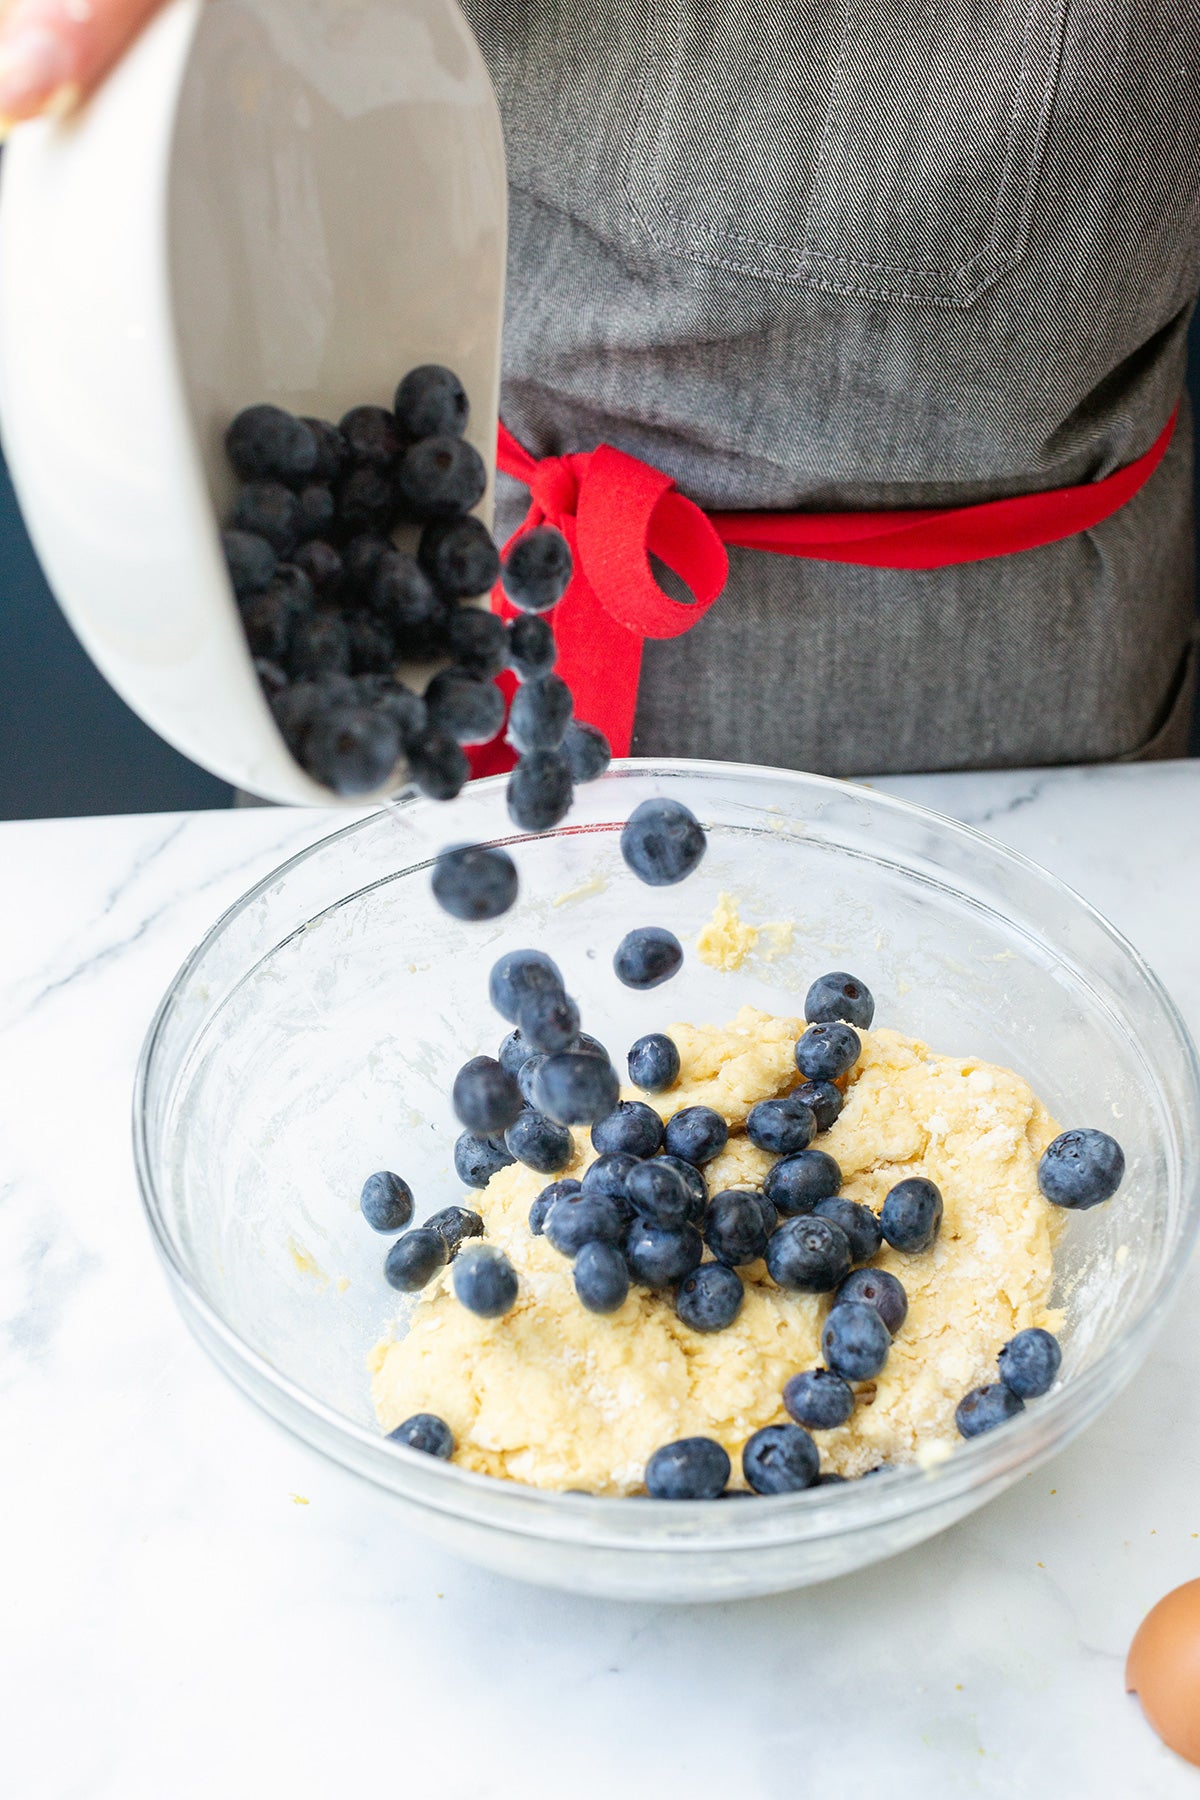
If a few end up bursting, that’s OK — but whole berries impart an impressive look, so try to keep them intact if you can.
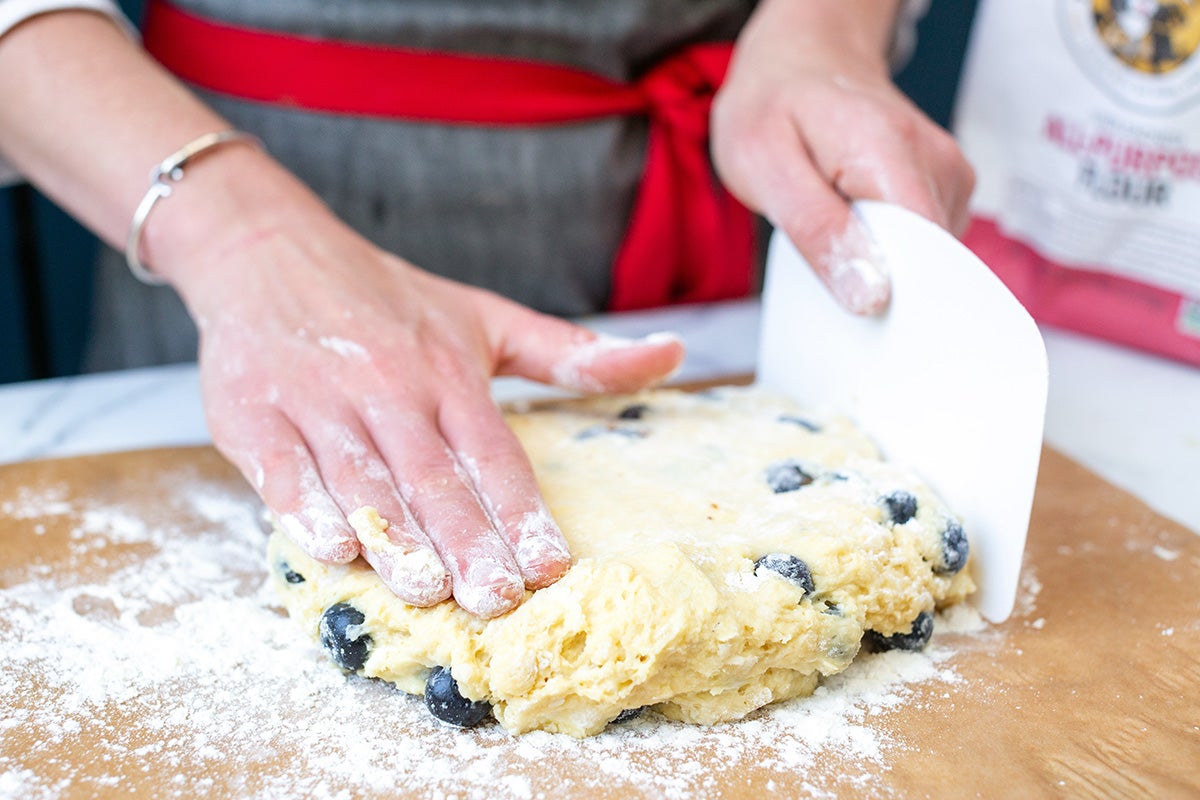
When you’re ready to shape your scones, dust your work surface with flour. Use enough flour that you could write your name in it and easily read the word. Don’t use so much that your surface seems totally white — that would make your scone dough dry.
Next, take the dough out of the bowl and place it on the counter. Using your hands, pat it into a 1” thick rectangle. An 8” by 10” rectangle works well here. Use a dough scraper or bench knife to tidy up the edges.
At this point, you can wrap the dough in plastic and put it in the fridge for a few hours, or up to overnight. Having scone dough ready to bake in the morning is a glorious gift you can give yourself (and any lucky houseguests).
You can also freeze the unbaked scones if you want to bake them later. To do this, use a bench knife or a sharp knife to cut the dough into 10 triangular scones.
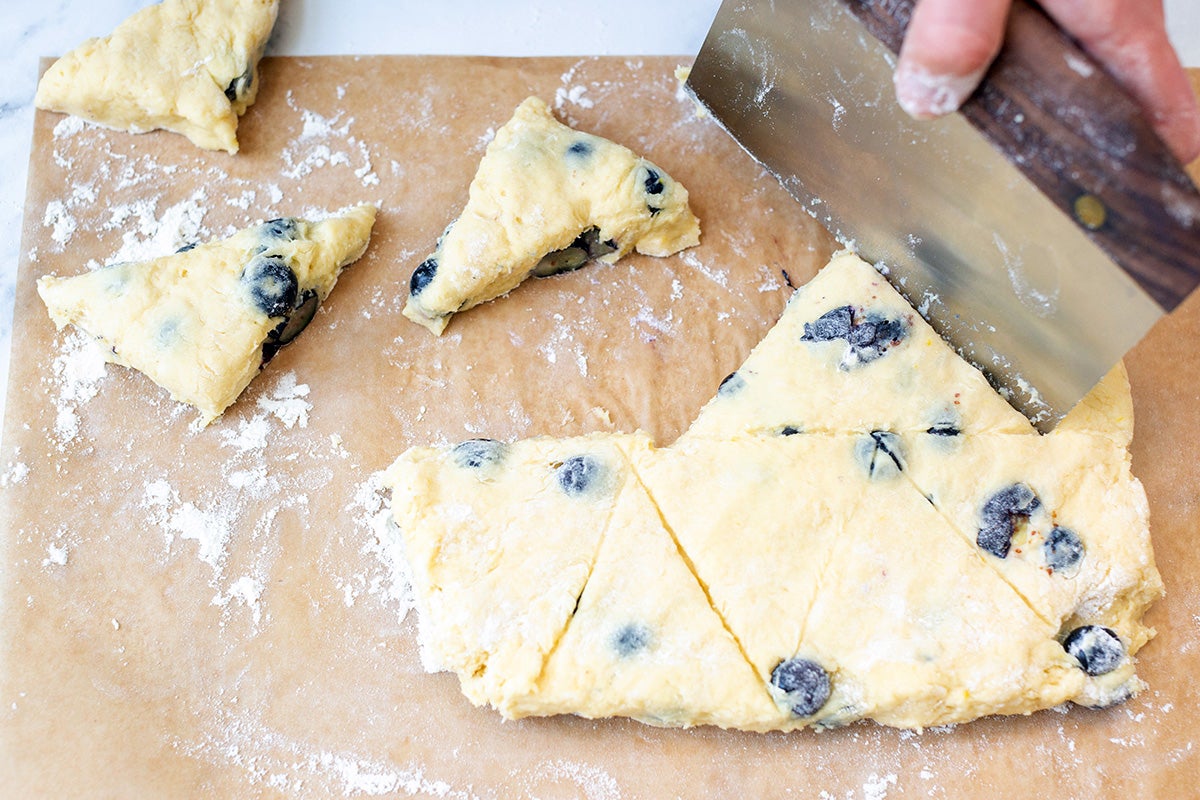
I cut the dough in half length-wise first and then cut equal-sized triangles from there. Feel free to use whatever process you like to divide the dough evenly; you can even shape the dough into a 1"-thick disc if you prefer cutting wedges from a round.
Bottom line: You want to end with up 10 scones that are about the same size so they bake evenly.

Once the dough is sliced, place the scones on a baking sheet or plate that will fit in your freezer. Put the scones into the freezer for 30 minutes to harden. Once the dough feels solid, you can put the scones in a zip-top bag or reusable container. Label and freeze for up to a month.
If you’re ready for scones now, cut the scones the same way, into 10 triangular pieces. Place on a well-greased or parchment-lined baking sheet.
For frozen scones, let them thaw on a baking sheet for at least a few hours in the fridge before baking. This will ensure the centers will bake through fully.
Right before the scones go into the oven, brush the tops with melted butter. This encourages them to turn golden brown during baking. Sprinkle with Sparkling White Sugar or granulated sugar for a little extra crunch and sweetness.

Bake the scones for 20 minutes, or until they’re lightly browned. If you insert a toothpick, paring knife, or cake tester into the scones, it should come out clean.
Cool the scones completely on a rack. This prevents the bottoms from becoming soggy. You can store leftover scones at room temperature in an airtight container for several days. Reheating scones before enjoying is a fantastic way to refresh them.

One of the easiest ways to make a better-for-you scone is to add some whole wheat flour to the mix.
My go-to whole wheat flour is King Arthur Golden Whole Wheat Flour — it's 100% whole grain yet lighter in color and less assertive in whole wheat flavor than other types of whole grains.
Use 1 cup (113g) of whole wheat flour in place of the all-purpose or pastry flour in the recipe. No other changes are necessary, and you'll end up with delightful, whole wheat fresh blueberry scones!

If you or someone you're baking for adheres to a gluten-free diet, you're in luck! You can still enjoy bountiful blueberry scones.
Simply replace the all-purpose (or pastry) flour called for in the recipe with 2 cups (240g) of our Gluten-Free Measure for Measure Flour.
Check the scones after 20 minutes of baking to see if the tops are firm and the bottoms are brown. Gluten-free baked goods often need a few more minutes to bake through than their gluten-full counterparts; your gluten-free Lemon Blueberry Scones may need about 2 to 3 minutes of additional time in the oven.

Whatever version of this Lemon Blueberry Scones recipe you end up baking, you're in for a treat. The tender crumb, the buttery flavor, the crunchy sugar topping are all accented with fresh blueberries in every bite. Yum.
Make this recipe while the berries are fresh and flavorful!
Let us know what you're excited to make with fresh blueberries this season in the comments, below.
Thanks to Anne Mientka for taking the photographs for this post.