


Twinkling Good Vanilla Snack Cakes
Homemade vanilla snack cakes ... in the Twink of an eye!

When we started planning our Snack Cake Smackdown (more word on that Friday), my first thought was "Woo-hoo!" quickly followed by "I wanna do Twinkies!" Growing up in Massachusetts, we lived in the same town as a Hostess Thrift shop, and boxes of Twinkies were a favorite treat for lunchboxes and after school. With three kids and a tight budget my mom rationed them out so that we didn't eat the whole box in one sitting, but I think we could have without too much effort. The cake was soft and fine, but ooooh, the filling!
Then, I heard through the grapevine that PJ had laid claim to Twinkies. Stomp feet, grumble under breath, sigh. I suppose I have to make something else. Isn't that just awful? Here I am with one of the best jobs out there, baking wonderful treats and sharing them with others, and I'm fussing about it?! “Really, Mary,” as my mother would say.
So, I fiddled with a few different possibilities like re-creating the Hostess Fruit Pie. I loved the blueberry ones as a kid, and never could figure out what the square pieces of fruit were in the filling (they were pear). It sounded like a great project, but then I decided I wanted to skip frying. My husband David kept pushing for Ho-Hos, and my 14-year-old daughter Shannon was no help at all; she doesn't eat any of the above.
Nothing sounded just right, and I just kept thinking about Twinkies...
I had finally settled on some version of Ho-ho's when PJ sent around a reminder about the blog and said she was doing Choco-Bliss, not Twinkies. The grapevine had a kink in it this time, and Twinkies were really up for grabs - so grab them I did! I was ecstatic, and couldn't wait to get testing.
In just about every Twinkies ad I've seen there's been a reference to the sponge factor of the cake itself, so of course my first thoughts for the cake were sponge cake. But somehow I didn't want sponge cake, I wanted chiffon cake. What's the big difference, you ask? Let's take a look.
Sponge cakes and chiffon cakes both rely on the incorporation of air into eggs to lift the flour and sugar into a light and tender cake. Sponge cakes don't contain additional fats, while chiffon cakes have oil incorporated into the batter. Sponge cakes may be made without separating the yolk and white of the egg, but chiffon cakes have the yolks in the batter, and the stiffly beaten whites are folded in later. Sponge cakes are most often associated with jelly rolls and jam filling. Chiffon cakes had their heyday in the ’50s and ’60s as light, fruity cakes with a delicate glaze for topping.
So, again, why choose a chiffon cake over a sponge cake for these Twinkie wannabes? One vivid memory I have of Twinkies is the way the cake looked inside the package. There would be a thin film coating the inside of the plastic sleeve, and small, moist pieces of cake and filling would be stuck in the creases. Those would be swiped up first on the tip of a finger to give a tiny taste of the treat to come. That moistness was what motivated me to think that chiffon cake, with its added richness from the oil, would be perfect for these cakes. Boy howdy, was THAT ever the right move!
As fellow Twinkie fans know, the filling is very hard to duplicate. It isn't the same filling that Suzy Q's and Hostess Cupcakes have. That filling is a bit coarse and grainy (in a good way), where Twinkie filling is smooth, oh so smooth, and more luscious than those other fillings. My first try for filling was the classic Marshmallow Fluff filling, and while it was good, it wasn't quite right. In doing some research into creamy vanilla fillings, I came across a reference to a cooked flour filling. Now, I admit I couldn't wrap my head around a cooked flour filling at first, but once I made a batch, it was love at first bite. Sure, I've tweaked it a bit since then, but take it from me: this is THE filling to use.
For those of you who read PJ's earlier note about Banana Split Twinkies, don't worry. I've included that version in the tips section of the recipe. One banana, two banana, three banana, four... Let's make Twinkling Good Vanilla Snack Cakes.
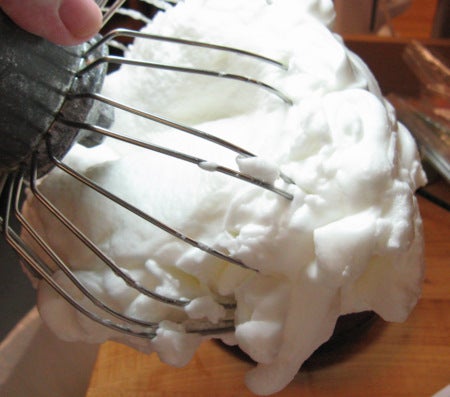
Begin by separating 7 eggs. Set aside the yolks for the cake batter, and in your mixer bowl, whip the whites until very stiff. I do this in my mixer bowl first, when it's cleanest. Any dirt or traces of fat will keep the whites from whipping properly.
Preheat the oven to 350°F and coat your filled cake pan or cupcake tins with a light layer of cooking spray.
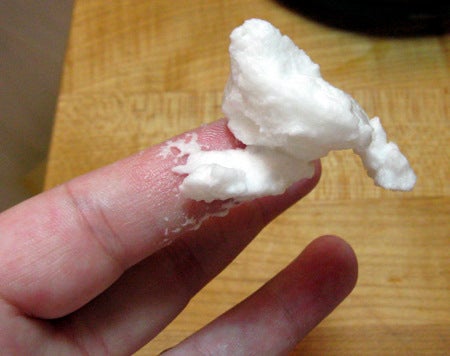
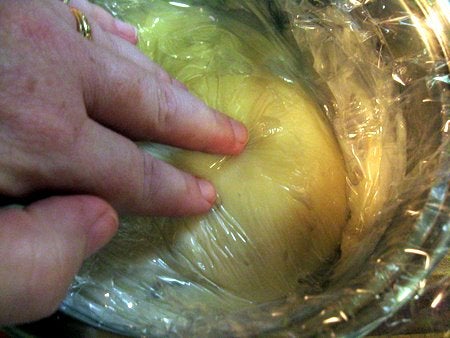
You'll know the whites are stiff enough if you can pick up a piece with your finger, and it holds its shape perfectly, no sagging or drooping. Honestly, I just scooped up this piece and didn't notice until I was editing the photo how much it looks like a tiny little bird perched on my fingertip.
Transfer the whites to another bowl while you prepare the rest of the batter.
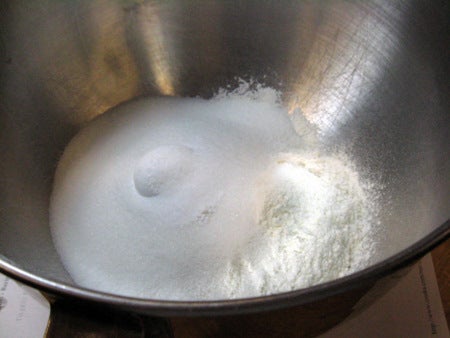
Place all of the dry ingredients in a mixing bowl and whisk for 1 minute on low speed to aerate and incorporate the ingredients.
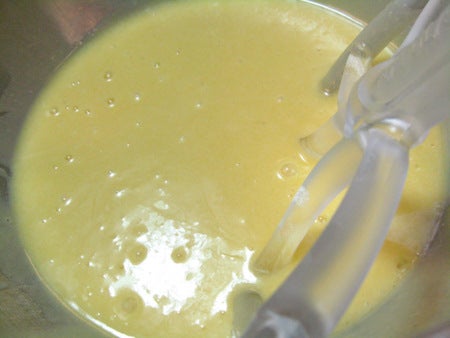
Add the yolks, oil, and water, plus vanilla. Beat on medium speed until smooth.
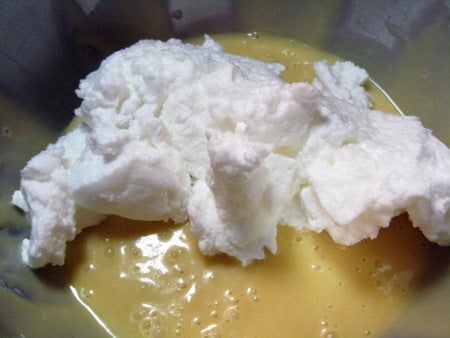
Take about 1/3 of the whipped whites and add to the batter. Don't worry about folding gently at this point. This first addition of whites is just mixed in to lighten the batter so it accepts the folded whites more easily.
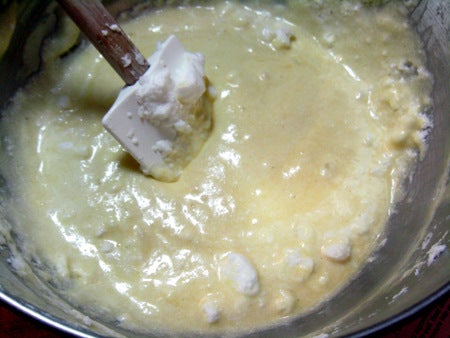
See? Not fancy, just blended in until there are only small lumps of white remaining.
Add another 1/3 of the whites and fold them into the batter gently. A wide spatula is your best tool here. To fold, cut down through the center of the whites to the bottom of the bowl and lift, turning the spatula over as you come back to the surface of the batter. Give the bowl a quarter turn, and repeat until only the barest traces of whites show in the batter.
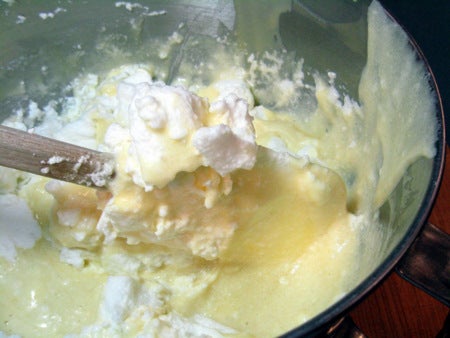
Add the last of the whites and fold in again.
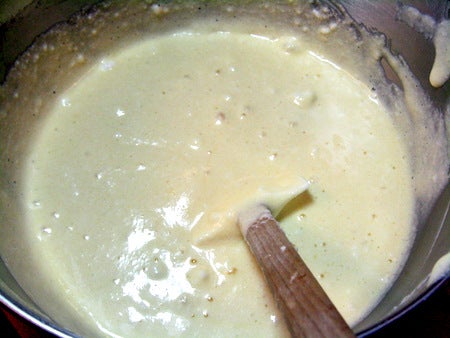
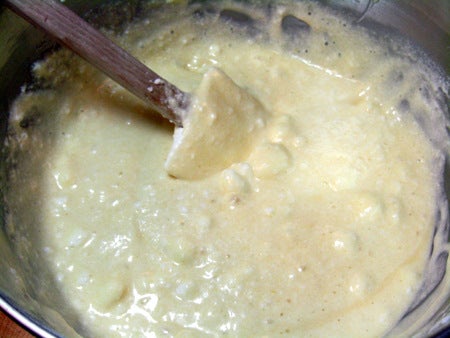
When you're finished folding, the batter will have increased in volume significantly and look light, airy, and full of bubbles.
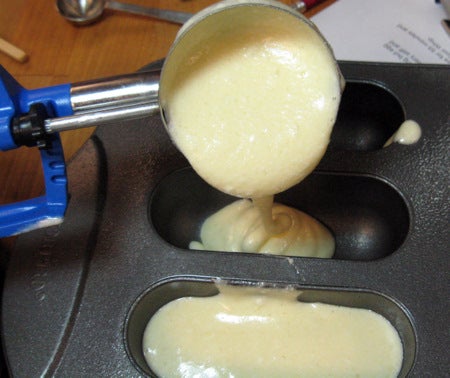
A muffin scoop is a huge help here as you fill your pans 2/3 full. These cakes have a lot of spring, but you definitely want to fill more than half way. You'll see the comparison in a later photo. Bake the cakes for 10 to 12 minutes, slightly longer for cupcakes.
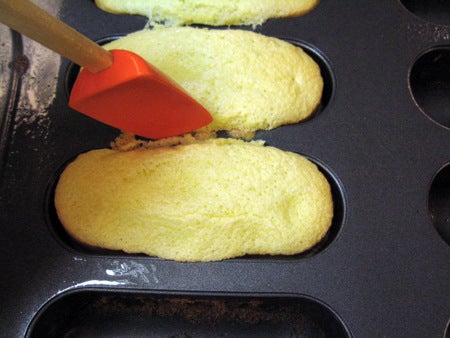
The cakes are done when they're golden brown at the edges, puffy in the centers, and have begun to pull away from the edge of the pan. Use a soft, flexible tool to gently coax the cakes from the pan. These mini silicone tools are perfect for the job. Cool completely on a rack while you prepare the filling.
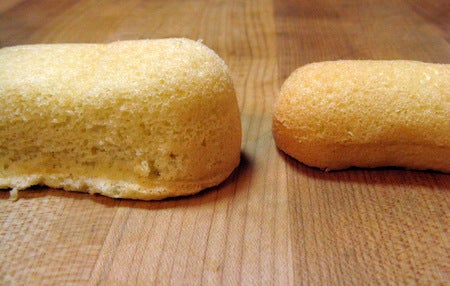
Remember filling the pans 2/3 full? The cake on the right was only filled 1/2 full, and you can see a definite difference. In my mind more cake is better. After all, more cake can hold more filling. Speaking of filling, let's take the plunge into this unique cooked filling.
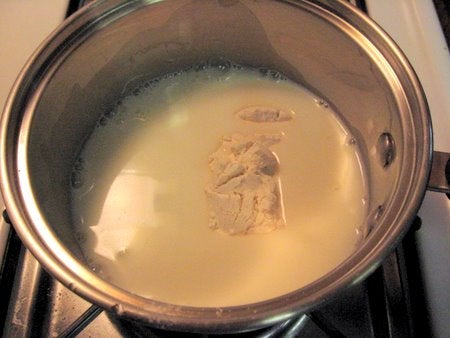
In a small saucepan, combine the flour and milk and cook over medium heat, whisking constantly.
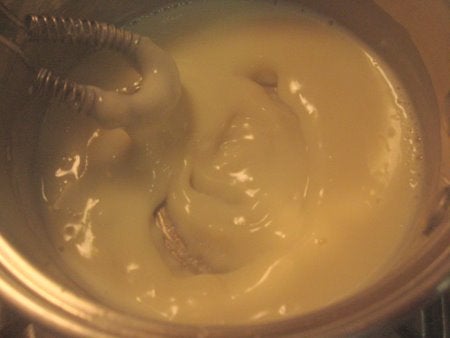
As the filling begins to thicken, reduce the heat and continue whisking.
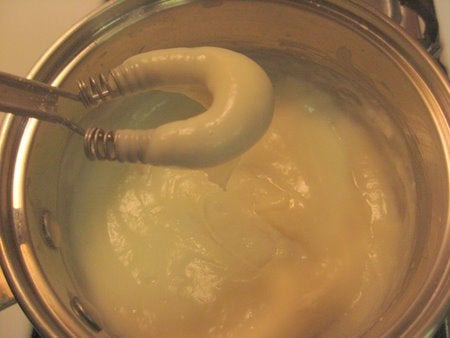
When the mixture has thickened to the consistency of pudding, remove from the heat and continue to stir for 1 minute.
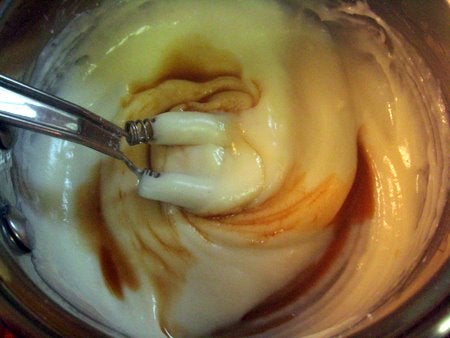
Add the vanilla (and a dash of salt, if desired), and stir until well combined.
Cover the mixture with plastic wrap, pressing the wrap down well to avoid a skin forming, and set aside to cool completely.
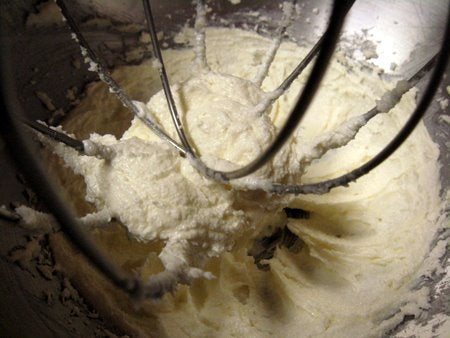
In your mixer bowl cream the butter, shortening, and sugar until lightened and fluffy.
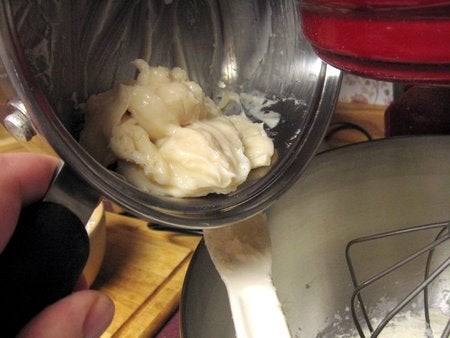
Add the cooled flour mixture and beat on high speed for 3 to 5 minutes, until light and creamy.

Mmmm, creamy and delicious. Let's get filling!
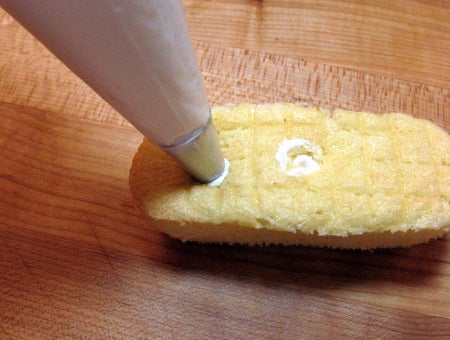
Using a pastry bag with a wide round tip, pipe the filling into the cooled cakes. Press the tip into the cake about halfway and gently squeeze in the filling. Holding the cake in one hand can be very helpful as you'll feel the cake expand and can judge when to stop so that the filling doesn't burst through the side of the cake.
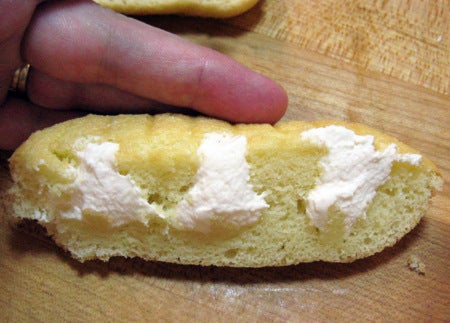
Ah, just right. Each bite will have soft, springy cake and creamy filling.
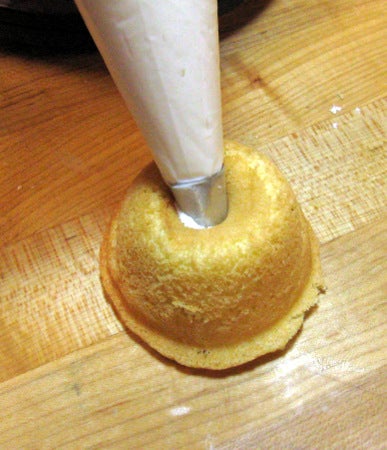
To fill cupcakes you can fill from the bottom or the top; it's baker's choice here. For the vanilla snack cakes I filled from the bottom. Slightly rotating the tip in the cake as you fill will help distribute the filling to the sides instead of just the center of the cake.
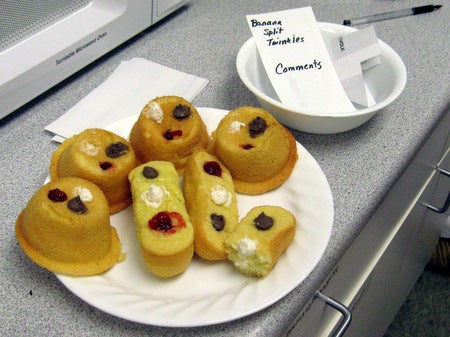
Drum roll, please! Introducing the Banana Split Snack Cake! Few people know that the original flavor for Twinkies was a banana cake with vanilla filling. While the cakes were very popular, rationing of fruit led to today's vanilla version.
While I was getting ready to test these cakes, I was chatting with fellow bloggers Susan and PJ and hit upon the idea of a banana cake version, but decided to take it to the next level with a trio of fillings to invoke that oh-so-delightful summer treat, the banana split sundae.
Begin by substituting 1/2 to 3/4 teaspoon of banana flavor for the Princess Cake flavoring in the cake. How much flavor you use depends on how much you like banana. Mix and bake as usual. For fillings I chose the creamy vanilla shown above; strawberry jam, and chocolate icing.
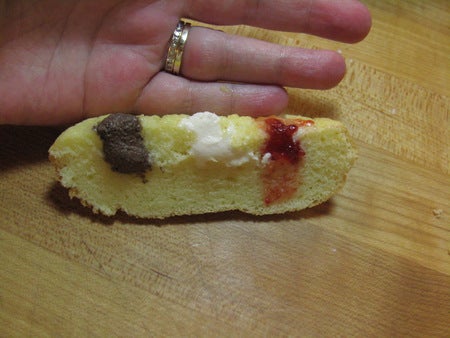
Fill each of the classic three holes with a different filling. The jam is a bit trickier to pipe if it has bits of fruit in it, but makes for a more authentic sundae experience.
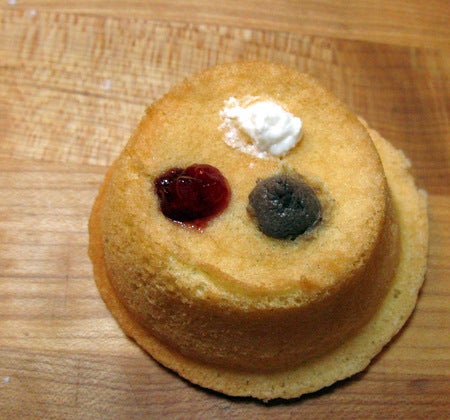
Yummy, banana split cupcakes. How's that for a bake sale special or lunchbox treat?
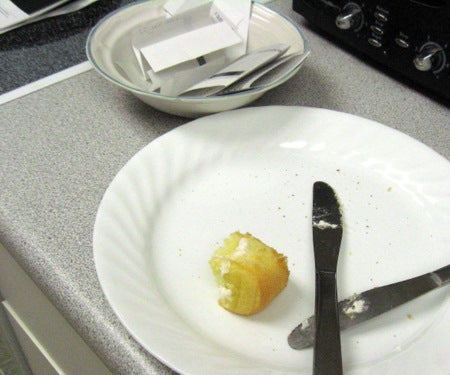
Come taste-testing time, you can see that these Vanilla Snack Cakes were a big hit with our crew.
Now it's your turn. Please bake, rate, and review these Twinkling Good Vanilla Snack Cakes and let us know what you think! Happy baking!
