-
Preheat the oven to 350°F with a rack in the center. Line two 6" round pans with parchment rounds, then lightly grease the parchment and sides of the pan.
-
To make the cake: In a small bowl, whisk the flour, baking powder, and salt. Set aside.
-
In the bowl of a stand mixer fitted with the flat beater attachment, or working in a large bowl with an electric hand mixer, combine the sugar, oil, and butter on medium-low speed until the mixture is pale and creamy, 1 to 2 minutes.
-
Add the eggs one at a time, mixing on medium-low speed after each addition until the egg is fully combined. Scrape down the bowl, add the extracts, and beat until well-combined.
-
Add about one-third of the dry ingredients and mix on low speed until almost no dry streaks remain. Add half of the milk, beat to combine, then add another one-third of the dry ingredients, followed by the remaining milk. Add the last third of the dry ingredients and beat on low, scraping the bowl as needed, until the batter is smooth and combined.
-
Pour about 2 cups (about 470g) of the batter into a liquid measuring cup; this is the vanilla batter. Pour the remaining batter into a second liquid measuring cup or small bowl. Sift in the cocoa powder and espresso powder, then whisk by hand until well combined; this is the chocolate batter.
-
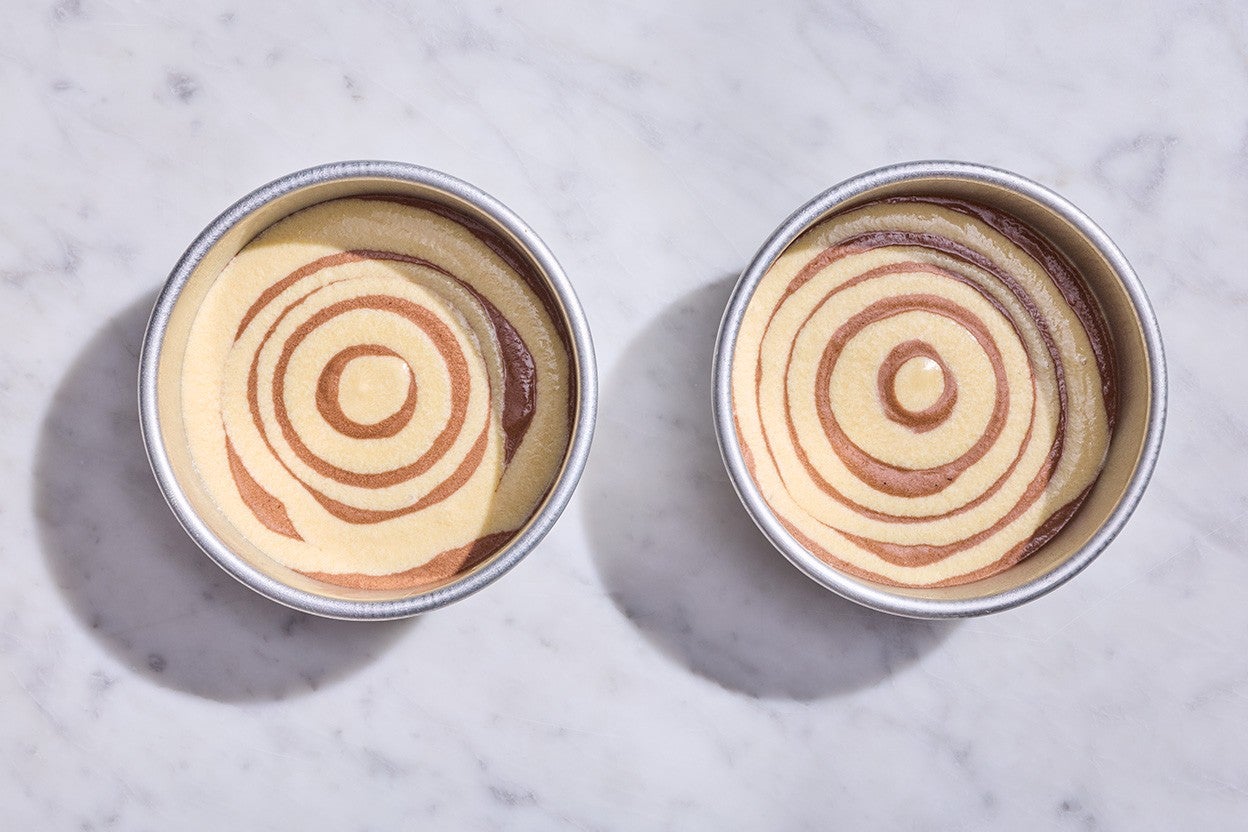
To each pan, pour or scoop 1/4 cup (about 50g) of the vanilla batter into the center (a 4-tablespoon scoop works well here). Next, add 1/4 cup (50g) of the chocolate batter right on top of the vanilla batter in the pans (aim to portion it directly in the center), which will cause the vanilla batter to spread into a ring. Continue to add 1/4 cup of each alternating batter in a bull’s eye fashion until the batter is used up, ending with vanilla batter. As you work, you will likely need to create slightly smaller rings to best fill the space — this is more an art than a science!
-
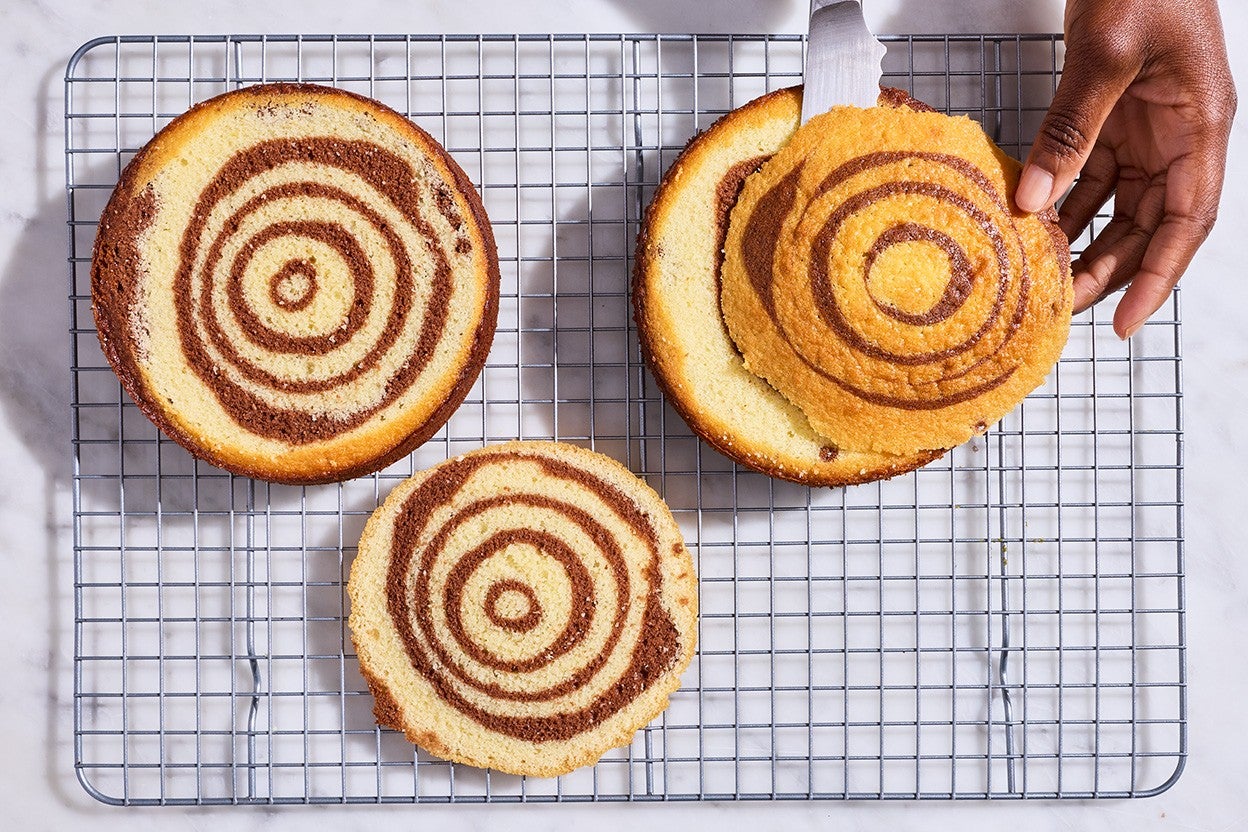
Transfer the pans to the oven and bake for 35 to 45 minutes (cakes made with Gluten-Free Measure for Measure Flour will take the full time), until golden brown; when done, the edges should pull away from the sides of the pan and the center should spring back when lightly pressed. Remove from the oven and transfer the cakes to a wire rack. Run an offset spatula or dull knife around the edges to loosen. Let cool for 10 minutes in the pans, then turn out onto a wire rack to cool completely.
-
To make the cake soak: In a small bowl, whisk together the granulated sugar and hot water until the sugar has dissolved. (If necessary, microwave the mixture in short bursts, stirring between each, until the sugar granules disappear.) Set aside.
-
To assemble the tree stump cake: Carefully trim just the very tops off both cakes to flatten them out and expose the striped pattern below. (Save the most beautiful trimming; snack on the other one.) Next, carefully slice each cake in half horizontally to make a total of four layers plus one trimming.
-
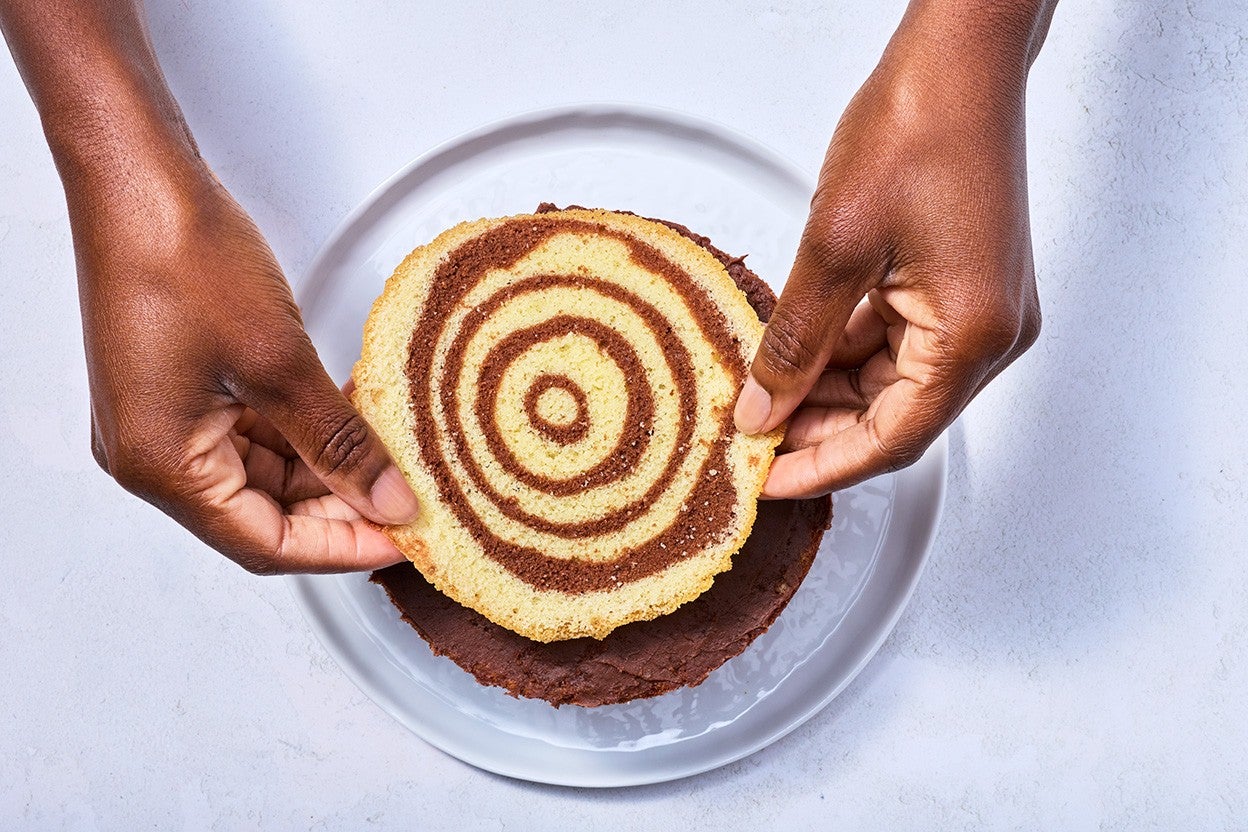
Place one layer, cut-side up, on a cardboard cake round or serving plate. Use a pastry brush to generously dab the exposed cake with some of the soak, then top with about 1/4 cup (60g) of the chocolate frosting (a 4 Tablespoon Scoop works well here) and spread it into an even layer.
-
Top with 1 tablespoon (21g) of the raspberry jam, spread into an even layer, then place the next cake layer on top. Repeat the process of stacking the cake, brushing the soak, and layering with chocolate frosting and jam until you’ve added the final layer of cake.
-
Brush the final layer of cake with the soak, then spread about 2 tablespoons (30g) of the chocolate frosting on top to make a thin layer; place the reserved trimming on top of the frosting, exposed-side up. (This adds height to the cake and reduces scraps.) Gently brush the remaining soak all over the top of the cake.
-
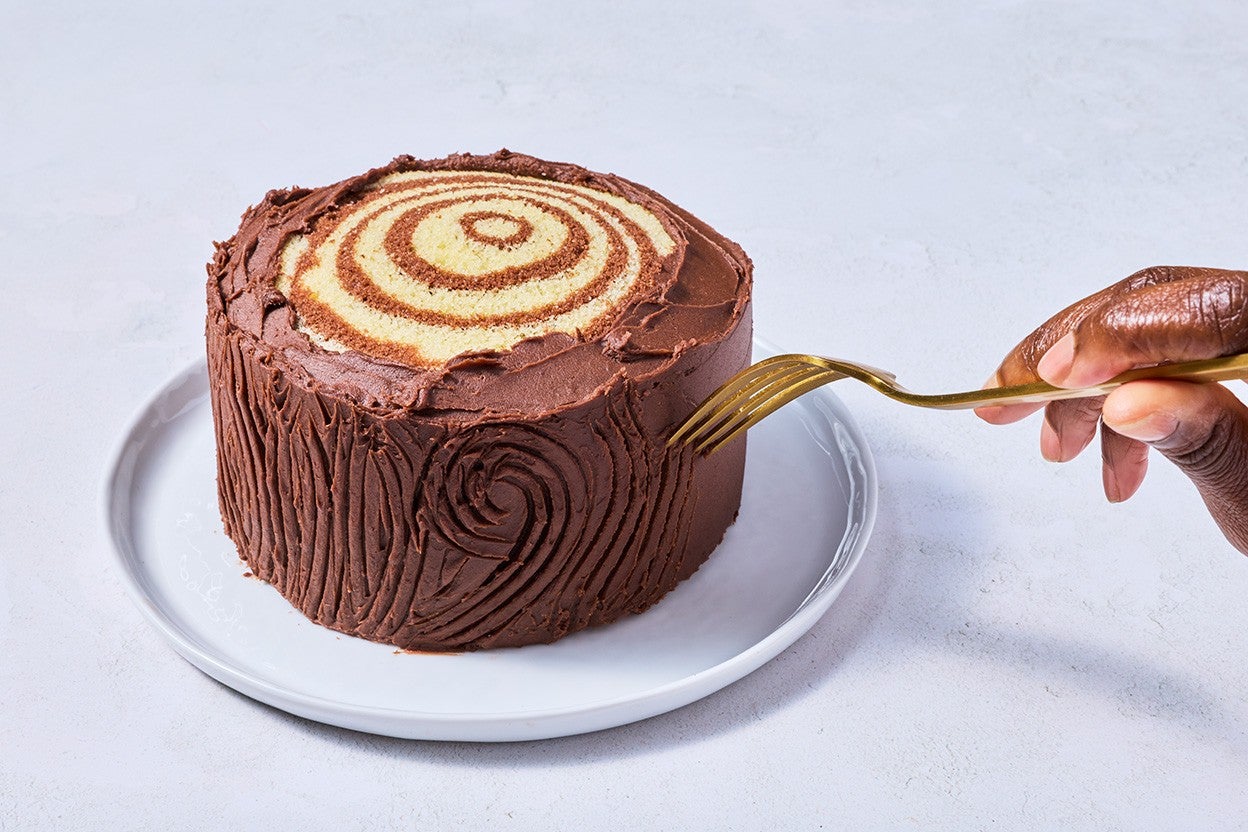
Cover the sides of the cake with a thin layer of chocolate frosting (the “crumb coat”), then chill until set, about 20 minutes.
-
When the frosting is set, apply more frosting to the sides of the cake, avoiding the top, which will be left bare to show off the “rings” of the tree stump cake. Drag the tines of a fork over the sides of the frosted cake in a wavy pattern to create a bark-like appearance. Sprinkle ground pistachios around the edge of the cake to mimic moss, if desired. Slice and serve at room temperature.
-
Storage information: Store the tree stump cake in the refrigerator for several days; wrap well and press a piece of plastic against any non-frosted surfaces. Let come to room temperature before eating.