-
To make the cookie dough: In the bowl of a stand mixer fitted with the flat beater attachment or working in a large bowl with an electric hand mixer, beat together the butter and sugar on medium speed until light and fluffy, 1 to 2 minutes.
-
Beat in the egg and vanilla until well combined, 1 to 2 minutes, scraping the sides and bottom of the bowl as needed.
-
Add the baking powder and salt, beat to combine, then add the flour and mix on low speed to form a stiff dough, 1 to 2 minutes, scraping the bowl as needed.
-
Transfer half of the dough (about 1 1/2 cups or 420g) to a sheet of parchment. Place a second sheet of parchment on top and press to flatten the dough slightly. Roll the dough to 1/4" thick, making about a 10" round. Repeat with the remaining dough, then transfer both parchment sandwiches to a baking sheet and refrigerate for at least 30 minutes and up to overnight.
-
When ready to bake, preheat the oven to 350°F with a rack in the center.
-
Remove the chilled dough from the refrigerator. Peel off the top sheets of parchment and use them to line two baking sheets.
-
Use a 2 3/4" round cutter to cut out rounds from each sheet of dough. (We especially like using a fluted round cuter for these iced sugar cookies.)
-
Transfer the cookies to the prepared baking sheets, spacing evenly apart, up to 12 cookies per tray.
-
Bake the cookies for 12 to 14 minutes, until the edges are just beginning to brown. Cookie dough that was refrigerated overnight may need a couple of extra minutes to bake.
-
Remove the sugar cookies from the oven and let cool completely on the pan.
-
While the first batch bakes, gather and re-roll the scraps of dough. Refrigerate the rolled-out dough for a few minutes, as needed, to make it easier to handle. Repeat until all the dough is used; cut and bake as directed.
-
To prepare your food coloring: If using powdered food coloring, like our Plant-Based Food Colors, place each color powder in its own small bowl. Mix the powders before hydrating if you’d like to create a color you don’t have on hand. (Make green by mixing blue and yellow; make purple by mixing red and blue.) Once all your colors are mixed and in their own small bowls, hydrate them as directed on the package. If using gel colors, create any additional colors you desire by mixing accordingly in small bowls. Otherwise, there’s no additional preparation required.
-
To ice the cookies: In a large bowl, stir together all the icing ingredients except for the coloring, starting with the smaller amount of milk. Use a flexible spatula or a fork to mix until smooth. The glaze should be thick but soft enough to spread easily and settle into a smooth, even layer. If the glaze is too thick, dribble in more milk, 1 teaspoon at a time.
-
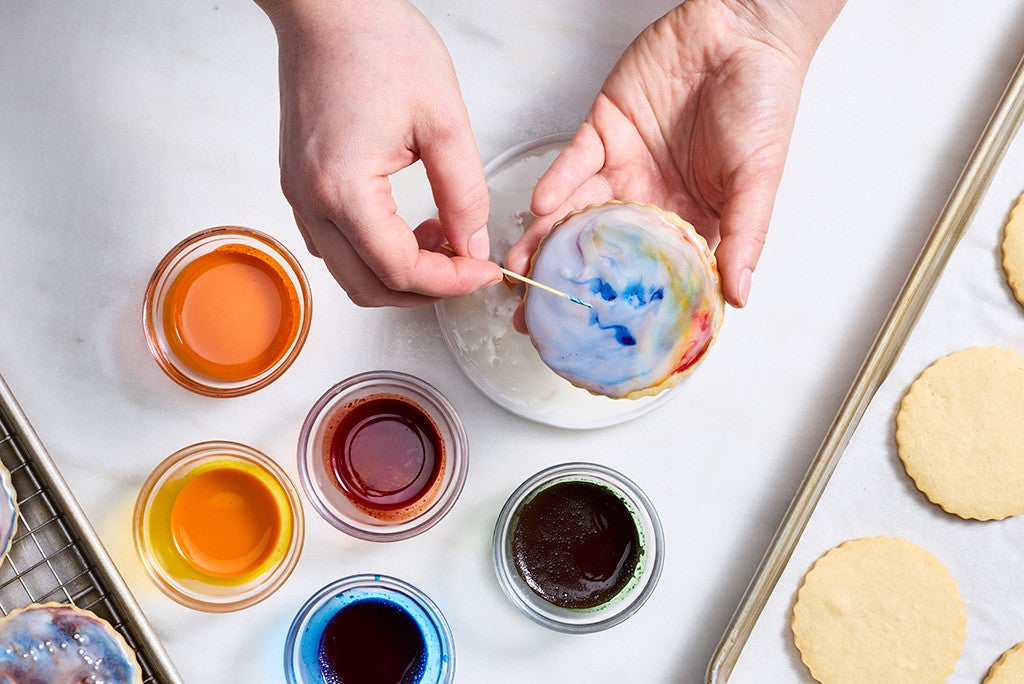
Transfer about 1/2 cup of the glaze to a shallow bowl or rimmed plate. Using small spoons (1/4- or 1/8-teaspoons work well), portion a few drops of various colors onto the icing, then gently swirl them together with a toothpick or the tip of a knife. Don’t mix in the color completely; you want streaks to remain.
-
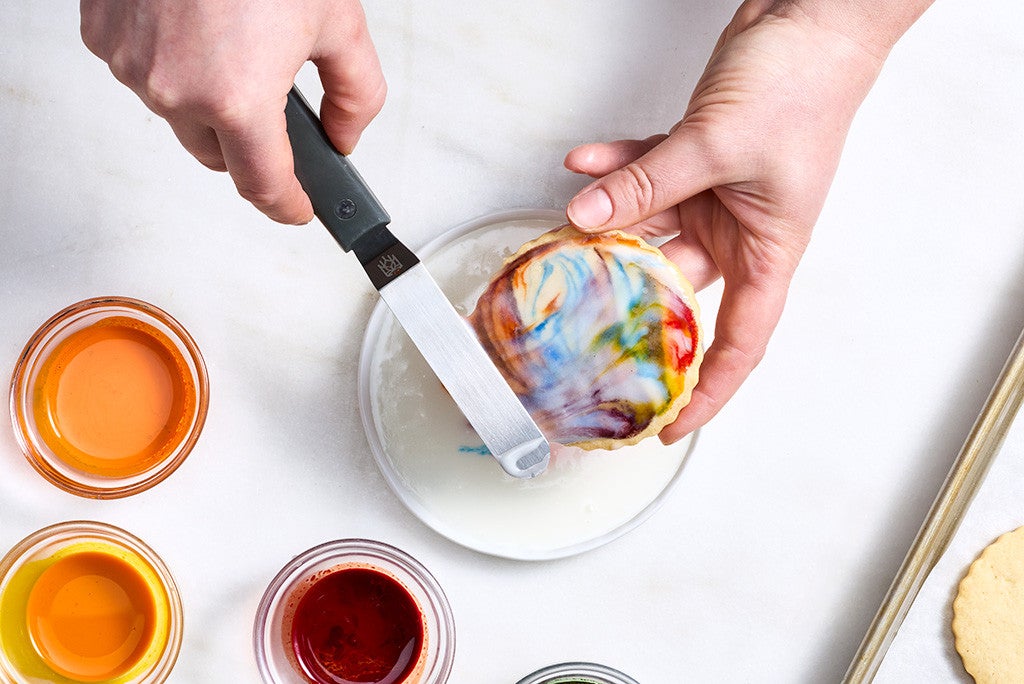
Dip the face of a cookie into the icing, then rotate it once or twice from side to side. Carefully lift the cookie straight up and let any excess icing drip back into the plate or bowl.
-
Use a small offset spatula to smooth the icing into an even layer. The colors will mix together in an organic-looking design.
-
At this point, you can add a few more streaks of food coloring to the surface of the cookie itself and use a toothpick or small offset spatula to swirl them in, or pick up specific-colored icing from the plate. The decorating process is more art than science — experiment with different techniques and embrace the variance of every cookie!
-
Return the iced cookie to the lined baking sheet and while the icing is still wet, sprinkle with sparkling sugar, white nonpareils, and/or your favorite sparkly sprinkles. (A random smattering, with some concentrated in one area, looks particularly celestial.)
-
Decorate the rest of the cookies, adding more food coloring to the icing and more icing to the plate as necessary. (Adding the icing in stages prevents it from mixing together into one uniform color as you work.)
-
Let the iced cookies set at room temperature before serving or storing the cookies, at least 1 hour.
-
Storage information: Store leftover iced sugar cookies airtight at room temperature for 5 days; freeze cookies, preferably undecorated, for longer storage.