





How to proof bread in the oven
Common challenge, simple solution.

Date
October 23, 2026

During proofing, bread and other yeasted doughs do best in a temperature-controlled, humid, draft-free environment. Your kitchen counter may not cut it (especially in colder months), but is there a corner of your kitchen that fits that description? Yes, your oven — and you don’t even need to fire it up!
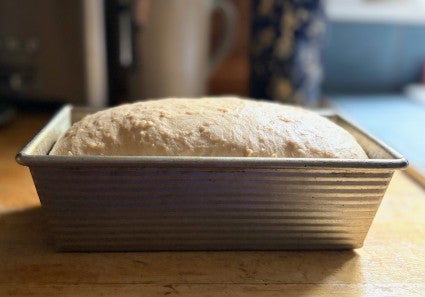
Yeast dough is happiest when rising at temperatures between 75°F and 78°F. It will certainly rise in cooler or warmer temperatures. But for most doughs, that range is optimum for both yeast development and bread flavor.
Your oven’s interior will pretty much mirror room temperature. And depending on the time of year (or how much you use air conditioning), that temperature could be pretty cool—too cool for yeast’s comfort.
To get the oven up to that ideal proofing temperature, people often turn to a couple of different methods. I decided to try a bunch of them to see which is best — and helpfully, there was a clear winner.
It’s tempting to simply preheat the oven for a minute or so to warm its interior; but not only is this hit-and-miss (How long should I leave it on? Will the oven get too hot?), it’s ineffective; the heat quickly dissipates once you turn the oven off.
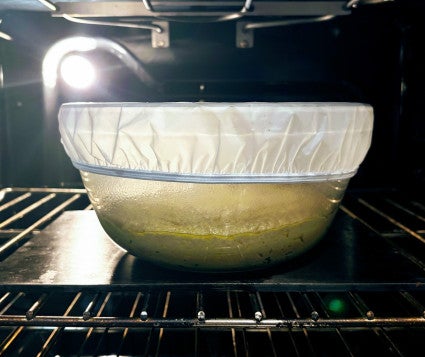
Enter your oven light. When turned on, your oven light’s slow, gentle heat will gradually warm the oven to the desired temperature. After trying a number of different methods for proofing bread in the oven, including several listed below, this was my clear favorite because it created the ideal temperature (not too hot, not too cold), maintained that temperature for several hours, and was essentially failproof (no overshooting the temp, for example!).
It can take your oven a while to reach the desired temperature, especially if your kitchen is cold to begin with. With so many variables — season, climate, kitchen, oven — you’ll want to do a simple experiment to determine your own best method for turning your oven into an effective, efficient proof box:
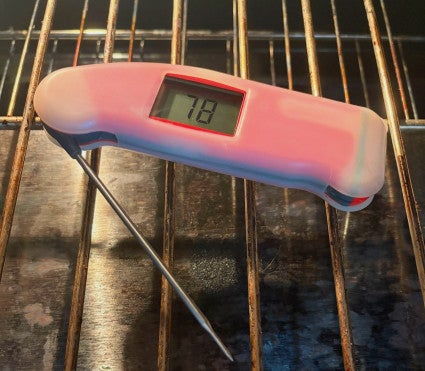
Take your oven’s temperature before turning on the light. Then turn on the light and measure the temperature again at 15-minute intervals, to see just how quickly the light warms things up. For reference, the light in my electric oven takes about an hour to raise the oven’s interior temperature by 10 degrees, and another hour to raise it an additional five degrees; your results will probably vary a bit.
Warm your oven to about 80°F before turning off the light. Over the next couple of hours, the temperature will gradually drift down by about 10 degrees, giving your rising dough plenty of time in and around that 75°F to 78°F sweet spot.
Once you know how to warm your oven using only its lightbulb, think about maintaining humidity: Dry dough can develop a tough skin, which inhibits rising.
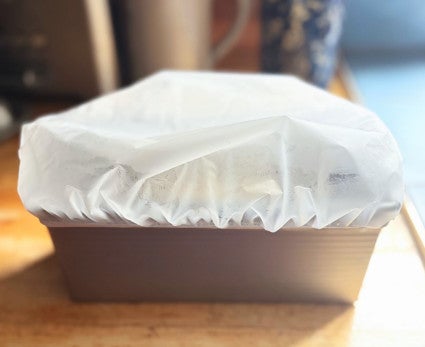
If you’re proofing dough in a bowl (or later, a shaped loaf in a pan), cover it with a clear plastic shower cap or reusable plastic bowl cover. Whatever you use, make sure it's large enough to form a “poof” on top, so the cover doesn’t touch the rising dough.
For shaped rolls (or anything else in a large, flat pan), use an extra-large shower cap; or simply drape the pan with well-greased plastic wrap, waxed paper, or parchment.
What if your oven doesn’t have a light, the lightbulb only lights when you open the oven door, or it’s a “cool” LED bulb?
Then your best bet is a pan of boiling water set on the lowest rack, which will both warm and humidify your oven’s interior. Place the bread dough on the oven’s middle rack; no need to cover it. Set a shallow pan (e.g., 9" x 13" pan) on the lower rack, and add four cups of boiling water. Quickly close the oven door.
Your oven’s temperature will immediately rise by about 30 degrees, which will probably be warmer than you want. Cool it down by opening the door wide for about five minutes; the temperature should drop about 15 degrees.
As the water in the oven cools, the air around it cools, too. But it happens so gradually that your oven should still remain sufficiently warm for the one to two hours your bread typically needs to rise. For longer-rising breads, simply switch out the cool water with another pan of hot water, if necessary.
Some ovens actually have a proof setting or proofing drawer. I don’t always love using this setting, though: Most are programmed to temperatures ranging from 90°F to 100°F, far warmer than yeast dough’s optimal 75°F to 78°F. For best results, figure out how long it takes to reach about 80°F, then turn it off.
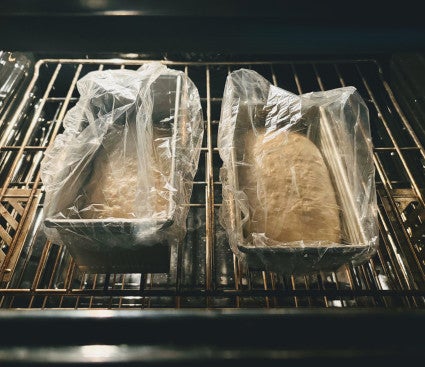
Tip #1: If you have to open the oven door to check your rising dough, don’t worry. Unlike the huge 15- to 20-degree drop you experience when opening a fully heated oven, the temperature inside your light- or steam-warmed oven will only drop by a degree or two.
Tip #2: Typically, you don’t preheat your oven with rising dough inside. So when your dough is close to fully risen, remove it from the oven and set it somewhere safe. (If there’s room, the top of your fridge is both warm and out of harm’s way.) Timed just right, your bread will be perfectly proved by the time the oven finishes preheating.
Tip #3: To prevent someone from killing your rising dough by turning on the oven (say, to warm their leftover pizza), write “NO!” on a sticky note and affix it to the oven’s start button. Really!
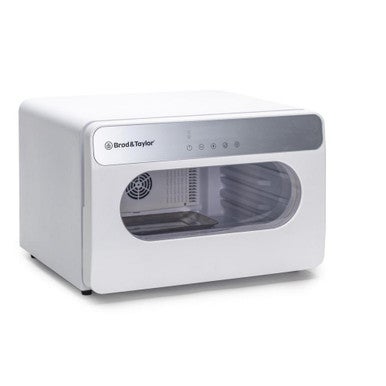
For the highly passionate bread baker (or a small baking business), an electronic proof box like the Brod & Taylor Proofer Pro is a step up from proofing dough in the oven. It controls temperature with exquisite precision, from cold-proofing (down to 41°F) for those overnight ferments up to 122°F for an express warmup, all while ensuring perfect humidity. Wi-Fi and programmable timers let you control your dough’s development for up to eight days. It’s literally set it and forget it — the process is simple, but the results are simply amazing.
Still looking for a warm, draft-free spot for your rising bread dough? Think beyond your oven to other major appliances: Both your clothes dryer and dishwasher can double as a proof box!
Cover photo by Mark Weinberg; food styling by Liz Neily.