Baking outdoors this summer? Here’s where to start.
A beginner’s guide to baking over a fire, including the best recipes to try.

Summer is here, so baker and outdoor cooking expert Ashley Rodriguez is here to show you how to take advantage of the beautiful weather and do a little baking outdoors.
* * *
Baking outdoors marries two of my loves: eating good food and being outside. And while many people may think the quality of the food is sacrificed when baking over a fire, I disagree. With simple planning and know-how, you can bake almost anything on the campsite that you could at home.
Not that it’s the same process. Baking outdoors is as much about practicing mindfulness as it is about eating warm sourdough slathered with salted butter and jam around a fire. The tools you rely on in your home kitchen (timers, thermometers, etc.) aren’t readily available — conditions are constantly changing, forcing you to be fully present. You have to watch the fire and tend to the changes that arise. While this may sound daunting, it’s a welcome change from the multitasking that fills my days at home.
Baking outdoors is for those who enjoy the process nearly as much as the reward, who long to spend as much time outdoors as possible during summer, who like to impress their fellow campers, and who enjoy a bit of adventure in their baking. If this sounds like you, then it’s time to embrace being an outdoor baker. But first, we need to know what we’re doing.
Here is what’s always in my camping kit for successfully baking over a campfire:
Cast iron skillet: There are plenty of options out there. Choose what’s best for you — preferably something you can comfortably lift that’s still big enough to feed your crowd.
Dutch oven: This is necessary for baking outdoors. Choose something you don’t mind getting dirty, as flames will lap at the sides and mark a lovely enamel coat. I like cast iron for this reason.
Stainless steel bowls: These are incredibly useful at home and in the great outdoors, as they’re light and stack tightly. They’re quite inexpensive at restaurant supply stores.
A knife kit: In the kit I include a sharp knife, a serrated bread knife (if sourdough is on the menu), a heatproof spatula, and a wooden spoon.
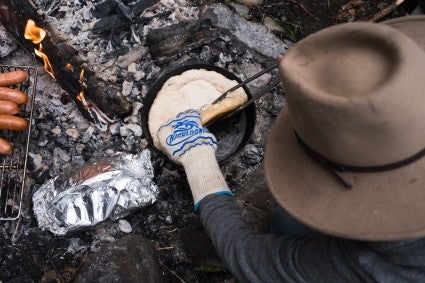
Heatproof gloves: I find these incredibly useful and much safer to use than a dish towel or potholder when lifting heavy pots out of the fire. These gloves fit tightly and handle high heat, giving you great control and protection.
Long metal tongs: These are helpful for giving you some distance from the heat of the fire.
Cutting board: This is handy to use as a work surface for shaping loaves, prepping pizza ingredients, and cutting cobbler biscuits.
A laser thermometer (optional but helpful): Great to have on hand, especially as you’re getting started baking over a fire. Eventually you’ll learn to trust the process and have a good idea of how much heat you’re getting, but this will quickly and accurately measure the heat of the outside and inside of your pan so you know if you need to remove or add more charcoal while baking.
Ingredients prepped at home: Before heading out on your adventure, read through the recipes you plan to bake and see what steps you can do ahead of time. For example, I make cobbler dough at home then freeze it so it’s ready to cut and bake at the site. This is an essential step to making baking outdoors a smooth process.
Pantry ingredients: While I do a good bit of the prep at home, I always bring a few pantry staples including salt, pepper, sugar, flour, olive oil, vinegar, and lemon.

Baking over a fire is about learning how to control and utilize the coals, not the flames. Setting up a fire for baking is different than creating a fire for gathering around and telling stories. The key to a good baking fire is to get and maintain a continuous source of hardwood coals. (Hardwood creates long-lasting, hot coals.)
To speed up the process, I bring a bag or two of hardwood lump charcoal with me. You can also use briquettes, which offer a relatively consistent heat and can be used to get a pretty accurate temperature, as they're all the same size.
To begin, build a fire as you normally would. Once the logs have ignited, you can add the hardwood charcoal around the fire. Don’t smother the flames, but do try and get the charcoal as close to the fire as possible. After about 20 minutes you should have a nice bed of hot coals.
At this point divide your fire pit into roughly two sections: one for where you'll be doing the actual baking and the other for lighting more coals. Gather the lit coals and create some separation from the part of the fire where there are flames. This is where the baking will happen.
You’ll need a good and steady supply of lit coals for the base (and in some cases, the top) of your baking vessel. Continually add unlit coals near the flames to keep them hot so you’re not waiting for fresh coals. This is especially important if you're planning to bake for quite a while over the fire. Hardwood lump charcoal will keep a steady, hot heat for 30 minutes; after that, the coals start to lose heat. Continually adding lit coals to the baking section of the fire will ensure that you have a steady source of consistent heat. The amount of coals you’ll use is dependent on how many dishes you're baking, the size, and how long your item needs to bake.
The three recipes below are perfect to start baking over the fire. They're simple, not too fussy, and can stand a bit of heat fluctuation.
It helps to have a good understanding of baking these three things in your home oven. While the process differs around the fire, there are many similarities. For example, I know that at home my bread bakes in about a 450°F to 500°F oven for an hour for best results. Around the fire I’m going to try and emulate that heat and bake time as best I can by controlling the coals around and on top of my Dutch oven.
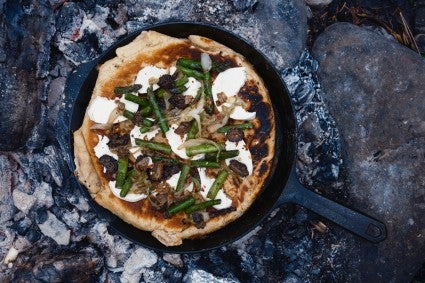
Pizza is a great starter recipe for baking outdoors. Using the base of a cast iron skillet like a pizza stone, you can get a nice bubbly, browned crust from the high heat of the coals.
When making pizza over the fire, I use the same dough that I’ve prepped for sourdough loaves to make my crust. Alternatively, you can use your favorite pizza dough recipe. I also like to prepare my toppings at home, saving myself from having to chop at the campsite.
How to bake: Form your pizza dough to fit your cast iron skillet. I like to lightly dust the dough with flour, then use my hands to shape, leaving more dough around the edge for a hefty crust — but we’re not seeking perfection here.
Heat your empty cast iron skillet over a bed of hot coals. Once hot, add a tablespoon of olive oil to the pan. Then carefully lay your pizza dough in the hot skillet while wearing your heatproof gloves. Let this cook for about 5 minutes or until the bottom crust looks golden.
Once golden and crisp, flip the pizza dough. Add your toppings then continue to cook until the cheese is melted and the dough is cooked through, another 5 to 10 minutes, depending on the thickness of your dough.
Remove the pizza from the cast iron and allow to cool slightly before slicing and enjoying.
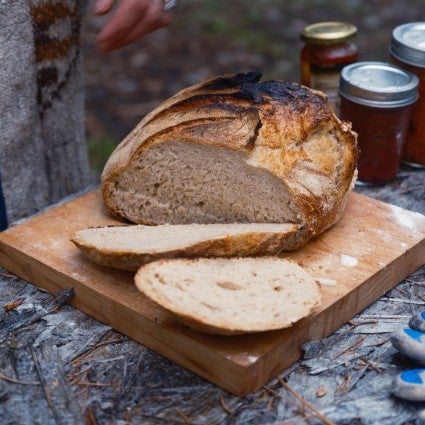
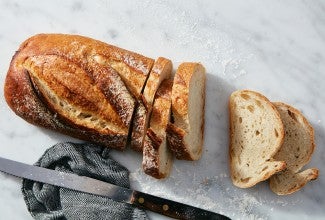
Baking a good-quality loaf of bread over the fire is a lot easier than you might think. If you’re baking bread at home, you’re likely using a Dutch oven in a hot oven. It’s the same method over the fire, except the high heat is produced by lit hardwood charcoal. Using a Dutch oven over the fire gives you a loamy, soft interior and a crisp, crackling crust.
I highly recommend prepping the dough at home. The day before I plan to bake, I make my dough, allowing it to rise at room temperature for a couple of hours before tucking it into the refrigerator overnight. I’ll pack the dough in my cooler and can bake it when I get to the campsite or even wait until the next day, as long as my cooler stays nice and cold.
How to bake: Right before I begin to prep my fire, I shape my sourdough loaf on my cutting board and let rest in the bread basket I brought from home. This is completely optional. You can simply shape and set on a lightly floured surface.
Once you have a lit bed of coals, set the empty Dutch oven (with the lid on) on top of the coals. While wearing your heatproof gloves and using the tongs, cover the lid with coals. Heat for at least 20 minutes. If you’ve brought a laser thermometer, check the outside and inside temperature. If there’s no thermometer, I can usually get a sense of the heat by carefully lifting the lid and hovering my hand over the surface of the oven. It should feel very hot in the pan. (To prepare for baking over a fire, you can get an idea of what the temperature feels like by feeling that heat from your home oven.)
Once heated to roughly 400ºF to 500ºF, add your sourdough loaf to the Dutch oven, then use a sharp knife to cut a slit in the top. Replace the lid and return the coals to the top. Every 5 or so minutes, rotate the pot to try and keep the heat as even as possible. You can replace any spent coals with freshly lit coals (this is why you keep a steady supply going).
Baking over the fire requires constant tending and checking to ensure you don’t have any massive hot spots. I begin checking my loaf after 10 minutes of baking. If you see more browning happening, move the pot and adjust the coals accordingly.
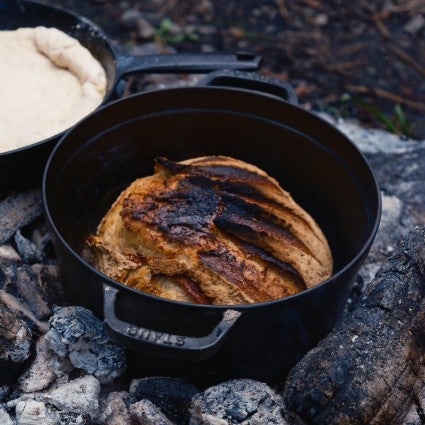
Unlike at home, over the campfire I keep the lid on during the entire bake so I can retain the heat and get a deeply browned and crisp crust. I try and get the most heat during the first 20 minutes and adjust the heat from there so the loaf bakes for about an hour total without getting overbaked on the top. By the end of the baking process, you may have no coals on the lid but are just using the heat of the coals surrounding the base of the Dutch oven.
After about an hour, remove the Dutch oven from the fire, then remove the loaf using your heatproof gloves. Let the loaf cool completely before cutting and serving to your campmates.
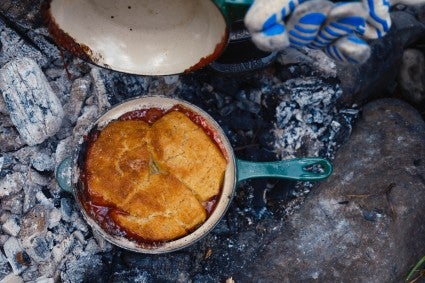
Cobbler is perfectly suited for the fire because it’s unfussy and you can control the heat on the top and the bottom while baking. I often bake my cobbler in a Dutch oven and make sure there are plenty of coals on top so the biscuits are golden brown and baked through while the fruit gently simmers underneath.
For the biscuits, I like this Biscuits for Breakfast recipe; for the filling, I suggest using your favorite cobbler filling or simply tossing fruit together with a little sugar and flour while on the campsite. For every pound of fruit (about 3 cups or so), I add roughly 1/4 cup sugar and 1 tablespoon all-purpose flour.
Like the other recipes, I prepare my cobbler biscuit dough ahead of time. Once prepared, I freeze them, which also adds another layer of chill to the cooler to keep all my ingredients cold. Double duty! You can prepare your fruit filling in advance too, or simply bring sugar and flour with you to the campsite and add to whatever fruit you’ve brought or foraged on the day’s hike.
How to bake: Add the fruit filling to a Dutch oven (or another heavy-duty baking vessel with a lid), then top with your prepared biscuits. Shower the biscuits with granulated sugar then set the pot on top of a bed of hot coals. Add the lid to the pot and place coals on top of the lid. You’re aiming for a temperature range of about 350ºF to 400ºF and you want this to take about 45 minutes to bake, or until the biscuits are golden and cooked through and the fruit filling is bubbling.
Check your cobbler every 10 minutes and rotate the pot to ensure there are no hot spots and everything is baking evenly. If after 20 minutes you’re not getting much color on the biscuits, replace some of the coals on the top of the Dutch oven with freshly lit coals. Alternatively, if your biscuits are getting too brown and aren’t cooked through, remove some of the coals from the lid. Serve with cold lightly whipped cream or a little cream poured right over the top.
I hope these recipes help with some of the fear and intimidation around baking outside. This process has taught me to embrace imperfections, as I know that the results are often so different from what I can expect from my home oven. There are likely some charred bits on that sourdough loaf, and the biscuits on your cobbler may not be as flaky as you’d like, but nothing is better than eating warm bread, pizza, or cobbler while watching the flames dance under a starlit sky.
For even more summer baking suggestions, see this Classic Summer Desserts Recipe Collection.
Cover photo by Ashley Rodriguez.