


We're excited to welcome pie artist and Pieometry author Lauren Ko to share her custom design for weaving a decorative quilted pie. Flex your creative skills and get your pie crusts ready!
* * *
As we head deeper into colder weather, the air turning crisper and leaves crunchier every day, I find myself tumbling headlong into hibernation mode. Heavy blankets, chunky knits, and woolen socks have been excavated from their boxes in the basement, and flannel has reinserted itself into its autumnal rotation.
But cozy doesn’t just stop with what I can burrow into! This interval between fall and winter — what I enthusiastically embrace as peak pie season — is the perfect time to liberally apply cozy to everything, pastry included.
Tuck a new quilt over your classic apple pie (or another pie of choice) and transform a traditional dessert into a stunning — and snuggly — rendition.
Start by making All-Butter Pie Crust. You’ll need three rounds of dough for this pie design, so you can either prepare a double batch of the recipe, stashing one of the four pie crusts it yields into the freezer for future pie adventures, or make one full batch and one half batch of the recipe.
You can also use your preferred pie crust recipe here — just make enough to have three rounds of dough ready for your pie.
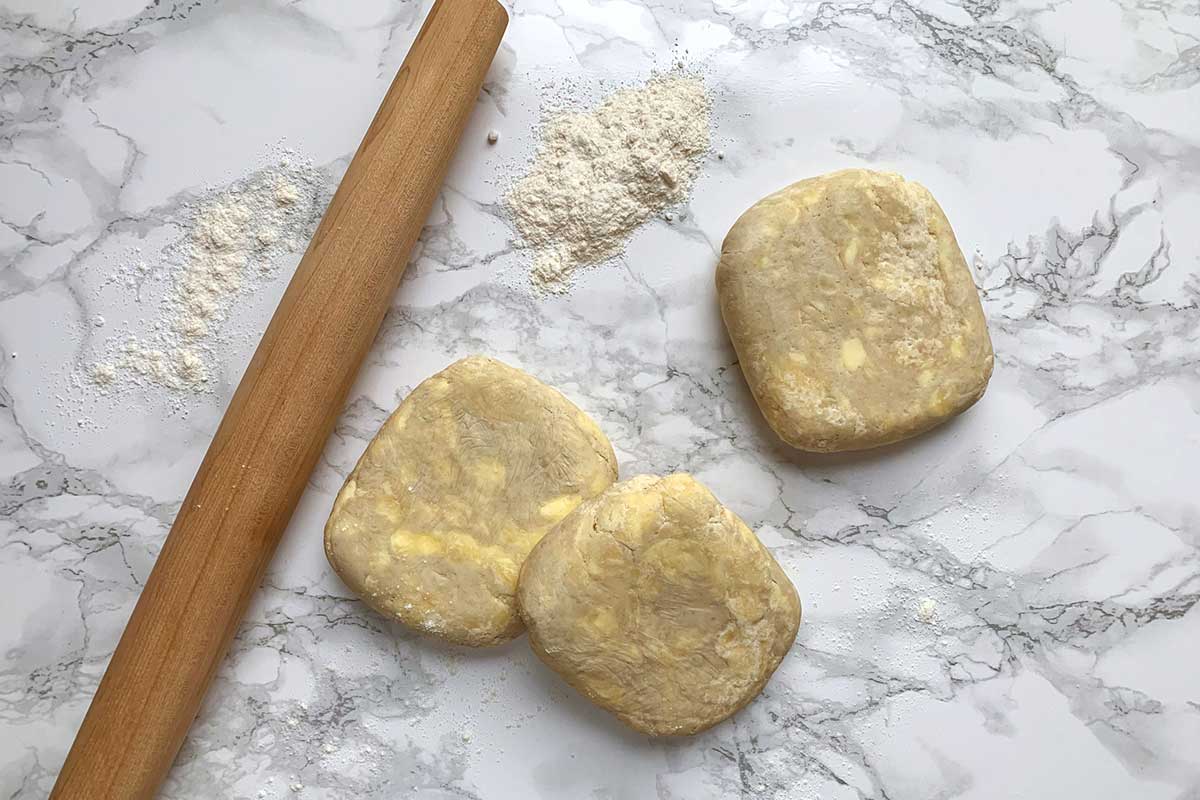
You’ll use one disk of crust as the bottom of your pie, and the other two disks for the topping. Go ahead and wrap the disk you’ll use as the bottom crust tightly in plastic and place it in the refrigerator while you prep the top design.
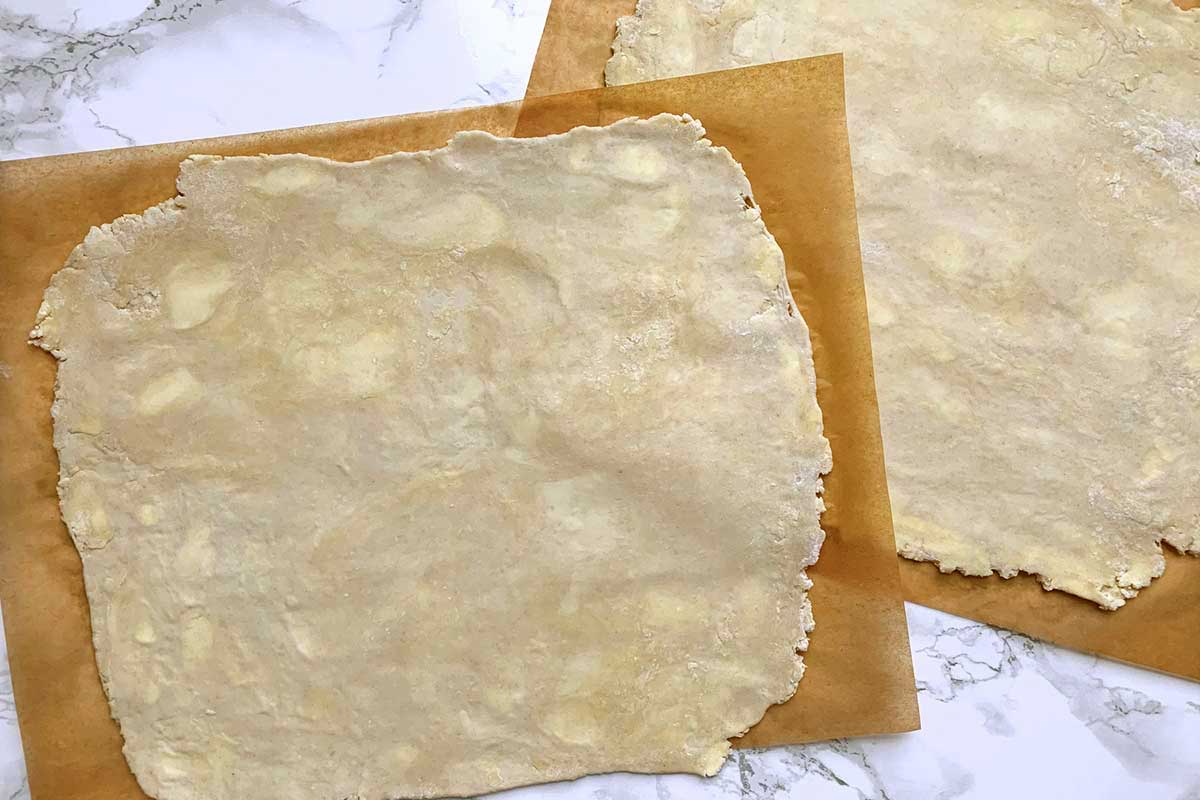
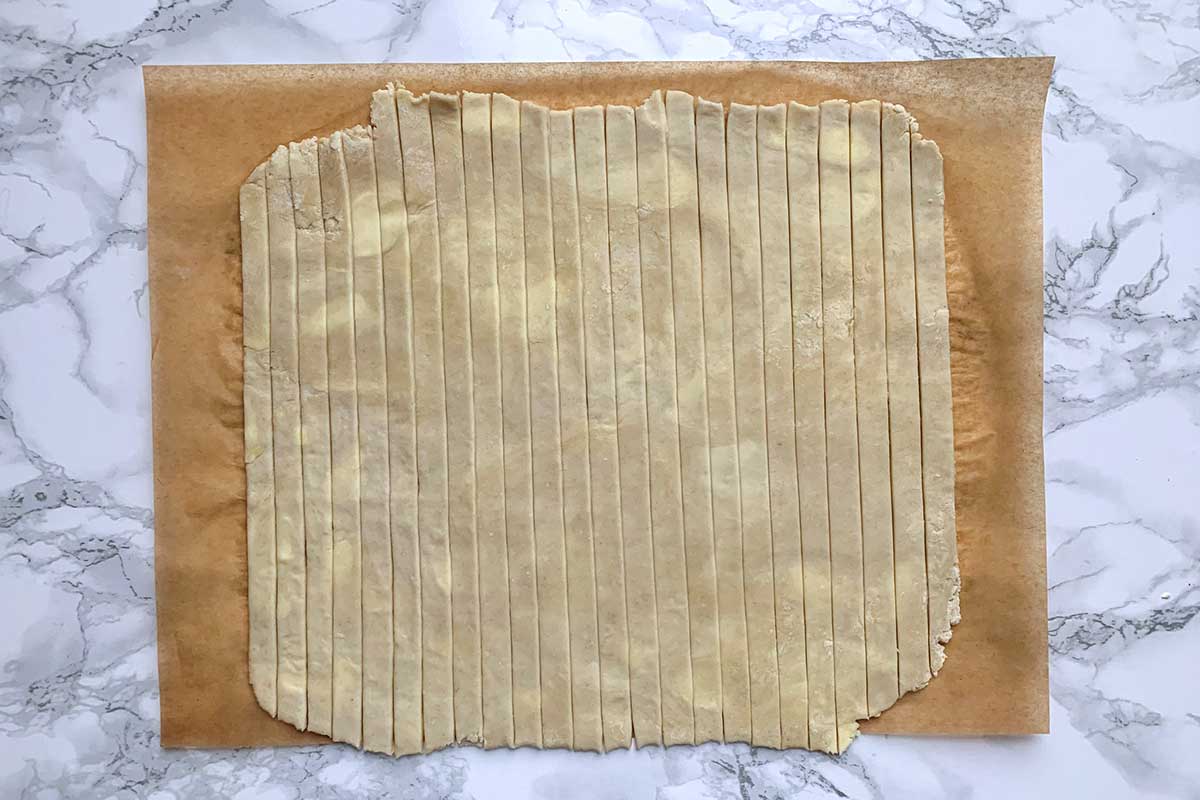
Roll one disk of pie dough into a 13" x 13" square and place it on a sheet of parchment paper. Slide the dough and parchment onto a baking sheet and place in the refrigerator to chill. Repeat this process with the second disk of dough.
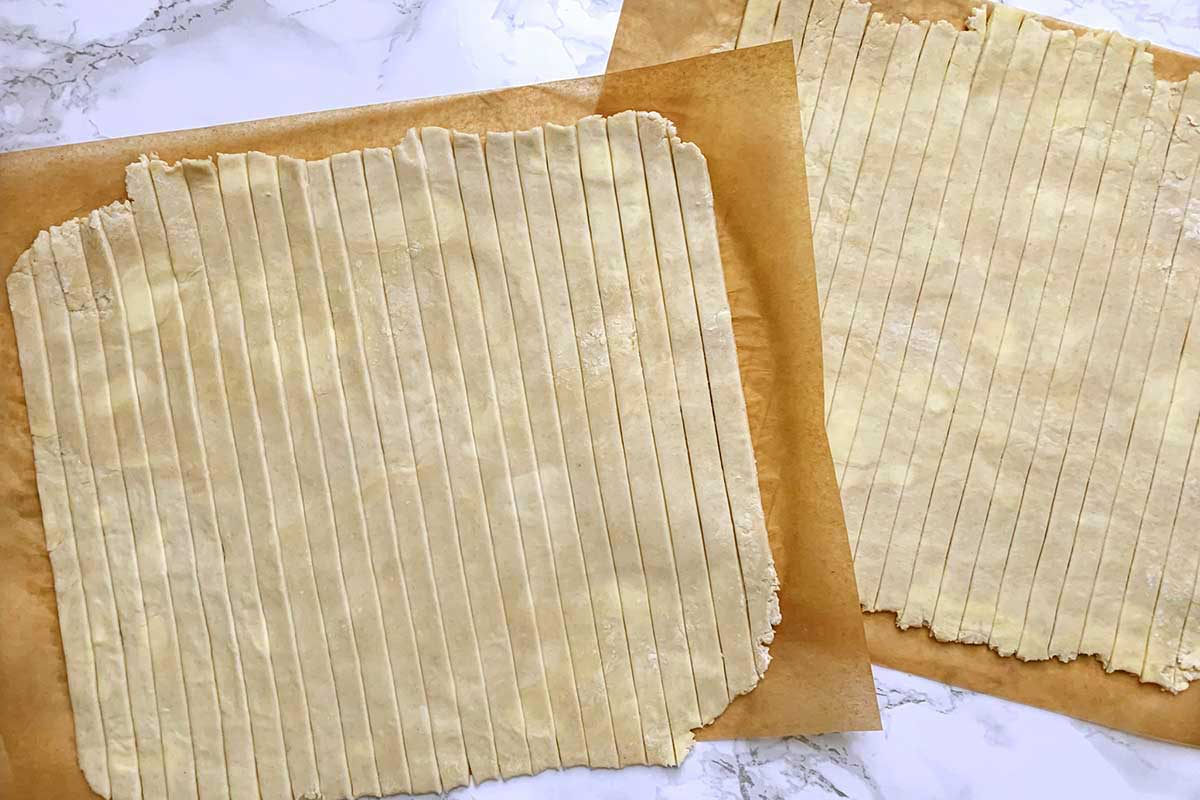
After about 5 minutes, remove the first sheet of dough from the refrigerator. Using a pastry roller or pizza wheel and a ruler as a straight edge, cut the dough into 1/4" to 1/2" strips, then do the same for the second sheet of rolled dough. The exact number of strips doesn’t matter.
If the dough feels a bit soft after cutting, slide the sheets of parchment paper back onto baking sheets and place them in the refrigerator for about 5 minutes to chill.
Remove the dough from the refrigerator and place one sheet of dough strips (still on the parchment paper) in front of you on your workspace, with the other sheet within reach.
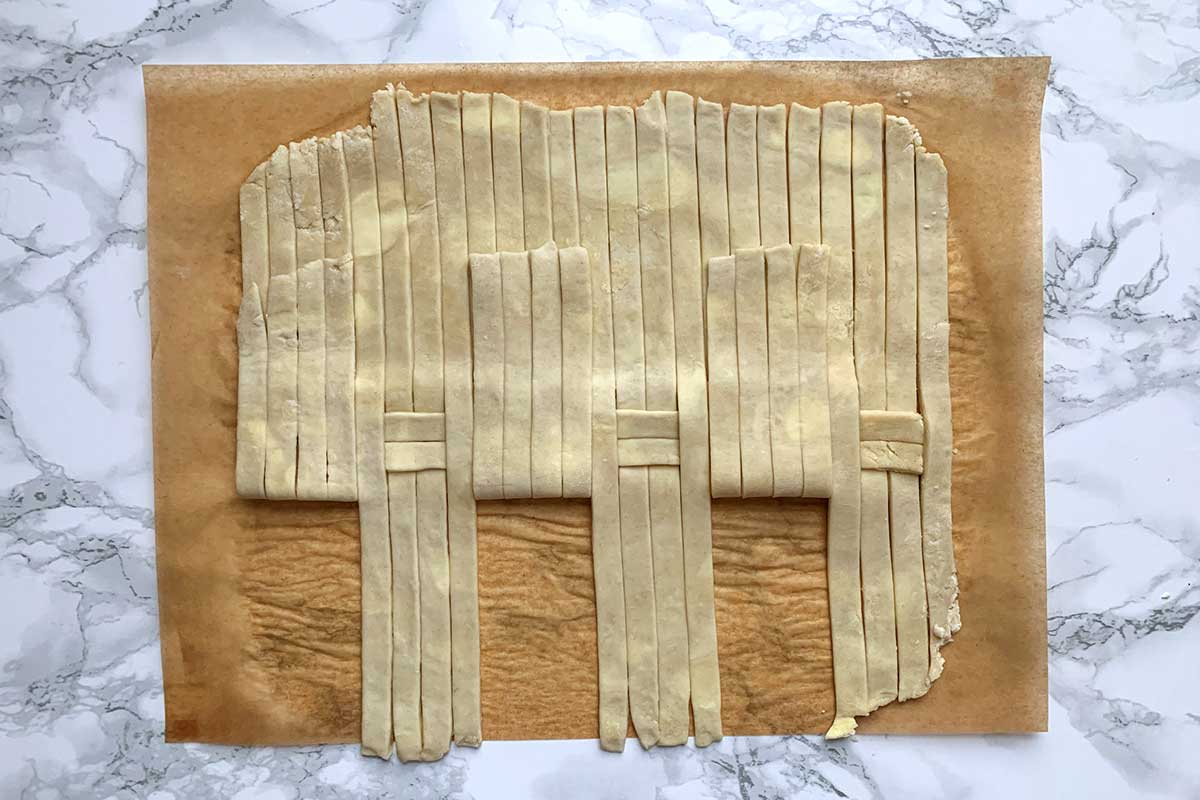
Beginning from the left, leave the first four dough strips laid flat. Fold back the next four strips halfway. Leave the next four strips laid flat. Fold back the next four strips. Proceed in this manner — alternating between leaving four strips flat and folding four strips back halfway — until you run out of strips.
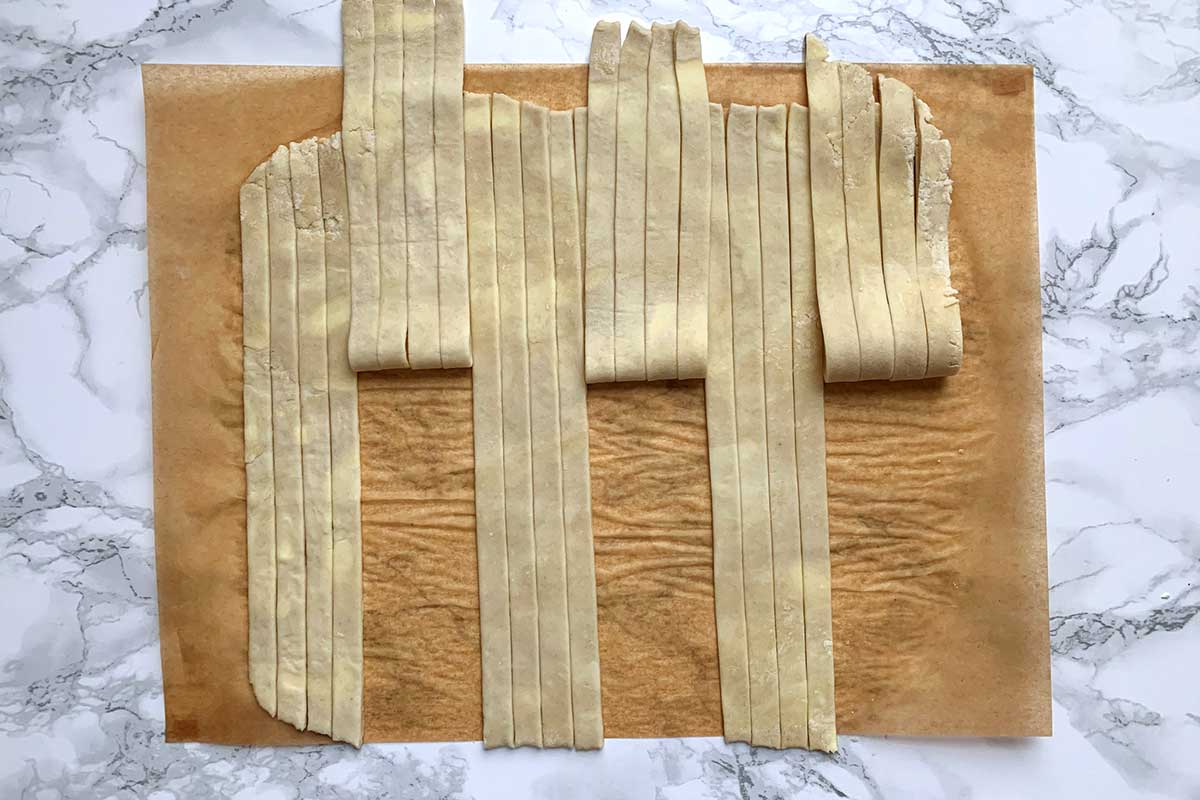
Lay one strip of dough from the second sheet horizontally across the middle of the first sheet of strips. From each quartet of folded-back strips, unfold the middle two strips.
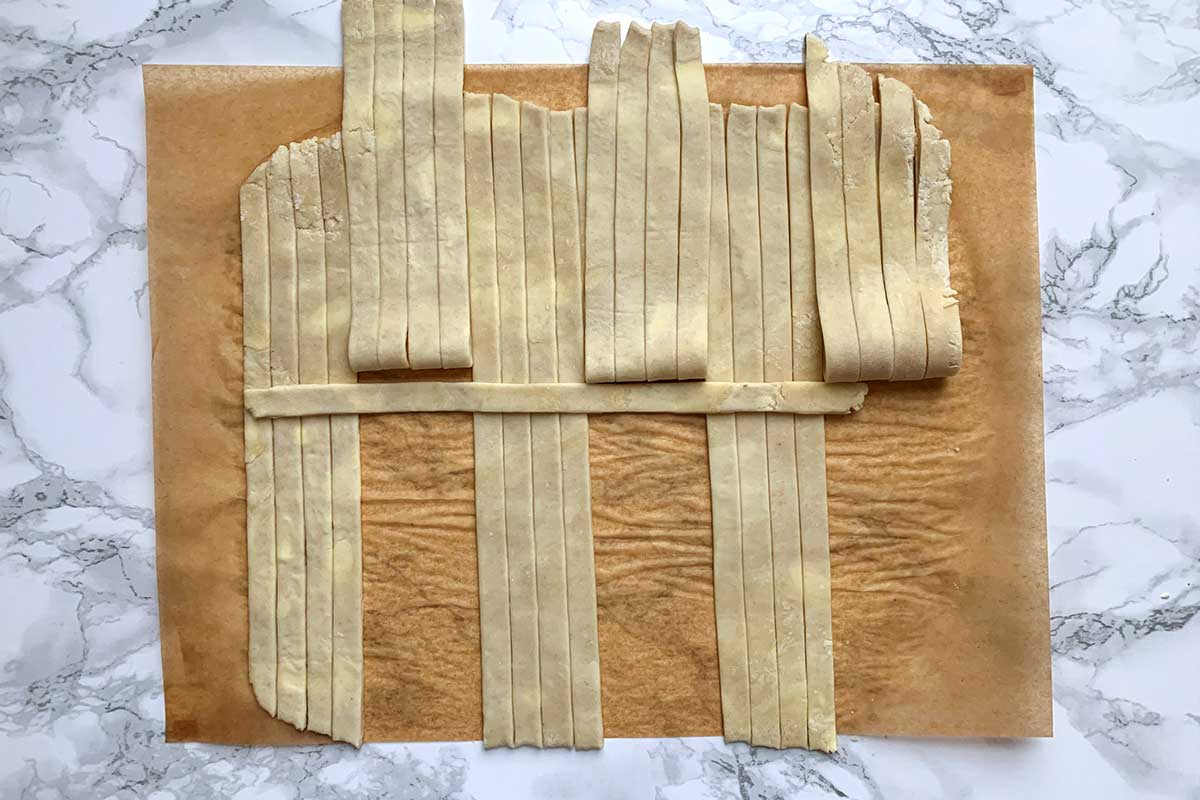
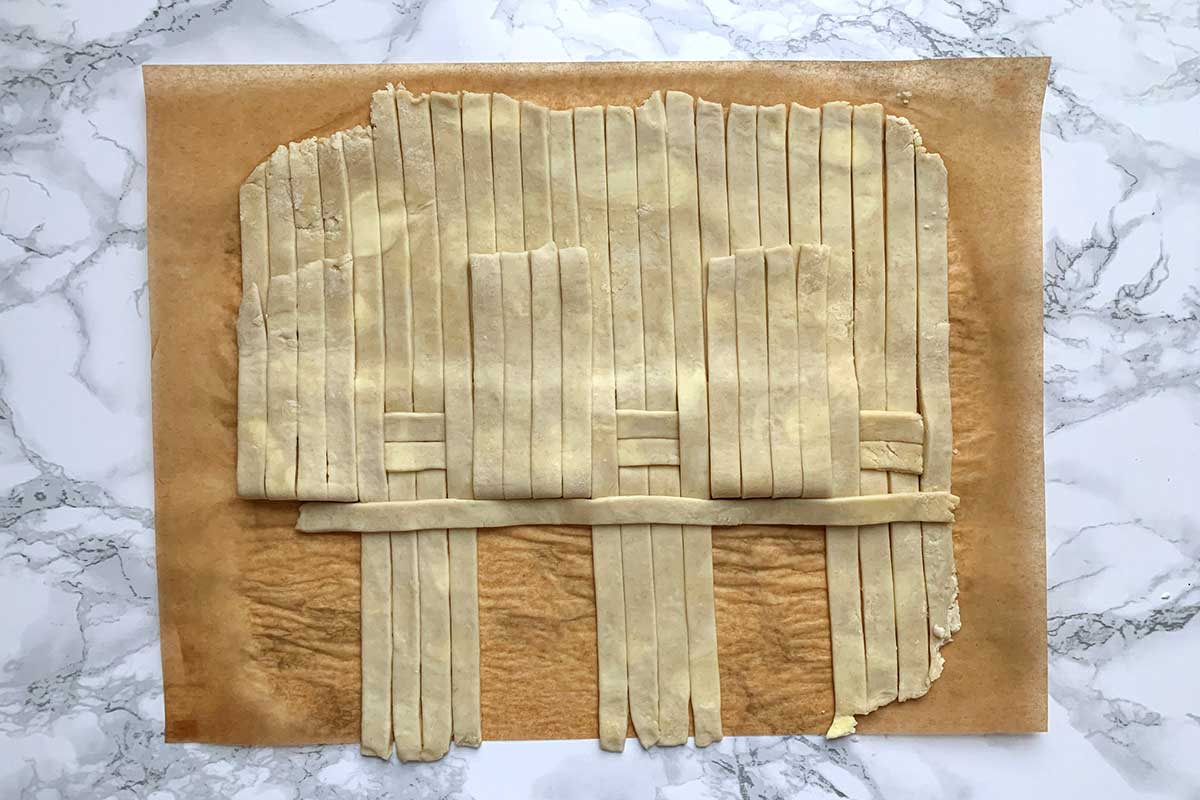
Take two strips from the second sheet of dough and lay them horizontally on the first sheet, nestling them closely to the first horizontal strip. Fold back the two vertical strips that were unfolded in the previous step, so that they're folded over the two strips you have just laid horizontally.
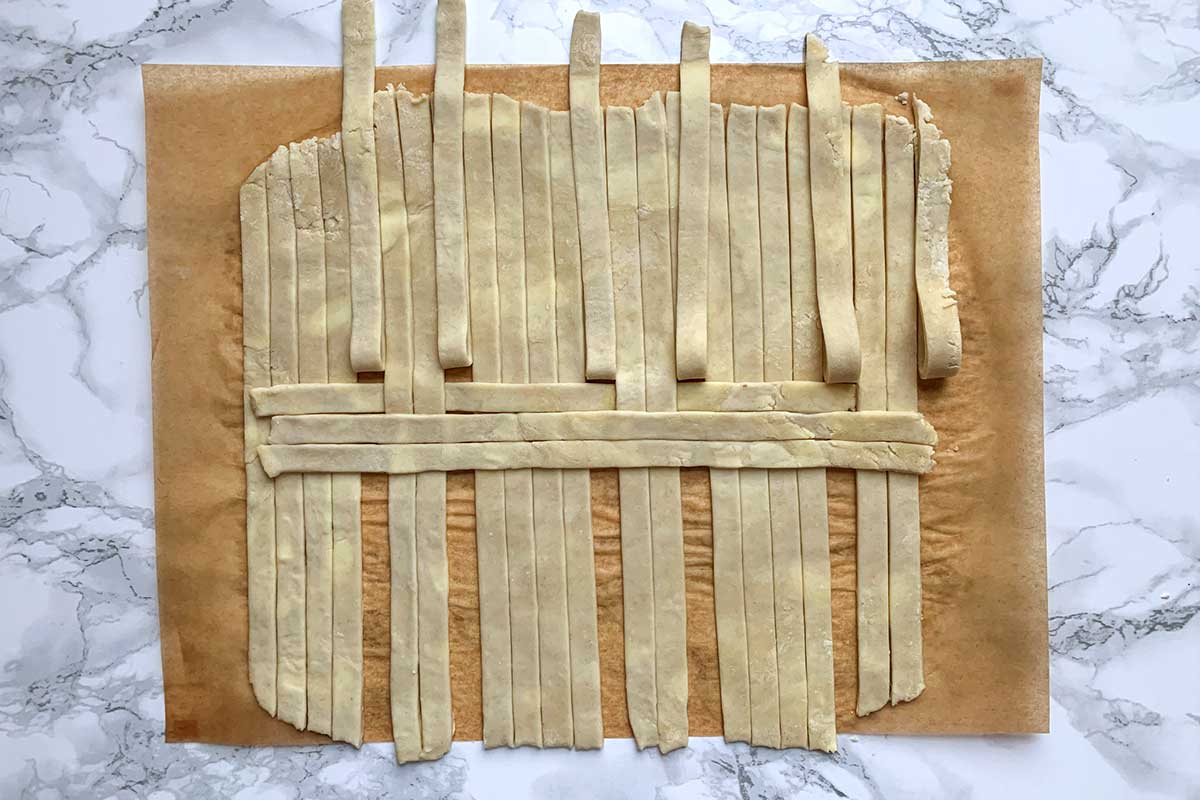
Take one strip from the second sheet of dough and lay it horizontally, fitting it closely with the previous horizontal strips. Now, unfold all the strips.
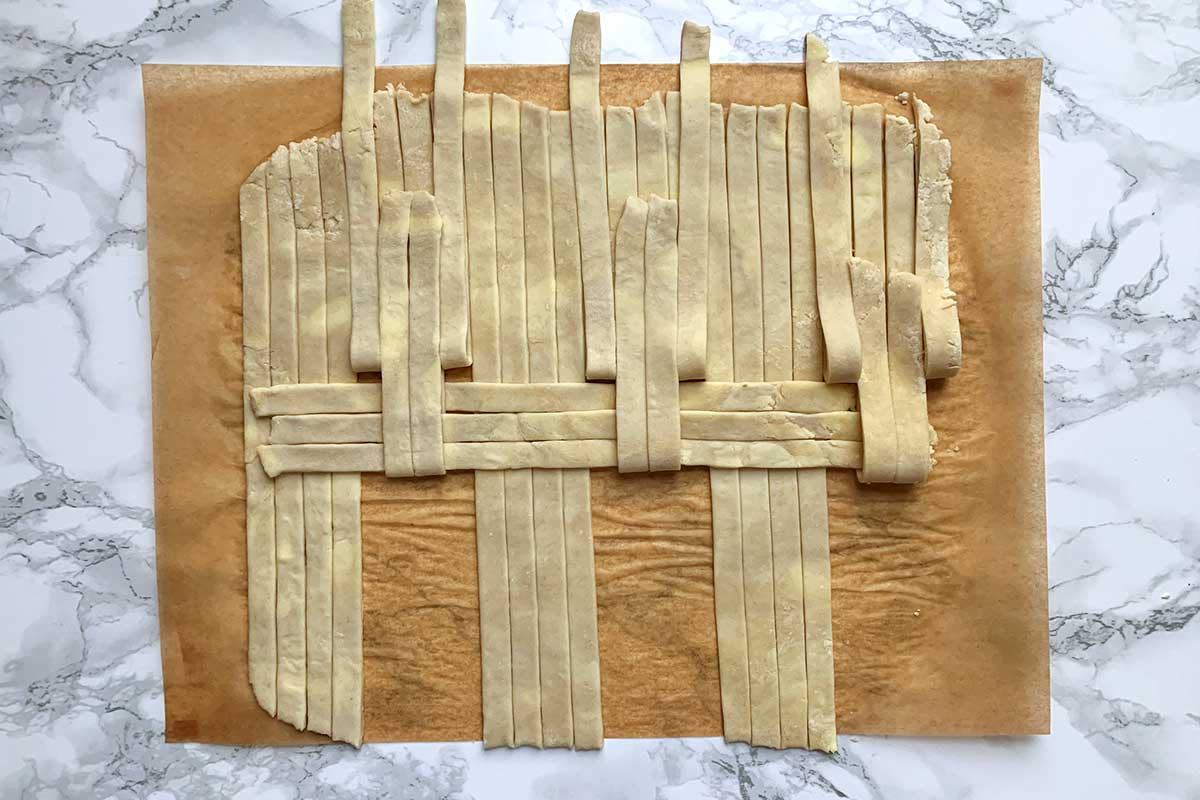
Now you’ll essentially repeat this whole pattern again, starting by folding back the first quartet of strips this time. I'll walk you through it:
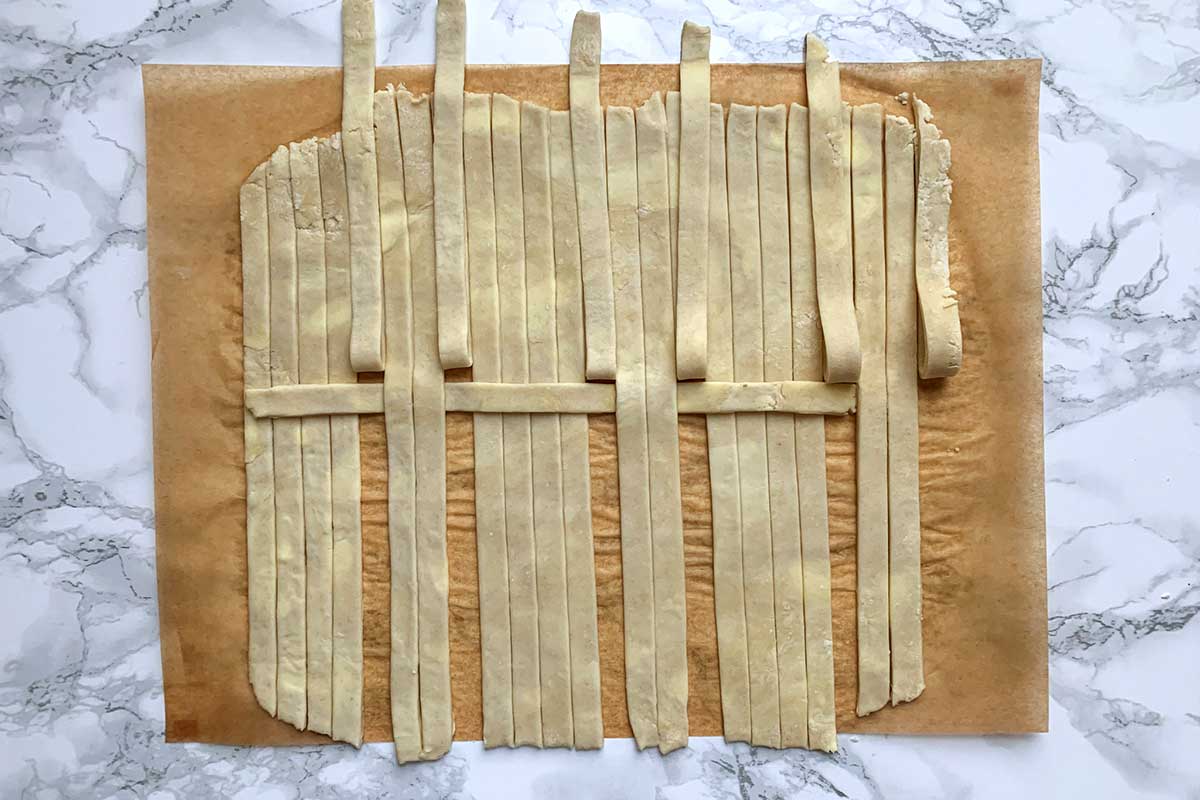
Beginning again from the left, fold back the first four strips of dough, leaving the following four alone. Then fold back the next four and so on until you reach the end of the sheet.
Lay one strip of dough from the second sheet horizontally across. From each quartet of folded-back strips, unfold the middle two strips.
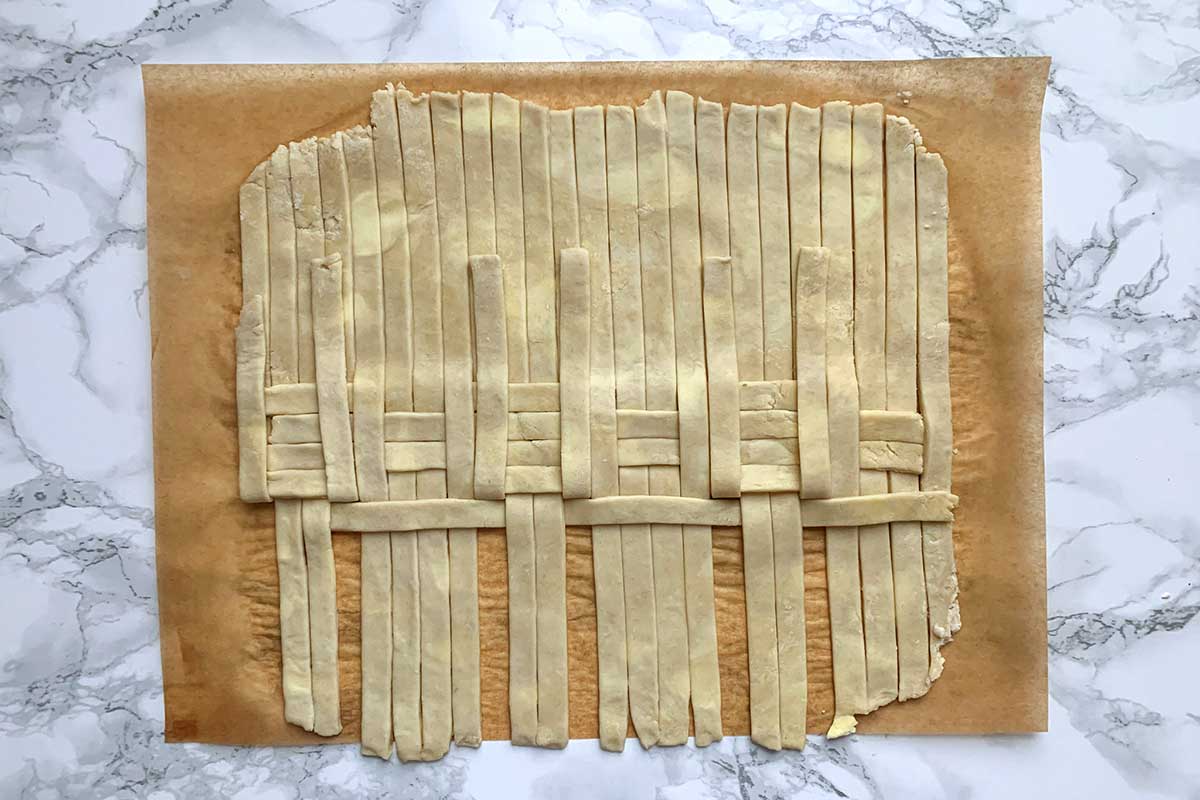
Take two strips from the second sheet of dough and lay them horizontally on the first sheet, nestling them closely to the prior horizontal strip. Fold back the two strips that were unfolded in the previous step, so that they're folded over the two strips you've just laid horizontally.
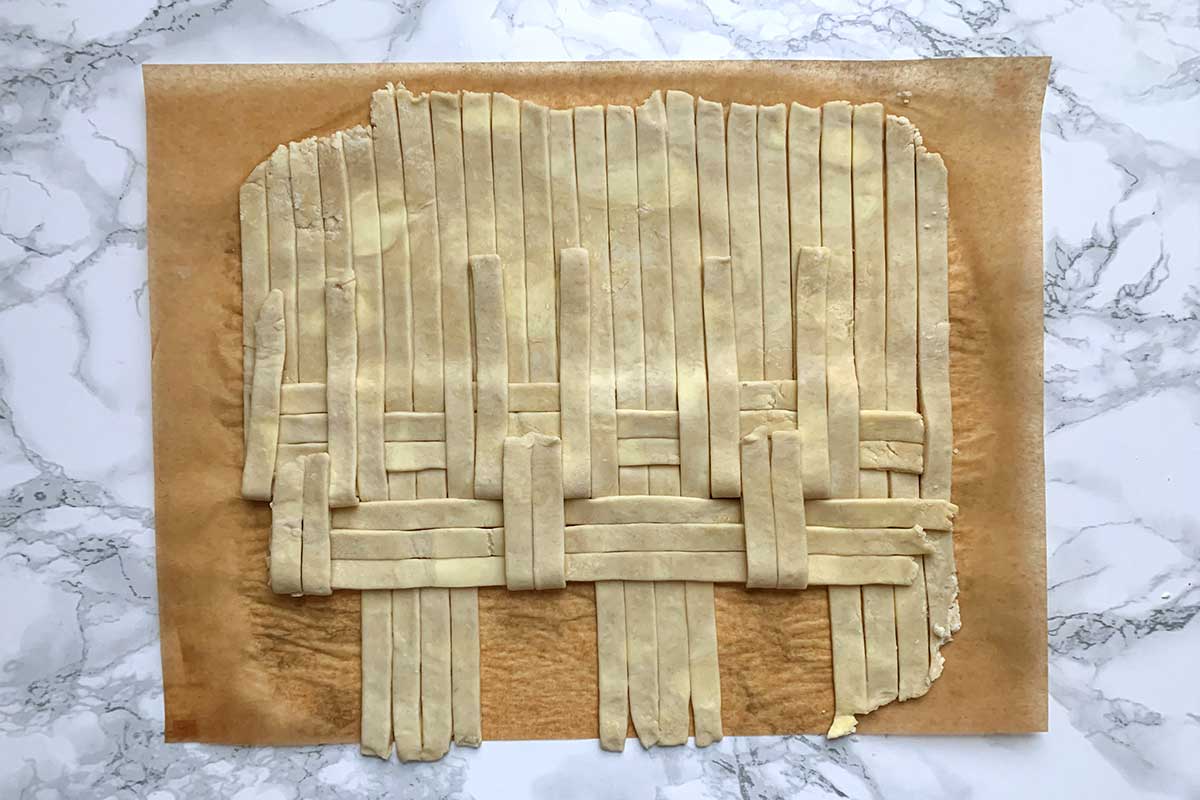
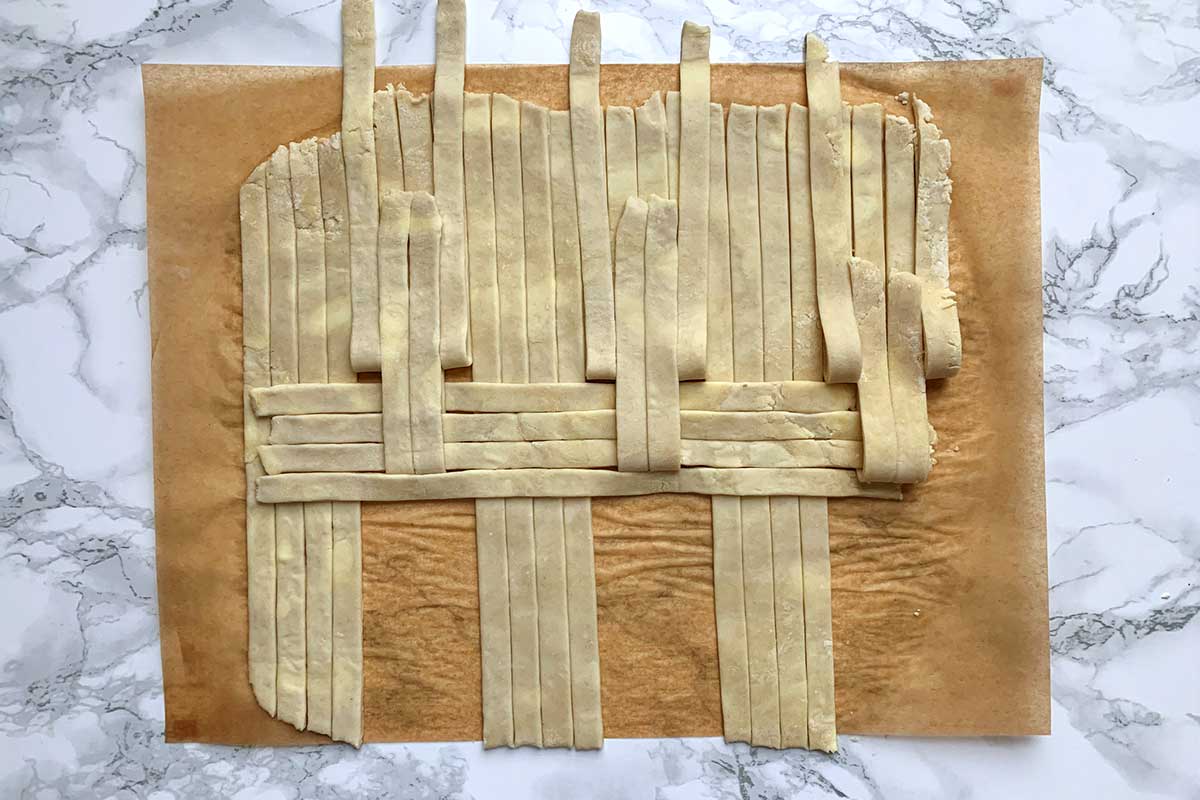
Take one strip from the second sheet of dough and lay it horizontally, fitting it closely with the previous horizontal strips. Unfold all the strips.
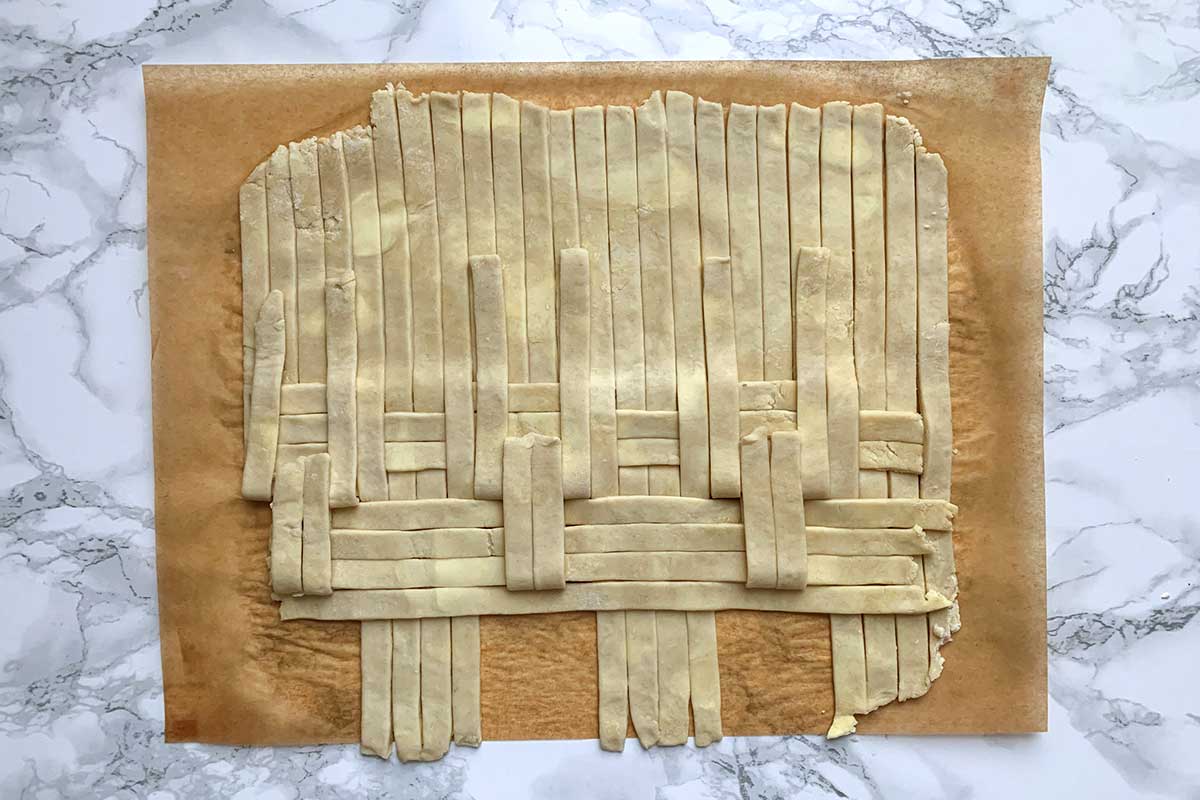
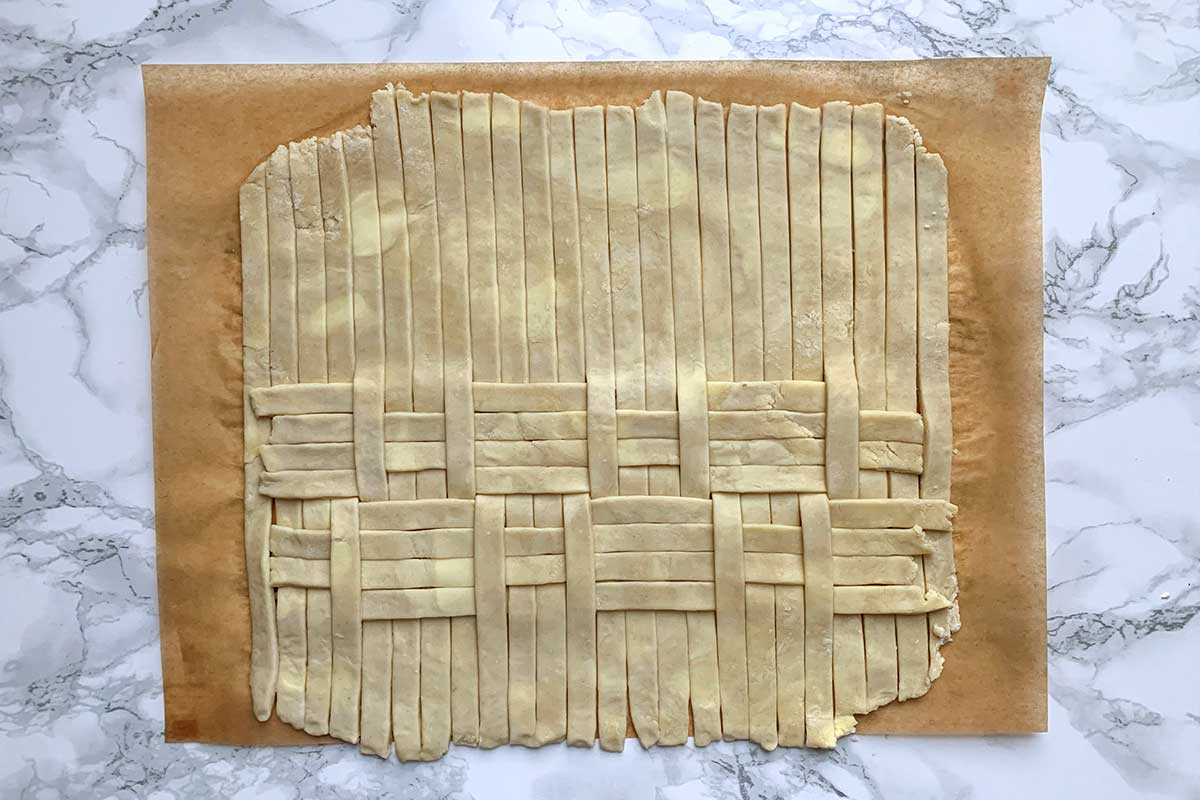
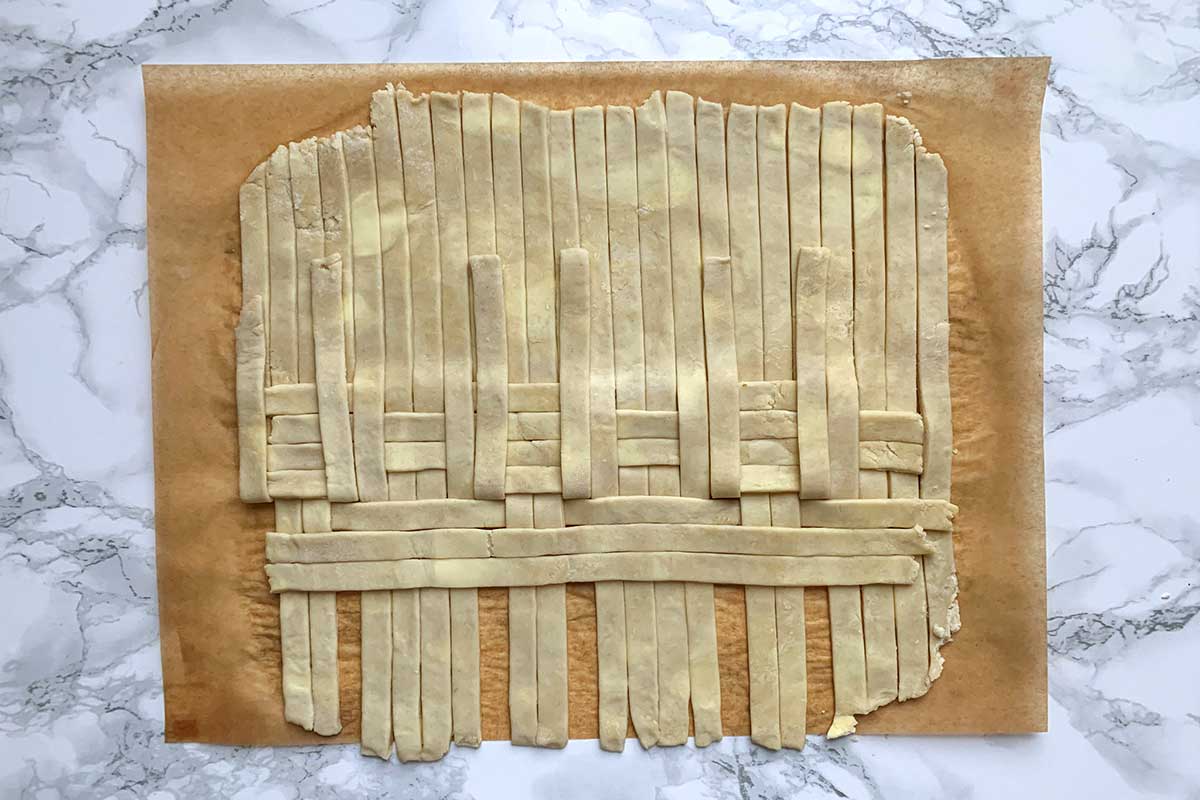
Repeat the pattern all the way down until you’ve woven the entire bottom half of the dough.
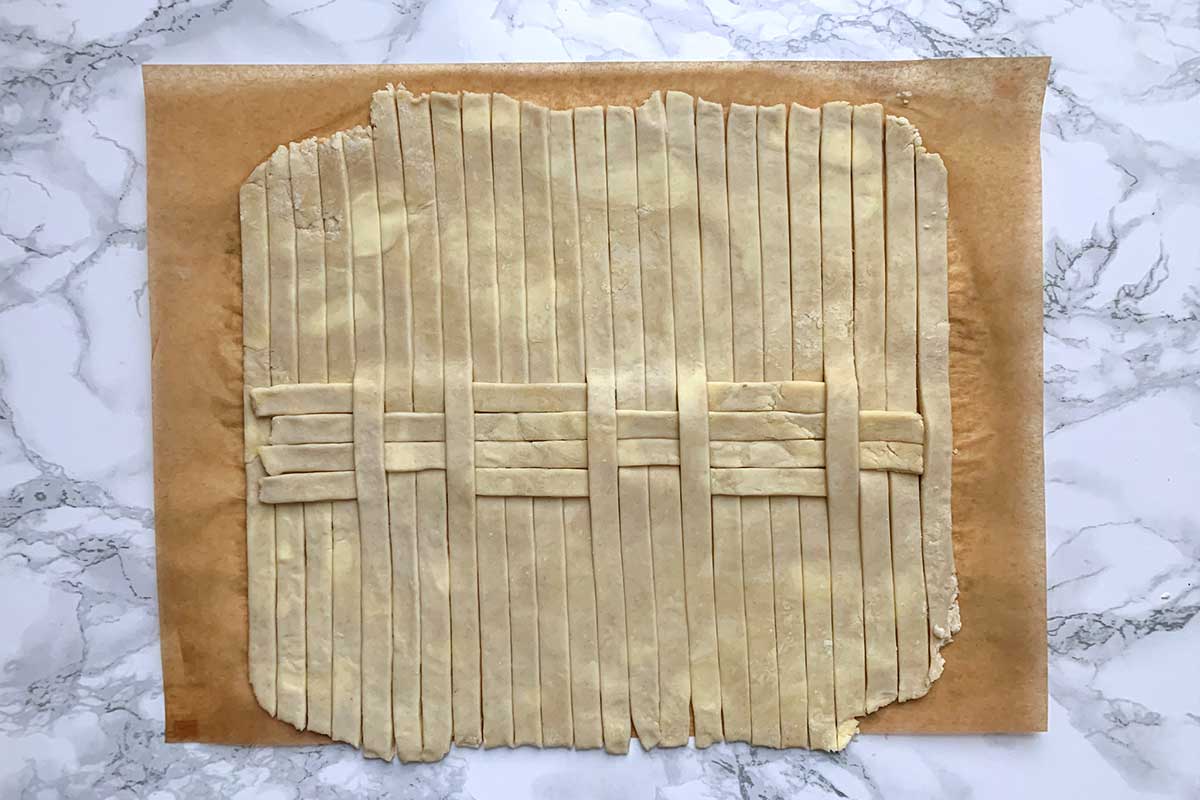
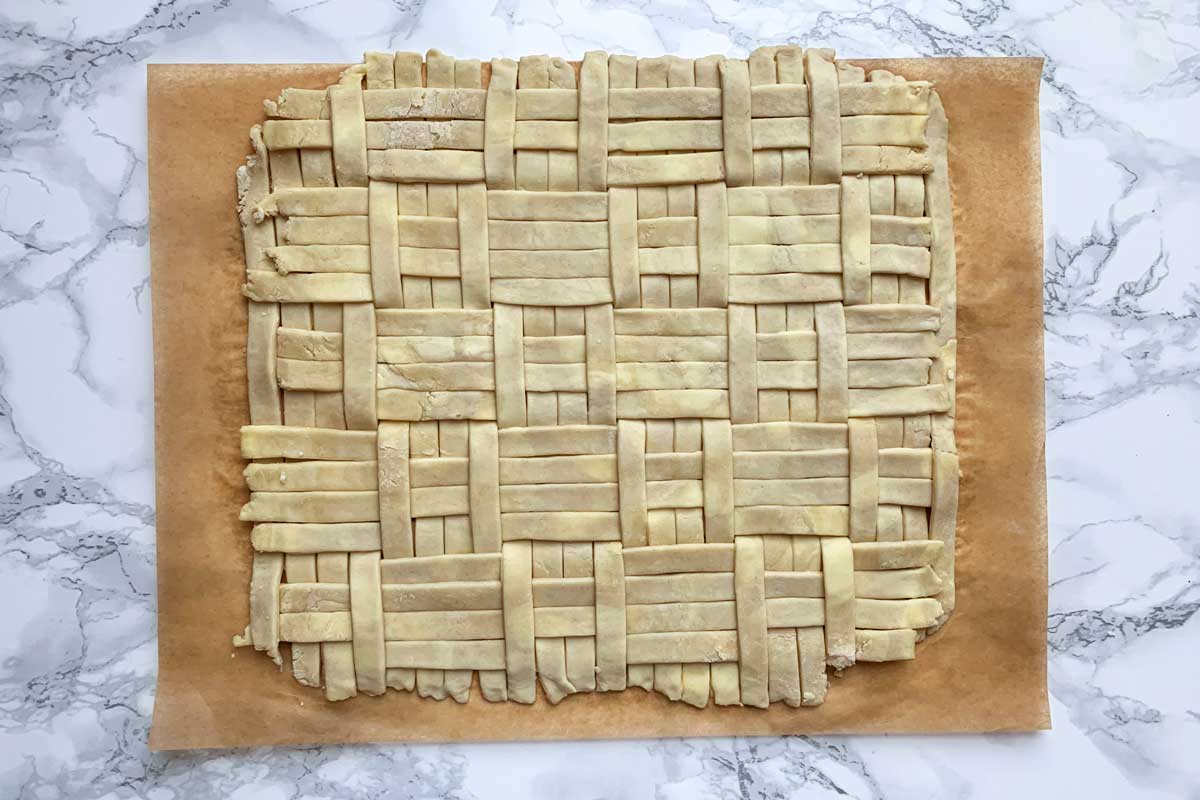
Rotate the half-woven sheet of dough 180° and repeat this pattern again until the entire sheet has been woven. You'll finish with a fully woven crust to top your pie.
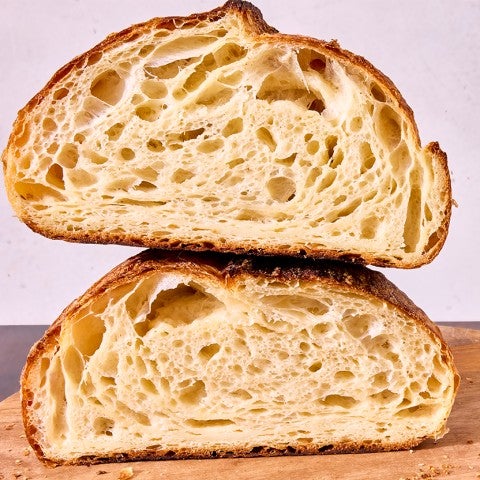
I baked this crust into an apple pie, the quintessential cozy autumnal dessert. But you can use this decorative crust technique for any double-crusted pie! Here's how to put everything together, using Apple Pie as an example.
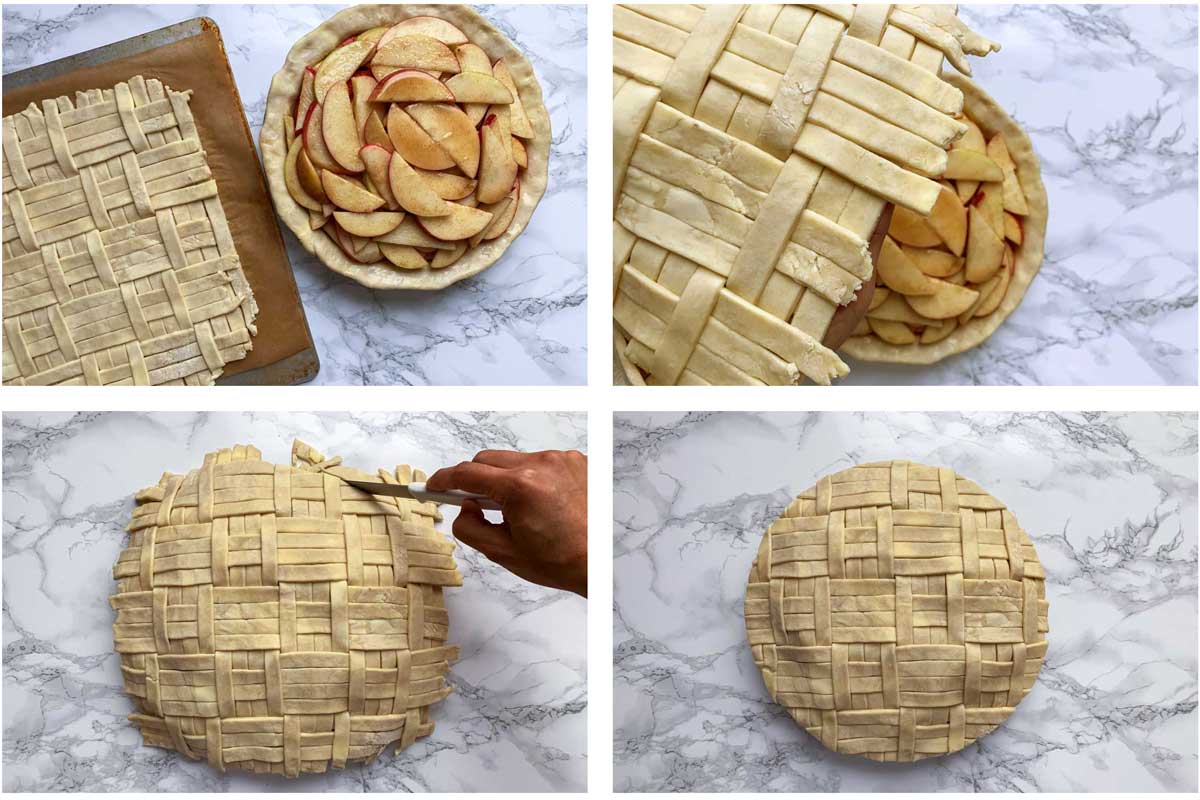
Slide the parchment holding the woven sheet of dough onto a baking sheet and place in the freezer until solid, about 20 minutes.
While the pie top freezes, roll the third disk of dough into a 13" circle. Roll the dough onto your rolling pin, and gently unfurl the dough over a 9" pie pan.
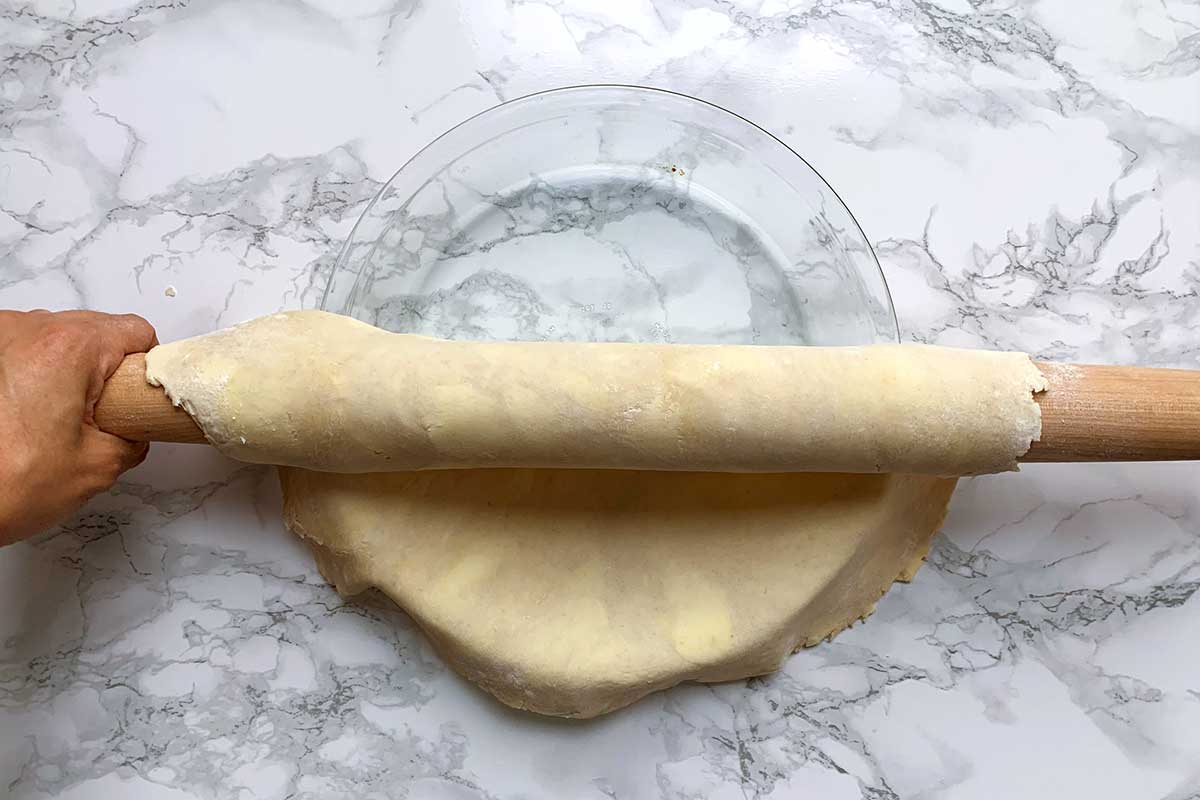
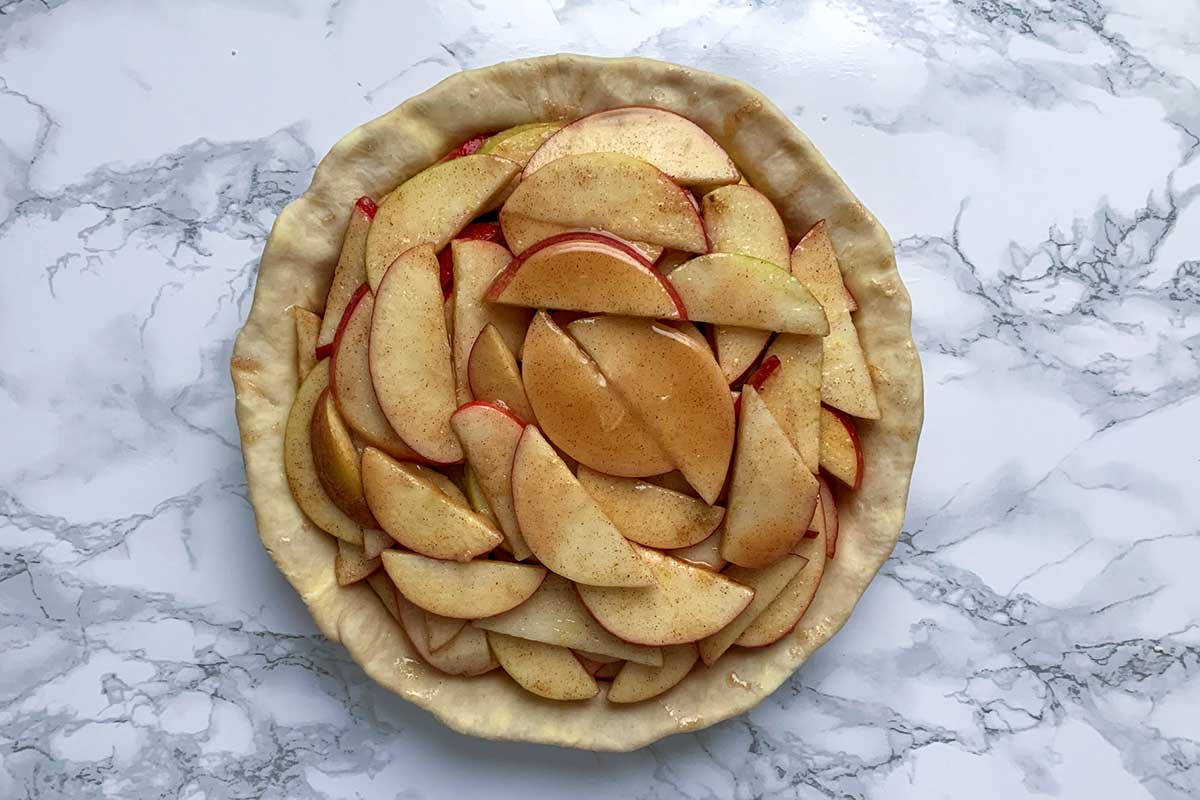
Prepare the filling for Apple Pie (or your favorite pie recipe!) and pour into the pie pan lined with dough. Trim the edges of the bottom pie crust and fold under to create an even overhang of dough.
Preheat the oven to 425°F. Brush a small amount of water around the edge of the bottom pie crust to help attach the pie top.
Remove the frozen pie top from the freezer and gently place it over the filled pie. Allow the pie top to thaw for 2 to 3 minutes before pressing the edges to seal and running a paring knife around the edge of the pie pan to trim the excess dough.
Baker's tip: Dough scraps can be gently pressed together, wrapped tightly in plastic, and rested in the refrigerator for at least an hour before re-rolling once more for another pie. Alternatively, dough scraps can be placed on a baking sheet, brushed with egg wash, and baked until golden and crisp for a snack to tide you over until dessert-time!
Brush the pie top with egg wash (1 large egg mixed with 1 tablespoon water) and bake for 20 minutes.
After 20 minutes, lower the heat to 400°F and cover the pie edges with a pie shield or aluminum foil. Bake for another 45 minutes or until the top is brown and the filling bubbly.
Remove the pie from the oven, and place it on a rack to cool completely before cutting.
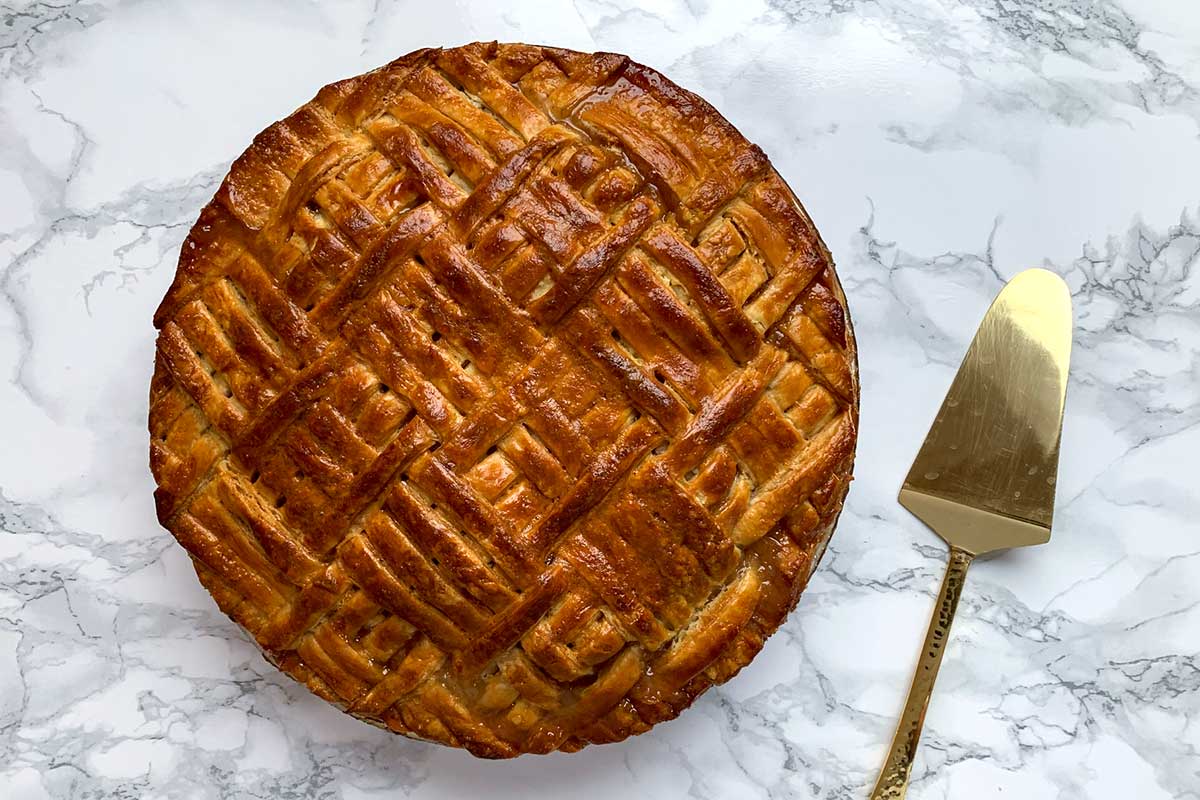
The cozy vibes abound with this warmly spiced apple pie, snuggled up with a golden quilt that doesn’t involve pesky needle pricks or lugging out the sewing machine! It’s the perfect way to spend a fall day inside, and with these photos to guide you, step by step, it promises to be a mellow, meditative exercise that anyone can nestle into.
See more of Lauren's stunning pie designs on Instagram and in her new book, Pieometry. And for additional creative pie ideas to try out this season, see our post on fancy pie crust.