How to make filled scones
Stuff your scones with chocolate, jam, caramel, and more.

Date
May 5, 2015


A fresh-baked scone will always be great. But you know what may be even better? Taking a basic scone recipe and add your favorite filling to the center: caramel, jam, chocolate, cream cheese, and more.
So what's the easiest way to make filled scones? How do you get the filling into the center without a lot of extra work?
It's actually very simple.
This process will work with any scone recipe that produces dough sturdy enough to shape easily. In other words, reserve your drop scone recipe — the one with the very soft dough — for another day. For a recipe already designed for filling, choose these Double-Decker Filled Scones, which we’ll use to demonstrate the method below.
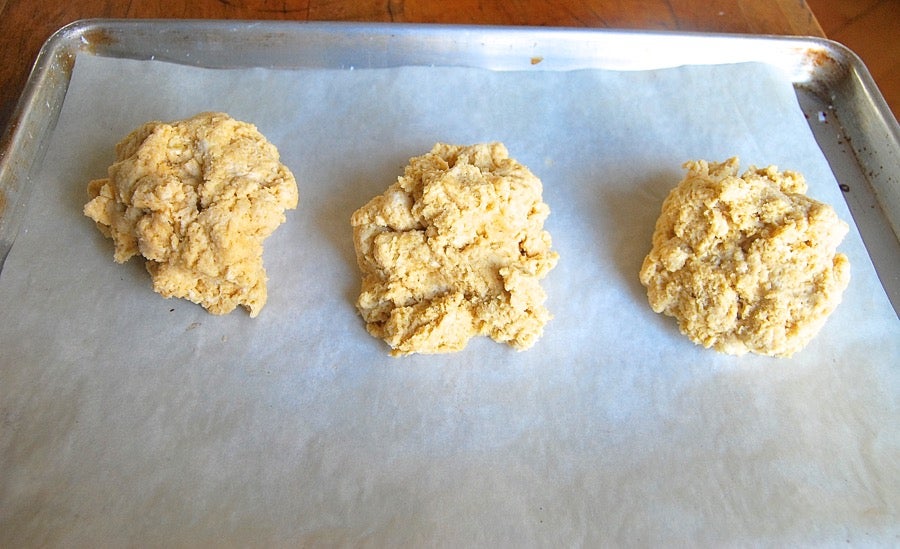
A scale simplifies this task. Want fewer, larger scones? Divide the dough in half.
Pat each piece into a 4" disk about 1" thick. It's the 1" thick that's key — if your recipe makes larger or smaller disks, that's OK, so long as they're 1" thick.
Place the disks on a baking sheet. It's a good idea to line the sheet with parchment, for ease of cleanup.
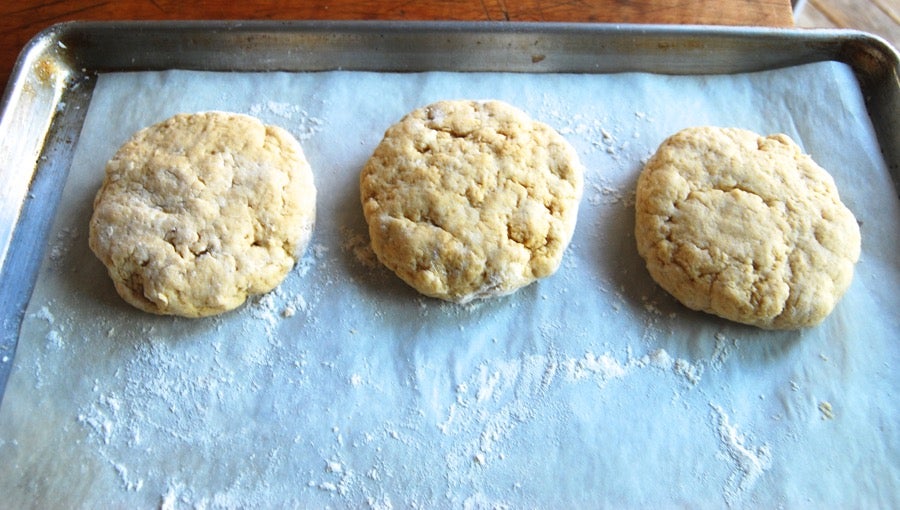
Put the pan in the freezer for 30 minutes; no need to cover the dough. This short chill will make it easier to handle.
Preheat the oven while the dough is chilling. This recipe calls for a baking temperature of 375°F.
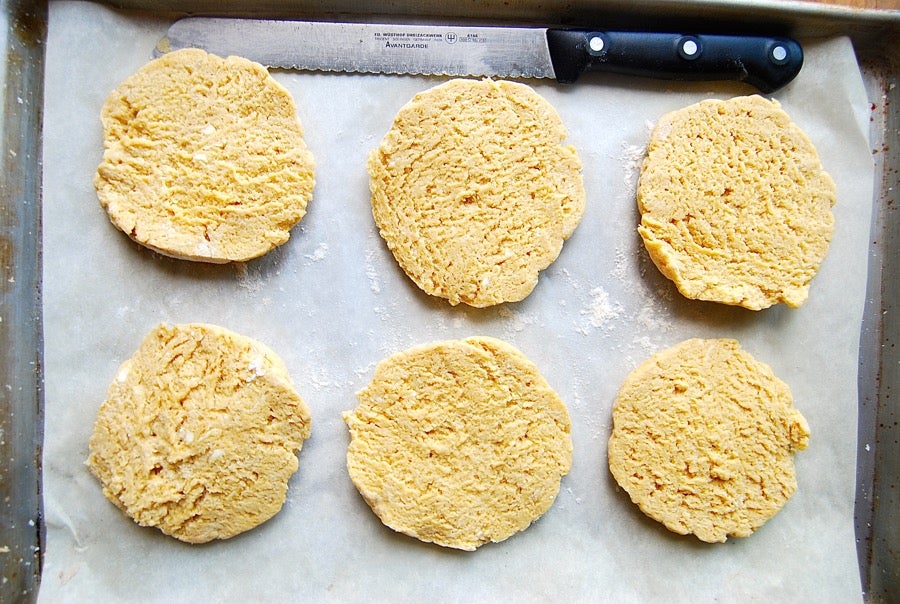
Use a long, sharp chef's or serrated knife.
These look baked, don't they? That texture you see is actually the baking powder, already starting to do its thing and lighten the dough.
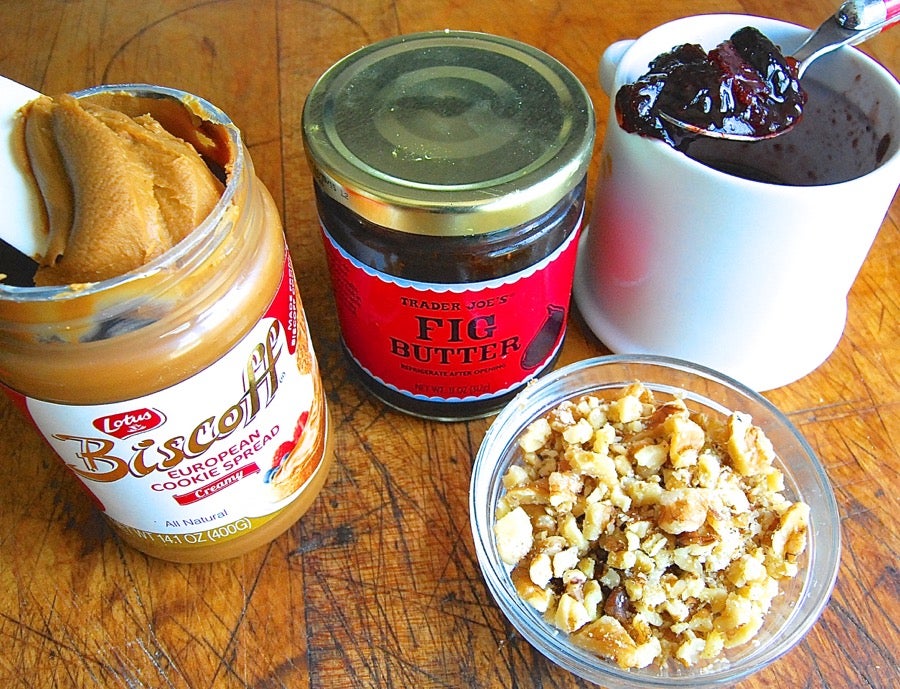
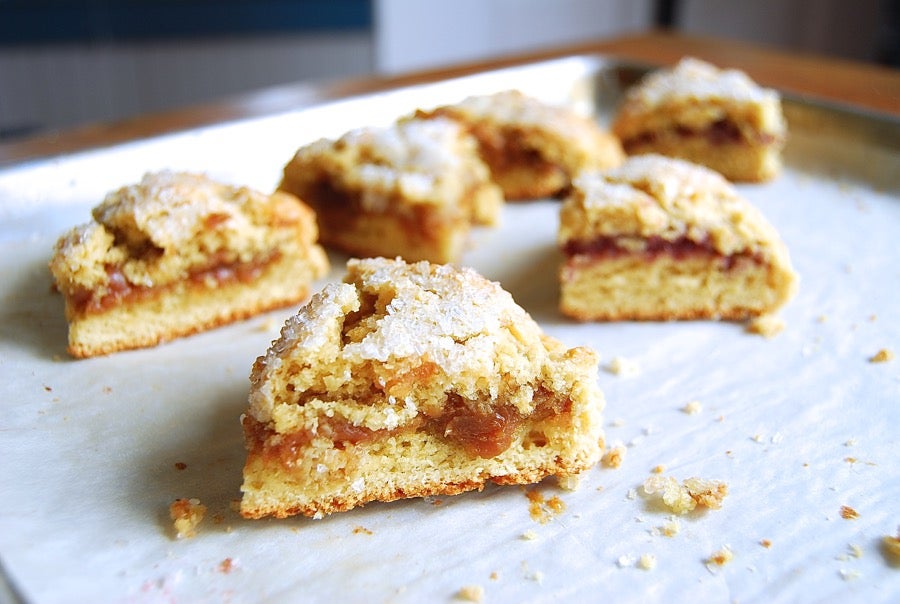
We experimented with a bunch of different fillings, including Biscoff spread (a.k.a. cookie butter); fig jam with toasted chopped walnuts; and cherry conserve, all pictured above; plus raspberry jam; solid caramel; and chocolate ganache.
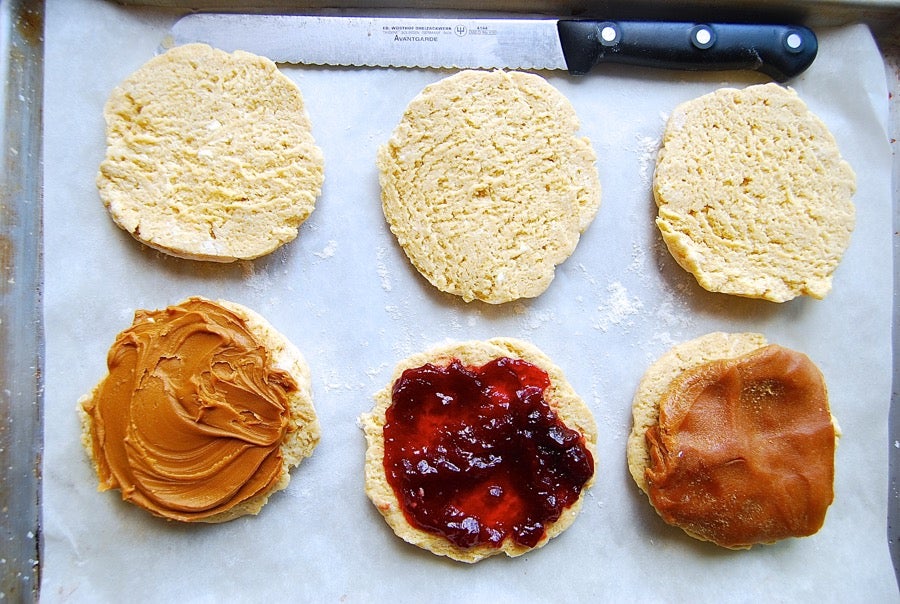
Place the other half of the dough on top, pressing it down gently.
Brush each disk with milk and scatter with a heavy shower of coarse white sparkling sugar, for crunch, flavor, and a slightly glittery appearance.
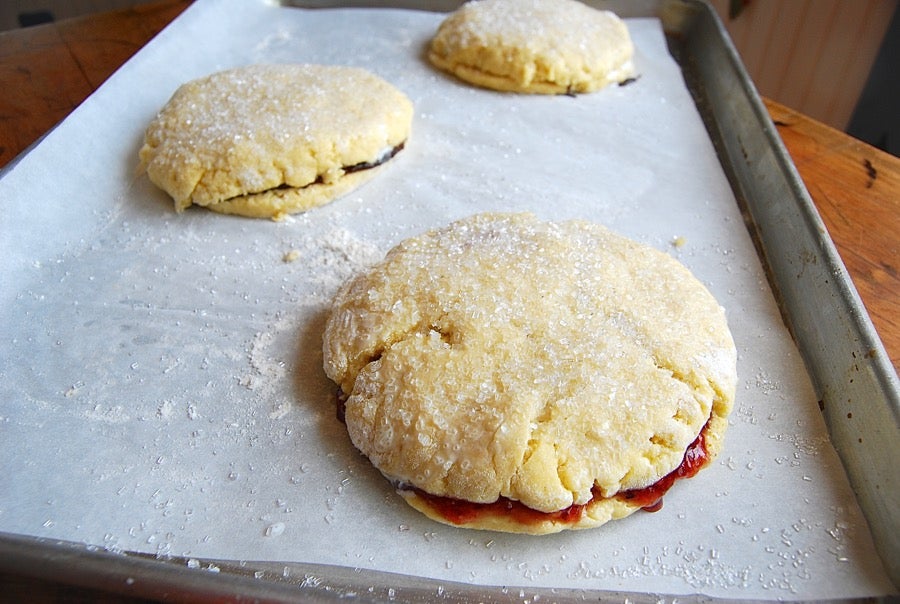
This is where this method departs from most other filled scones; not only do we not pre-cut the scones, but we also don't seal the edges. Instead, we cut the scones after baking (more on that below).
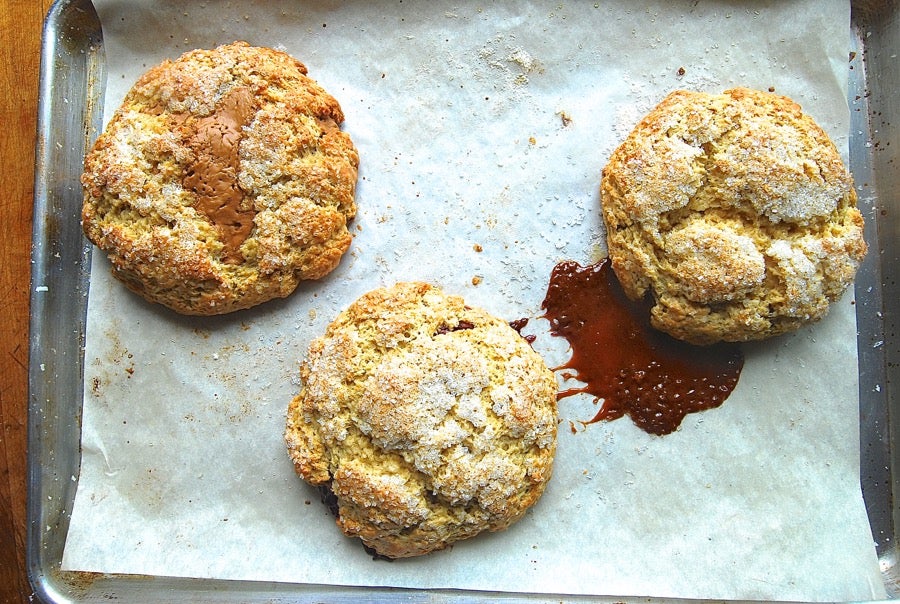
Bake the scones for about 20 to 24 minutes, until they're golden brown, and a toothpick inserted into the center comes out clean. Remove the filled scones from the oven; leave them right on the pan to cool for 15 minutes.
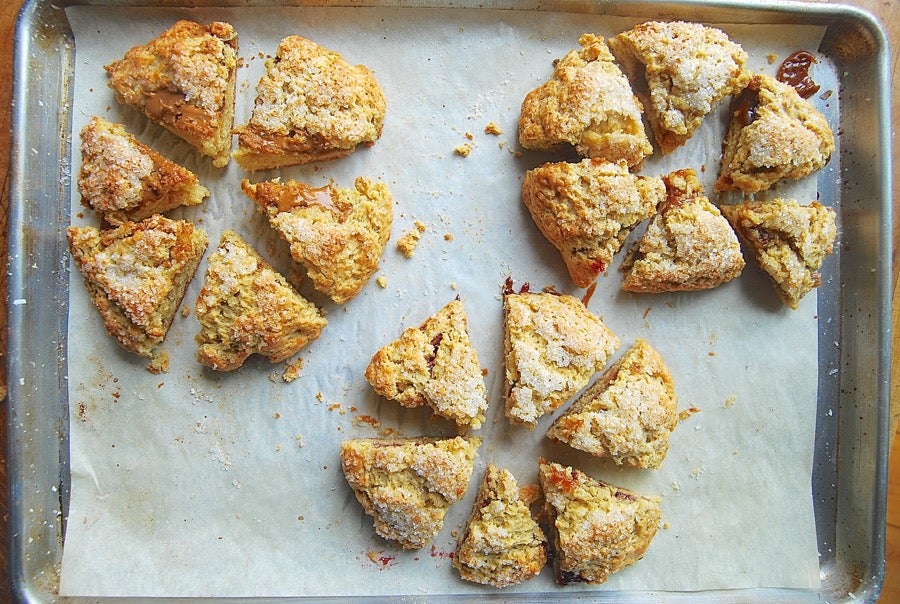
After 15 minutes, use a sharp knife to cut each disc into six wedge-shaped filled scones. Separate them. You'll have 18 soft-sided filled scones. Because they baked without being cut first, their sides are soft — not crisp.
Also, because you didn't cut the dough ahead of time, there was less opportunity for the filling to leak out. (Though some filling may still leak, which is why we highly recommend baking on parchment paper for easy cleanup.)
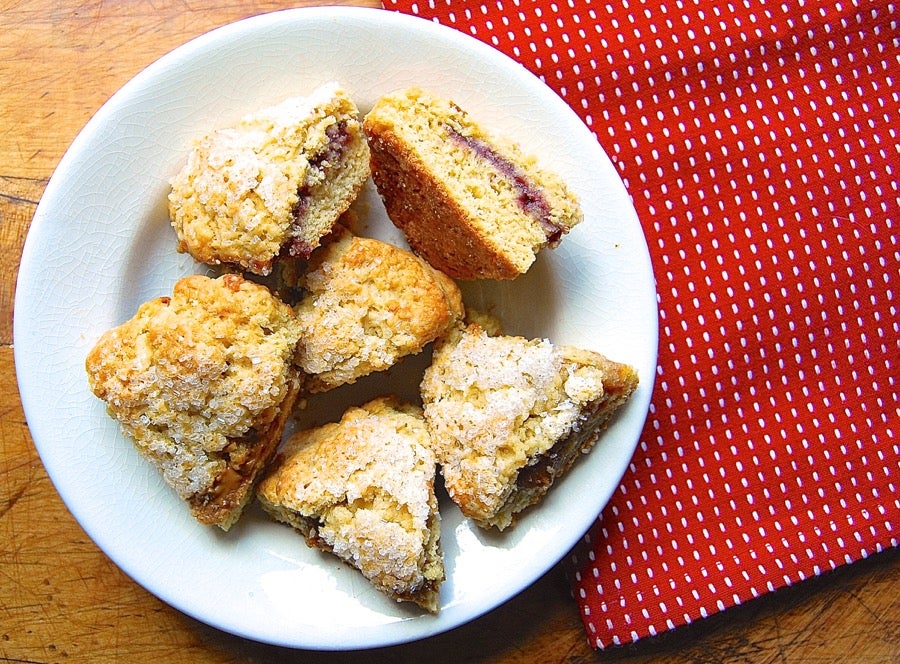
Serve warm, or at room temperature. Due to their moist filling, these scones stay soft longer than most.
Please bake, rate, and review our recipe for Double-Decker Filled Scones.