


Did you know New Year's is one of the biggest takeout pizza occasions of the year?
Truth. In order, more takeout pizza is consumed on 1) Halloween, 2) Super Bowl Sunday, 3) New Year's Eve, 4) New Year's Day, and 5) Thanksgiving Eve, than any other days of the year.
Now, put New Year's Eve and Day together, and you've got one hot pizza holiday!
I love takeout pizza. But that's because I love ALL pizza. Like Chinese food, and brownies, and spaghetti and meatballs, and cinnamon toast, it just never gets old for me.
So, pizza is an occasional (and thus special) treat. And if that's the place it holds in my life, I'd just as soon my pizza be homemade (thanks just the same, Pizza Hut).
For the past few years, I've been making giant, rectangular, thick-crust Sicilian-style pizzas for an annual family party – and they get rave reviews. When you're used to takeout (as I assume the vast majority of Americans are), homemade is a revelation.
My pizzas are topped not with typical Italian toppings, but with sautéed Portobello mushrooms, caramelized onions, and three-cheese sauce; or with scallions, Buffalo chicken bits, and a scatter of blue cheese crumbles.
Sometimes I lay down a base of Brie, and arrange golden roasted potato chunks on top; other times, it's steak tips, cheddar, and roasted peppers, for a "steak bomb" approach.
So many homemade pizzas – so little time!
The holidays are about to wrap up, with one final occasion to break out the bubbly: New Year's. And while I won't be hosting the party this year (it's someone else's turn!), I've volunteered to supply part of the buffet dinner: make-your-own pizza. Or, top-your-own pizza, to be exact, because I'll have the crusts made, shaped, and baked when I arrive at the festivities.
If there's any challenge at all to homemade pizza, it's making the crust. I mean, who can't drizzle tomato sauce and sprinkle cheese? No, it's that pesky crust that makes people think twice about the pizza recipe, then speed-dial Domino's.
The solution? Make the crust ahead of time, without the pressure of a hard deadline. I've taken to always making my crust ahead – and I don't mean just the dough. I make the dough, let it rise, shape it, let it rise again, then bake it halfway. When it's just set, and its bottom beginning to brown, I pull it out of the oven, cool it, and wrap. If I'll be using it within a few days, it sits on the counter; for longer storage, it goes in the freezer. Either way, when pizza sounds its siren song, I have crust ready – awaiting only its toppings and a quick trip through a hot oven.
Tuesday is New Year's Eve - which means tonight I'll start the crust, tomorrow I'll finish it, and Tuesday night I'll bring it to the party, along with a selection of toppings, from classic pepperoni and mozzarella to Cabot Habanero cheddar, sautéed baby bellas, roasted cheery tomatoes, and crisp fried bacon (of course). Everyone will have their own personal pizza to top and enjoy – while the hostess and I kick back with a glass of wine.
This New Year's Eve, think outside the (takeout) box – homemade pizza is terrific, and much easier than you think.
First, decide how many crusts you want to make. Here's a rule of thumb: a recipe using 3 cups of flour will yield 10 personal-sized (about 6" diameter) medium-crust pizzas; or six 6" diameter thick-crust pizzas; or 10 "cracker crust" (ultra thin crust) pizzas, about 7" in diameter.
My suggestion: go with the medium-crust pizzas, unless you know for sure you'll be feeding a NYC-style, cracker-crust crowd; or a group that goes for thick, Sicilian-style crusts.
The following recipe for Now or Later Pizza (either version, with or without semolina) makes 10 medium-thick, 6" crusts; it's easily doubled to make 20 crusts, for larger gatherings.
Since I really do enjoy a nicely flavored pizza crust – rather than some cardboardy thing that's only there to corral the toppings – I give my dough an overnight rest in the fridge before shaping. As the chilled dough continues to rise, slowly, the yeast creates alcohol and organic acids – both wonderful flavor carriers.
Combine the following:
3 cups (361g) King Arthur Unbleached All-Purpose Flour
1 tablespoon + 1 teaspoon (8g) Pizza Dough Flavor, (optional, but delicious)
1 teaspoon instant yeast
1 1/4 teaspoons salt
2 tablespoons (25g) olive oil
1 cup + 2 tablespoons to 1 1/4 cups (255 to 283g) lukewarm water
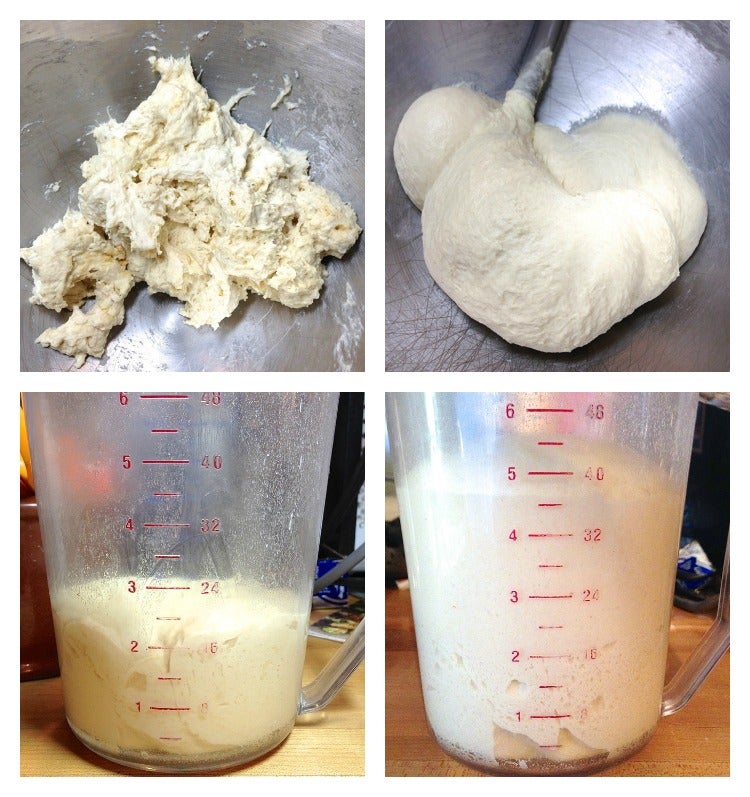
Beat the ingredients at high speed for 2 minutes, using your stand mixer equipped with the beater blade. Switch to the dough hook, and knead for 7 minutes; the dough should be smooth and quite soft. You can also make the dough in a bread machine set on the dough cycle.
If kneading by hand, mix the ingredients, then let the dough rest, covered, for about 30 minutes; this will give the flour a chance to absorb the water, which will make kneading easier.
Allow the dough to rise, covered, for 45 minutes; then refrigerate it for 4 hours (or up to 36 hours); this step will develop the crust’s flavor. It'll continue to rise in the fridge, so make sure it's in a big enough bowl.
Note: If you're in a hurry and don't care to refrigerate the dough, let it rise in the bowl for about 90 minutes before using.
When you're ready to make the crusts, remove the dough from the refrigerator, and gently deflate it.
Next, divide the dough into however many crusts you think you'd like to make. A piece of dough somewhere in size between a golf ball and billiard ball (about 2 1/4 ounces, about 64g) will make the size pizzas mentioned above: a medium-thickness crust, about 5 1/2" to 6" diameter. So divide your dough into 10 pieces, if this is the size you want.
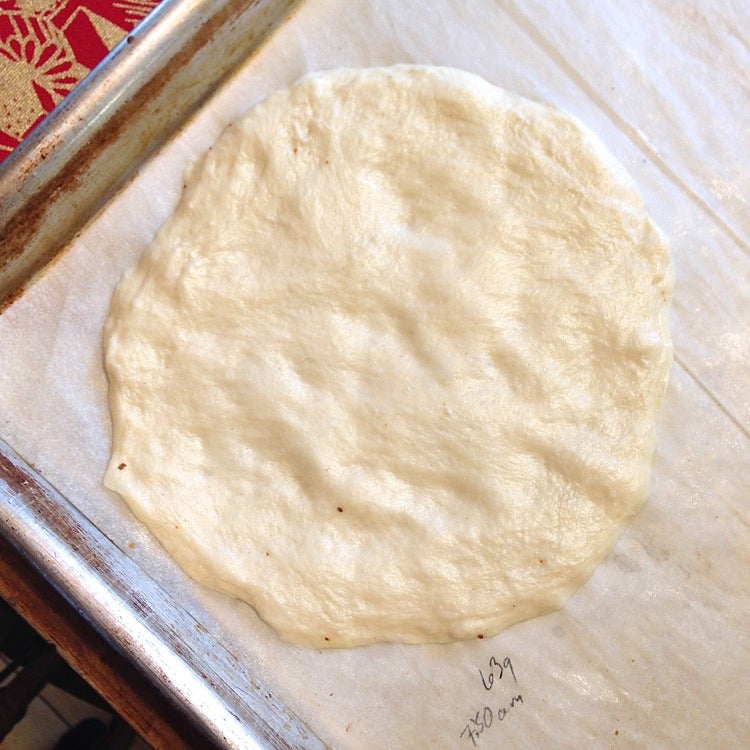
Gently stretch each piece into a flattened disk about 5 1/2" in diameter. Lay the disks on lightly greased or parchment-lined baking sheets (3 or 4 to a sheet), and let them rest while you're preheating the oven to 425°F.
If you have a pizza stone, now's your chance to use it; place it on the bottom shelf of the oven as the oven preheats.
Not into standard crusts? Try a cracker-thin, New York-style crust.
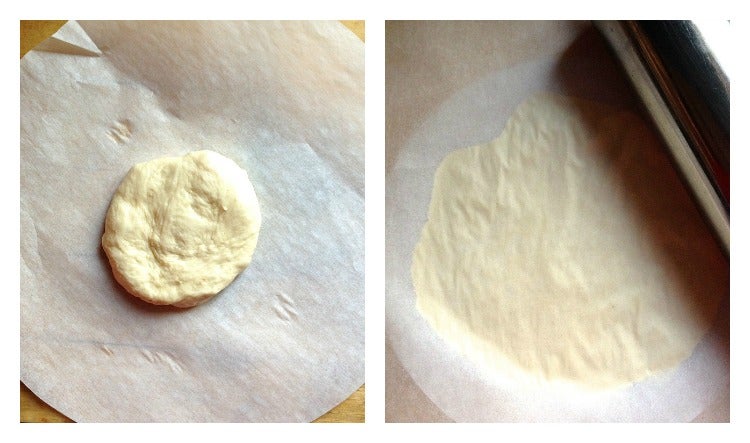
An easy way to create this super-thin crust is to place a flattened ball of dough on a 9" parchment cake round. Cover with more parchment, and roll VERY thin – the disk will stretch to about 7" diameter. Remove the top piece of parchment, but leave the crust on the bottom piece; it's too thin to try to transfer to a pan.

Once the oven is heated, bake the standard crusts for about 10 to 12 minutes, or just until their bottoms start to brown. You may also see the slightest bit of brown on top, too. You want the crusts set (done enough so they won't deflate), but not completely baked.
If you're baking thin cracker crusts, bake just until the very edges of the crust are brown, about 7 to 8 minutes. If you see it ballooning up like pita bread, just stick your hand into the oven and poke it with a sharp knife; it'll deflate.
Now, what about if you like those thick, Sicilian-style crusts?
Divide the dough into six pieces initially, rather than 10. Flatten each piece into a round about 5 1/2" in diameter. Place the rounds on a lightly greased or parchment-lined baking sheet, cover the sheet, and let them rise for 1 to 2 hours, until they're quite puffy.
Bake these thick crusts for about 13 minutes.
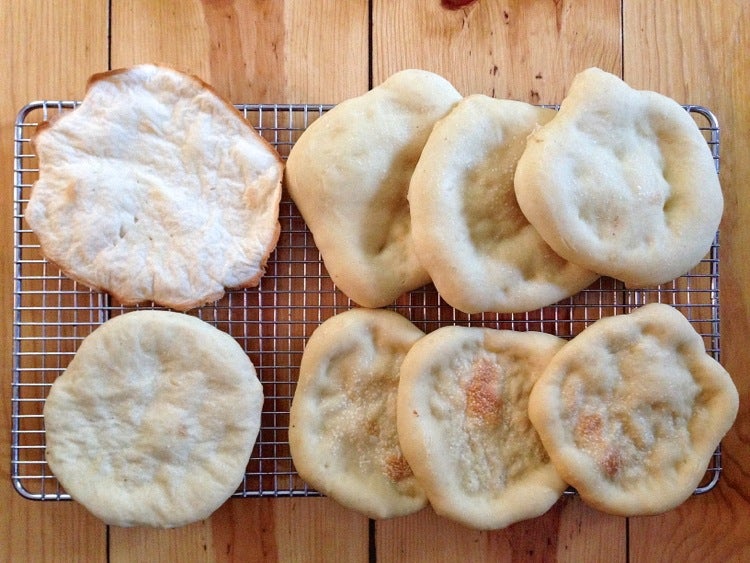
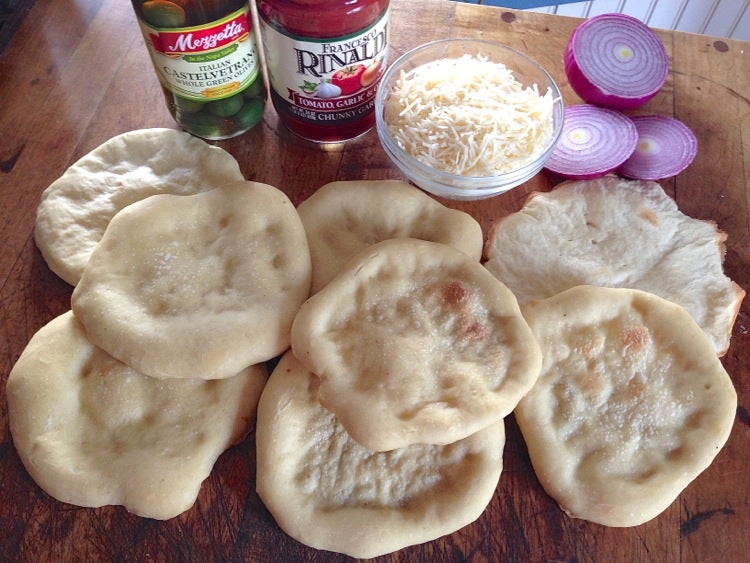
Here's the result of my various size experiments: four standard crusts; one cracker crust; and three thick crusts, from one 3-cup-flour dough recipe.
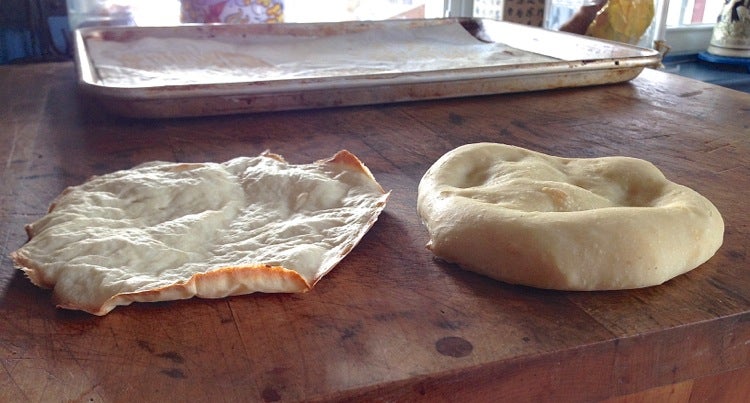
And here's the difference between a cracker crust, and a thick crust.
They all look pretty unprepossessing, don't they? Never fear; dress them up with toppings, and you'll see them in a whole new light.
First, though, decide if you want to bake pizzas right away, or store the crusts until later.
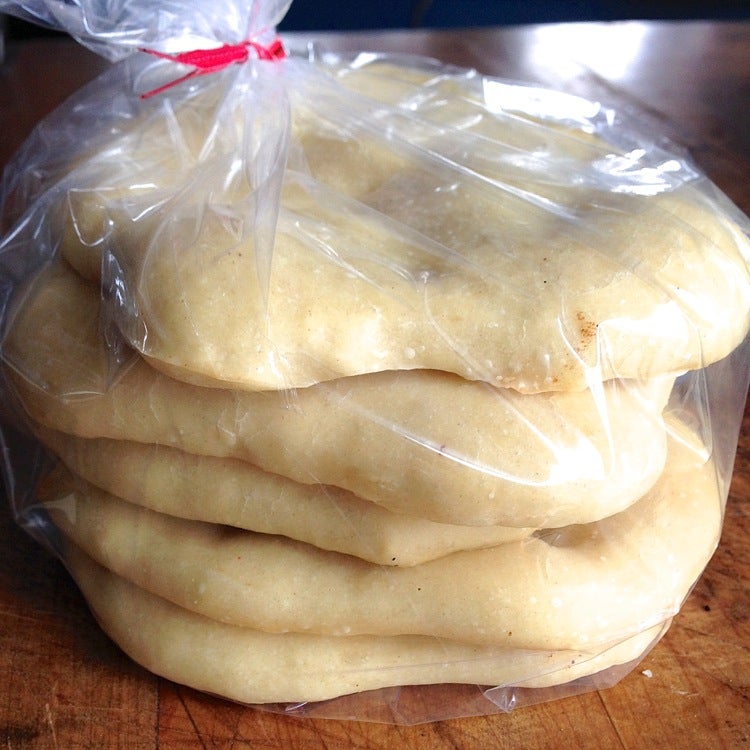
To store, simply wrap them as airtight as possible in a big bag, and leave them at room temperature for several days. If it's particularly hot and/or humid, freeze them – which is also what you'd do for longer storage, up to a month or so.
At some point, someone's going to say, "Can we have pizza tonight?"
Sure!
If the crusts have been frozen, let them thaw, unwrapped at room temperature, while you prepare your toppings. Don't worry, they'll warm up quickly.
Preheat the oven to 425°F (again using a stone, if you have one).
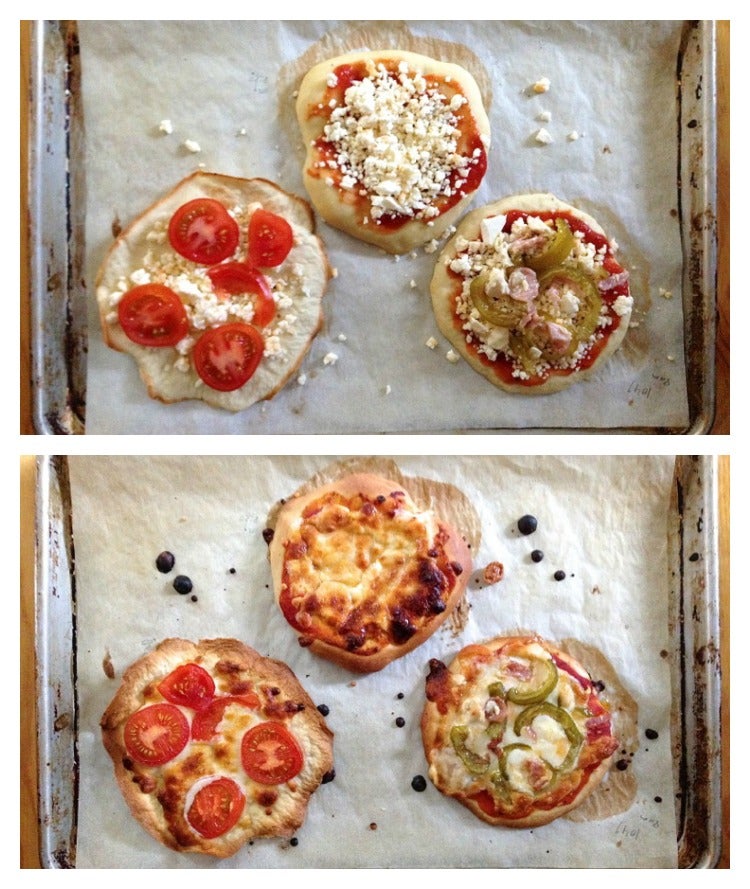
Top the pizzas as desired. This is the fun part – let everyone do their own thing.
Bake the pizzas on the stone, or on a lower rack of the oven, for about 15 minutes; the cracker crust will be done a couple of minutes sooner. Your goal is pizzas that are nicely browned, top and bottom; move them around in the oven if necessary (bottom to top, top to bottom), to achieve this goal.
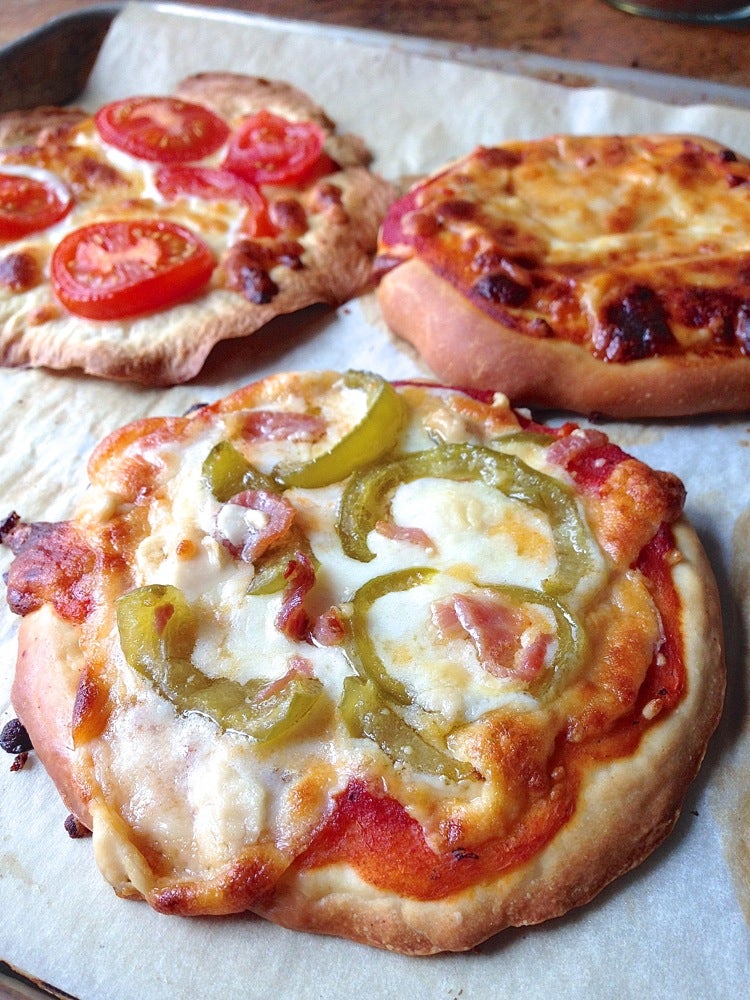
Remove the pizzas from the oven. Dig in!
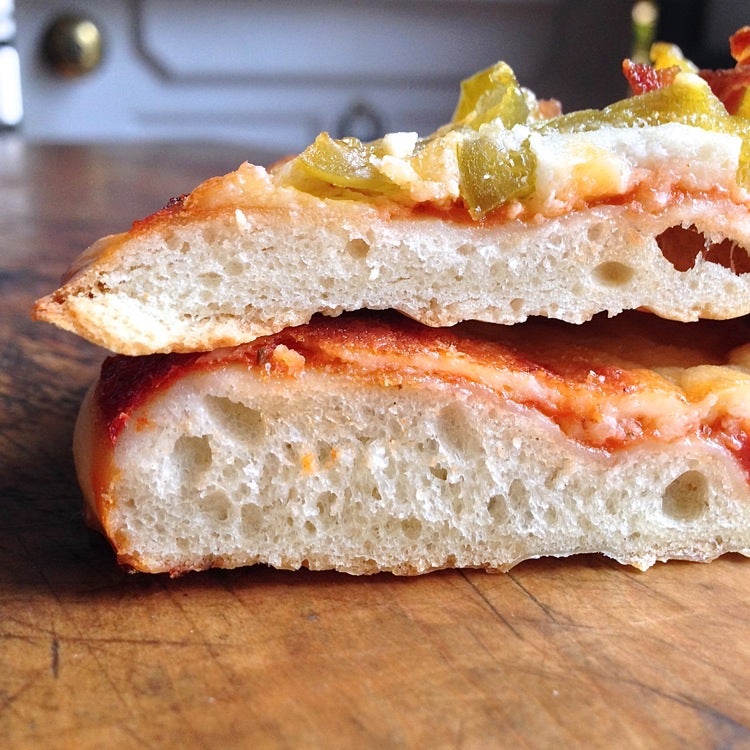
Nice crusts: thick on the bottom, standard on top.
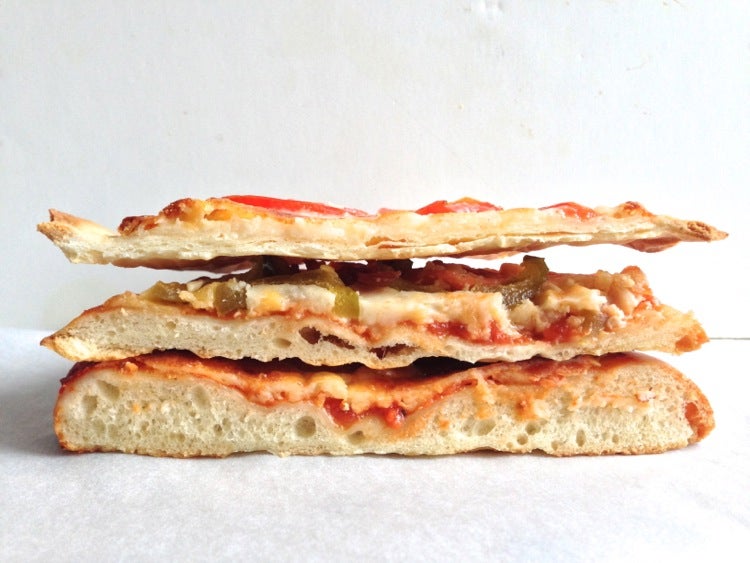
Here's a shot of all three thicknesses – see why that thin crust on top is called "cracker"?
Now, one final note: don't feel you have to make one of these three specific crust types. Want a slightly puffier standard crust? Let it rise longer. A cracker crust with a bit of chew? Let it rise for 30 minutes or so. How about a thick crust that's more substantial, and not QUITE as tall? Let it rise for 30 to 60 minutes, instead of 2 hours.
See where I'm going here? To a large extent, the final thickness of your crust depends on how long you let it rise before baking. Experiment; you'll soon discover your preferred degree of thickness.
Note: While this method can be applied to any pizza dough recipe, I used our recipe for Now or Later Pizza.
