

Here's my mantra: If you can read, you can bake bread.
No, really. If you can read, you can bake bread.*
*One caveat: to bake GOOD bread, you should use GOOD ingredients.
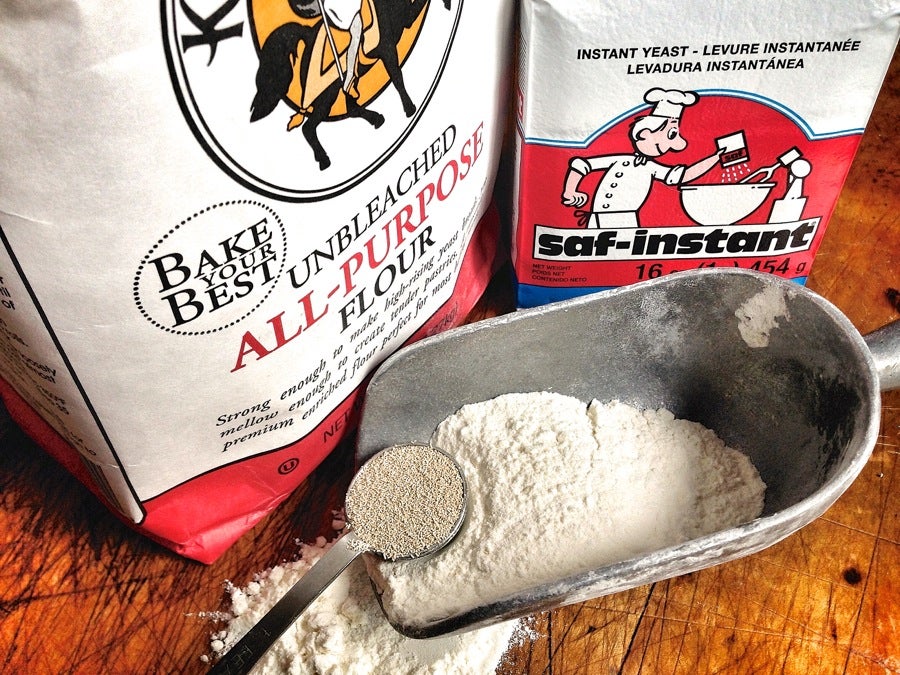
Starting with flour and yeast. Make that King Arthur Unbleached All-Purpose Flour, and SAF Red instant yeast.
King Arthur Flour is a given. And this isn't just a sales pitch: Flour is our signature product; it has been for 223 years. And we care about it like a mom cares for her children.
From wheat field to mill to warehouse to supermarket to your kitchen, we care about our flour. Our milling specs are the tightest in the industry, and we stick by ’em; we've been known to return entire rail cars of flour to the mill if it's not absolutely perfect.
Personally, I like our all-purpose flour for bread; with its 11.7% protein (more than a percentage point higher than other national brands), it's perfect for yeast bread, while still remaining ideal for pie crust, pancakes, and popovers.
What's this protein stuff, you ask? The percentage of protein in wheat flour can have a direct bearing on how high your bread rises. Protein, when mixed with liquid, becomes gluten; and gluten is the elastic network that traps air in your yeast dough. Without gluten, your dough is a leaky balloon; you can keep blowing it up, but it'll never expand. The more gluten, the easier it is to get bread to rise nice and high.
So, when do you use bread flour? I use bread flour (12.7% protein) when I want a really chewy bread – think bagels, or ultra-chewy pizza crust.
I also use it when whole grains make up a large percentage of the flour in my recipe. The bran in whole grains tends to slice through gluten (again, think leaky balloon); so using bread flour as part of the flour in a whole-grain bread recipe gives you a head start: with more protein (read: gluten) to begin with, the bran doesn't have as big a negative effect.
So, once you've got your King Arthur Flour, what next? Yeast.
Fleischmann's makes good yeast. As does Red Star (a company that's actually owned by SAF). But I started using SAF over 20 years ago, so I'm sticking with it. It's never, ever disappointed me; I buy it in fresh 1-pound vacuum-packed bricks, so I KNOW it's good and active right from the get-go. And, stored in the freezer, it easily stays nice and active for a year or more.
Flour. Yeast. Beyond that, all you really need is water (and usually salt) to make a great loaf of bread. For instance, a baguette.
But since we're not French, we're going to make a great loaf of American sandwich bread: high-rising, soft-textured, and mildly sweet.
With its small amount of added fat, and a touch of whole grains, you might say this is a "better for you" loaf. Hey, we all say we want to eat healthy, right? But for many of us, that doesn't mean at the expense of flavor and texture, which this bread offers in spades.
Vermont Whole Wheat Oatmeal Honey Bread is one of the most popular recipes on our site. Readers love it. Here's a typical review, from "jarobo": "Gorgeous, yummy and easy -- what more could you want? Makes the most awesome PB & J!"
Kids love it. Parents, too. Remember, if you can read – and if you have "the right stuff" in your pantry – you can bake this bread. Want to give it a try? Read on.
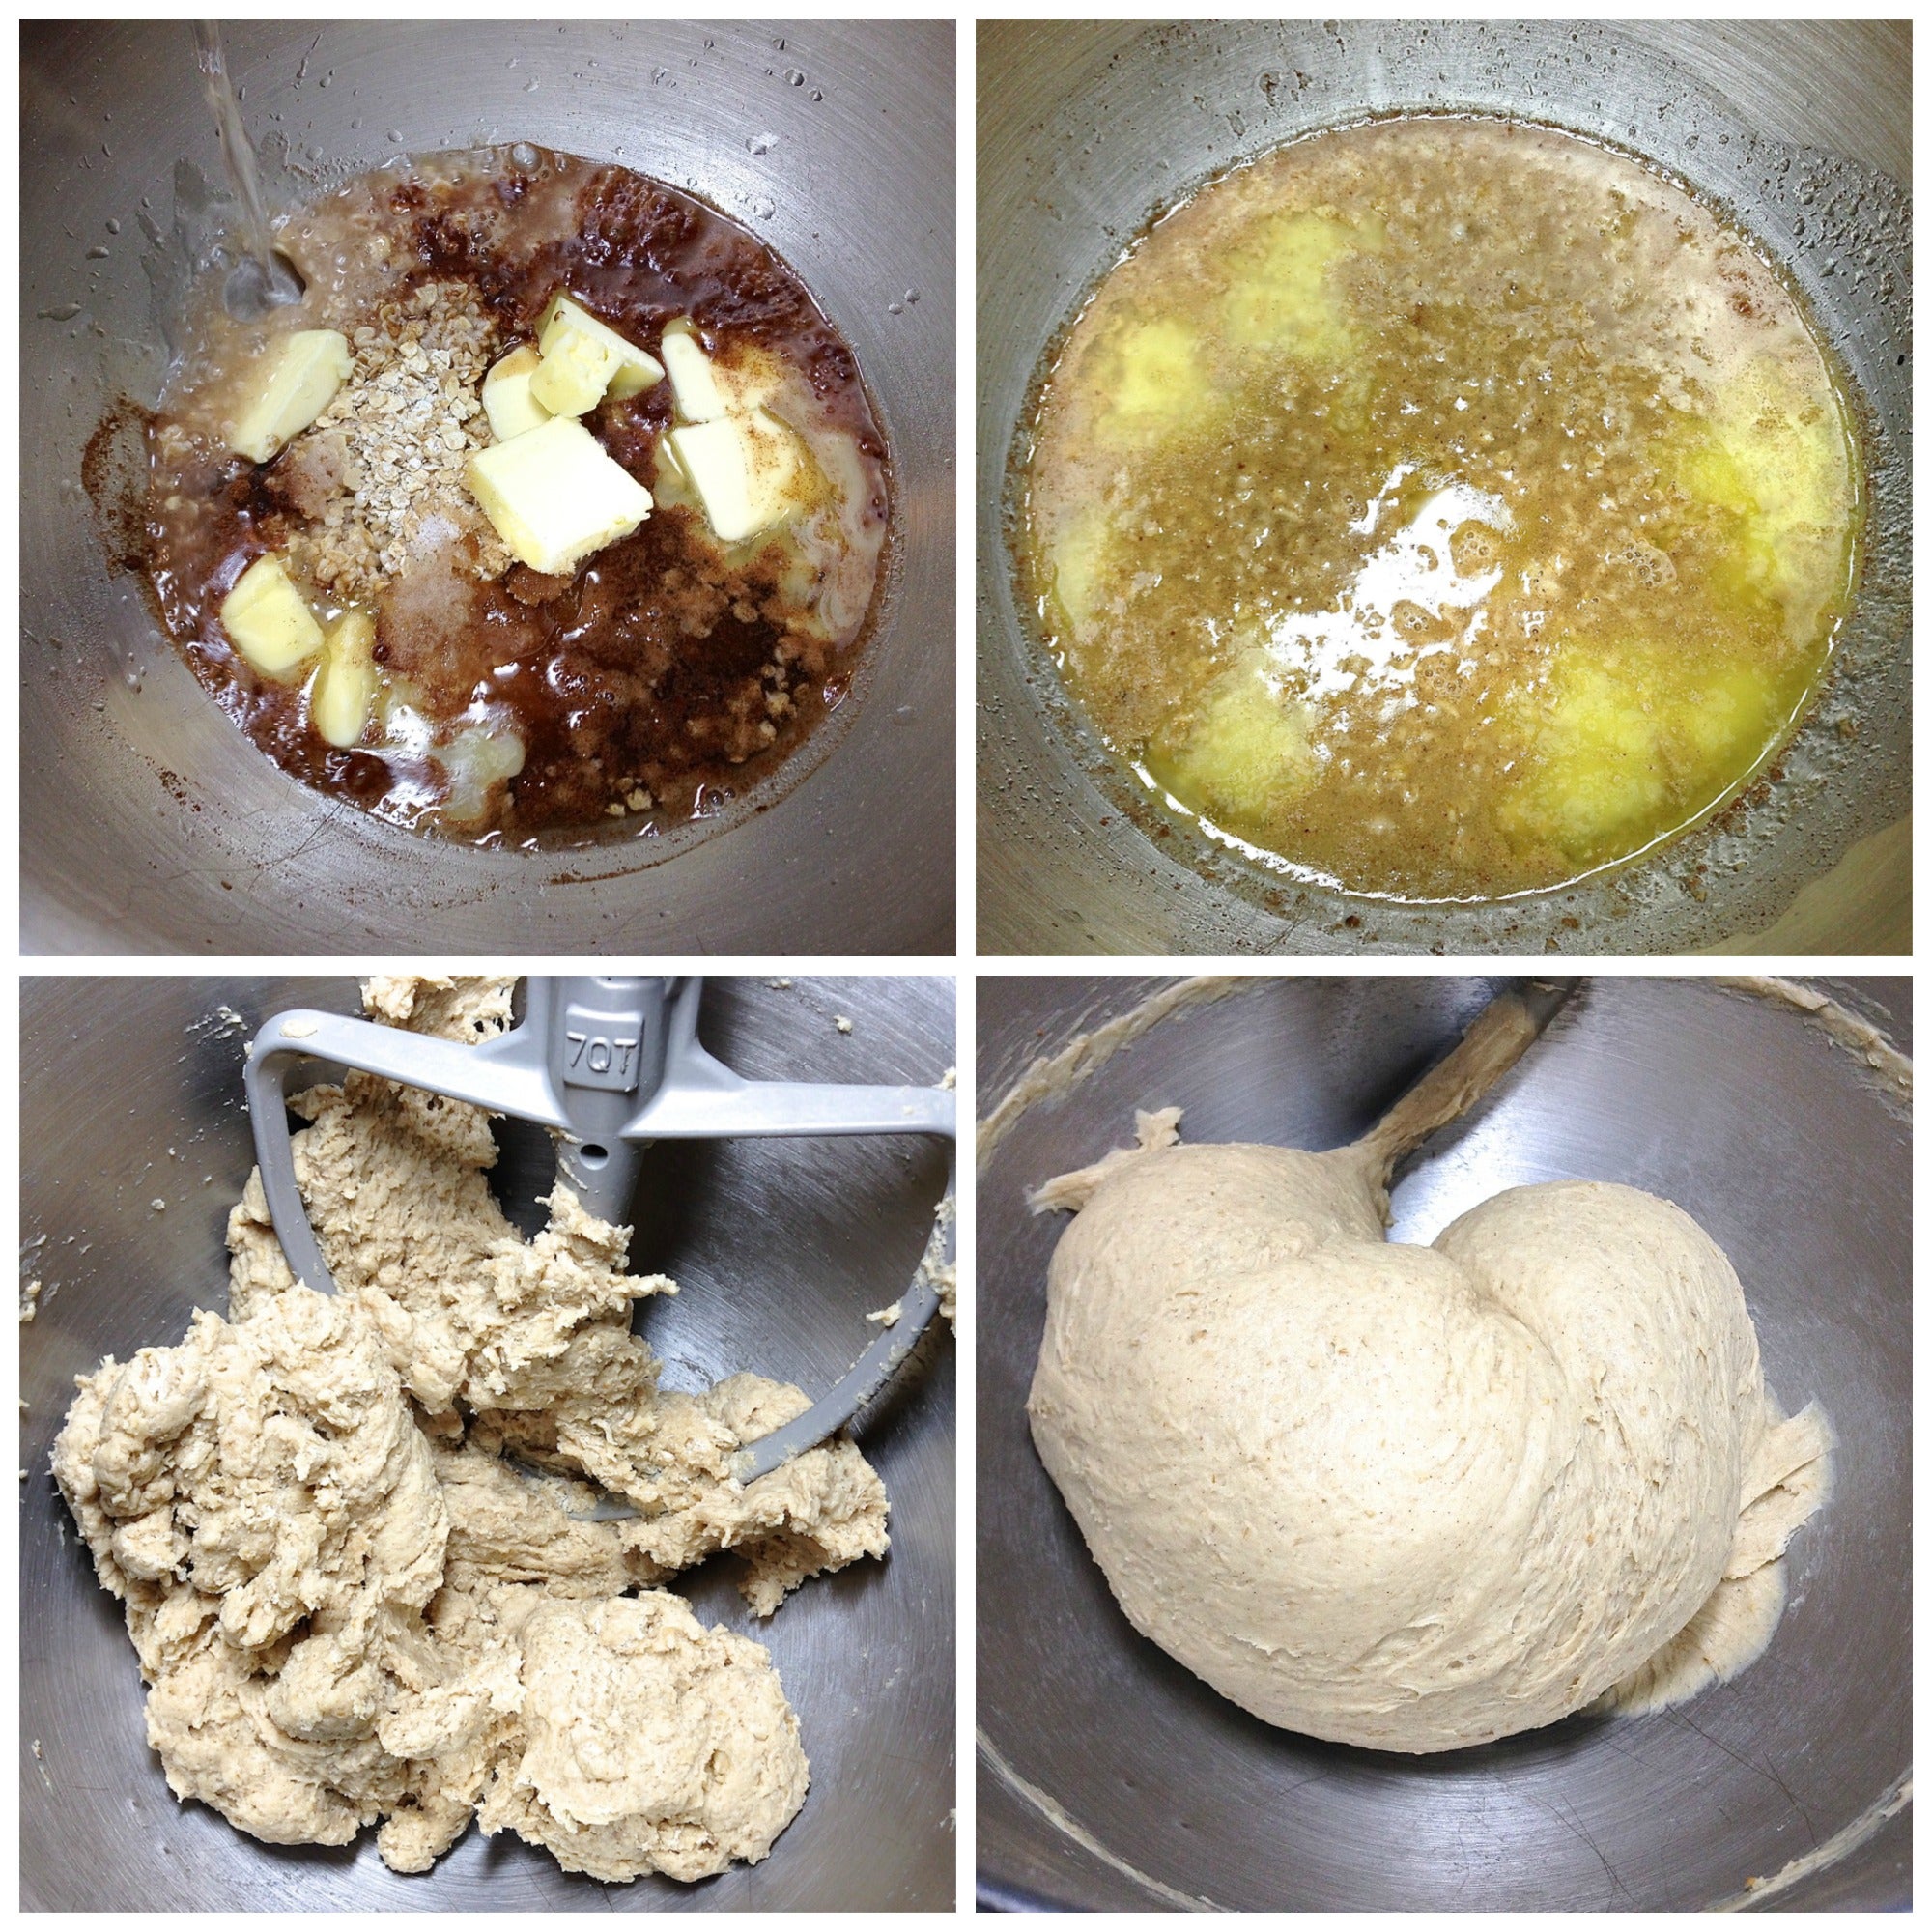
Place the following in a large mixing bowl:
1 cup (89g) rolled oats, traditional or quick (not instant)
1/2 cup (78g) maple sugar or 1/2 cup (106g) brown sugar
1 tablespoon (21g) honey
4 tablespoons (57g) butter
2 1/2 teaspoons salt
1 teaspoon cinnamon, Vietnamese preferred; optional, for very mild cinnamon flavor
Stir in 2 cups (454g) boiling water. Let everything cool to lukewarm, about 10 to 15 minutes. This first step melts the butter, and softens the oats, plus gives them a chance to absorb some of the water; this will make your bread easier to knead.
Add the following to the bowl:
1 tablespoon instant yeast
1 1/2 cups (170g) King Arthur Golden Wheat Flour or Premium Whole Wheat Flour
4 cups (482g) King Arthur Unbleached All-Purpose Flour
Stir to combine. Oh, by the way, when baking bread, it makes a BIG difference how you measure your flour; too much flour = dry, crumbly bread. If you don't already know about the "sprinkle and sweep" method, check out our quick measuring video.
Stir everything together to form a rough dough. Knead the bread (about 10 minutes by hand, 5 to 7 minutes using a mixer) until the dough is smooth and satiny.
Do you have a bread machine? Use its dough cycle to knead the ingredients, plus take the dough through its first rise.
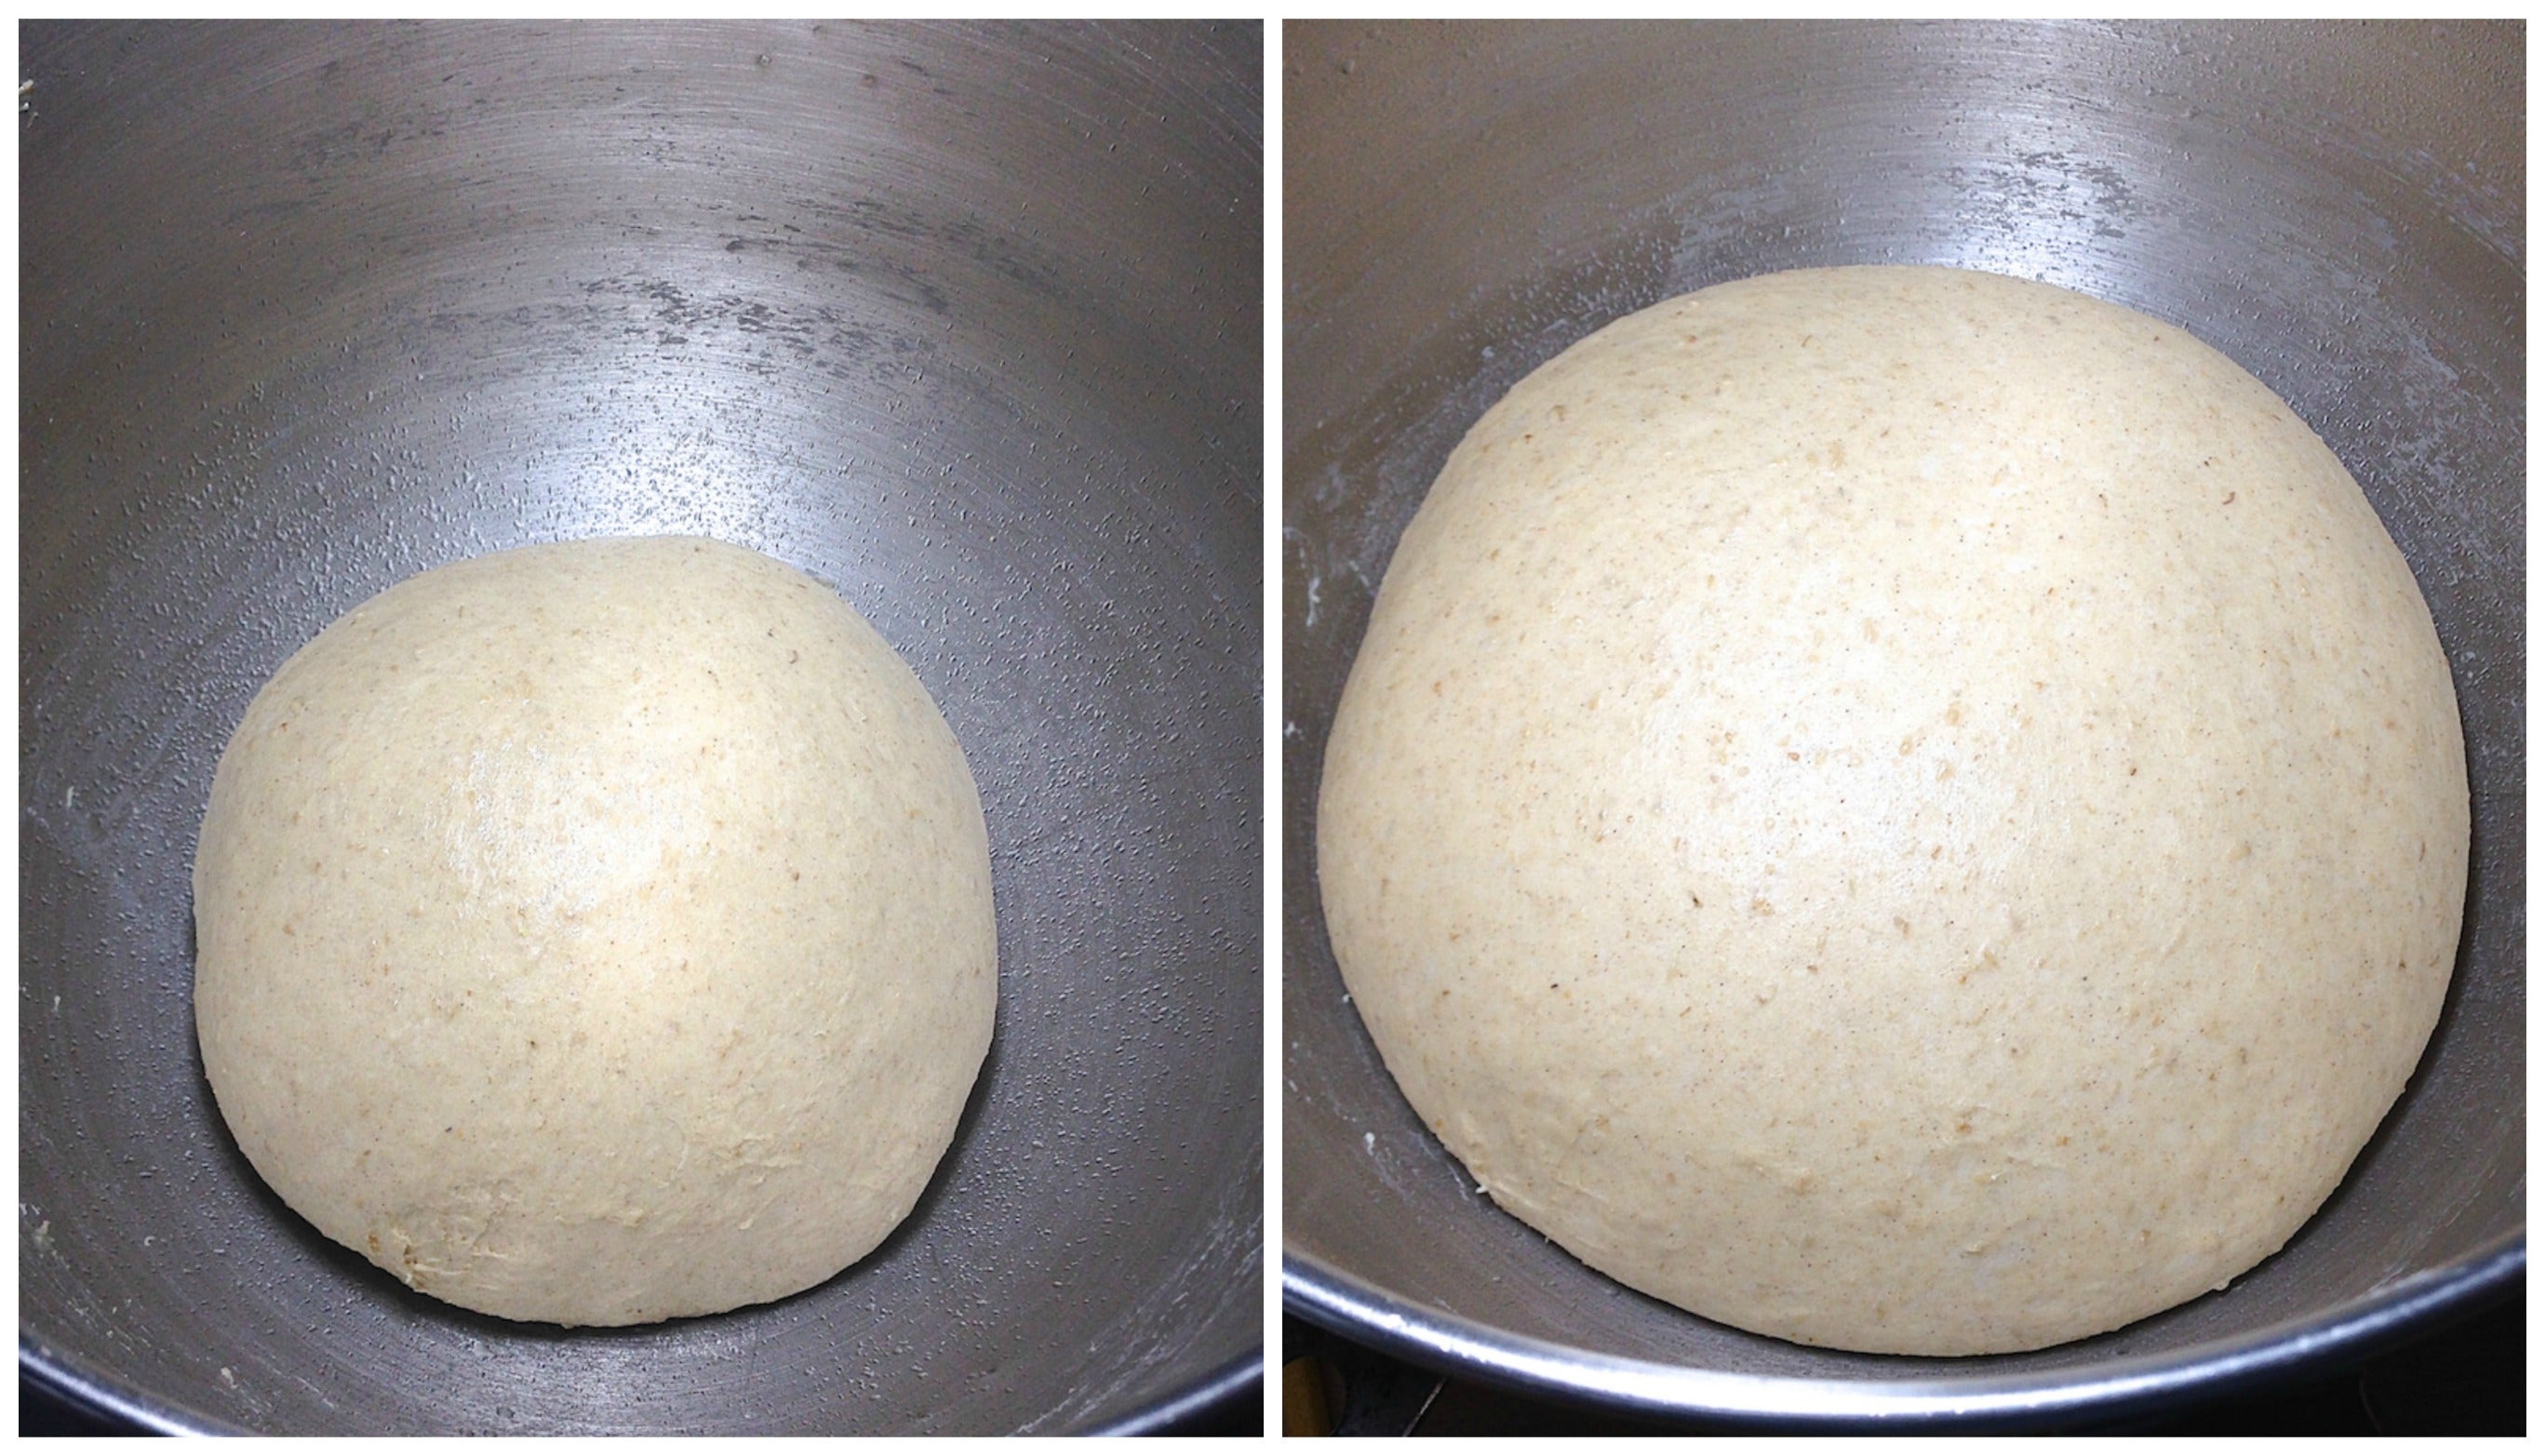
Round the smooth dough into a ball. Scrape any bits of dough from the sides of the bowl; spritz the bowl with vegetable oil spray, and place the dough in the bowl.
Cover the bowl; a clear plastic shower cap works well, letting you watch the dough rise without uncovering it.
Let the dough rise somewhere not too chilly (e.g., above 65°F) until it's gotten quite puffy. The cooler the room temperature, the longer this will take. I was making this bread in early October, and the temperature was around 75°F, which is ideal for yeast dough. In the dead of winter, finding somewhere in the house that's as warm as 70°F is a challenge.
Our electric bread proofer is an extremely useful tool; but heck, I realize it's an expensive solution, and probably only for those who are passionate bread bakers (including bakers of sourdough and salt-rising loaves, where it's incredibly helpful). Warming your oven VERY briefly (say, 60 seconds or so), then turning it off and putting the bowl inside works well, too.
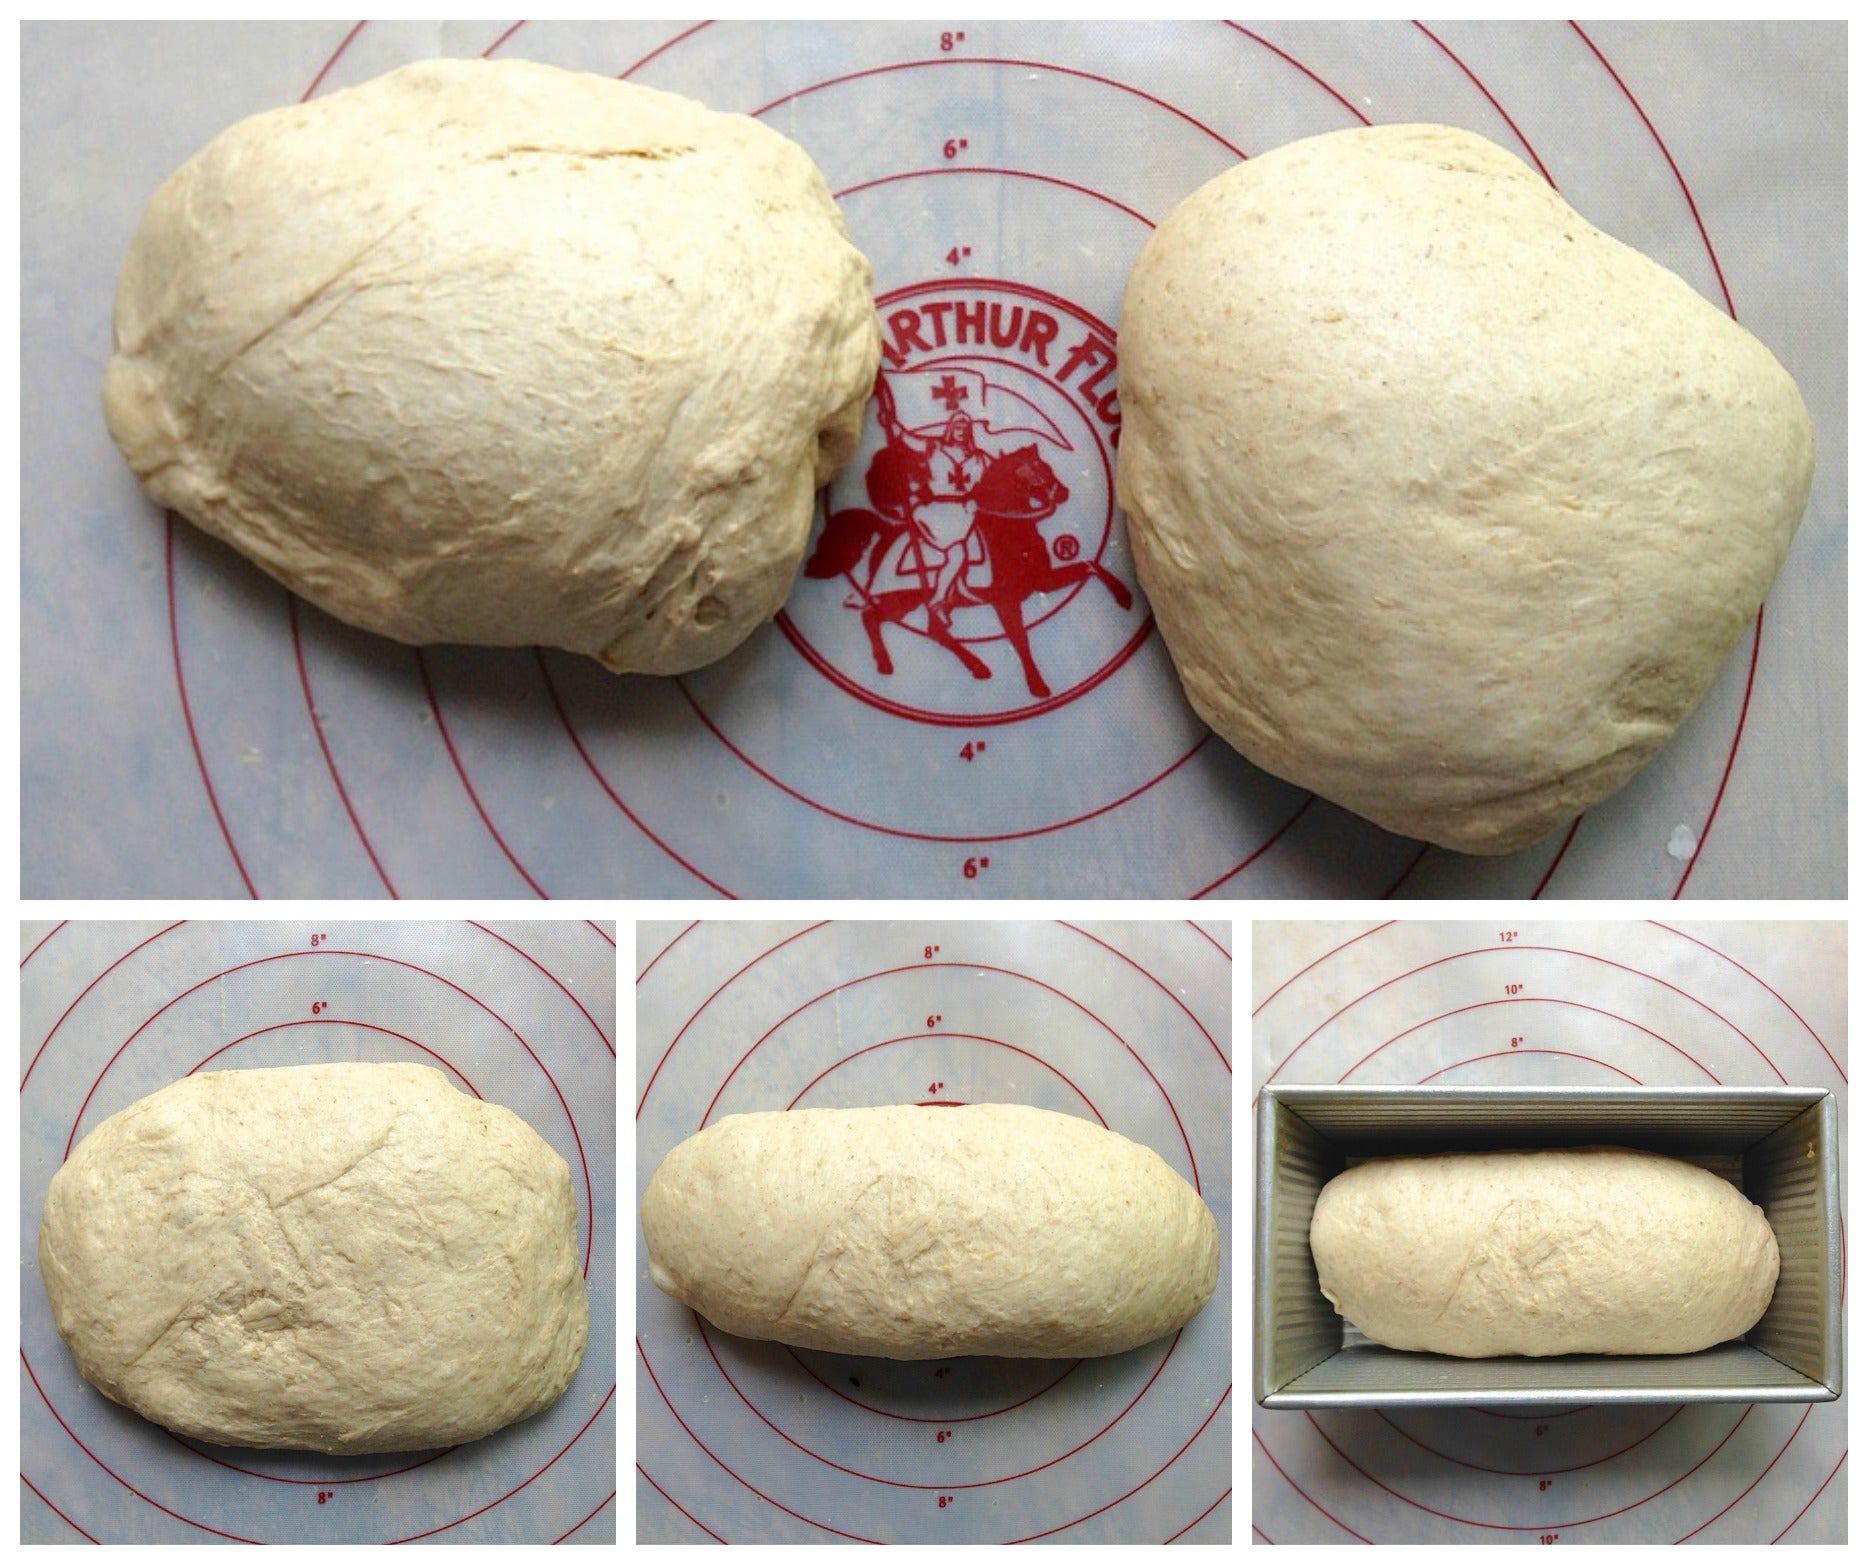
Once the dough has risen nicely, gently deflate it. Divide it in half, and shape each half into a log. Gently pat each piece of dough into an oval, then fold over to make a log. Place the loaves in two greased 8 1/2" x 4 1/2" loaf pans.
What if all you have is a single 9" x 5" loaf pan? Well, that's fine; wrap one of the dough halves lightly in greased plastic, and refrigerate until your first loaf is baked and you have the pan back – later the same day, or even the next day. The dough will rise gradually in the fridge; that's OK. Once you shape it and put it in the pan, understand that it'll take a lot longer to rise, since it's starting out cold.
Or feel free to simply make half this recipe. Though since you're making one loaf, why not make two? If you can't deal with two loaves yourself, surely one of your neighbors would like some fresh, home-baked bread.
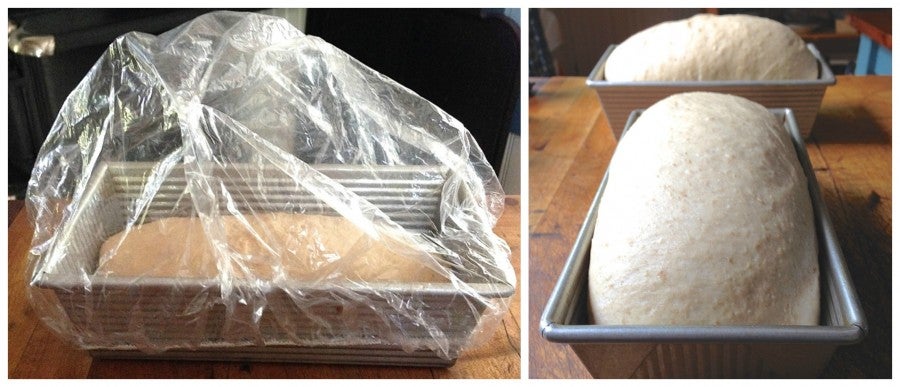
Cover the pans with lightly greased plastic wrap (or clear shower caps, as I've done here), and allow the loaves to rise until they've crowned about 1" over the rim of the pan, about 1 to 2 hours.
Again, the warmer the environment, the faster this will happen; try for mid- to upper 70s, but anything over 65°F will do.
While the loaves are rising, preheat your oven to 350°F.
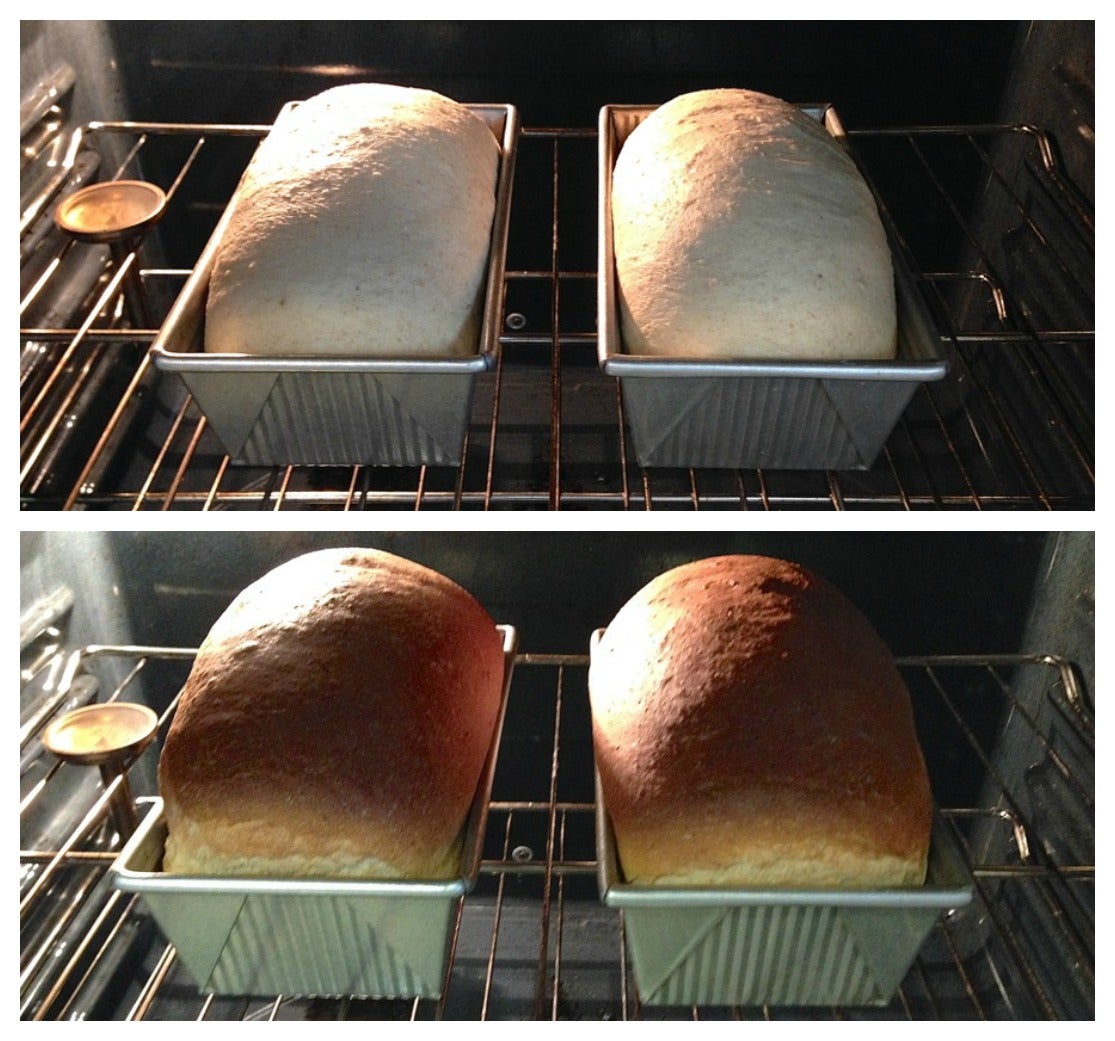
Bake the loaves for 35 to 40 minutes, tenting them lightly with aluminum foil after 25 minutes, to prevent over-browning.
Notice how the loaves rise quickly once they're in the oven – this is called "oven spring." And oven spring is the reason you don't want your loaves to rise TOO high before you bake them. If a loaf looks beautifully and fully risen before it bakes, it'll collapse once it hits the oven's heat. Remember the balloon? POP. So, a good rule of thumb is, bread shouldn't rise more than about 1" over the rim of the pan before going into the oven.
Remove the loaves from the oven when they're golden brown, and the interior registers 190°F on a digital thermometer.
I used to thump the bottom of the loaves to see if they were done, but honestly? That's an inexact science (to say nothing of being uncomfortably hot!) To make sure your loaves are done, stick a thermometer through the end or side (not through the top, if you care about cosmetics), and when it registers 190°F at the center – it's done for sure.
Personally, I use a Thermapen digital thermometer, for all manner of cooking and baking tasks (as do our friends over at Cook's Illustrated/America's Test Kitchen); it's expensive, but it's also a long-term investment, and totally worth it.
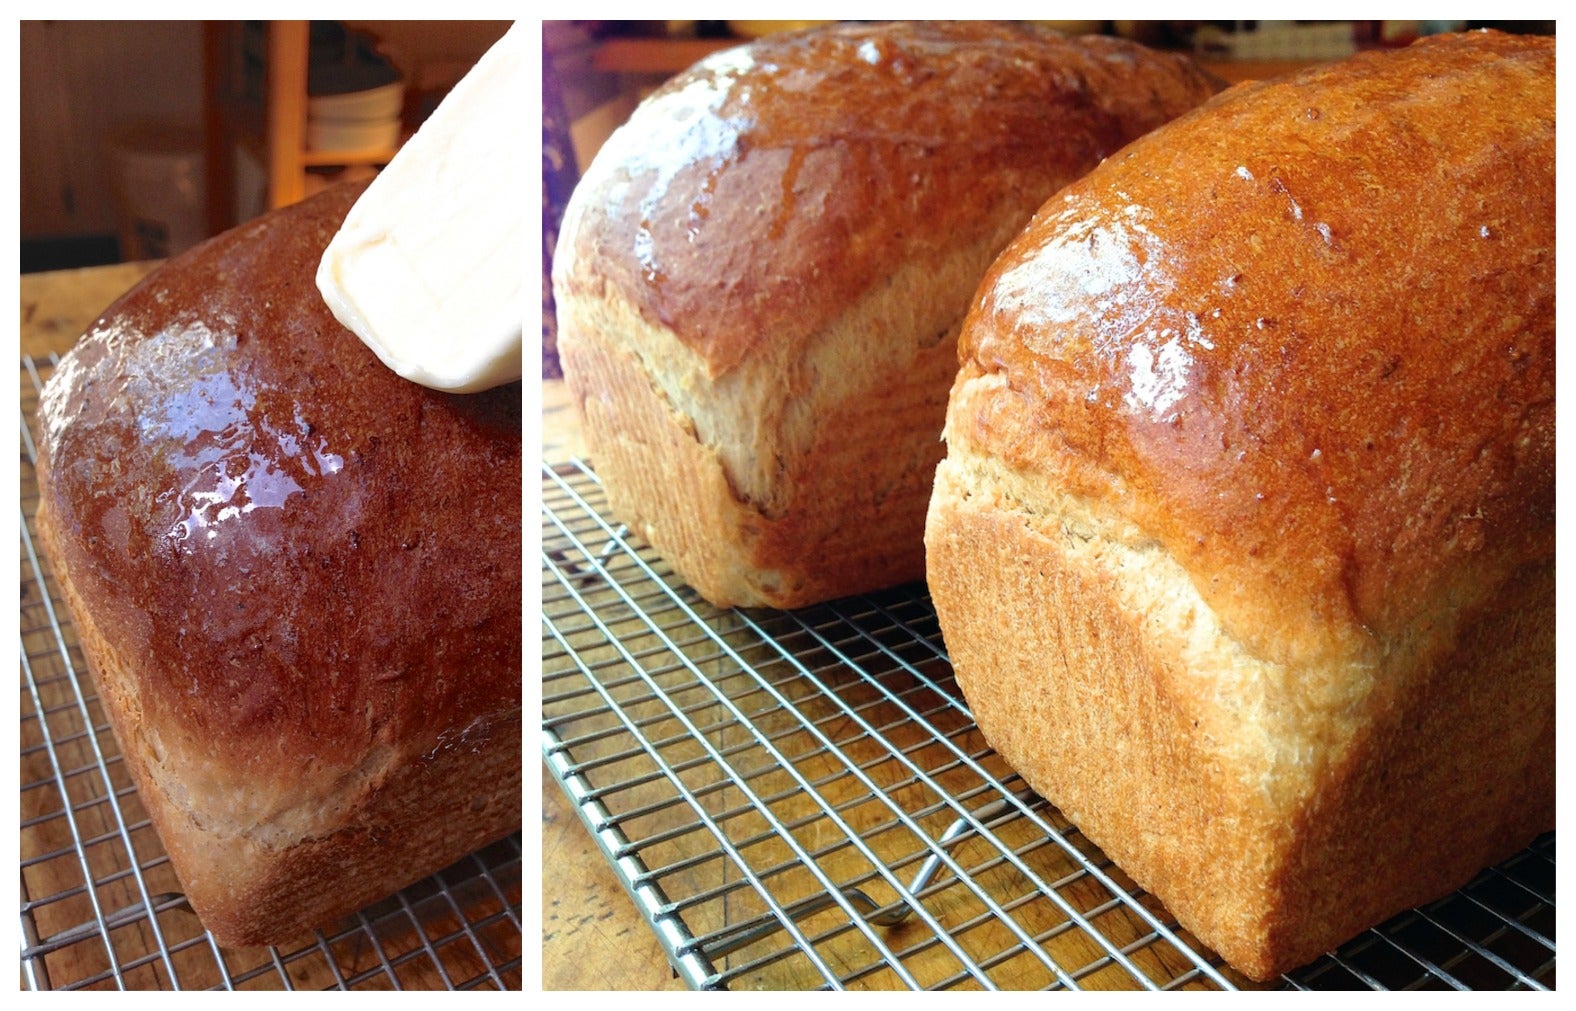
Turn the loaves out onto a rack; they should slip right out of the pan. I like to run a stick of butter over the top, which gives the crust a satiny appearance, soft texture, and wonderful flavor.
Now comes the hard part:
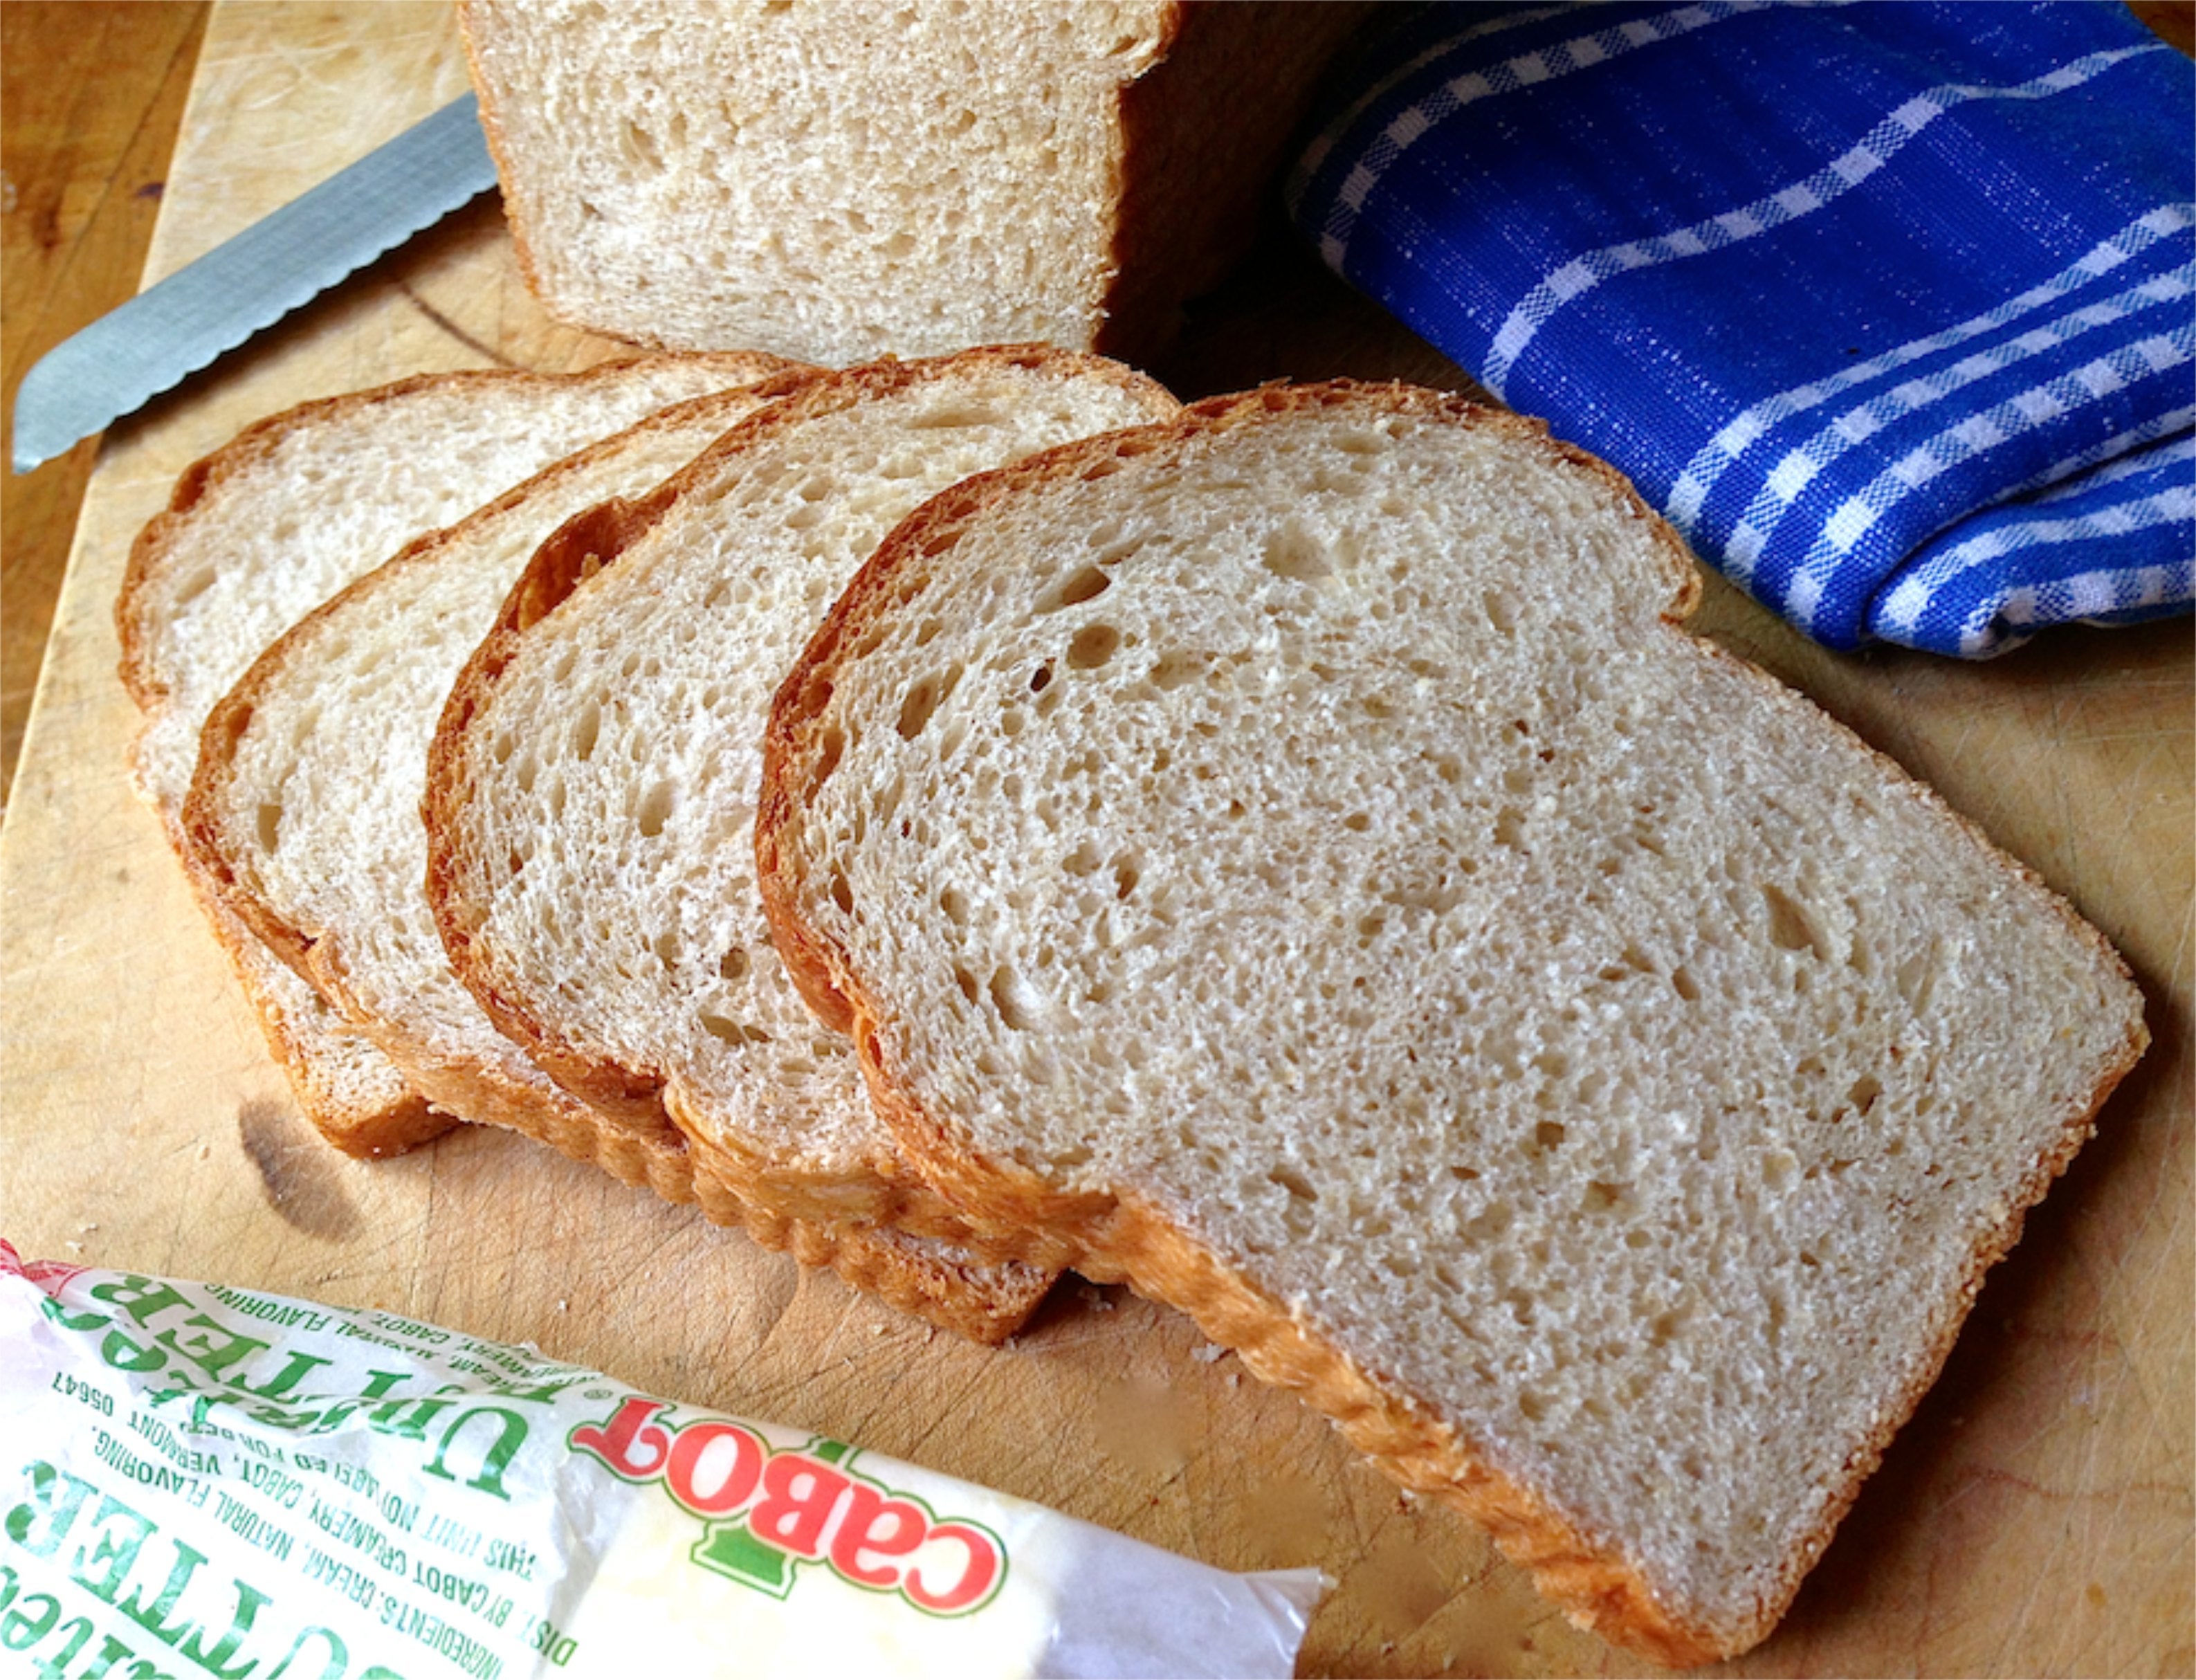
Waiting for the loaf to cool before you slice it!
Slicing a hot loaf will make its texture gummy; I'm not quite sure why, but it happens.
If you HAVE to sample a bit, slice off just a tiny chunk at the corner; the less interior surface exposed to air while the loaf is still hot, the better it'll be when totally cooled.
So, if you successfully read all the way to the end here – you can bake bread.
If any of this puzzles you, either leave a comment below, or call our baker's hotline, 855-371-BAKE (2253). All of us here at King Arthur are determined to help you become the very best bread baker you can be!
Please read, bake, and review our recipe for Vermont Whole Wheat Oatmeal Honey Bread.
Attention, first-time bread bakers: want to sample a simple recipe before tackling this one? Try our no-knead English Muffin Toasting Bread.
And, when you're ready to try Classic Baguettes – we can take you there, too!