Chocolate-Hazelnut Stollen
Martin is our Santa this year! He took stollen, the classic fruit and spice holiday bread, and personalized it for anyone who's ever loved Nutella. This stollen is infused with orange zest, filled with chocolate and hazelnut, and now has a lighter texture than the original. Chocolate-Hazelnut Stollen pays respect to its roots, while beginning an exciting new holiday tradition.
-This is Martin and the whole gang here saying, "Let's holiday bake." It's holiday baking season. And I wanted to share with you a little bit of a tradition that we have at my house. My birthday is on the 24th of December. Each year I get to choose how I spend the day and I always spend it baking and then driving around and delivering delicious things to friends and family. This loaf is something that I like to make.
It's a Chocolate Hazelnut Stollen, inspired by the classic, but twisted into a chocolate sort of hazelnut vibe. It's delicious. It's worth the effort. Let's jump into the video.
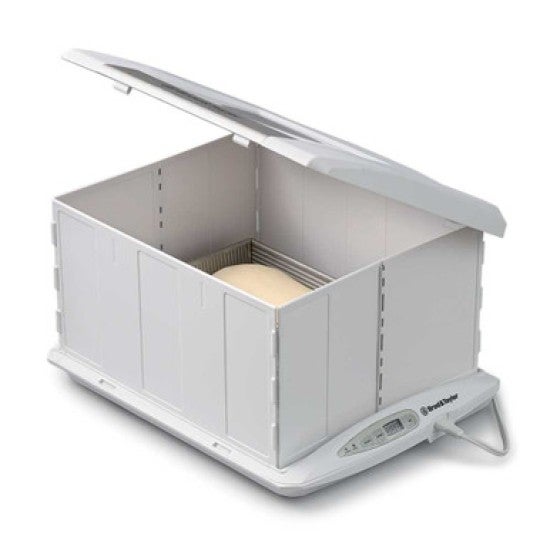
So let's mix this preferment. This is a stiff preferment. You might even say it's a biga. It's a preferment that is yeasted and the total hydration is in the low 60s, so pretty stiff and we'll let it rise overnight. Very, very small amount of yeast, one gram or about like a rounded quarter teaspoon, something like that. Very, very small amount. I really like a stiff preferment, whether it's a sourdough preferment or a yeasted preferment. I find that to me, I really like amount of flavor, the amount of flavor that you get from a stiff consistency preferment. It's different than a liquid consistency preferment. Water, 65 grams. And I'm just gonna start to combine. I sort of do the best that I can with the handle in of this spoon and then I'll dump it out and I'll just knead for a second just to get it homogenous. I didn't flour the bench or anything. It won't need it. This is a stiff enough consistency that you can just knead with the flour that's included in this little batch and just incorporate it as you go. There is our cute little stiff yeasted preferment. Get it in a container, put it in a comfortable spot to rise overnight. All right, so we've made our preferment. Now let's make the soaker. I'm gonna start with these oranges. You know, we're making three loaves. This is a three loaf recipe. There is one orange per loaf, which is a lot. Go big, lots of orange zest. I'll get these grated and then we'll come back and chop our hazelnuts. So I've got my oranges zested, and now I've got some hazelnuts to chop. I think the best result here is to use the knife. And I would not judge you if you used your food processor. And I didn't tell you how to toast these nuts but what I would say is that I think I did about maybe 12 minutes, something like that at 350 on a sheet tray. Anytime you put a seed or nut, almost any time you put a seed or nut inside of a loaf, it's a good idea to toast it because if it were on the outside of the loaf, it would have the opportunity to toast a little bit and get more flavor. But because it's on the inside, it doesn't have that same exposure to heat. So that's why we've toasted these. We want them to be maximally flavorful. And the reason that we're soaking these overnight is because on mix day, you don't want these nuts, which are quite dry, to pull moisture from your dough. You want 'em to go into the dough in a sort of moisture neutral state of hydration. You don't want 'em to be real dry. They'll just sort of suck water out of the dough and that's not what we're looking for. Okay, so hazelnuts and orange in the bowl and boy, smells super good. Now I'm gonna get my booze in here. You know, this time of year, I like to have a loaf that's decadent and has a little bit of something boozy in it. This is cognac and so I'm gonna put that in. You could also use a strong steep of tea, something like Earl Gray that's got some bergamot, that would be a really nice option. And I've also got some vanilla as well. We'll get this in here. Just give it a quick combine, get a lid on it, set it aside. I'm gonna put mine next to my preferment. These can sleep overnight. We'll be back tomorrow to do our mix. All right, let's jump into this mix. So before I add anything, I want to talk for just a second about how I've sort of prepared these ingredients. One, the egg. The egg is not right out of the refrigerator, it's not fridge temp, it's warm. I brought it out, I put it in some warm water. I brought it up to room temperature. The water is quite warm. There's a temperature range written on the formula. The recipe's right down there as always in the link in the description below. So I've got my egg, let's get that cracked and get it into the bowl. And then some warm water. There is not a lot of water in this recipe for the final mix. There's some that was in the preferment, the eggs are bringing a little bit, the butter is gonna bring a little bit of moisture as well, not very much water, like thirty two grams. And then I have some yeast here and then some sugar and a little bit of honey. I'm gonna whisk these together and I'm basically just giving that yeast a chance to get a little bit of moisture before I put it into this dough environment, which at the onset is a little bit on the stiff side. I'm going with some flour. I've got 133 grams. It's just over a cup and some salt and cocoa. This is Dutch-process cocoa. This one is a little bit on the dark side and I like that. Okay, and last but not least, I've got my preferment here. It looks really good. The structure, if I tear it open a little bit, is beautiful. You can see the strength inside of there. If I smell it, it smells really good. Beautiful aroma of fermentation, which is what we want. Get that in the dough and onto the mixer. Before we turn this thing on, one thing that I should note is that I wrote this recipe as basically a chocolate brioche. We are calling it stollen because of the way that it's shaped and because of the fact that it has that beautiful center to it, which is traditionally made of marzipan. I like chocolate and hazelnut better than marzipan. And so we're making this Chocolate Hazelnut Stollen, right? But what I wanna to mention is that this is basically a brioche style. If you've never made brioche before, this is gonna be fun for you. If you have made brioche before, you'll recognize this method where I start and mix a strong base dough, a very strong base dough, and then I add the pliable butter in once I have that good base strength, right? It's that sort of like firm and then softening out with the butter during the mixing process. So we're gonna mix it for a long time. By the end, you'll be able to see a beautiful windowpane. If you feel like you have sort of a bicolor dough, just take it out and knead it briefly on the counter just to sort of help the mixer out. This isn't a huge batch and so you may find that you need to just give it a little bit of a hand and it's okay, no big deal. Put it back in. You're doing a good job, buddy. Okay, the dough's homogenous, it's strong. And now I can start adding that butter in a little bit at a time. Now, I don't wanna put the butter in there just like this, right? I want it to be pliable. And the reason for that is that if it's not pliable, it won't incorporate into the mix very well. And so just on your bench with a rolling pin or some similar tool, you can just soften it up. And then what I'm gonna do is I'm gonna add it back in a little bit at a time, maybe a tablespoon or so, something like that. After each additional sort of addition of butter, I'm gonna let it mix until it's mostly in there and then I'll add another piece. So it's almost like I'm just sort of drizzling it in, but in chunks. So during the initial addition of butter, it's going to resist, the dough's gonna resist, it's gonna take a while. The hook isn't really gonna grab it. You're gonna have this sort of like sometimes I say in this style of dough, it's like you have this dark night of the soul, like all your doubts are there, you can't quite figure it out. Just stick with it. And eventually as this dough begins to incorporate the butter, it will loosen up a little bit. The hook will grab it better, it'll begin to clean the sides. Everything's gonna work out. Just keep at it. Okay, beautiful. So I wanna show you the quantity, the amount of strength that we have and the way that I'm gonna do that, so I'm gonna tear off a piece and I'll do a little bit of what we call a windowpane test. And the windowpane is basically us just seeing, well, how thinly can I stretch this dough? Like, how much base strength does it have? Does it have enough that I can stretch it thinly and it won't necessarily tear? Yes, it does. It's a beautiful full windowpane. So let's get the rest of this stuff in. Beautiful toasted hazelnuts, we'll get those in. And then really good chocolate chips as well. I'm gonna stir this just until it begins to combine. It won't do a super, super good job because we have so much stuff. So I'm gonna go back with a flexible scraper and give it some folds. I'll use my hand as well and then we'll get it into a container for its bulk fermentation. Okay, so scraper, just scrape down the sides of the bowl, make sure we're not leaving any of these wonderful ingredients behind. Then I'm gonna go in and just give it a little bit like a bowl fold or bowl knead with the scraper just to make sure that everything looks pretty good, and then we'll get it into a container. Boy, the dough feels really nice. Just sort of get it into a nice cohesive ball. Last but not least, I'm gonna check real quickly and see what my dough temperature is. This is something that honestly I think we could talk about a lot more. Dough temperature is what, in many ways, guides the rate of fermentation. And with a dough like this, with so many inclusions and sugar and everything else, I wanna see if it's at least in sort of the low to mid-70s. That would be ideal. Let's see where we landed. So wow, this is actually 76. That's perfect. That's gonna ferment really well. That'll keep us right on track in terms of when we're ready for the divide. All right, so set this in a comfortable spot to rise. We'll be back in 15 minutes for the first fold. Okay, so let's give this the first fold. You're not gonna feel a lot of activity out of the gate, right? But over the course of, you know, this hour or so, you will feel some changes. And this actually is moving. It is definitely moving. It feels really nice. The dough has good strength. I'm glad that we got a good dough temperature on it. It means that we're gonna see great fermentation. So I'm just working my way around the bowl. Just a little bit of an organizational check-in. I like to turn it so that it's seam-side down. Lid back on, back into your warm spot. We'll be back in 15 minutes for the second fold. Okay, fold number two, as always with this folding stuff, you know, don't be too uptight. The dough is very flexible. You can set those timers, but it also has some give or take, right? There's a lot going on, holiday season, everybody's busy. So I'm back for my second fold and dough feels very good. The truth is that we could probably get away without doing quite as many folds. What I wanted to make sure of was that at home, where sometimes you know, we don't get the dough development that we need in order to get the loaf quality that we want, I added those folds just to make sure that you're getting plenty of development and that we have this nice, like somewhat light loaf at the end of our process. If you wanted to skip a fold or two, this recipe will work just as well. Just make sure you give it that period of relaxation or rise after the last fold. So give yourself 30 or 60 minutes. So warm place, we'll be back for our fold number three. Yeah, dough feels real good, strong, super aromatic. Okay, back in 15 for the final fold. Okay, fourth and final fold. Dough continues to move well. I've got mine in my little Brod and Taylor proof box. You know, look around your house, find a warm spot. Maybe it's above the, I don't know, maybe it's above your refrigerator or maybe it's inside your microwave if you have one, you know? Heat some water, leave it in there, put your nice dough in there. You've got this sort of coddled rising environment. So after the last fold, we're gonna let it rest for 30 to 60 minutes. If you haven't made your hazelnut paste, now's a good time to do that. Get yourself set, we're gonna come back 30 to 60 minutes and we'll divide and preshape. All right, so let's make this hazelnut paste. So the reason this is hazelnut is that there's several people that I know around who don't like almond paste. They love stollen or maybe they would love stollen, but they can't get beyond the almond paste inside. And so as I was thinking about flavors that might be fun, I thought chocolate and hazelnut. And then I thought, well, why not just make a really good hazelnut paste? How hard is it? It's not that hard. You're gonna toast some hazelnuts, all of the toasted hazelnuts into the food processor and just about half of the confectioners' sugar. It's enough to sort of just get 'em broken down and be on their way to a fine structure. And we're gonna run it until it's a sandy consistency. And then I'm adding some cocoa powder, little bit of salt, very important. Get the rest of the sugar in there. And then I've got a little bit of egg white. And the egg white is just a really good binder. That's what's gonna bring everything together. And then I'm gonna run it until it comes together. If after a minute or so it's not clumping, you can add a little bit of water. Gonna add just a little bit of water. Yep, that's good. This recipe actually makes twice as much as what you need, but I don't think that's a bad thing. All right, so what I'm gonna do is I'm gonna go ahead and make my logs that I'm gonna put inside the loaf. To do that, I need three pieces at 30 grams. So I'm gonna cut this piece in half and then I'll cut it into thirds and I find it easier to work with this on a little bit of confectioners' sugar and then working one at a time, I just roll 'em, and you want 'em about five inches long, somewhere in that range. Set 'em on my sheet tray here, I've got it lined. The one thing that I'll tell you about these pastes, like almond paste, like pistachio paste, like hazelnut paste is that they will dry out really quickly if you don't protect 'em. So get 'em onto something and then make sure you have a lid and we'll set those aside until we're ready for 'em. That other piece, just wrap it in some clingfilm or put it in the container, throw it in the fridge, cut a piece off, put it on your toast, whatever you want. Nibble on it throughout the day. Perfect snack. All right, so we're here, we're ready to divide. I had it in a warm spot, but not too warm. If you have it too warm, remember, there's a lot of butter in the dough and if you're above 85 degrees, you can see a little bit of melt. So just be thoughtful about that. Find that good Goldilocks zone. So onto a lightly floured or, you know, somewhat generously maybe floured surface, dump that out, a little bit of flour on top and then we'll divide it into three pieces, round 300 grams, somewhere right around there should be about right. Boy, that's a very beautiful dough. Feels nice. So about 300 grams each. Now what we're gonna do is we're gonna give it a tubular preshape. I wanna shape it like a tube. The final shape of stollen is sort of elongated. It's almost rectangular. So I'm gonna use a tube preshape because that's sort of going in the direction that we're gonna need for the final loaf. So I'm gonna pat it out just a little bit, about five inches wide, about four inches high, something like that. You don't need to get a ruler out here, I don't think. If you wanna use one to confirm, that's okay too. So I'm just patting it a little bit and then I'm gonna fold the sides in, just pat to it here. And then I'm gonna roll it down and boy, all the way up here, I can smell this beautiful, beautiful orange aroma. Incredible. So lemme show you that again. And we're gonna come back when they feel like they've relaxed a little bit, about 15 minutes or so. Maybe a little bit of flour on top if your lid is close, just in case they rise into it. Set those aside back in 15 for the final shape. Okay, been about 15 minutes and these are ready to shape. So they've been resting seam-side down and I'm gonna bring 'em over to my work surface and I'm gonna put 'em seam-side up, right? I want that to be on the interior of the loaf. And with my hand, you know, working like a paddle, I'm gonna press out to about five by seven. This soft dough will press very easily. Make sure you got a little bit of flour down because you don't want it to stick, right? Grab a piece of your hazelnut paste and I'm gonna put it in the upper third of the loaf and then I'm gonna roll the top over it and press to seal. I'm pressing all the way along the length of the loaf and then I'll roll it one more time and press to seal again. And I have this sort of seam, little bit of a seam right there on the edge. And that's okay. Grab my tray. And, you know, this makes three. I mean, they're not large loaves, but they're also not small. And if you're gifting these, as I would like to, you may find yourself wanting to sort of divide this batch into maybe six pieces or something like that. So five by seven basically, somewhere in that range. Grab your paste, upper third, fold it over, press to seal, fold it one more time. Press to seal. And I sort of have this log situation. Okay, three loaves, get a cover on, put 'em in a comfortable spot to rise. 60 minutes. During that time period, you're gonna get your oven preheated to 350 degrees with a rack somewhere in the middle and we'll be back to bake in no time. So this has been about 60 minutes. If your dough was cool or if your house is cool or if it's a little bit sluggish, just wait it out. It could take up to 90 minutes. That's okay. Like don't be in a hurry here. So I'm looking for a dough that has risen a little bit, but it's not gonna be like some poofy doubling or something like that, right? I'm just looking for the dough to feel somewhat marshmallowy. One thing that I'll say is that if you feel like they're opening along that seam a little bit, you can just give 'em a gentle encouragement to remain somewhat adhered. Although during baking, they will unfurl just a little bit. They will unfurl just a little bit and that's okay. That's to be expected. It's part of the shaping actually. So let's get these in. They smell really, really good. So that was 30 minutes right on the nose, 350 degrees. They're still soft, like it doesn't take much to move them still. And that's okay. I mean, the crust has some structure to it, but if you go too far until they're firm, like a hearth bread or something like that, you're pulling a lot of moisture out. And what we want is a loaf, which is open and fully baked, but also not fully dehydrated or something. So go with those times and you should be good, around 30 minutes, 30, up to 35, I think 35 is definitely on the far side. They smell incredible. The amount of orange and like citrus plus chocolate is incredible. Before they lose too much heat, I'm gonna brush some butter on and being gentle, right, being gentle, I'm gonna brush the whole thing. And you'll see why I'm doing that in just a second. Part of the reason for the butter is so that the sugar that I'm gonna sprinkle on will adhere. That's part of the reason. The other part is that they will actually keep even better. You're almost like putting this fat layer on the outside. Stollen is one of the great storage breads, you know? Like panettone, like some of the other sort of traditional holiday breads, they should store very well. One of the reasons though that I really like stollen is that it's honestly, it's not quite the process that a traditional panettone is, right? Lots of work in the traditional panettone, and I think that flavor of this stollen is every bit as good as panettone. Don't come after me for saying that. Okay, so real generous with the butter, right? Real, real generous here. So once you have 'em fully covered with butter, we're gonna do granulated sugar. And then after they're fully cooled, we'll come back and we'll hit 'em one more time with some non-melting sugar. Or if you don't have that, you can also use confectioners'. So if you're gonna make multiple batches of this, I would say it's a good idea to go ahead and put some sugar into a shallow pan and just put the loaves in there and then sort of toss them gently, gently, but toss the sugar onto them to really make sure that they're sort of fully coated. So it looks like a lot of sugar. The truth is that the base dough is not that sweet. It's not a super, super sweet dough. So adding this to the outside gives it that more confection, almost like holiday-spirited situation. So we're gonna let these cool a little bit and then we'll be back to finish them. So I have a couple of loaves that have cooled and they're ready for the non-melting sugar or this sort of final finishing phase to sort of gild the lily of this beautiful loaf. The thing about the non-melting is that once you wrap it, it'll sort of hold that white, it won't melt, it'll remain sort of beautiful in a way that's surprising when you cut it open and there's this beautiful chocolate loaf on the inside. So I like using that. Confectioners' sugar will also work. So I'm gonna add this and I really wanna make the loaf sort of, I wanna give it full coverage. And so I'll turn it, I'll hit all sides and then, you know, when I wrap these and give them as gifts, I'll either use parchment paper or occasionally I'll use some clingfilm or something like that. I'm gonna treat myself to a slice here. Let's see what we got. To me, one of the things I like about this loaf, and I've probably said like 20 things I like about this loaf, but it feels a little bit like a confection to me. So it looks great. It's got a nice open sort of tiny bubbled structure. I can see the nuts. I see that chocolate hazelnut paste in there. It's got this sort of border of sugar all the way around. It's just like chocolate orange, chocolate orange, chocolate orange, like amplifier 11 chocolate and orange. Incredible, incredible nose, and a really moist crumb, a moist tender crumb. I've said this before, but it's not super, super sweet. It's not sugary, right? It's sweet, not sugary. This is perfect for me. So listen, in this the season of baking, it's important to me as a baker to think of those around me. What can I do that I love that I can share with others? This Chocolate Hazelnut Stollen is a bit of a project bake, but I guarantee you that the smiles pay big dividends when you pull up to someone's house in the heart of the season and say, "Hey, I'm thinking about you. I care about you. This is what I have to show my appreciation for all that you are in my life." This is Martin and Tucker and Katz here as well, and everybody else at the King Arthur Baking Company saying, "Enjoy the season of baking. Enjoy this time with yourself and others doing this thing we love so much." Bake and give, share all of this goodness with those around you. We'll see you in the New Year.

Video Credits
Shop this video


Your bread fell flat. Your cookies crumbled. Who do you turn to?