-
To make the biscuits: Weigh your flour; or measure it by gently spooning it into a cup, then sweeping off any excess. In a large, shallow bowl, whisk the flour and sugar to combine. Place the butter in the bowl and toss it so that all sides are coated in flour. (This will make it easier to handle the butter and prevent it from melting onto your hands.) Using the slicer side of a box grater, shave the butter along the long side of the stick, letting it fall directly into the flour mixture. The butter should fall in long, thin strands; as you near the end, expect some shorter and smaller pieces — that's OK. Gently toss the butter pieces to coat in flour.
-
Transfer the bowl to the refrigerator or freezer, uncovered, until thoroughly chilled, 10 to 15 minutes. Meanwhile, line a baking sheet with parchment and gather your tools: You’ll need a flexible spatula, bowl scraper, rolling pin, bench knife or sharp knife, and pastry brush.
-
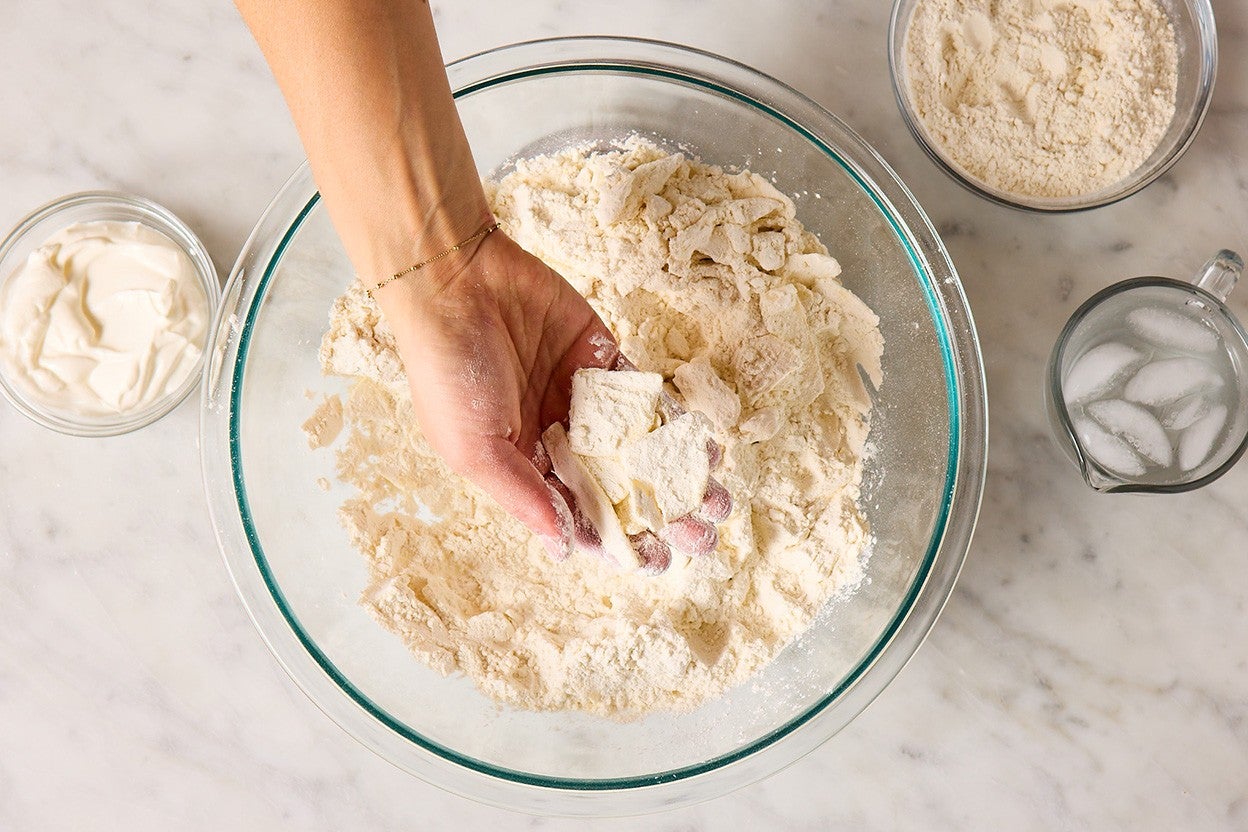
Form a well in the center of the bowl and add the sour cream and ice water. Starting with a flexible spatula then transitioning to your hands or a bowl scraper, incorporate the liquids into the dry ingredients using a smashing and pressing motion until a shaggy, crumbly dough forms (it will be dry, like pie dough). The point of this motion is to incorporate the butter in flat sheets rather than breaking it up into lots of little pieces. If there are dry bits at the bottom of the bowl that won’t adhere to the mass, add additional ice water, 1/2 teaspoon at a time, until it comes together. (Try to resist adding more than 2 teaspoons total of additional ice water.)
-
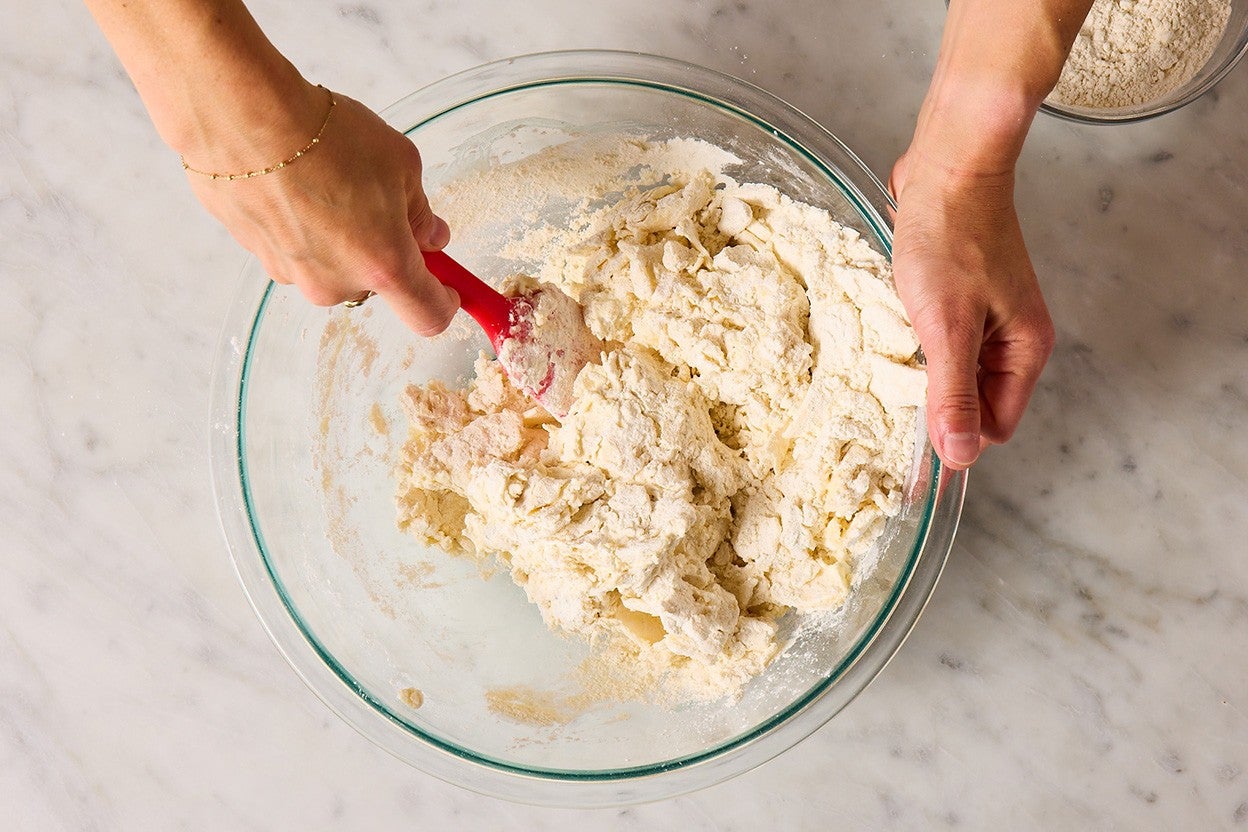
Press the mixture together into the bottom of the bowl, then use a bowl scraper to fold one half of the dough up and over the other. Gently pat the mixture back down into the bottom of the bowl. This folding process will bring the dough together into one cohesive mass. (You can also do this step on the countertop, but we find that a large, shallow bowl helps contain the mess.)
-
Repeat this folding process three or four more times, until the dough is a homogenous mass with lots of butter visible.
-
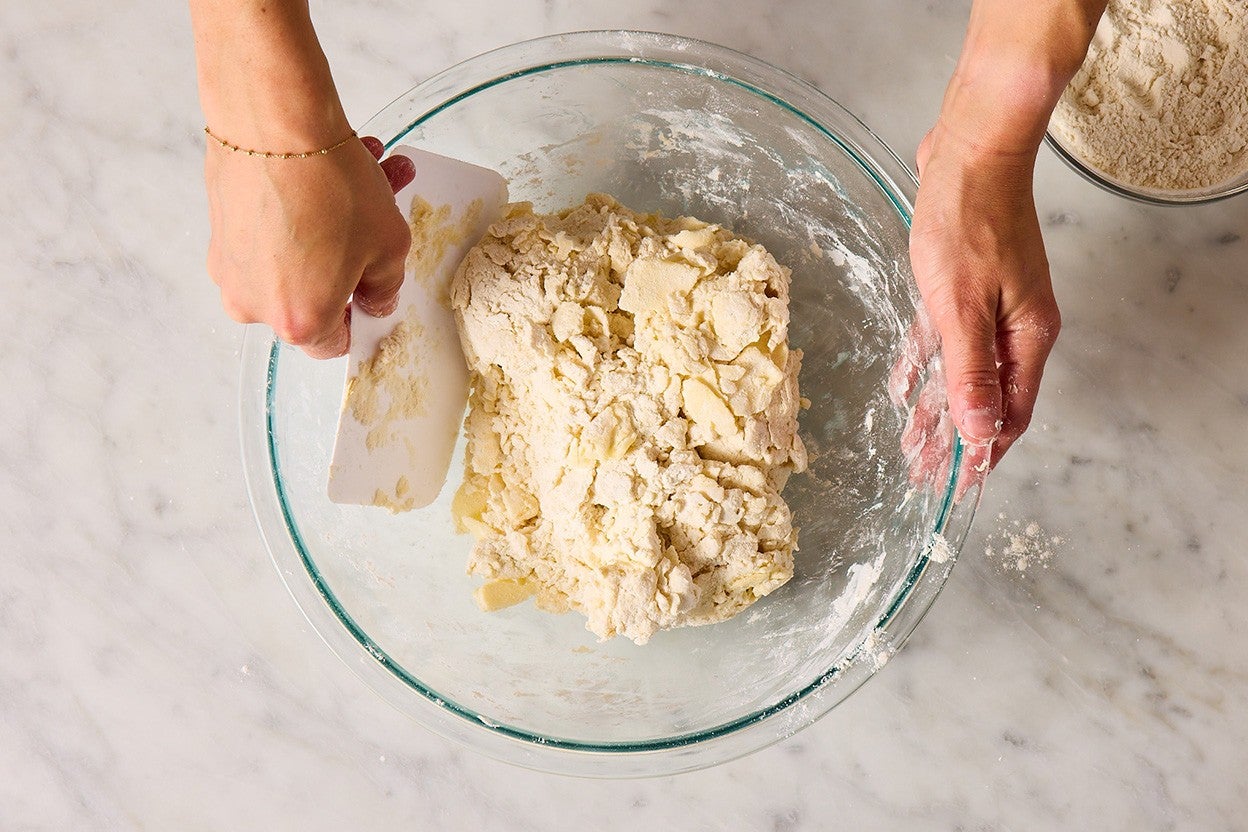
Transfer the dough to a lightly floured work surface and use your hands and the bowl scraper to pat it into a rough rectangle about 1 1/2" thick (with dimensions of about 4" x 7").
-
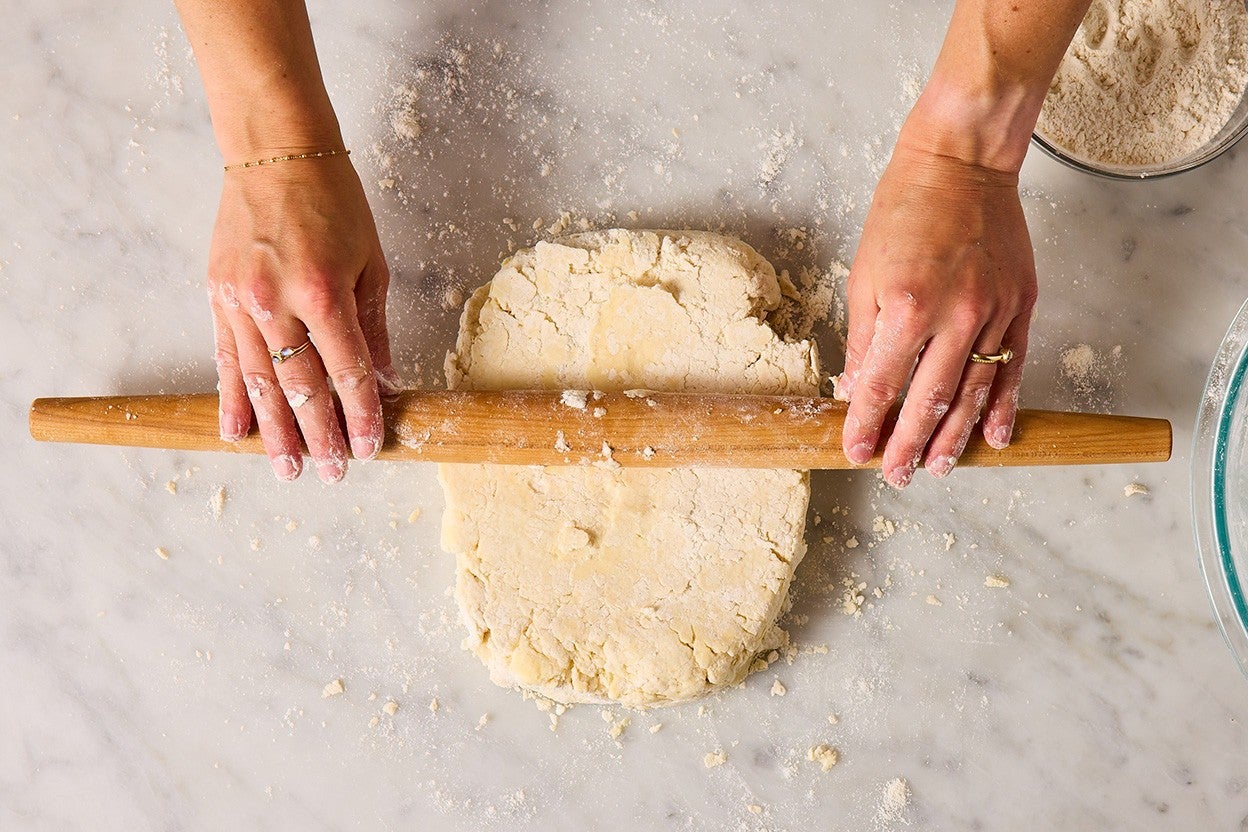
Use a lightly floured rolling pin to roll the dough into a 1/2"-thick rectangle (with dimensions about 8" x 10"), applying flour to the work surface and the dough as necessary to prevent sticking. It’s OK if the dough is still a little crumbly and dry as you roll it out — collect any errant bits and press them back into the sides and surface of the dough.
-
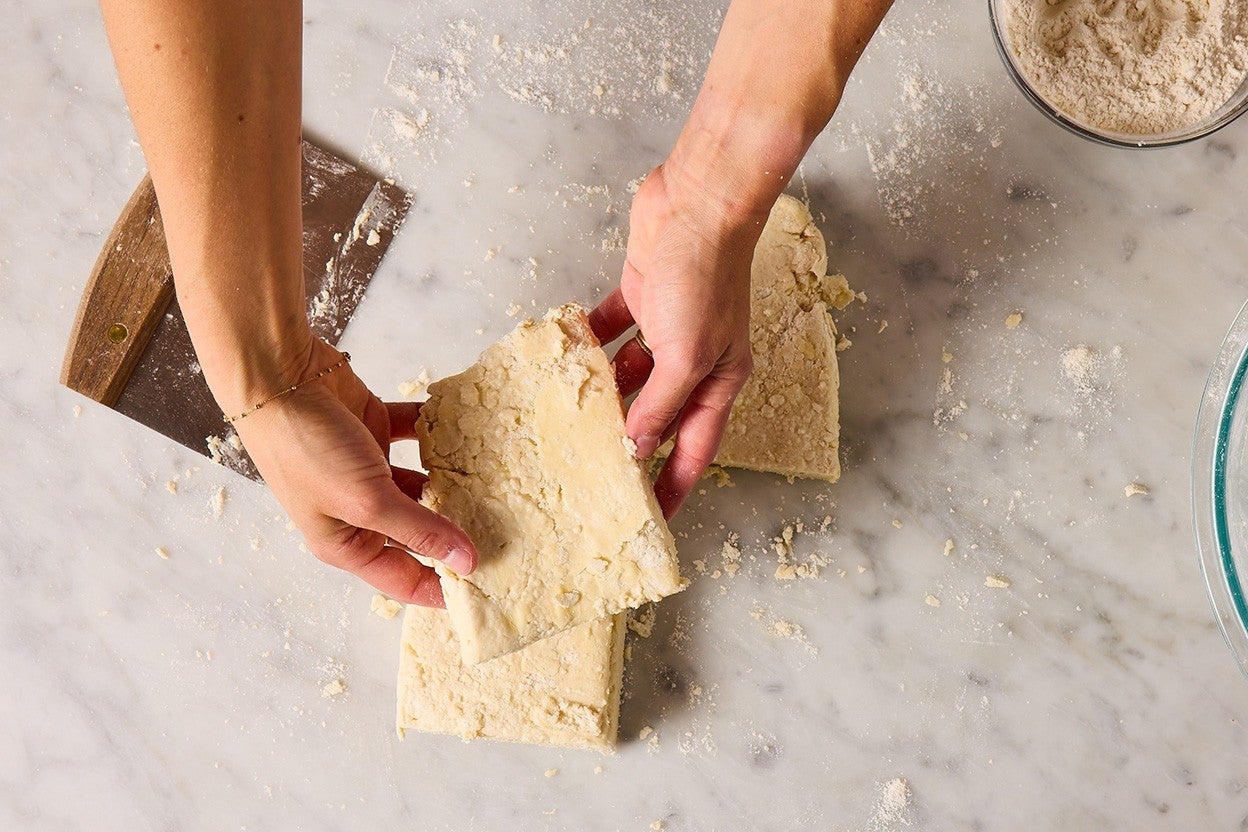
Brush the surface of the dough lightly with ice water. Use a bench knife or sharp knife to cut the dough into quarters, then stack these quarters on top of each other, aligning the cut edges when possible; place final piece of dough with the water-brushed side facing down. You should now have a stack of dough about 2" tall.
-
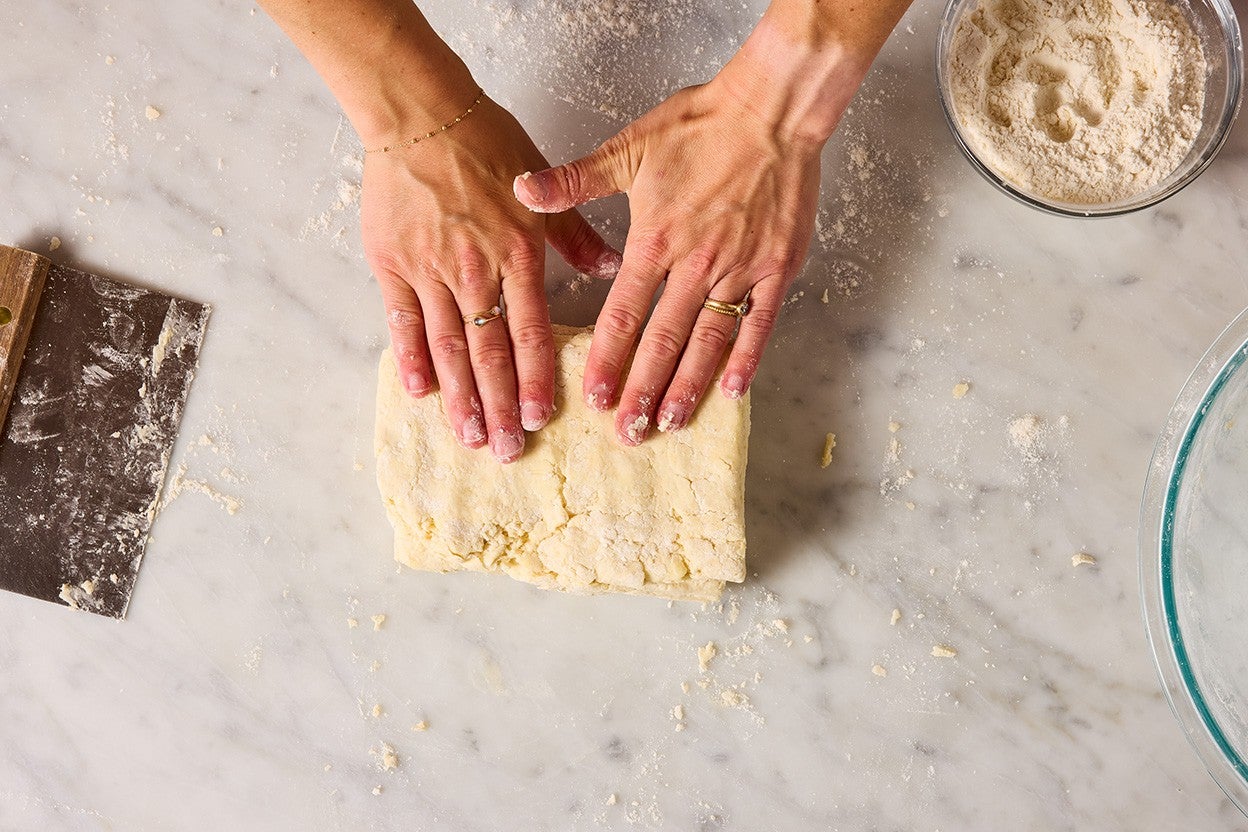
Using the rolling pin and your hands, pat and press the dough down to about 1 1/4" thick (aim for a rectangle about 4 1/4" x 8"). As you work, flip the dough over once or twice to ensure it’s being evenly compressed.
-
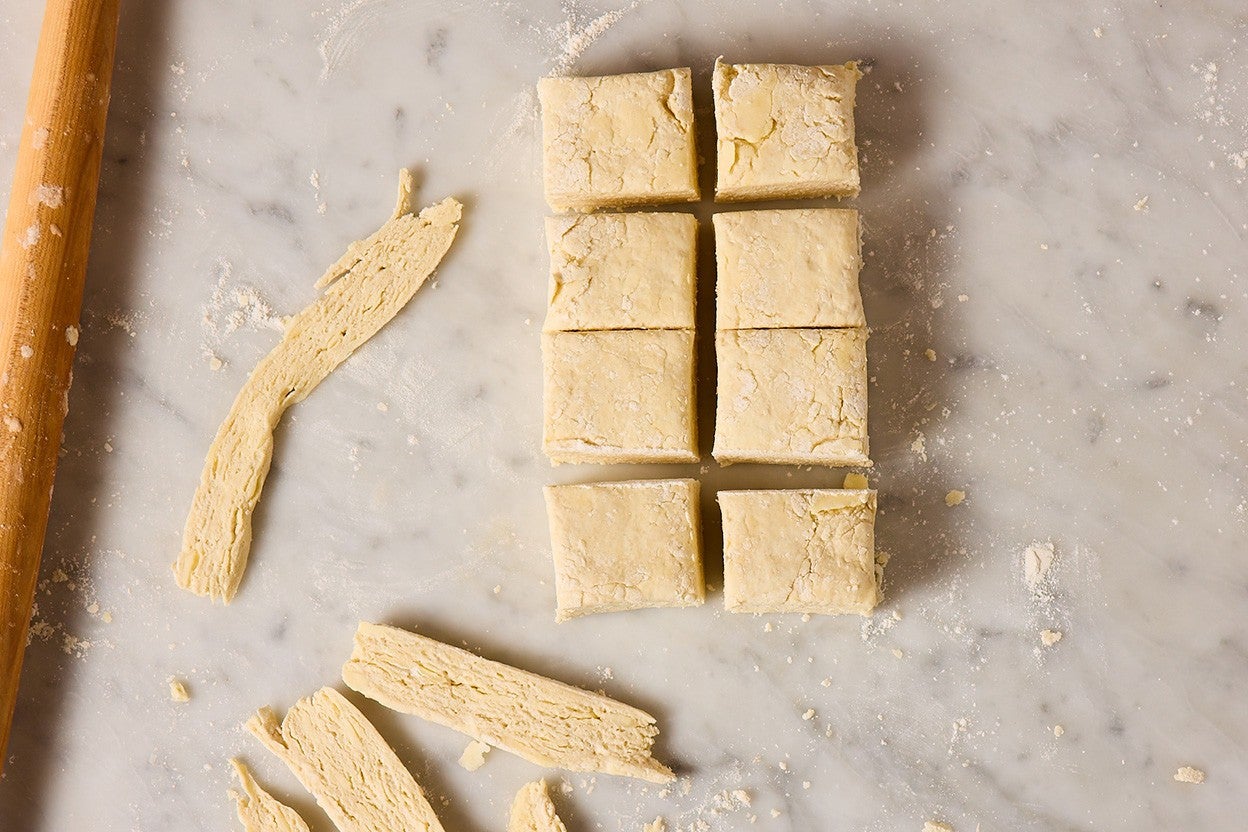
With a sharp knife, trim the sides of the rectangle to make neat edges while cutting off as little dough as possible to limit scraps. Set the scraps aside. (Trimming the edges exposes the layers and helps the biscuit rise high.)
-
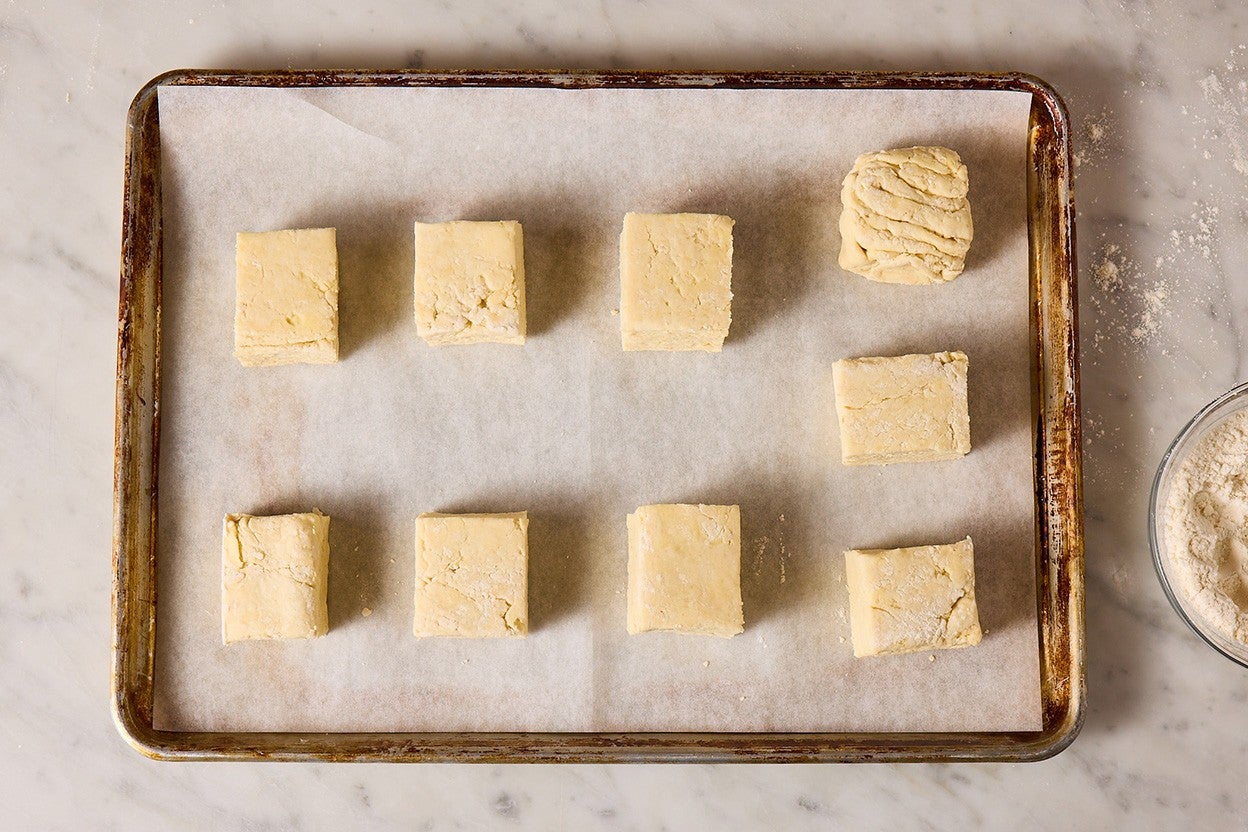
Cut the dough rectangle once in half lengthwise and then into four pieces crosswise to make eight biscuits, then transfer them to the prepared baking sheet with the smoothest side of each biscuit facing up. Bring the scraps together, moistening with ice water as needed, and form into one or two 1 1/4"-thick “bonus” biscuits and place on the baking sheet.
-
Transfer the baking sheet to the freezer for 1 to 2 hours, until frozen. (At this point, biscuits can be transferred to a freezer-safe bag and frozen for up to 3 months; bake directly from frozen.)
-
When ready to bake, preheat the oven to 425°F with a rack in the upper third. (Your goal is for the biscuits to bake in the top third of the oven, not too close to the top, so set the oven rack accordingly.)
-
To make the topping: In a small bowl, combine the sour cream and water.
-
Nest the baking sheet with the biscuits onto another baking sheet; this will prevent the bottoms from becoming too brown during baking. Generously brush the biscuits with the sour cream mixture; then go back and give each biscuit a second coat. Sprinkle with flaky salt and coarse sparkling sugar, if desired.
-
Bake for 23 to 28 minutes, until the biscuits are well browned on both the bottoms and tops, with no wet or damp dough visible through the layers. Gauge their doneness based on color and extend the baking time, tenting with foil, as needed.
-
Let the biscuits cool for about 10 minutes on the baking sheet, then serve warm.
-
Storage information: Biscuits are best enjoyed the same day they’re made. To reheat biscuits later in the day or the day after, wrap in aluminum foil and then heat in a 350°F oven until warmed through, about 10 minutes.