How to make butter at home — just one ingredient required
Homemade butter tastes better, and it's totally within your reach.

Date
April 8, 2022

When one of my King Arthur colleagues asked me to write about homemade butter, I was skeptical — very skeptical. With so many butters to choose from at the supermarket, why would I ever want to make my own? There’s a reason we left wooden butter churns back in the 19th century, right?
Thankfully, I put aside any hasty negative assumptions and read up on homemade butter. As it turns out, it’s simple to make if you have a stand (or hand) mixer, a blender, or a food processor. Within about 10 minutes, you can turn cream into solid butter.
But why would you want to? How does homemade butter differ from store-bought?
Flavor: Homemade butter is striking: It tastes unbelievably fresh. I tested my first batch of homemade butter against my favorite supermarket brand, and the difference was clear: Freshly made butter tastes FRESH, unlike butter that’s sat at the supermarket for a while.
Salt (and season) to taste: Do you like your butter salted, or not? I prefer baking with unsalted butter (to best control the salt level in the recipe) and using salted butter as a condiment: on toast, biscuits, scones, pancakes, and slices of crusty bread, to name just a few favorites. When you make your own butter, you can add just the amount of salt you prefer. (To replicate the salt level of store-bought butter, use a scant 1/4 teaspoon table salt per 4 ounces (113g) of homemade butter.)
In addition, homemade butter is soft and malleable before being chilled, perfect for making compound butter by stirring in some garlic, cheese powder, cinnamon sugar, or your favorite sweet or savory add-in. Can you do this with store-bought butter? Sure; it’s just less convenient since you have to soften the butter first.
Bakeability: Can I use homemade butter in my cookies and cake and pie crust — all the usual places I use store-bought butter? The answer is a qualified yes: and here’s why.
The level of water in purchased butter is strictly controlled, and recipes are always written with this level in mind. On the other hand, the level of water in homemade butter can vary (by about 12% in my experiments) depending on how thorough you are in separating butter from buttermilk. Does this variance matter? Not if you realize your process or results may vary slightly. If you’re making pie crust, for instance, you might simply have to adjust the amount of water you use by a teaspoon or so. If you’re using homemade butter that’s retained a lot of its liquid buttermilk to make cookies, they may settle and spread a bit more. For lots more good information about how different types of butter will affect your baking, see our post, Butter in baking.
Still, I mostly enjoy homemade butter as a spread or topping, where its flavor shines. In recipes, I reserve it for butter-forward ones where it makes a noticeable difference: in pie crust, for instance, or biscuits, or shortbread. It feels like a waste to add 3 tablespoons homemade butter to your banana bread recipe when, honestly, its flavor will be lost and store-bought will do the job just fine.
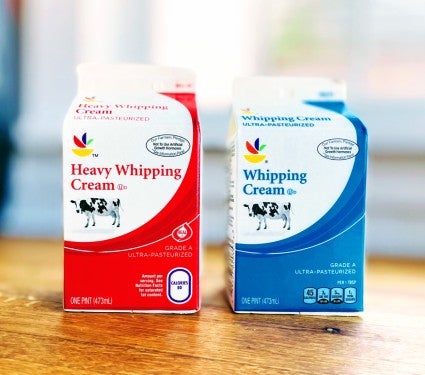
Cost: Does making butter at home save you money? Depends how you look at it. When butter is discounted at the supermarket it will be cheaper than homemade butter (unless you’re milking your own cow). But if you can get a great price on a quart of heavy or whipping cream (I recently paid $4.79 at my local club store), and you choose not to wring out as much of the buttermilk as possible during the finishing process, you can make close to a pound of butter from a quart of cream.
So, $4.79 for a pound of butter? That’s decent — and actually far below the price of premium butters at the supermarket, which is really what homemade butter should be compared to.
Here’s the bottom line: Butter is simply heavy or whipping cream that’s been whipped beyond its comfort zone and broken down into solid butter and liquid buttermilk. So however you make whipped cream, do it — and keep on going until the cream separates.
Once that separation happens, you’ll pour everything into a strainer to drain off the buttermilk, pressing down on the butter to squeeze out as much liquid (buttermilk) as possible. Note that the resulting buttermilk is fresh, not cultured (fermented) like store-bought buttermilk — so don’t substitute it for buttermilk in your baking, but instead use it as you would skim milk.

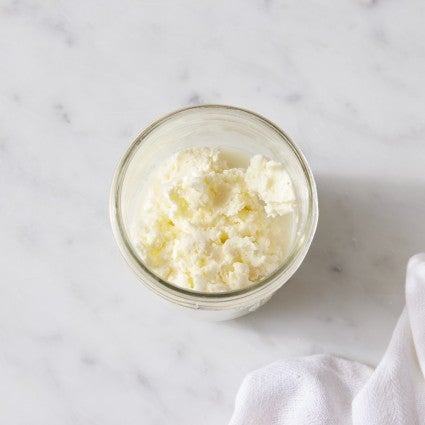
Once the butter and buttermilk are separated, rinse the butter in cold water until the water runs clean. The more buttermilk you wash out, the longer it’ll stay fresh; even so, homemade butter will have a shorter shelf life than store-bought — think weeks rather than months.
To finish, add salt or seasonings to taste (or not), pack butter into an airtight container, and refrigerate.
There are many different paths you can take to making butter at home. I’ve listed the following methods for homemade butter in order, based on how effectively and efficiently the appliance in question does the job.
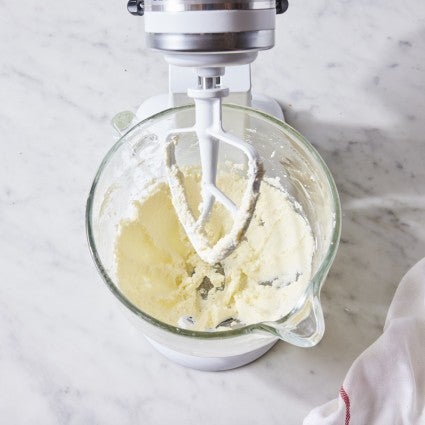
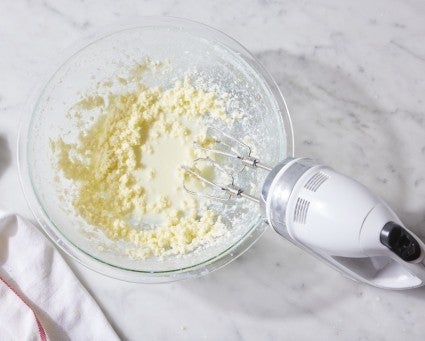
How to do it: Pour 16 ounces (454g) of cream (heavy or whipping) into the bowl of your stand mixer. Using the flat beater (not the whisk), beat on medium speed until the cream starts to thicken (about 1 minute), then increase speed to medium-high. After about 2 minutes the cream will lose its billowy smoothness and start to become a bit rough. Between 4 and 5 minutes, it’ll start to separate. When you see this happening, quickly drape a dish towel over the mixer — or risk getting a buttermilk bath! Once the butter and buttermilk have completely separated and settled to the bottom of the bowl, stop the mixer.
Elapsed time: 4 to 5 minutes
Final product: The purest of any of the homemade butters, almost completely devoid of remaining buttermilk.
Tip: While very effective, this is by far the messiest way to make homemade butter. Toward the end of the process, buttermilk will splatter out of the bowl (onto your work surface, walls, surrounding equipment, and into your face) if you don’t have a bowl shield — or drape the mixer with a dish towel large enough to cover the top and hang partway down the sides of the bowl.
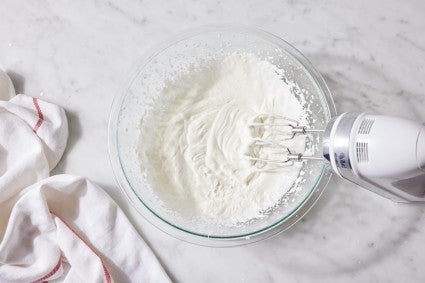
How to do it: Pour cream into a large mixing bowl. Using the beaters (not the whisk), beat at medium-high speed. The cream will gradually go from soft whipped to stiff whipped to separated. When it starts to separate, drape a large dish towel over your hands and the top of the bowl to shield yourself and your surroundings from splashing buttermilk (and/or move the bowl to a deep kitchen or workshop sink). Continue to beat until the butter and buttermilk have fully separated.
Elapsed time: This can vary a lot depending on the power of your mixer and whether it comes equipped with old-fashioned flat-blade beaters rather than whisk-type beaters. Flat-blade beaters will produce butter in as little as 6 to 8 minutes; using whisk-type beaters will extend that time to 10 to 12 minutes.
Final product: Pure, like butter made using a stand mixer.
Tip: If you’re really determined to make a small amount of butter, your handheld mixer is perfect for the smaller amounts of cream your processor or stand mixer balks at. I’ve successfully made butter from as little as 2/3 cup (about 5 ounces, 142g) of heavy cream using my handheld mixer.
How to do it: Pour cream into your blender and blend on high speed until the cream separates fully into butter and buttermilk.
Elapsed time: This may vary quite a bit depending on the blender you use; my Ninja took about 6 minutes.
Final product: Softer and creamier than butter made using a mixer, since it retains more of the buttermilk.
Tip: The cream tends to splash up the sides of the blender jar and stay there. Stop the blender and scrape down the sides of the jar frequently to make sure you’re getting all the cream into the bottom, where the blade is.
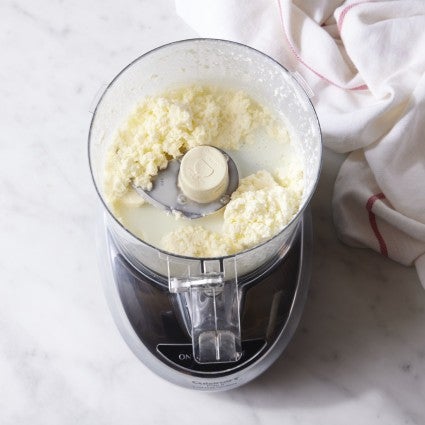
How to do it: Pour cream into the work bowl of your food processor equipped with the metal blade. Process until you see and hear liquid splattering the sides of the bowl. Stop the processor; if you see two discrete entities — butter and buttermilk — you’re done. If cream has collected on the sides of the bowl and the mixture still looks a bit creamy and not completely separated, scrape the bowl and continue to process.
Elapsed time: About 4 minutes
Final product: A slightly softer, creamier butter due to the retention of some of the buttermilk.
Tip: Rinsing the butter thoroughly under cold running water will wash out much of the remaining buttermilk. If you prefer a softer, creamier butter (though one prone to “sweating” beads of water in the fridge), simply don’t wash as thoroughly.
How to do it: Pour cream into a Mason jar (or any jar with a tight-fitting lid) to fill the jar about halfway. Then shake, shake, shake! The cream will thicken, then turn into whipped cream, at which point you may not hear much happening in the jar. That's OK; keep at it. Keep shaking until the whipped cream “breaks” and you have clearly separated solids and liquids.
Elapsed time: 20-ish minutes
Final product: Your hand-shaken butter will be softer and retain more buttermilk than butter made with the aid of a machine.
Tip: Eight minutes of pretty steady shaking, all the while gazing longingly at my stand mixer and food processor, was more than enough for me; the cream had barely thickened! If you’re determined to make butter using a Mason jar, definitely get some energetic friends to help: Make it into a group activity, and it could actually be fun!
If you think you’re going to make butter out of that 1/4 cup of heavy cream leftover from making Never-Fail Biscuits, think again. It’s difficult to make butter from anything less than about 1 1/2 cups (12 ounces, 340g) of cream; most full-size mixers and food processors simply don’t like dealing with small amounts of liquid. And with the yield of butter from cream ranging from about 35% to 50% (tops) by weight, it’s frankly not worth the effort (even if you do manage it) to start with a cup or less of cream and end up with just 6 or 7 tablespoons of homemade butter.
Did you know you can also make other favorite baking ingredients at home, like vanilla extract, and lemon curd, and almond paste, and … Check out our guide to homemade baking ingredients.
Cover photo by Kristin Teig.