


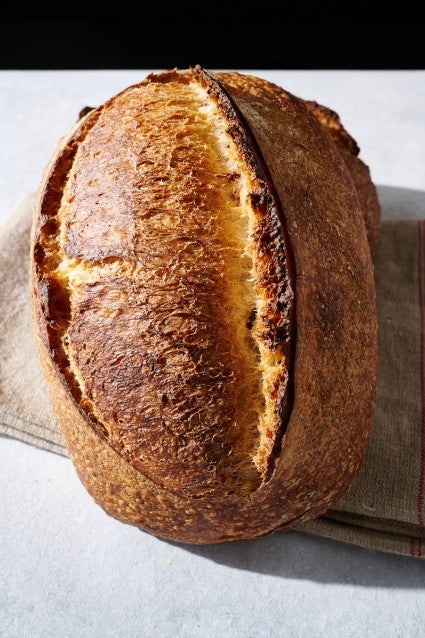
Given the choice, I almost always shape my hearth loaves into a long oval shape, also known as a bâtard. While a simple, round boule will forever have a place in my baking, there’s a certain appeal to an elegant, elongated loaf with a single (or double!) slash that opens wide and expressively. And this oblong shape isn’t simply a different way of folding, rolling, or tucking the dough; it also impacts the final loaf’s texture and, ultimately, might dictate how the bread is eaten.
Generally, shaping the dough as an oval (as opposed to a circle) results in a more open interior. That’s because this shaping method is a bit more gentle and helps preserve the interior’s airiness. There’s one more reason I prefer this shaping method: the oval shape — which results in a longer but narrower loaf — is conducive to the way I most often eat my bread, as thick slices in sandwiches.
There are many ways to shape an oval loaf, some gentler and others that impart more structure. Below are the two I use most often, and I find them quite effective. The first method is appropriate for a stronger and more elastic dough such as in King Arthur’s Naturally Leavened Sourdough, while the second method works better for a slacker dough (either because of higher dough hydration or less gluten development during mixing or bulk fermentation) as with King Arthur’s High-Hydration Whole Wheat Sourdough Bread. Try out both of these methods during your next shaping session, then you’ll have a feel for which is most comfortable for you and appropriate for the next dough you work on.
Use sufficient flour on both the work surface and your hands to prevent the dough from sticking excessively. Some shaping methods rely on the dough sticking to the work surface to help tighten the dough, but this is not the case with the two styles of shaping presented below. If you find the dough sticks at any point, pause and lightly dust some flour under the dough to help keep it from sticking to the work surface.
Be sure the dough has rested sufficiently after preshaping to facilitate the shaping steps to come. If the dough is still very elastic and tight, let it rest for 10 minutes more and check again. You want the gluten in the dough to be somewhat relaxed, so let the dough spread out on the work surface, making shaping easier. It will be hard to stretch, fold, and roll if the dough is too tight after preshaping.
Be gentle with this dough – compressing it too much can ruin its open structure. After folding the sides in to create a long rectangle in front of me, I like to imagine the dough has a central cylinder shape running perpendicular to the direction I’m rolling. When shaping, I try to roll and push the dough around this cylinder. In other words, I try not to excessively compress the dough as I’m tightening, which ensures the interior remains open and airy.
With the two methods below, I worked with King Arthur’s Naturally Leavened Sourdough recipe and started with each round preshaped after step 5 in the recipe, with a slightly longer rest of 35 minutes (instead of 20 as listed in the recipe) to account for my stronger dough and tighter preshape.
I use this method almost every time I bake bread. However, it requires that the dough be strong and elastic, because while it provides plenty of structure for the dough during its final proof, it’s not as intensive or aggressive as other methods (or my second method, below).
For me, the best way I can tell if my dough is strong enough to use this method is by how quickly it spreads during preshaping: If the dough spreads quickly and feels slightly tacky or sticky, I’ll use the technique for shaping slack dough, below. Conversely, I know I can use this method if the dough is smooth, elastic, and spreads slowly after preshaping.
Note that while I prefer rolling the dough down toward my body, it’s possible to use this method in the reverse direction by rolling it away from you, much like you’d roll up a beach towel you’re packing in a backpack.
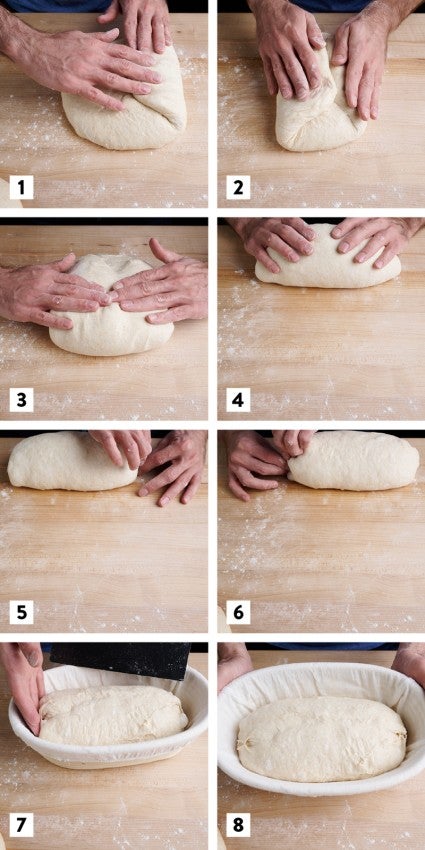
The method: Lightly flour the work surface and the top of your preshaped dough. Using a bench knife, flip the round over to the floured surface. First, fold the left side up and across toward the middle. Then, repeat for the right side. You should now have a long rectangle shape in front of you. If you typically degas your dough (I rarely do this), use your hand as a flat paddle and gently tap the dough from top to bottom.
Next, using both hands like paddles with your fingers pointed toward each other, lift and fold the top of the dough farthest from your body and fold it down just a bit at the top to begin a small roll, pressing the seam to seal with your fingers. Then, use both hands to begin rolling the dough down toward your body, using both thumbs to press the dough into itself at each iteration (see video above). With each roll, tuck, and push, the dough will get smoother and gain strength, forming a long cylinder in front of you.
Pinch the ends of the cylinder closed, if desired, at the end of rolling to prevent the dough from spreading during proofing.
Using a bench knife, gently transfer the shaped oval, seam side up, to a proofing basket for the final rise.
This method is helpful for highly hydrated doughs and those that are slacker and more extensible. Compared to my first method above, it has additional folds and a series of “stitches” that run top to bottom along the dough to increase its holding ability. Finally, the dough is rolled up to create the typical oblong shape.
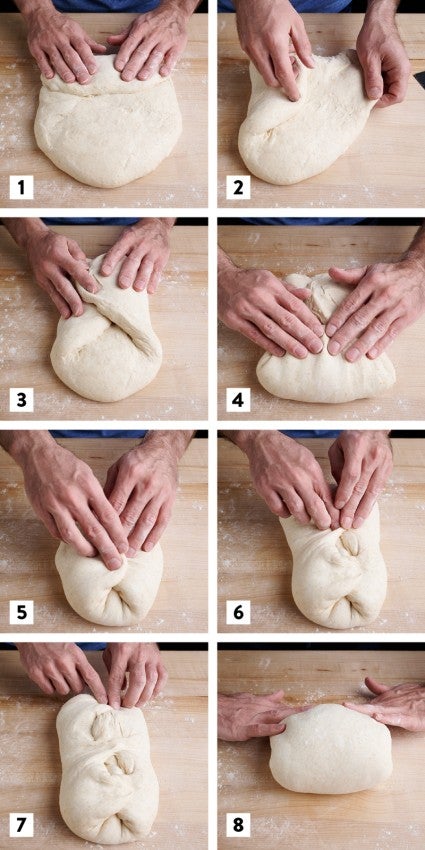
The method: Lightly flour the work surface and the top of your preshaped dough. Using a bench knife, flip the round over to the floured surface. First, using both hands, fold up the bottom third of the round dough toward the middle. Next, fold the left side of the dough across toward the middle over the bottom folded flap. Then, repeat for the right side. Finally, grab the top fourth of the dough and fold it down toward the middle, pressing lightly to seal. You should now have a rough rectangle in front of you.
Next, use each hand to grab a small corner of dough at the top (after folding the top flap of dough down in the previous step, you’ll see two points naturally there waiting to be grabbed) and fold each hand over the other to form an “X” of dough, pressing the seal. Next, grab another two bits of dough at the middle of the rectangle and fold them over each other to form another “X” in the middle of the dough. Repeat this process at the bottom of the rectangle.
Finally, use both hands to grab the top of the now stitched-up rectangle in front of you and gently roll it down over itself to form a tight rectangle.
Using a bench knife, gently transfer the shaped oval, seam side up, to a proofing basket for the final rise. The dough will likely be very tight in the middle of the proofing basket, but this tightness is precisely what we want for an extensible and slack dough; it will naturally spread during proofing to fill the basket.
Armed with these two methods for shaping bread dough into a bâtard shape, and a trusty bread formula, you’ll be able to accommodate any dough coming out of preshaping. These two methods do take a bit of practice, but as with everything in baking, that’s the fun part.
Interested in shaping a round loaf, as opposed to an oval? See my previous post on shaping a boule.
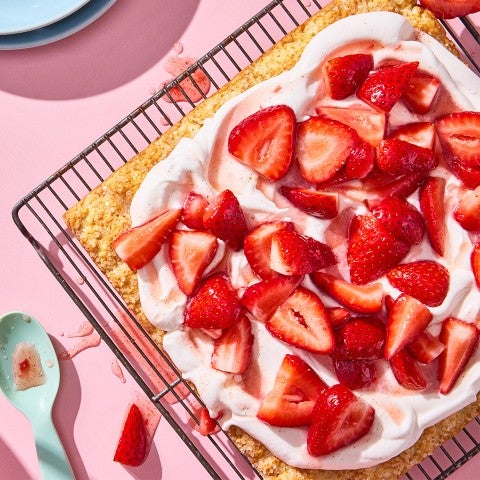
Cover photo by Maurizio Leo.