Quick! Name some bread shapes. 

What immediately springs to mind? A sandwich loaf, most likely. Round rolls, basic boules, traditionally tapered baguettes? 

The thing is, bread shapes can sometimes get a little ā€¦ dare I say ā€¦ boring?

Maybe thatā€™s a step too far (I love you, Classic White Sandwich Bread!), but itā€™s not a stretch to call most bread shapes familiar. Even fun, impressive-looking shaping techniques like braids are replicated across recipes. Ingredients and flavors may vary, but how often do the forms they come in deviate from the beaten path?

If youā€™re ready to go beyond ordinary bread shapes and step into something extraordinary, weā€™ve got you covered.

Below, we round up four incredible breads with distinct shaping techniques, as well as provide steps to achieve them in your home kitchen. Youā€™ll be rewarded with a gorgeous bread that looks extra-special, so be sure to snap a pic before you dig in! 

The leaf-like showstopper: Olive and Onion Fougasse 

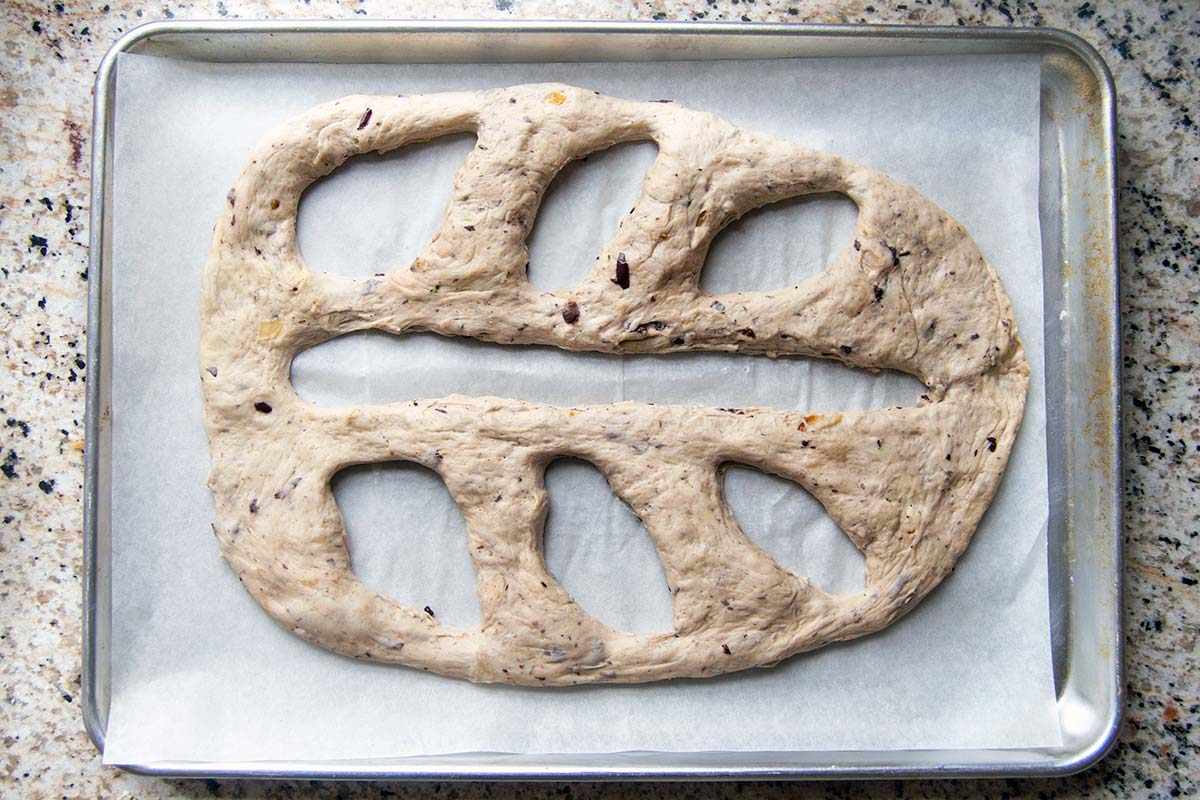
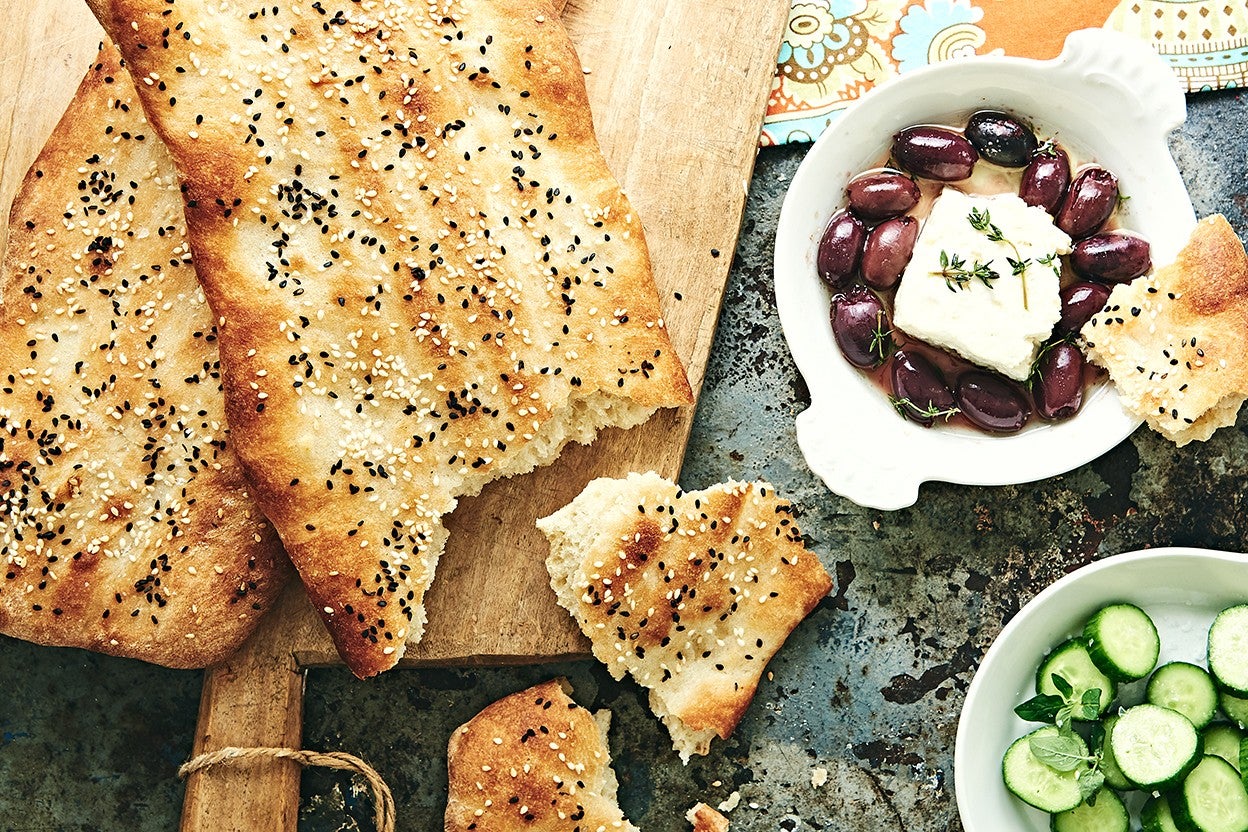
From the Provence region of France, this dense, chewy bread is unbelievably flavorful (thanks to the olives and onions folded into the dough) in addition to being extremely eye-catching. Its leaf-like shape is simply achieved with just a few strategic cuts to the dough. The result is a bread with lots of crusty edges and tear-able pieces, ideal for dunking in olive oil or another one of your favorite dips. 
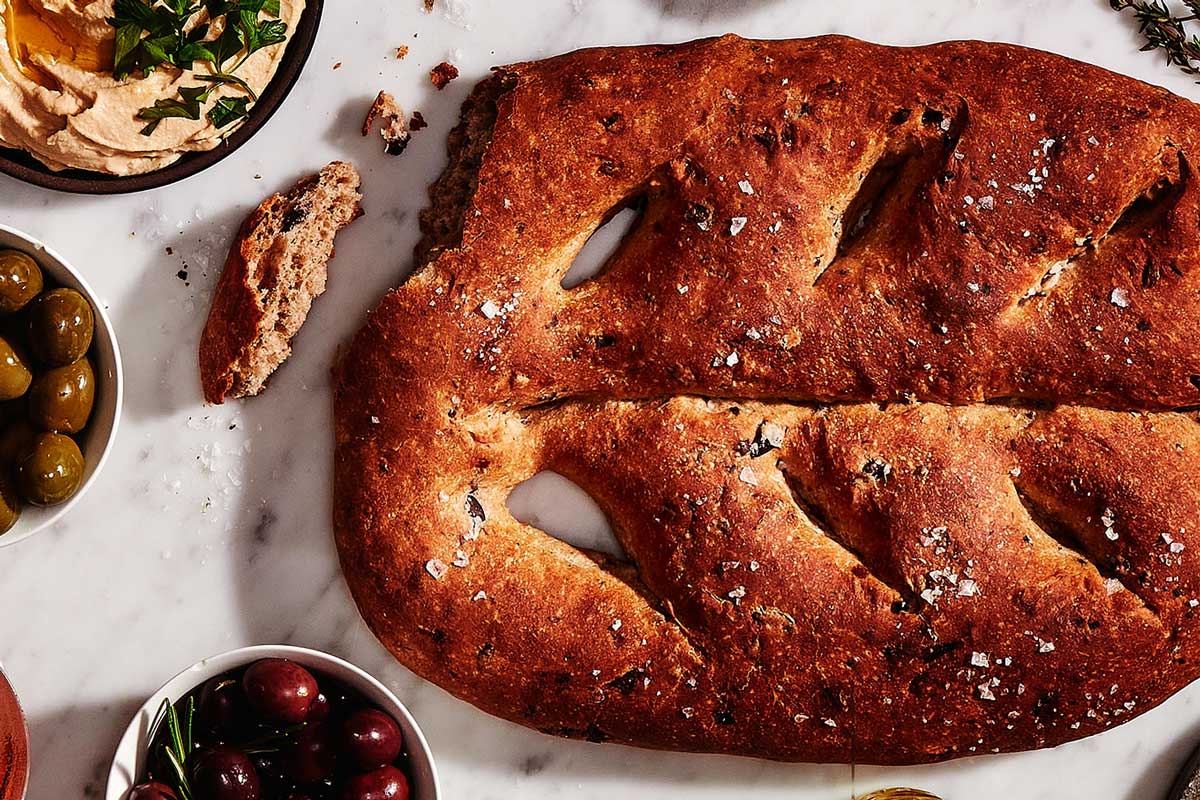
Fougasse
Photo by Rick Holbrook
How to shape fougasse 
 

To create that signature shape, youā€™ll use scissors or a sharp knife to make decorative cuts all the way through the dough. This hand-shaped, freeform bread is inherently rustic, which is part of the charm: the shapes you cut will morph and shift as the bread rises and bakes, meaning each version is unique. 

  • Use your hands to pat the dough into a 12ā€ x 6ā€ oval. Itā€™s nice to truly make this an oval, rather than a circle, to accentuate the leaf-like shape of the bread. 
  • After the shaped dough has risen for 30 minutes, use a sharp knife or scissors to cut one long slit the length of the dough, right down the center. Stop about 1" from each end, so the dough is still in one piece. 
  • Then cut three to four diagonal slits (about a few inches long) down one side of the dough. They should be at about a 45Ā° angle from the center line. 
  • Repeat on the other side of the dough, making the same amount of diagonal cuts. As with the center line, make sure to cut all the way through the dough. (Retrace your cuts a few times if needed.) 

Fougasse dough with slices cut

  • Use your hands to gently stretch each of the diagonal slits, so they form a hole about 1 1/2" to 2" wide. This ensures the cuts will stay intact even as the bread rises and bakes. You can also stretch open the center line, too. 

Fougasse with cut slits stretched out

  • Now your dough is ready to rise, bake, and eat! 

The bountiful boat of bread: Khachapuri 

A classic dish from the country of Georgia, Khachapuri is a boat-shaped bread of bliss. Regional versions can be found across the country; this open-faced Adjaruli version, made with a cheesy filling and egg added in the second half of the bake, is likely the most familiar to Americans. The signature oval shape creates the perfect cradle for oozing, melty cheese, so itā€™s helpful to focus on getting it just right. 

Khachapuri (Georgian Cheese Bread)
Photo by Rick Holbrook
How to shape khachapuri
 

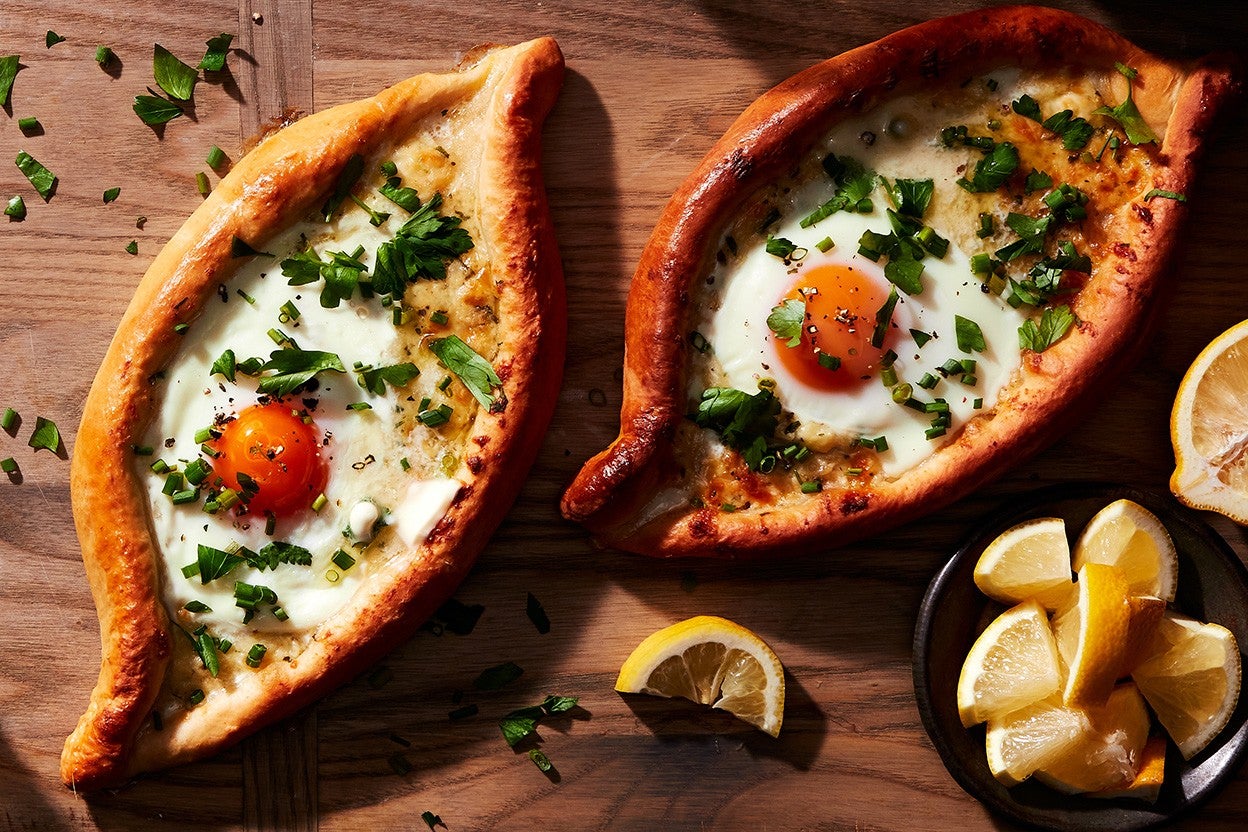
Made with bread flour, this dough is strong and elastic. It makes a stretchy, shapeable dough, but when it comes time to roll it out, donā€™t fret if itā€™s so elastic it starts shrinking back. Simply let it rest for 5 to 10 minutes, then try again. Itā€™s always easier to wait for bread dough to work with you rather than fight it. 

  • Roll a piece of dough into an oval shape about 10" long and 6" wide. The measurements donā€™t have to be exact, but you want to make sure this is truly an oval, rather than a circle. Otherwise, you wonā€™t get that elongated boat shape or tapered ends.  
  • Spread the filling, leaving a 1" edge of dough uncovered. This bare edge is essential for creating a barrier to keep the filling held in place, so err on the side of too much left uncovered rather than too little. 
  • Pull the dough's edges up around the cheese, overlapping the filling. 
  • Fold and twist the ends of the oval, pinching slightly to keep them in place and give them a noticeable taper. 
Khachapuri ā€“ Step 10
Our Khachapuri recipe page has images and GIFs throughout to help you navigate this recipe from start to finish. (Photo by Rick Holbrook)
  • After a quick rise and egg wash, this bread is ready to bake!

The nifty nigella flatbread: Nan-e Barbari

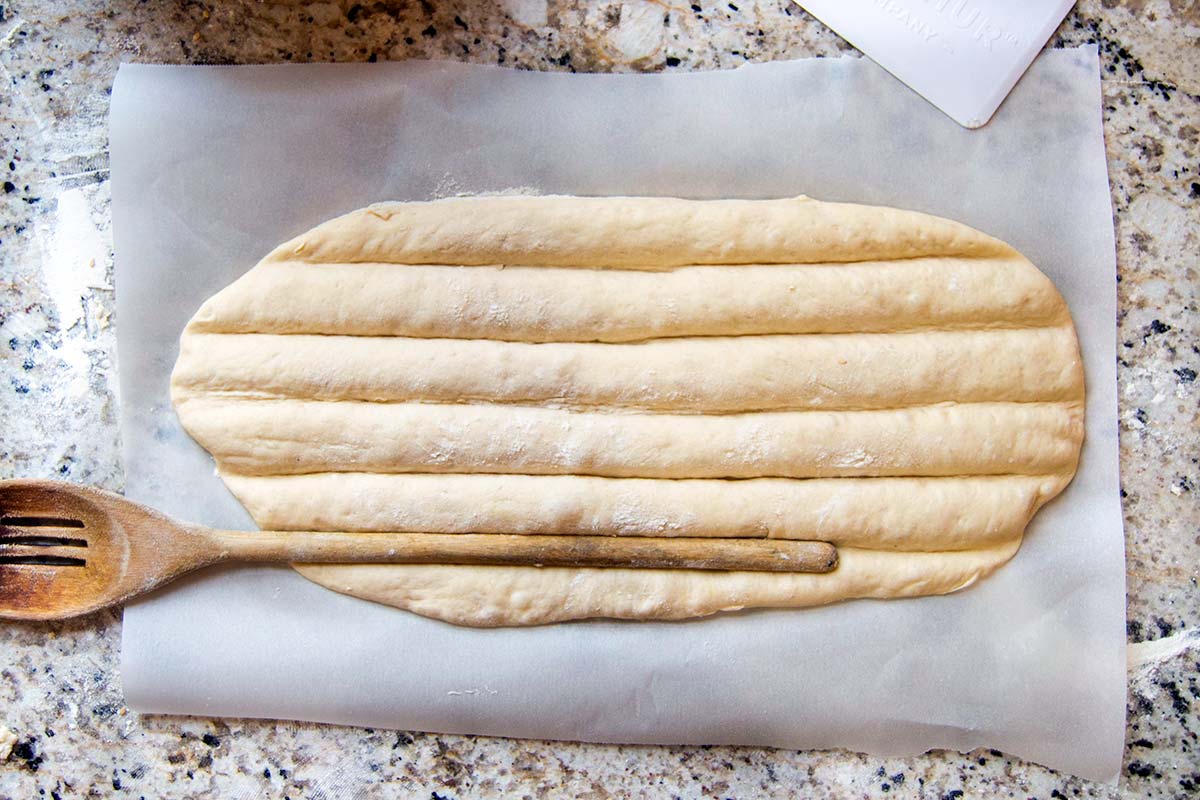
Generously shared with us by Hot Bread Kitchen, this traditional Persian flatbread has a crunchy, seeded exterior and chewy interior, thanks to bread flour. Itā€™s shaped like most flatbreads, but with a signature twist ā€” undulating grooves that run the length of the bread, creating a striped pattern and striking appearance. 

Hot Bread Kitchen's Nan-e Barbari (Persian Flatbread)
Photo by Liz Neily
How to shape nan-e barbari
 

This shape isnā€™t hard to achieve. Youā€™ll flatten the bread into an oblong shape using your hands. (As with the Khachapuri, donā€™t hesitate to walk away for a few minutes if the dough fights you on this.) Then press grooves into the surface. The long handle of a wooden spoon is an excellent tool here, or try another kitchen utensil like a spatula. If you canā€™t find anything suitable, using your fingers will work just fine. 
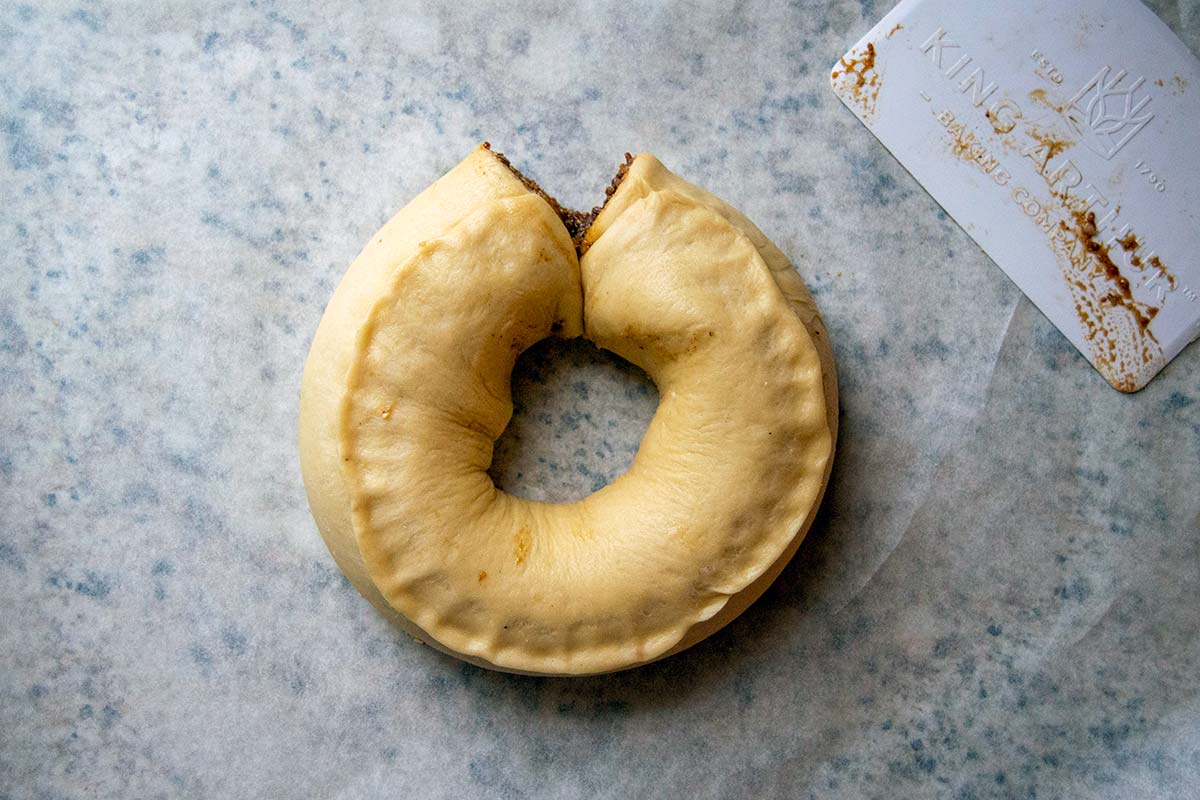
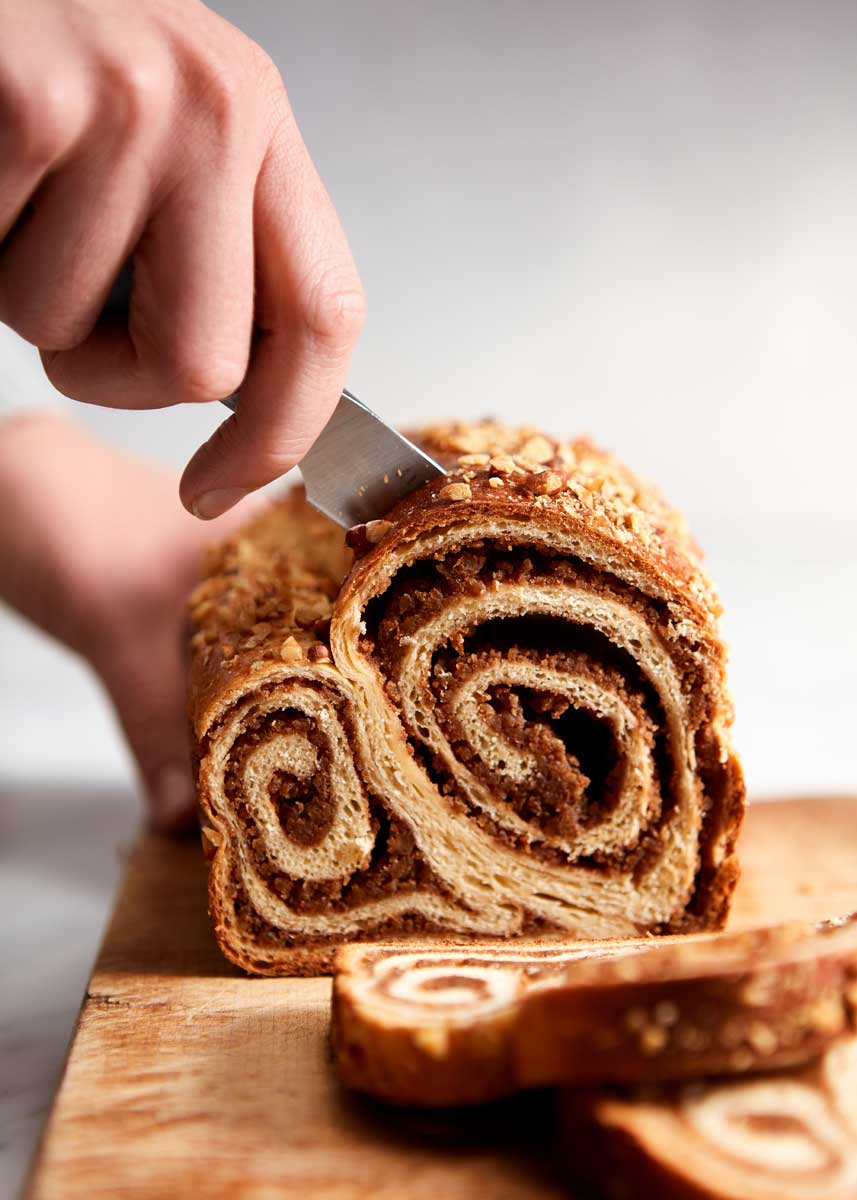
  • Working with one piece of dough (the recipe yields two loaves), gently deflate and pat it into a 14" x 5" rectangle. Youā€™ll want to be gentle but firm, so that your dough doesnā€™t deflate too much in the process. 
  • Using your tool of choice, press five lengthwise grooves into the dough. The key here is to press firmly, otherwise the grooves will disappear while baking, but don't cut through the bottom of the dough. If youā€™re using your hands, try running the pinky-side of your hand down the length of the dough, almost as if you were (gently) karate-chopping it. 

Shaped bread dough with wooden spoon making grooves

  • Spread the top of the dough with glaze, being careful not to affect the pattern youā€™ve just pressed in. It may be helpful to carefully press the grooves again after applying the glaze to recreate their distinctive shape. Finally, top the whole thing with seeds. 
  • All set for the oven! 

The intricately patterned loaf: Potica

Arenā€™t those swirls divine? They immediately leap out, capturing the attention of innocent passersby. A traditional Slovenian bread, this loaf is typically made for special occasions using recipes passed down through generations. And with a rich, sweet filling made from nuts and cinnamon, as well as that gorgeous spiral, you can see why! 

Poticza
Photo by Liz Neily
How to shape potica
 

Get this: that stunning interior shape isnā€™t that hard to form. Really! The dough just needs to be rolled up as if you were making a (very large) cinnamon roll, then snuggled just so into a loaf pan.

As you first get the hang of things, it might be messy trying to keep the filling from spilling out as you bend and twist and pinch the filled dough. But even if you have a few open ends or seams, the bread still bakes up beautifully once you get it all in a loaf pan. So no need to worry too much throughout this process. 

  • Roll the dough into a 26" x 18" rectangle. The dough will be very thin. Let it rest for 5 to 10 minutes then return to rolling if you have trouble getting the dough this large. It helps to ensure this is actually a rectangle, not an oval, so that it can be rolled into a log thatā€™s evenly sized. 
  • Spread the filling onto the dough, leaving 1" of one long edge untouched, then roll it all up into a log, like a cinnamon roll. With the thin dough and long shape, this is a slow, careful process, so take your time. 
  • Cut the log in half to make two smaller logs. Youā€™ll work with one of these at a time. 
  • This is where things differ from cinnamon rolls: bring the ends of the log together to form a ring of dough. Pinch the ends shut to seal the ring. This can be tricky to achieve, but do your best so you can keep the filling from spilling out too much. 

Potica dough making a ring

  • Gently flatten the ring of dough, so that it turns into more of an oval shape and thereā€™s no empty space in the center. 
  • Then squish the ring down into a loaf pan with the seam side of the original log facing down. You should essentially have two lengths of dough side-by-side in the pan. (If your logs of dough end up stacked on top of each other, rather than side-by-side, that's OK too! You'll still wind up with an intricately swirled pattern.) 

Potica dough in bread pan

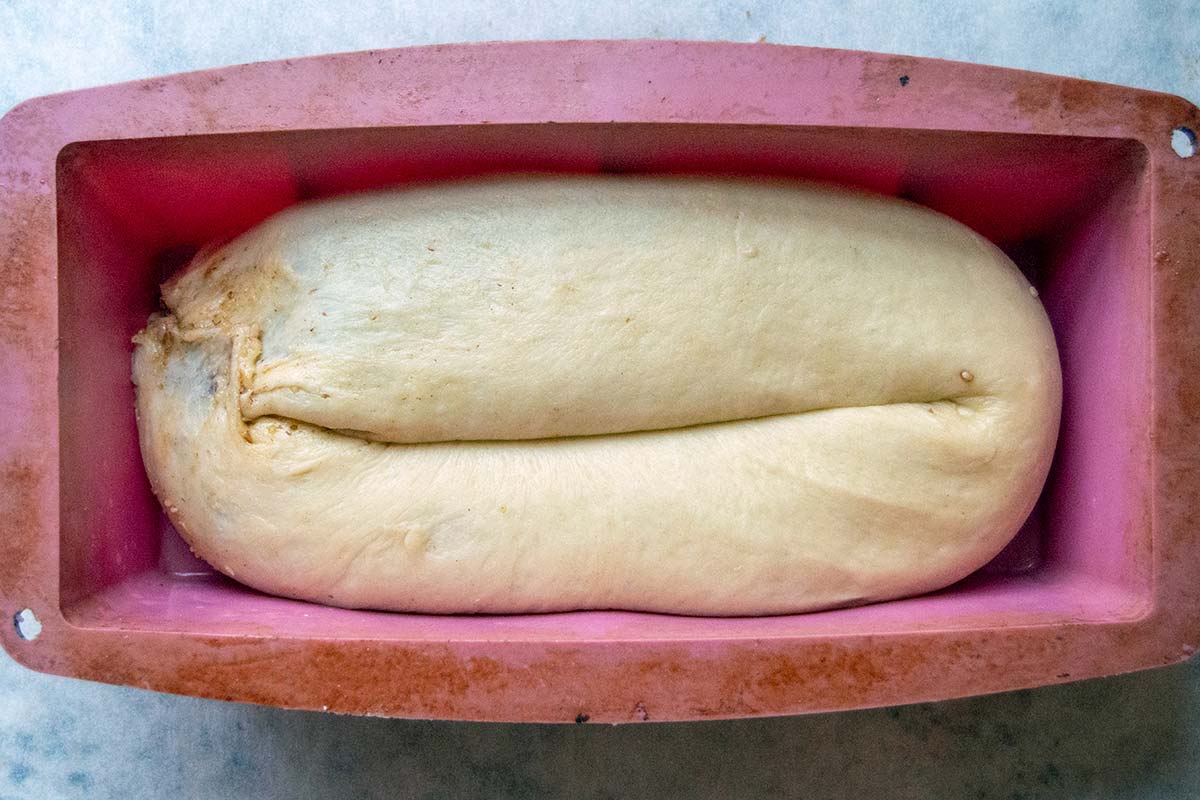
  • You'll repeat these steps with the second log of dough (and a second pan), then let them both rise one more time before baking. 

Bake something spectacular

Hopefully these recipes have inspired you to venture beyond common bread shapes to try out some different techniques. While we all love our beloved everyday recipes ā€” the familiar breads we turn to time and time again ā€” baking recipes that differ in shape (or flavor, technique, or ingredients!) can spice up the bread-making routine and remind us that the world of bread is vast and never-ending.

Which means thereā€™s plenty of baking to do!

Potica being sliced
Photo by Rick Holbrook

For more recipes that go beyond the ordinary, check out our collection of Extraordinary Breads. The dozen distinct recipes featured will have you thinking about bread in a whole new way. 

Cover photo by Rick Holbrook

Jump to Comments
Rossi crimping pie crust
The Author

About Rossi Anastopoulo

Rossi Anastopoulo grew up in Charleston, South Carolina, which is how she fell in love with biscuits. She didnā€™t have any bakers in her household (with the exception of her grandmotherā€™s perfect koulourakia), so she learned at a young age that the best way to satisfy her sweet tooth was to make dess...
View all by Rossi Anastopoulo