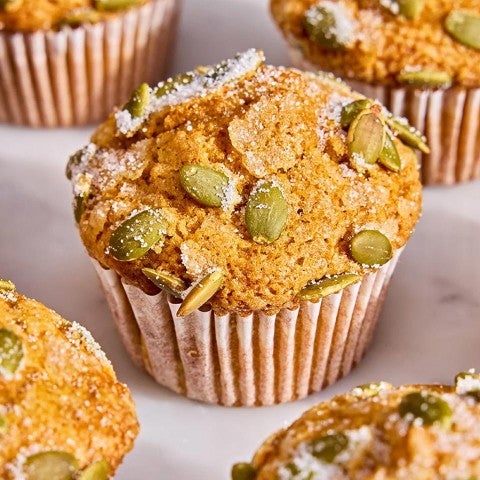


Linzer cookies are for many of us the type of cookie we would buy in a bakery, but never think we could make at home. Often-tiny treats with impossibly small and delicate looking cut-outs, and a drifted dusting of confectioners' sugar that miraculously never touches the jam filling, these can be intimidating cookies to look at. Have faith, dear reader, for I am here to tell you that the lovely linzer is within your reach.
Yes, you too can have these tasty cookies, with their jewel-like centers of sparkling jams, so tempting to taste with a fingertip. The dazzling white sugar surround is just waiting to tickle your nose when you take the first bite as it drifts down to cover the front of your sweater like soft snow on the lawn. Let's not forget the rich nutty flavor of the cookie itself, crisp and sandy before the jam hits your tongue. Oh, yes; linzers will be yours this season for sure.
Back before I came to King Arthur Flour, linzer cookies would have been something I associated with the holidays, and with a certain dining and entertaining maven with her own magazine and TV show. A fussy little cookie that maybe tasted good, but probably was just average and all about looks instead of flavor. Well, I couldn't have been more wrong. These cookies are big on style, but HUGE on flavor, and simpler to make than you might think.
Now that I've been here awhile and know the secrets of producing lots of linzers with very little time and effort, these cookies have been part of cookie trays and holiday plates at our house ever since.
Because it is the holidays and I'm full of good cheer, not to mention eggnog, I'm here to share those secrets with you. I'll even tell you what to do if you don't have any linzer cutters. (No, not just “go buy linzer cutters,” but a variation with all the flavors and none of the cutting out, fuss-free and fantastic. PJ Hamel, are you listening? This part's for you.)
First, let's chat a bit about nut flours. You have your choice with these linzers of three different kinds of nut flours: almond flour, hazelnut flour, or pecan meal. On top of that, you can choose the toasted or untoasted version of each. Untoasted nut flours are a milder flavor, more subtle; the toasted versions bring out a richer, deeper nut flavor. For those of you who cannot have nuts, it's best to choose a different recipe, but the technique would be the same.
You can try each nut flour in the recipe, or try a combination. I like an almond/hazelnut mix myself. Remember, they're your cookies and you can try what you like. I recently read a quote that stated “baking mistakes are your kitchen's way of telling you what you need to learn next.” Too true!
One of the things that I feel will make linzers even more attainable for novice linzer bakers is a linzer cookie cutter set. Ready? Let's make linzers!
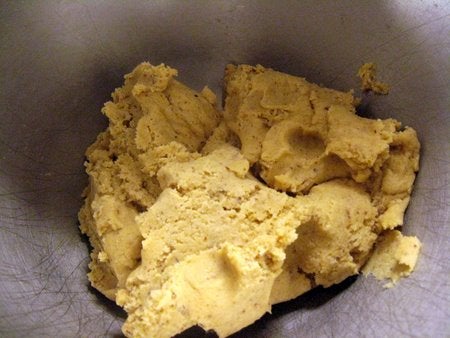
Beat the butter, sugar, and zest (or cinnamon) until light and fluffy, scraping the bowl as needed, about 3 minutes. Add the yolk and vanilla and beat until combined. Meanwhile, whisk together the flour, almond flour, and salt. Add the flour mixture to the egg mixture and mix until just combined. The dough will be soft and very slightly sticky.
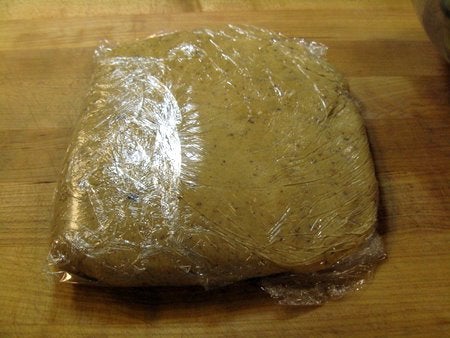
Divide the dough into two relatively equal pieces and wrap well in plastic wrap. Refrigerate for at least 1 hour. Overnight would be fine, and the dough can be frozen for up to 3 months at this point.
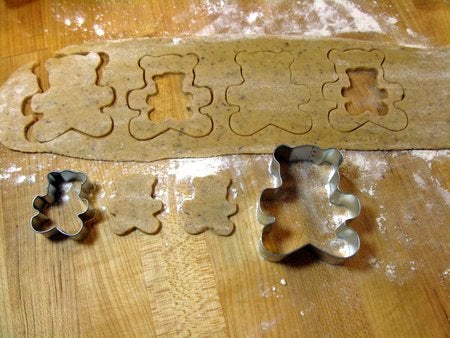
Remove the chilled dough from the fridge and allow to rest at room temperature for a few minutes to make rolling easier. I like to roll in narrow strips, between 1/8” and 1/4”, thinner for a crisper cookie, thicker for a sturdier cookie. You can certainly roll the whole piece at once. Generous flouring of the board will be your best friend at this stage.
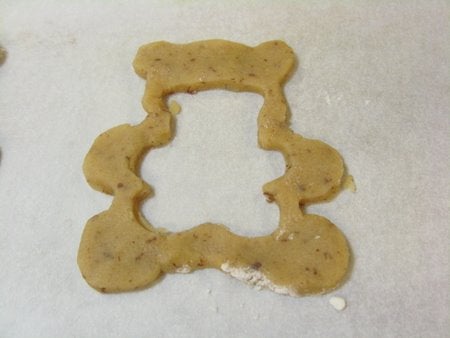
For each individual cookie, you'll need one base and one cutout topper. I like to cut mine in pairs so I know I have even numbers. Don't toss the little cutout centers either. They can be baked on a separate sheet and used for lunchbox treats just the way they are.
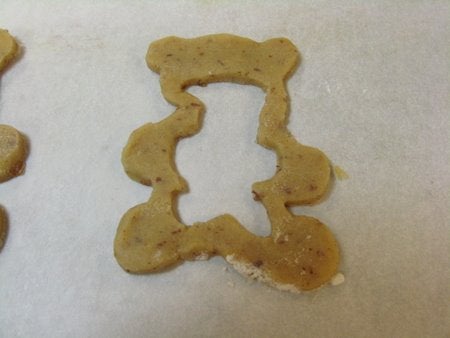
Uh-oh. Mr. Bear got a little bent out of shape during the move to the cookie sheet. No worries, there's a simple fix.
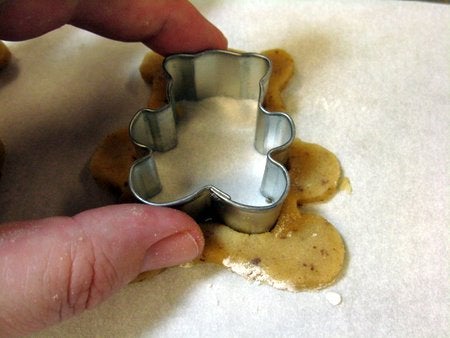
Place the cutter back into the “hole” in the cookie and gently wiggle it about on the cookie sheet until the cookie takes shape again.
Ta-da! All better.

Bake the cookies until lightly browned on the edges. They're quite fragile when warm, so do wait until the cookies cool before moving them for dusting with sugar. To create the beautiful white sugar tops, fill a fine sifter with confectioners' sugar or snow white topping sugar (lets you work with a warmer cookie, and doesn't melt off). Hold the sifter a few inches above the cookie and shake or tap the sifter to drift sugar onto the cutout piece of the cookie. Be sure to cover the cookie with an even layer, all the way to the center and edges.
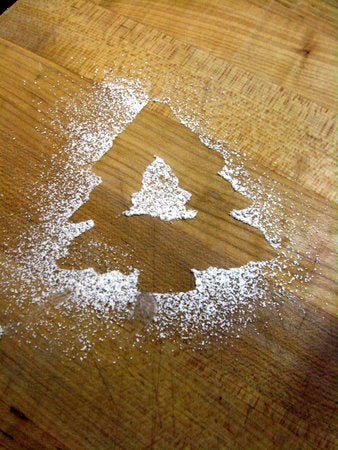
You should end up with perfect outline in sugar when the cookie is moved.
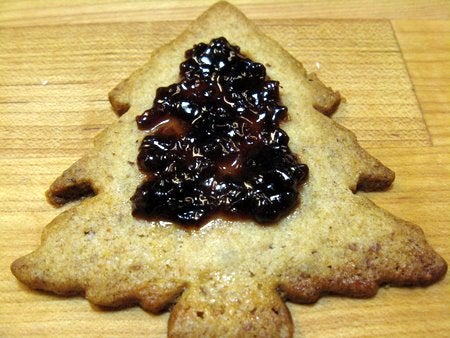
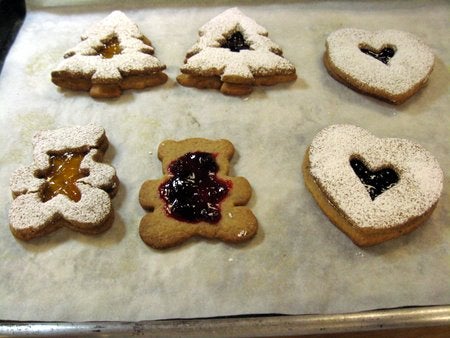
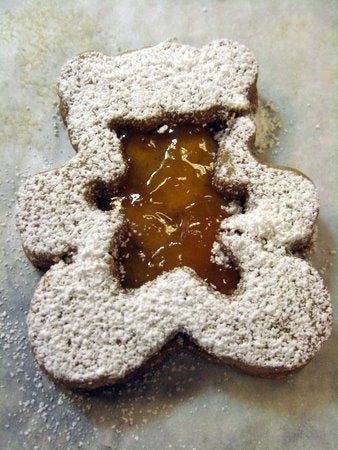
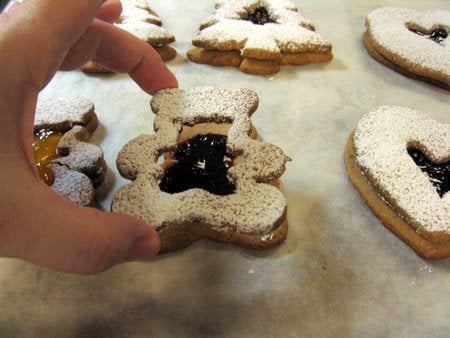
On the solid base of the cookie, spread 1/2 teaspoon of your favorite filling or jam. We've used apricot, raspberry, strawberry, chocolate, or even icing for fillings. Have fun and try different combinations.
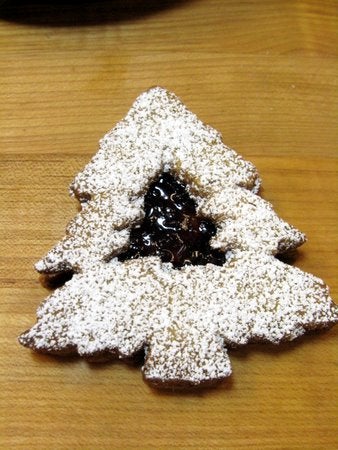
To complete the cookie, place the sugared top gently on the filled base and press together. It's best to let these cookies sit for a few hours to let the “sandwich” set. Overnight is fine as well; just cover the cookie tray with plastic wrap.
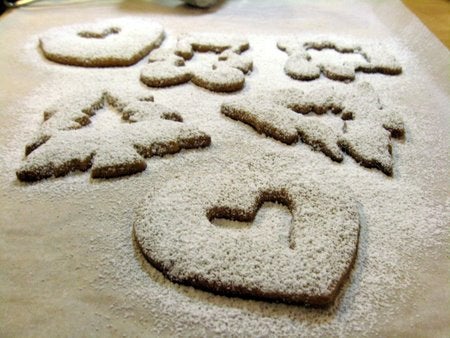
Remember, shortcuts make for happy bakers. Dust whole sheets of cookies at once, using a larger sifter and parchment paper for easy cleanup.
A separate tray of base cookie makes for easy assembly as well.

Oh dear, that bear is injured again. Pressing your pieces together can lead to breakage. A little “makeup” can hide a multitude of messes, though.
Sift a small pile of sugar onto a corner of parchment, and use a teaspoon to sprinkle a little onto the cracked parts of the cookie. An easy fix that makes any breaks much less noticeable.
I'll be more gentle this time I promise, Mr. Bear.
OK, I also promised to show you what to do with this recipe if you don't happen to have cutters.
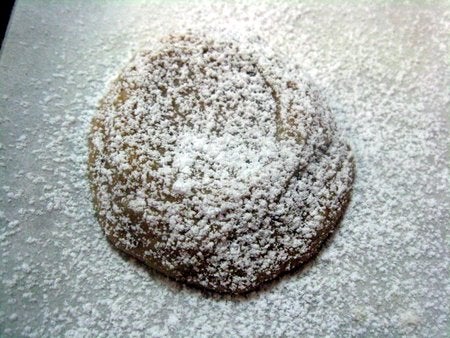
Make and chill the dough as directed in the recipe. Remove from the fridge and form 1”-sized scoops of dough. Our teaspoon scoop is perfect for this. Keep the size relatively small so that the cookies won't be soggy inside.

Using a bit of flour and your thumb, make a depression in the center of each ball of dough.

Your baking tray will look a bit like prairie dog holes, but go with it .
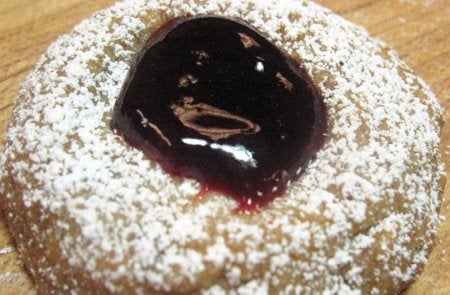
Bake for 12-15 minutes at 350°F. Cool the cookies on the baking sheets and dust generously with confectioners' sugar.

Fill each depression with 1/2 teaspoon of jam. Voilà
! Linzer thumbprints with all the wonderful nutty flavors, sweet jams, and delicate sugar – and not a cookie cutter in site.
YUM!
Read, rate, and review (please!) our recipe for Linzer Cookies.